
Fine line sacred heart tattoo ideas are everywhere online, but the trend that gets the most saves is not always the one that lasts. These delicate hearts read clean and modern at first, yet they ask for placement and touch-up planning if you want them to age well. Below are 27 variations that balance linework, symbolism, and real-world wear so you see what holds up and what needs a plan.
1. Flame-Topped Heart on Inner Forearm
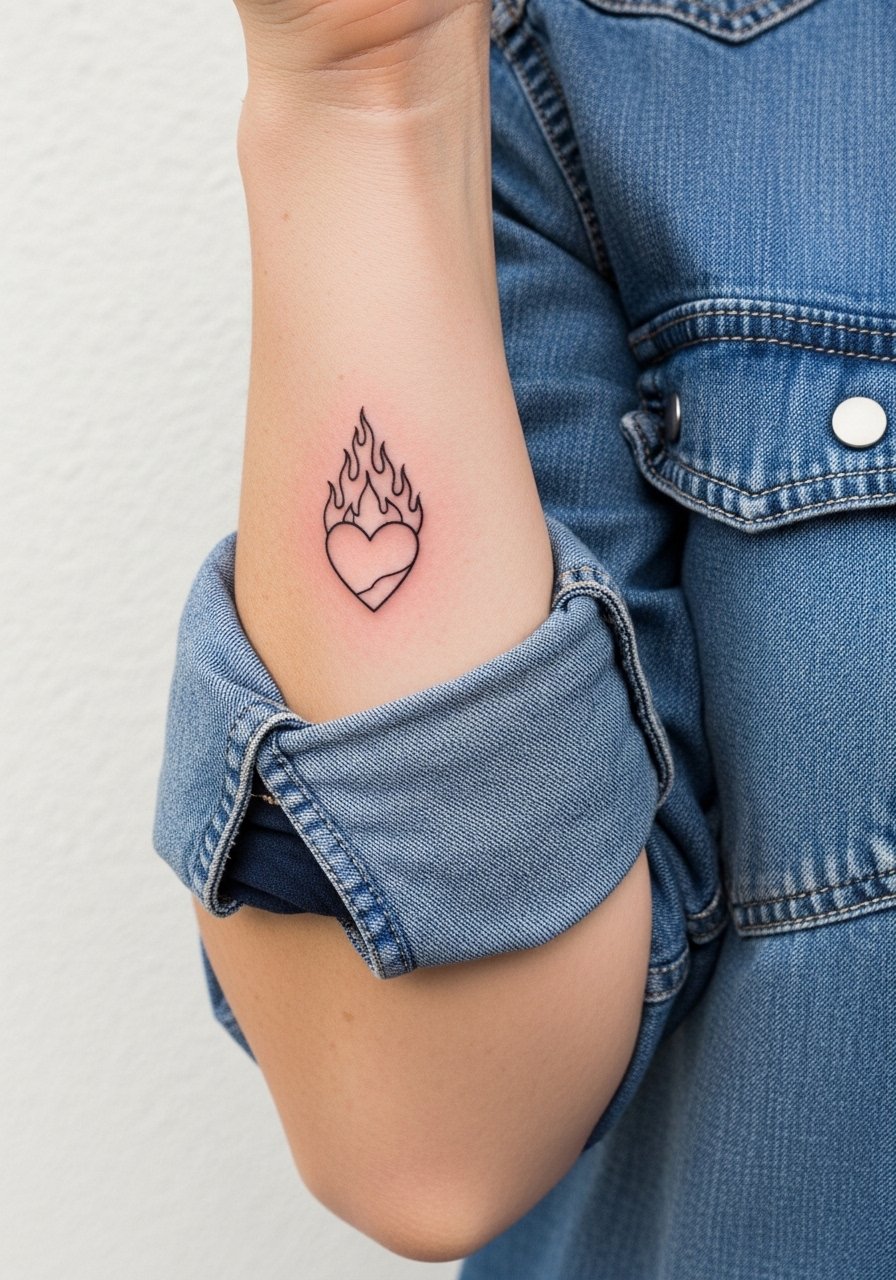
Most people pick the inner forearm because the skin holds single-needle linework well and the area is easy to protect from sun. I've seen this tiny flame-topped version stay legible for three years when the artist used slightly stronger lineweight and left breathing room around the flames. When you consult, ask for single-needle linework but request visible anchoring lines so thin strokes do not disappear. Common mistake is cramming too many rays into a one-inch design. For the session wear, roll up a chambray sleeve so the artist has clear access and the cuff frames the tattoo afterward. Pair it with a rolled cuff chambray shirt to show it off.
2. Thorn-Wreathed Heart Along the Collarbone
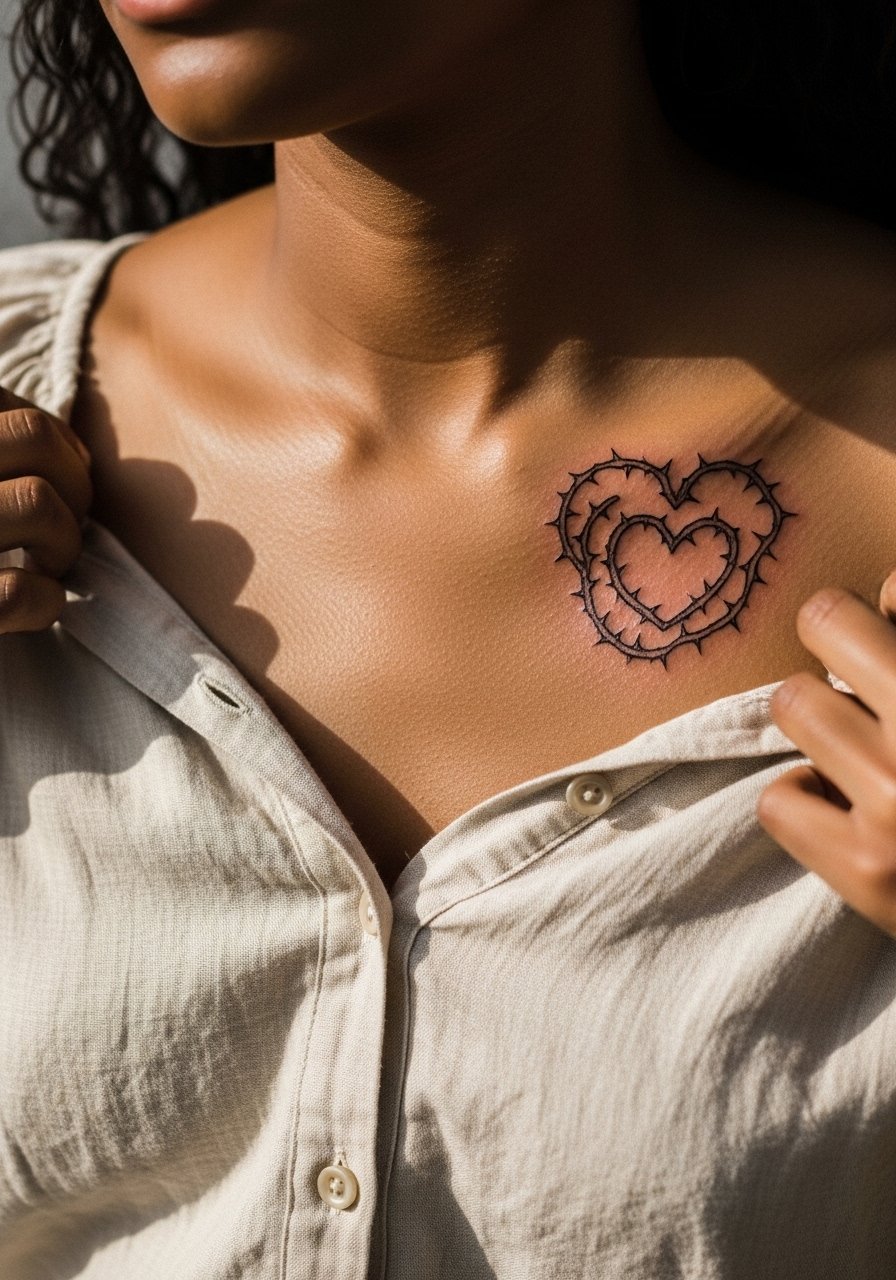
Fair warning, collarbone sessions can be tightly painful for many. The thorns look best with clean negative space, so ask your artist to keep the thorns airy rather than dense. One camp insists fine single-needle on collarbone blurs quicker because the skin there moves with clothing. The other camp argues that measured depth and spacing keep lines crisp. If you want the thorned motif to age, avoid filling in the thorns with heavy shading. For showing it off, an off shoulder linen blouse frames the piece while letting the collarbone read naturally.
3. Micro Dagger-Pierced Heart Behind the Ear
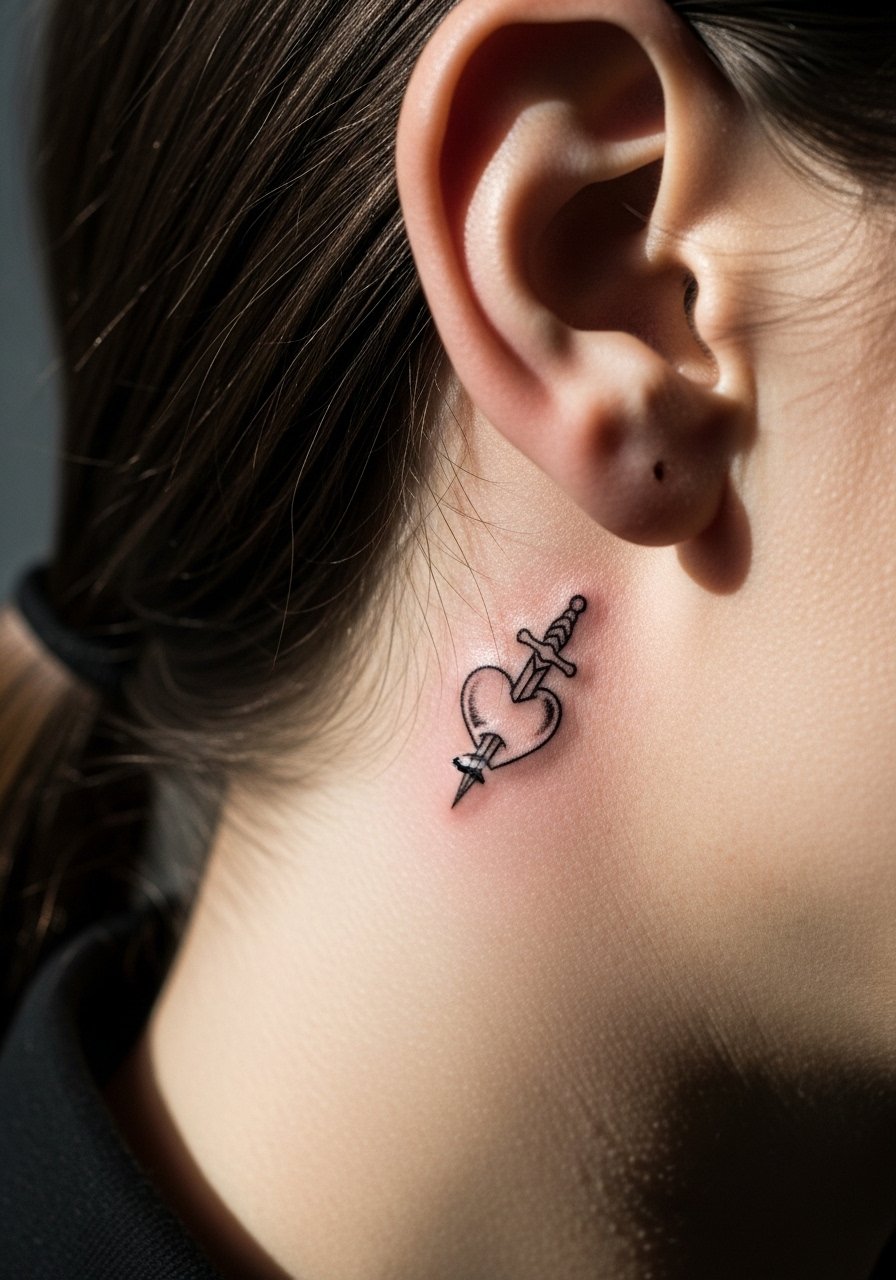
Behind-the-ear pieces heal quickly but can be awkward in photos. A common version that fails is doing the dagger at full scale behind hair so the lines blur with movement. The fix is to keep this under one inch and to ask for slightly bolder anchor lines so the dagger tip stays readable. For consultation, show exact scale references and expect a short single-session visit. Note that behind-the-ear work needs a careful artist who has done neck-adjacent pieces. This placement is discreet and best if you prefer something hidden rather than displayed.
4. Single-Rose Accent on Inner Bicep
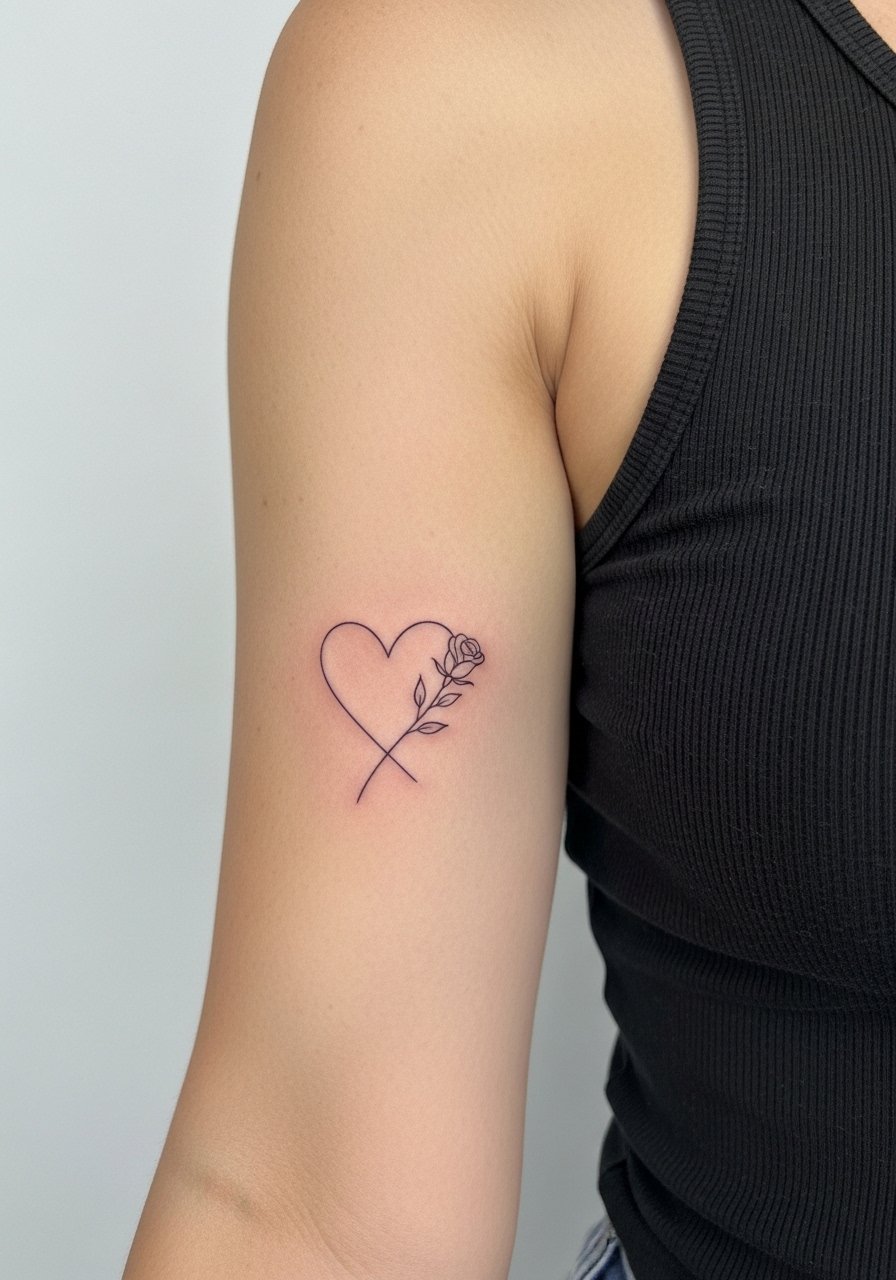
When you want romance without a large sleeve, the inner bicep gives enough space for a rose to sit without crowding the heart. Most folks underestimate how the bicep expands and contracts. The design that ages poorly is a tiny rose with dense stipple shading. The safer route is delicate outline with spaced stipple for shadow. Pain is moderate with a short session. A real mistake is placing the rose stem parallel to muscle fold lines, which can warp the image with movement. Wear a loose tank top to the session so the artist can access the area easily.
5. Minimal Outline Heart on the Ribcage
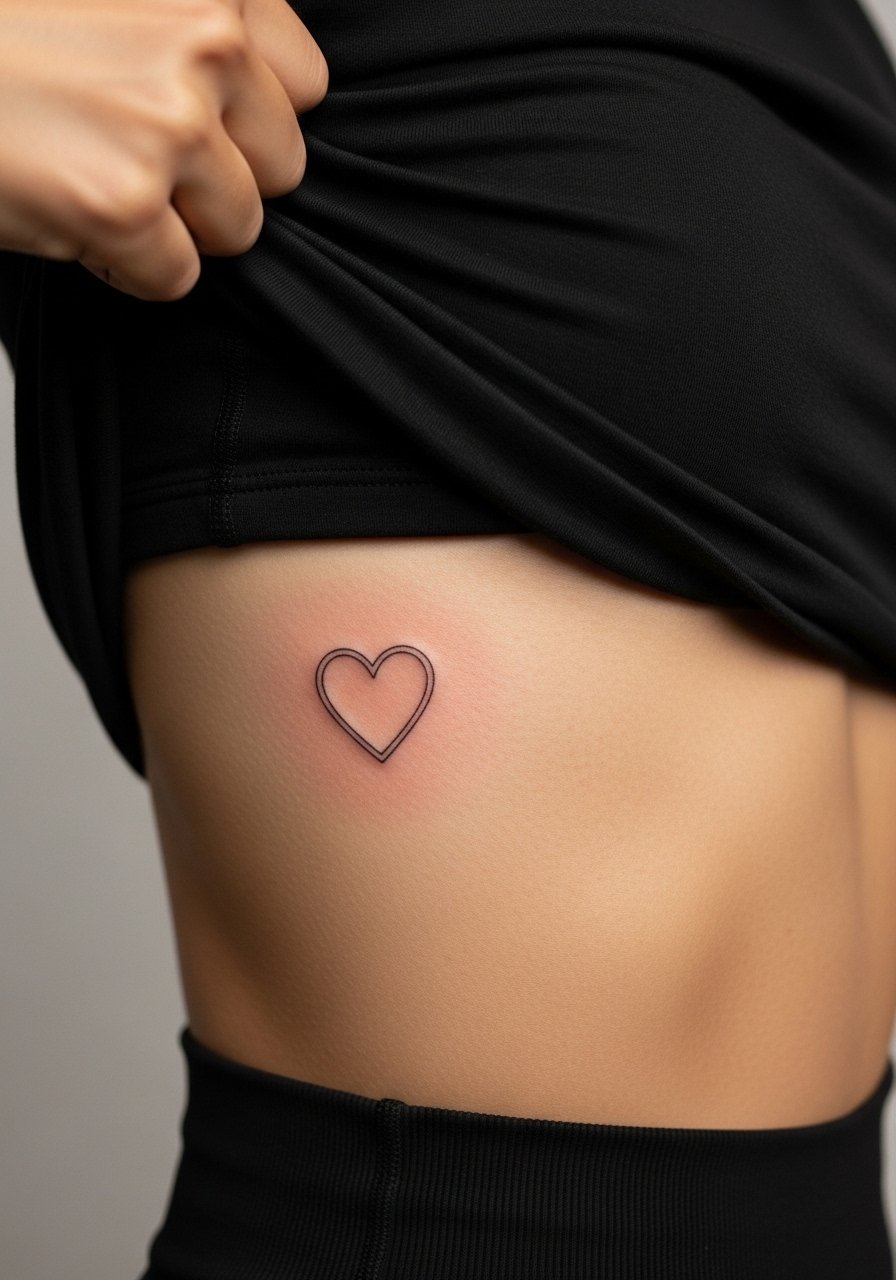
The ribcage is notorious for pain, so proceed only if you expect to sit through some discomfort. Most technicians I know recommend larger spacing for tiny lines on ribs because the skin stretches. A common mistake is asking for ultra-fine hairlines at one inch. That looks fragile initially and often softens into a blur. If you want this minimal outline to last, budget for a touch-up at the 12-month mark. Wear a cropped top you can lift without full undressing, and plan the session on a day you can rest afterward.
6. Heart with Radiating Rays on the Shoulder
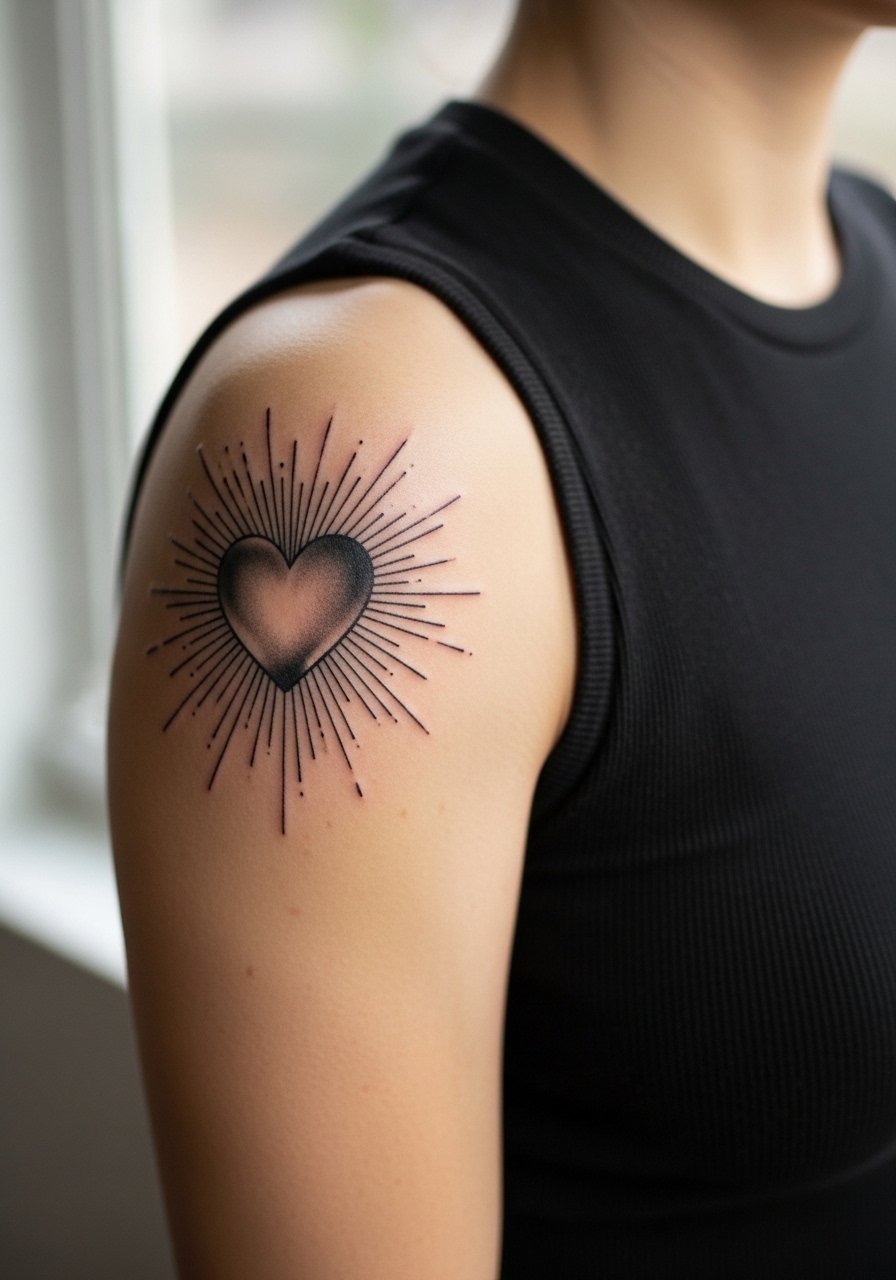
The shoulder is forgiving for delicate rays because the curve lets the design breathe. A frequent mistake is sketching too many rays close to the heart, which merges over several years. Tell your artist you want space between rays and ask for subtle gray wash only where needed. Sessions are short and pain is low compared with ribs or sternum. For showing it off wear a sleeveless fitted tee that frames the work without competing with the lines.
Studio Day Picks
These first forearm, shoulder, and ribcage ideas need different prep than lower-body or collarbone work, so a few targeted items smooth the session and first week.
-
Stencil transfer paper kit. Lets you preview and reposition the linework, which matters for the flame and thorn designs above.
-
Topical numbing cream. Applied per directions 30 to 45 minutes before can ease ribcage and inner bicep sessions without affecting line quality.
-
Thin protective film roll. Useful for shoulder and forearm pieces that might rub against straps during the first few days.
-
Fragrance-free gentle body wash. Keeps healing fine line areas clean without irritating delicate needle channels.
-
Aquaphor healing ointment. A thin layer for the earliest phase locks in moisture for single-needle work while you follow your artist's protocol.
7. Pierced Arrow Heart on Outer Forearm
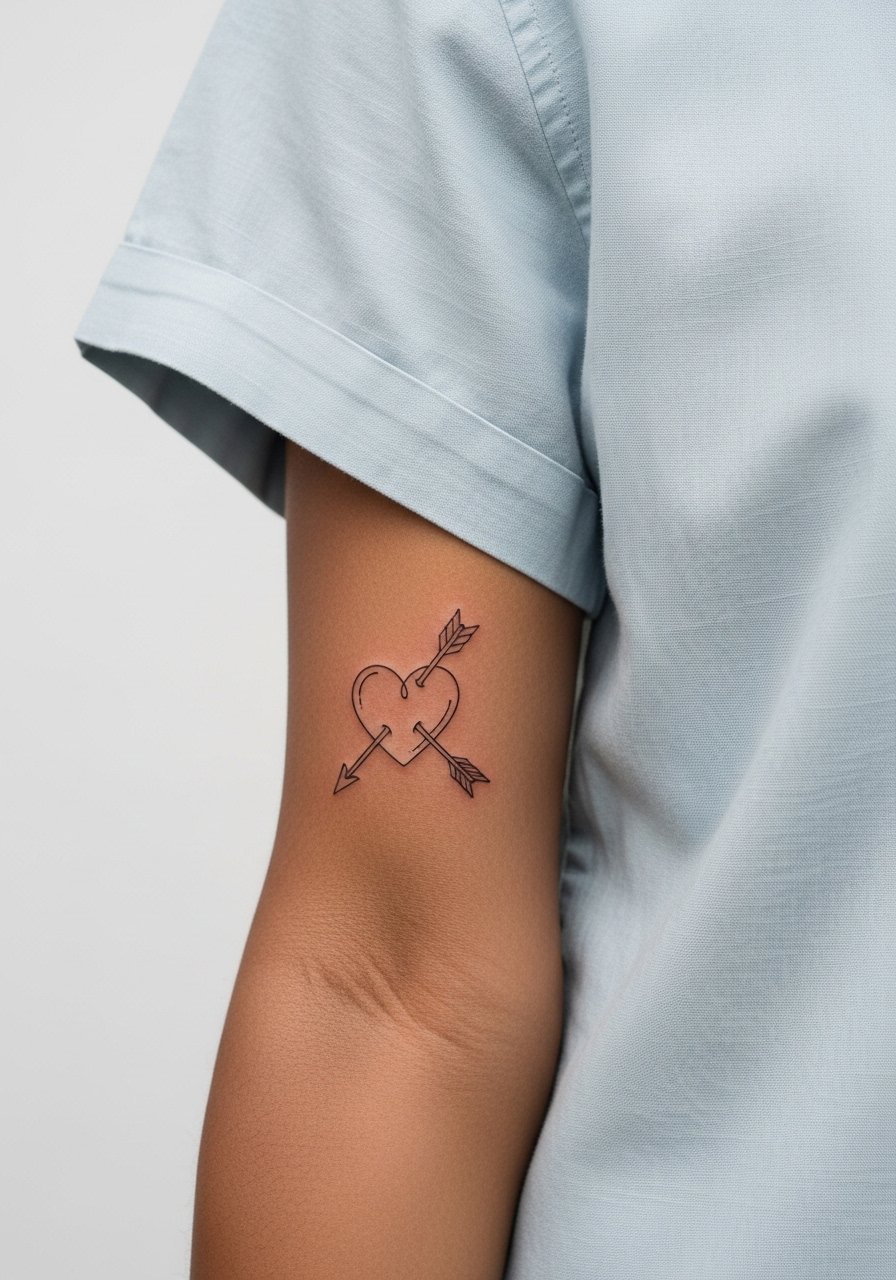
I've watched this arrow motif read dynamically with forearm movement when the line weight is consistent. The worst version is rushing the arrow detail in micro scale, which tends to bleed into the heart over time. Ask your artist to show a stencil wrapped around the arm so you can confirm the flow. Expect a single session under an hour. Pair it with a loose fit button down that you can roll up to frame the piece.
8. Cross-Base Heart on the Upper Arm
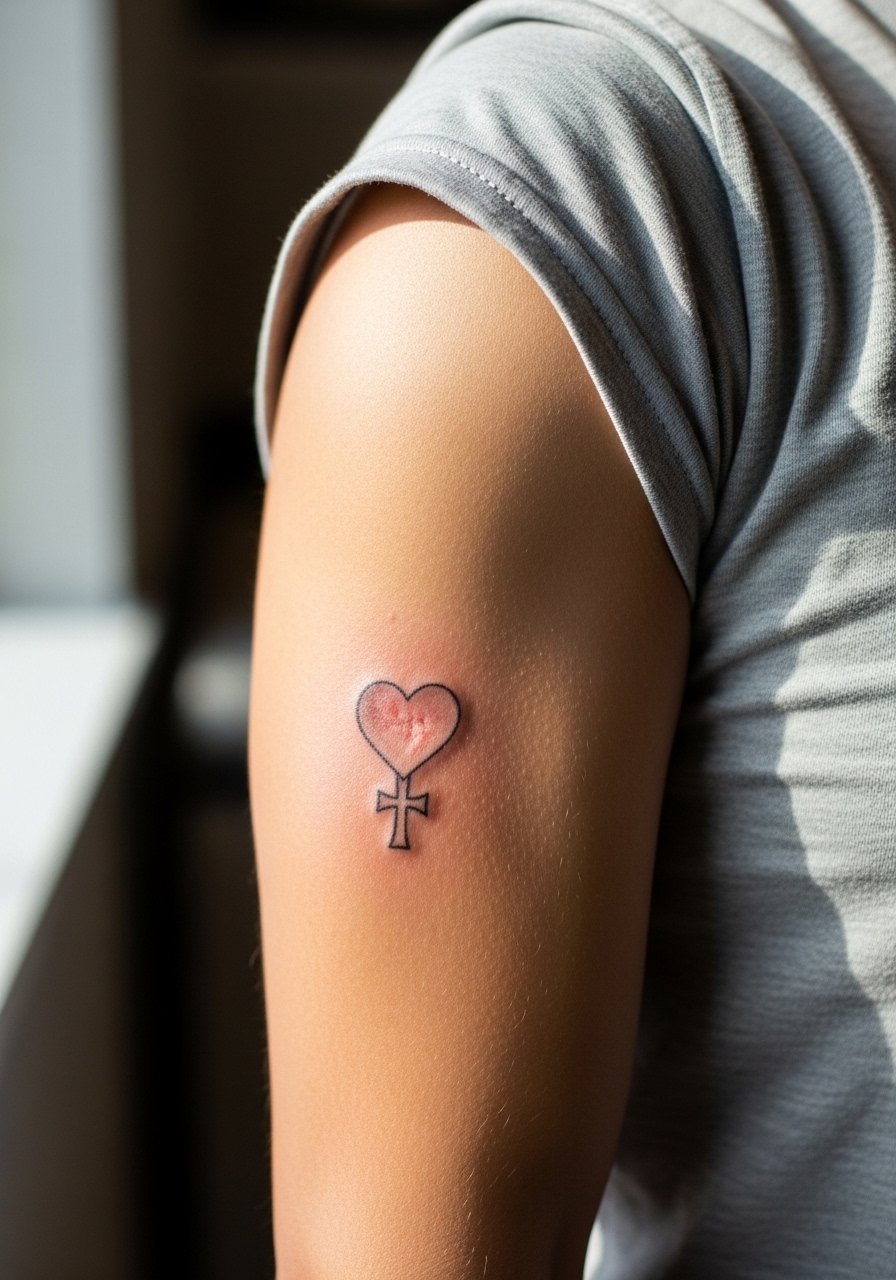
Most people choose the upper arm because it hides well under sleeves and ages predictably. The cross base benefits from a little gray wash around the base so the lines read without heavy saturation. Artists debate whether single-needle here holds as well as thicker lines. One group says thicker anchor lines help long-term. The other group says measured single-needle with spacing can last fine. When booking, ask the artist which camp their portfolio supports. Pain is low, session short, and this placement is friendly for first timers.
9. Ultra-Fine Solo Heart on the Ankle
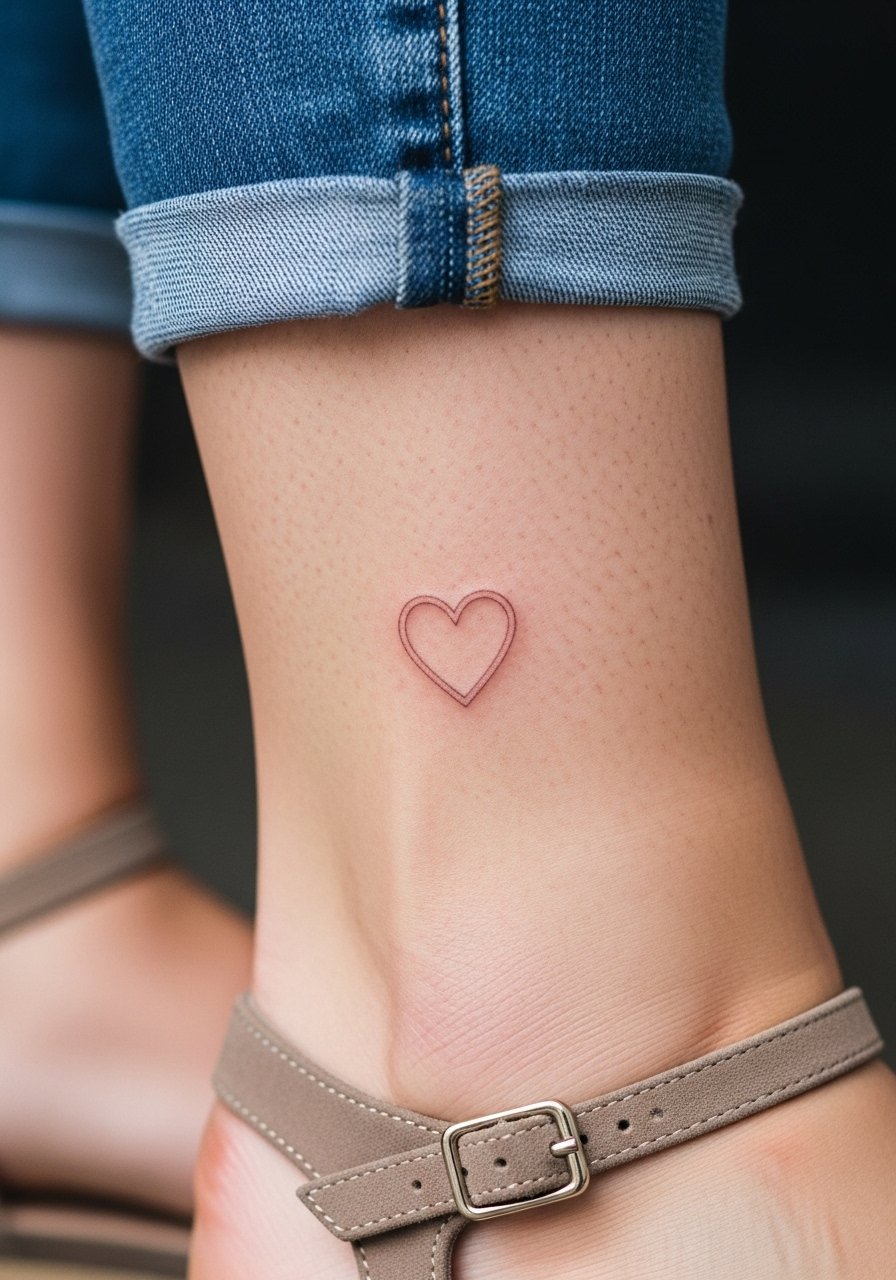
Ankle work takes a beating from shoes and socks. I've seen ultra-fine ankle pieces fade faster because of friction. If you want it small, ask for slightly denser outline to offset daily abrasion and expect a touch-up at 6 to 18 months. For showing it off, an ankle strap sandal flat and cropped pant keep attention on the area while reducing rubbing.
10. Floral Wreath Heart on the Calf
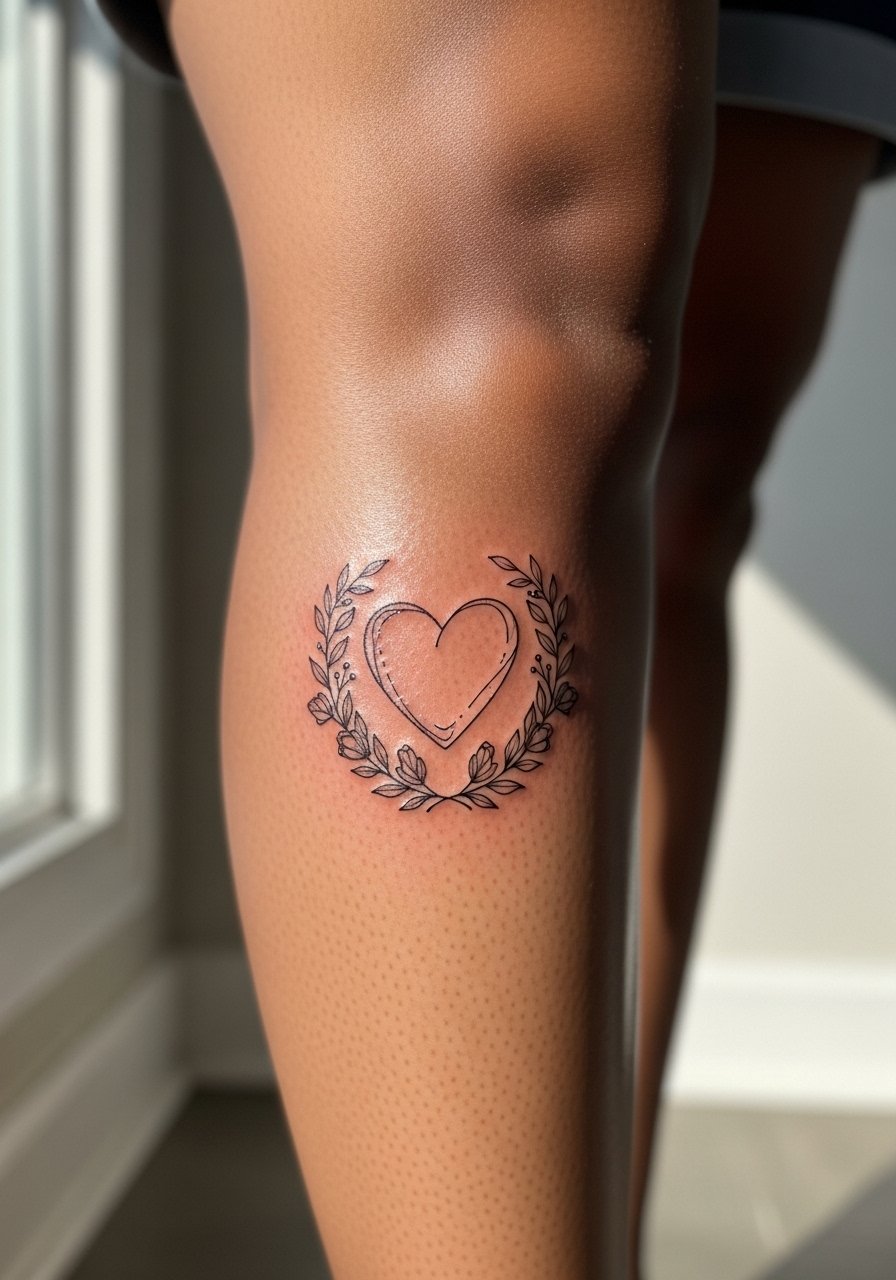
Calf pieces are a great middle ground for medium-scale work that will still sit well under clothing. The floral wreath needs spacing so petals do not fuse when the piece settles. A mistake is packing tiny leaves into a small circle. For session wear, pull on a pair of loose shorts or pants pulled up that give the artist clear access. Expect moderate session time with low pain.
11. Bleeding Heart Outline on the Collarbone
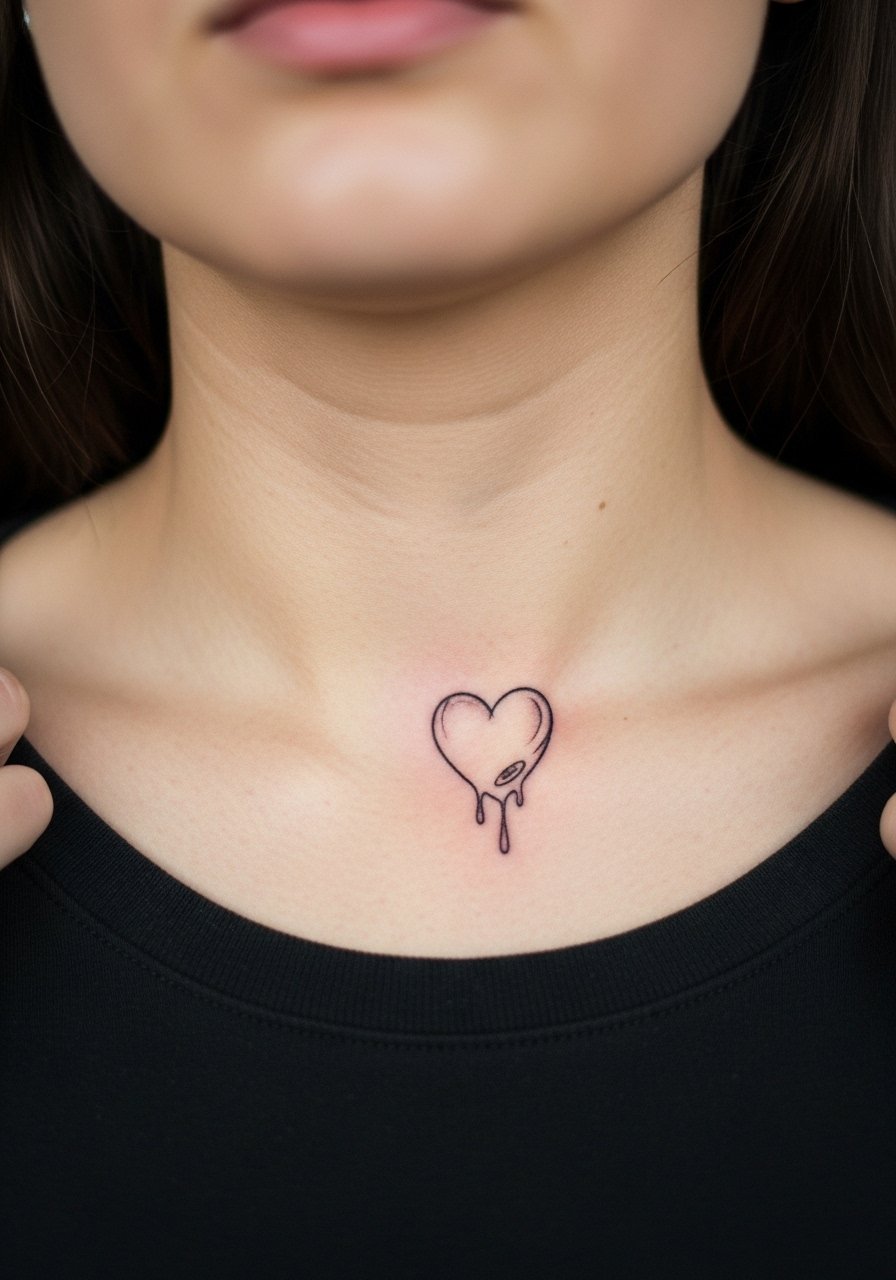
The bleeding-heart motif reads emotionally and is best kept minimal on the collarbone. I've seen dense drip shading merge into the neckline over time. Ask for single-line drips with light dot shading and avoid heavy fills. Pain is sharp but brief. Pair with a layered delicate necklace that sits below the design when you wear it out.
12. All-Seeing Eye Heart on the Inner Thigh
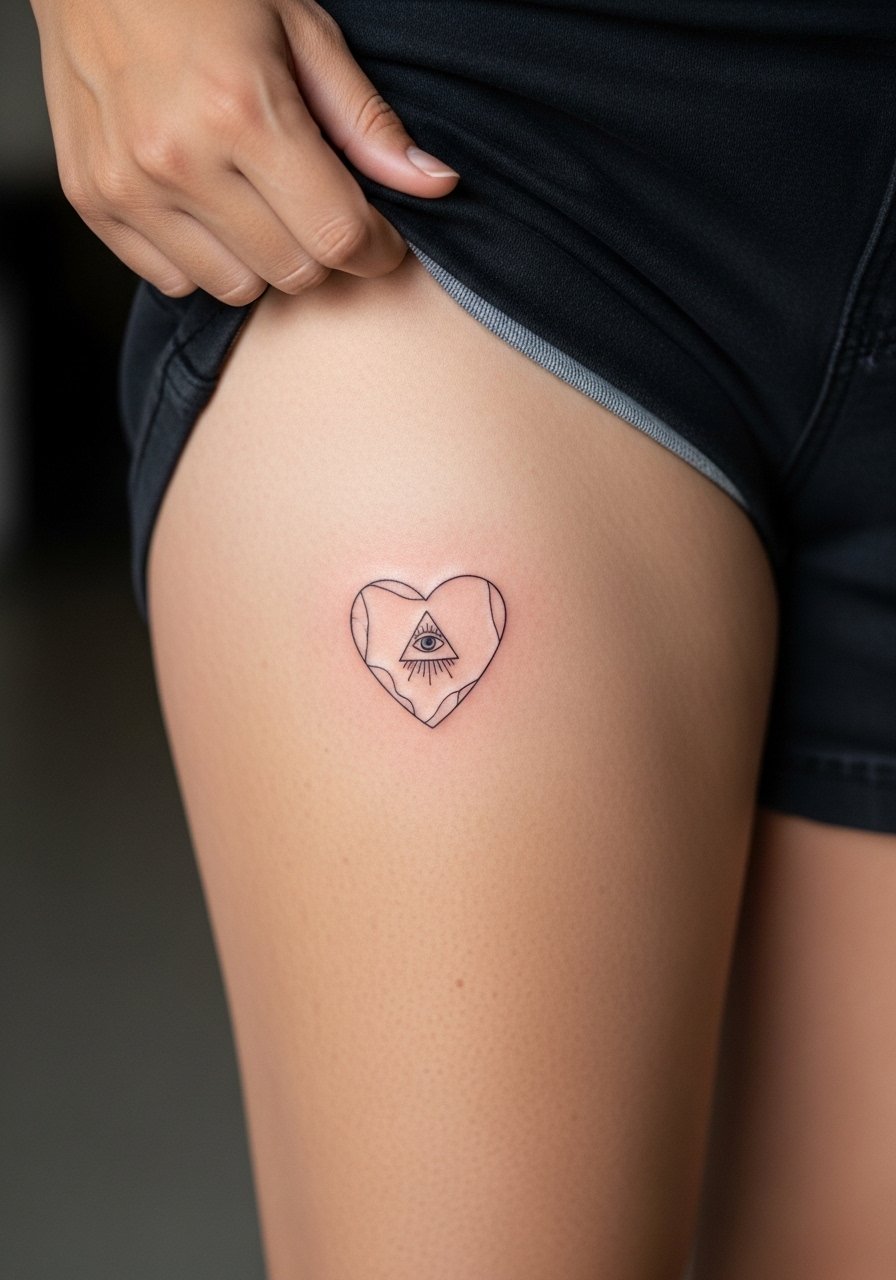
Inner thigh designs are intimate and require a specialist touch. The eye inside a heart benefits from larger negative space so the pupil and lashes keep clarity. A common error is compressing eye detail into a too-small oval. Expect moderate pain and a private session environment. This placement is ideal if you want something personal rather than visible. For showing off only around trusted moments, high-waisted shorts frame the region when you choose.
13. Neo-Traditional Arrow and Heart on Outer Arm
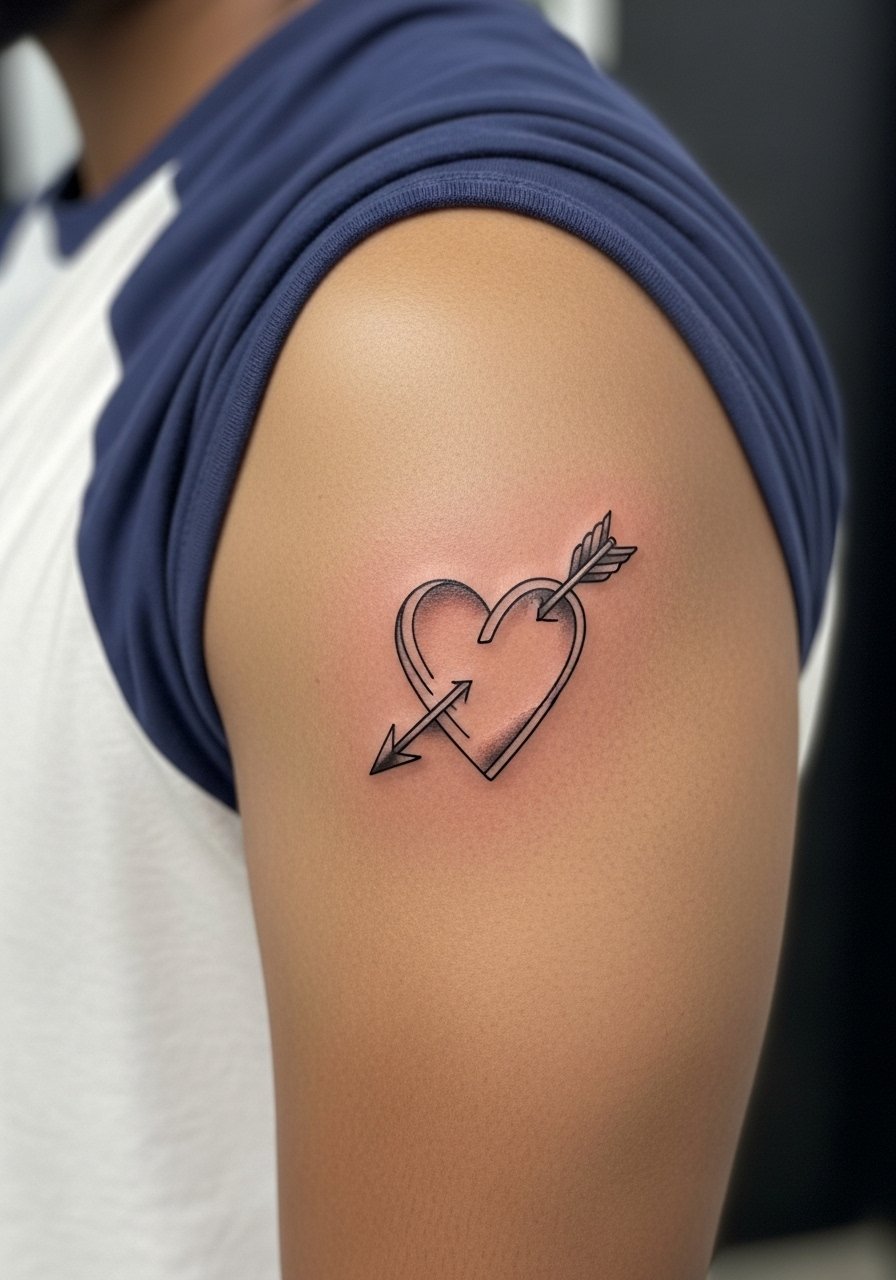
Bold motion helps this design age because the arrow creates directional flow that adapts with muscle. The mistake is over-detailing the arrow shaft in a tiny size. Ask your artist to simplify feathering and focus on a clean barbed tip. Sessions are short and the upper arm is forgiving. This design reads well with rolled sleeves on a racerback tank for casual days.
14. Micro Heart on the Finger
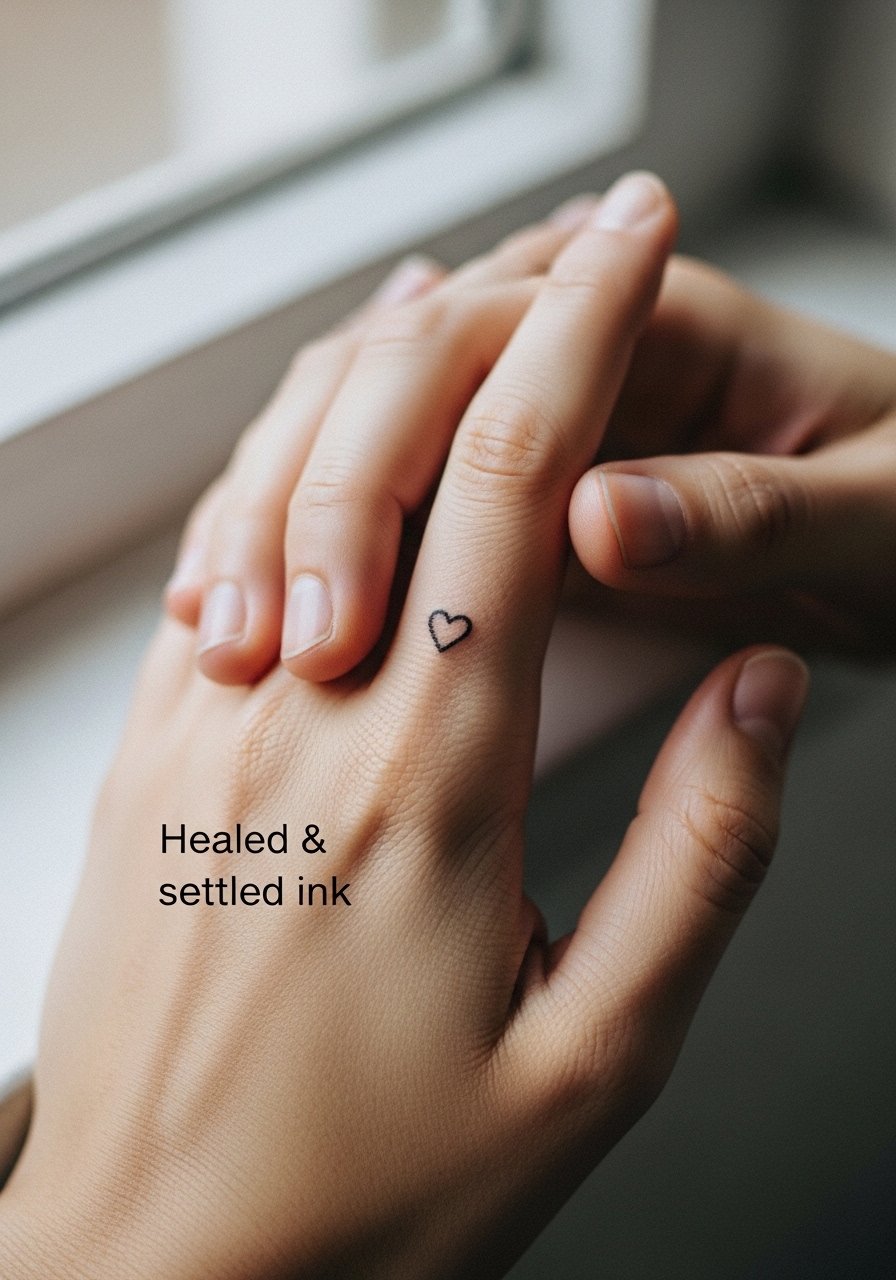
Finger pieces are convenient but notoriously transient. Expect faster fading because of constant washing and skin turnover. The version that lasts best uses slightly bolder contour on the side of the finger and avoids interior dot shading. A real mistake is putting complex elements on a fingertip surface that sees constant abrasion. Touch-ups are common. If you want a ring-like look without the upkeep, consider placing it on the lateral finger where friction is lower.
15. Botanical Heart Sleeve Filler
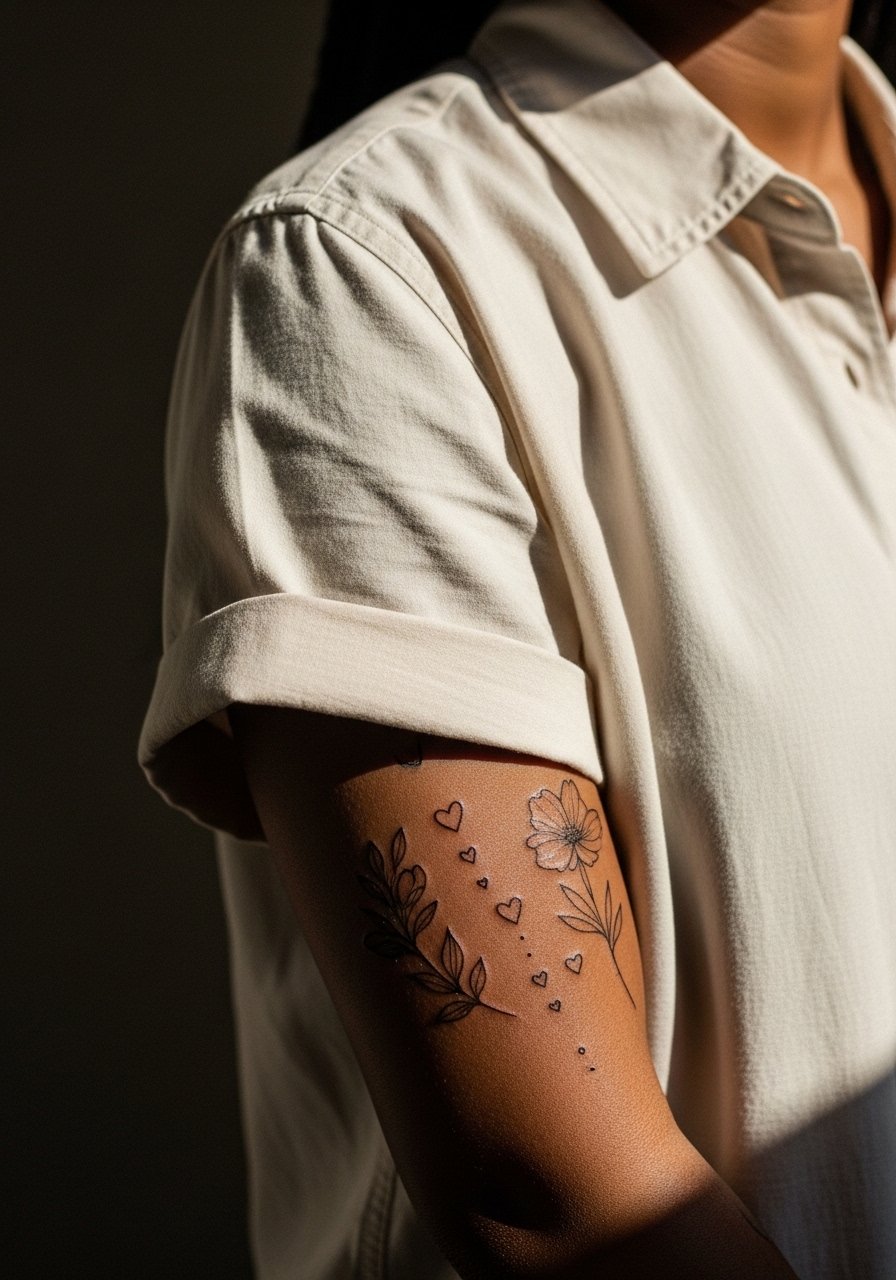
When a sacred motif becomes sleeve filler, the key is rhythm. I've seen small hearts repeat across a sleeve and read muddy when spacing is tight. Tell your artist you want alternating scales so each heart breathes. The forearm is forgiving, but commit to a plan for touch-ups as the sleeve densifies. Wear a loose short-sleeve button-up to sessions so the artist can easily access the full arm.
16. Blackwork Heart with Stipple Bleed on the Collarbone
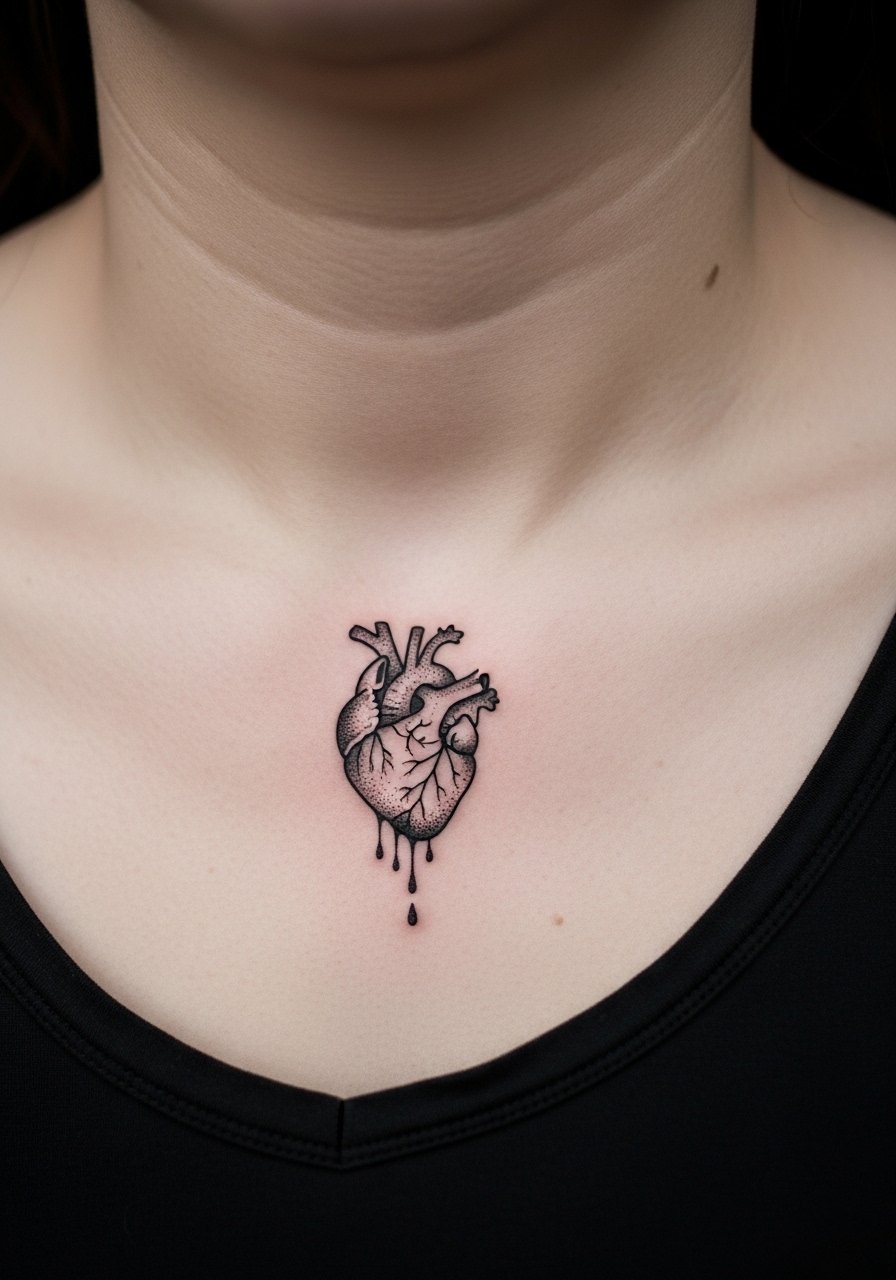
Blackwork in dot style can look dramatic but needs breathing room on the collarbone. One common mistake is stacking stipple too close to the linework which softens into a gray patch. Ask for staggered dot spacing and test a small area if you are unsure. Pain is brief and sharp. This approach reads bold without color and pairs well with layered necklaces that sit below the collarbone.
17. Heart with a Single Rose on the Inner Forearm
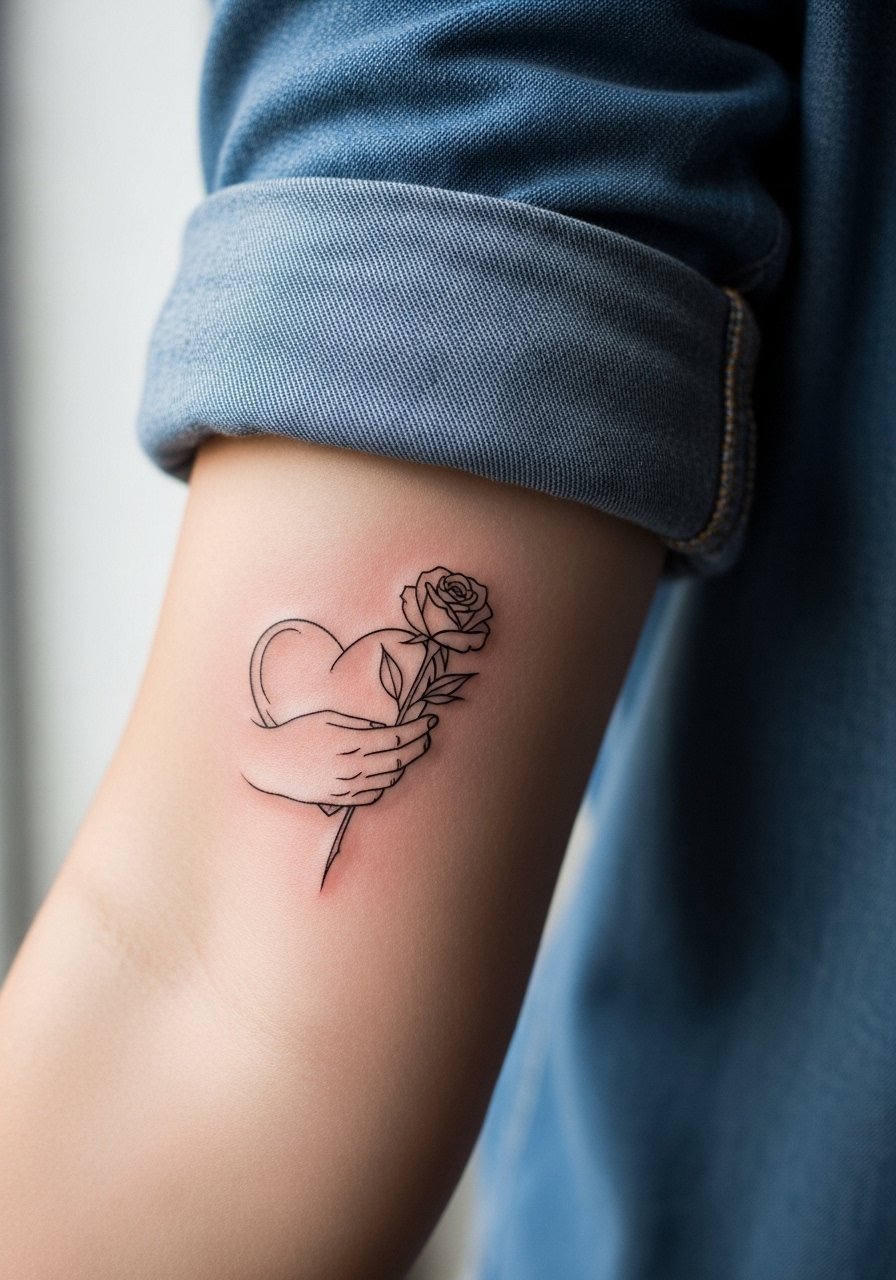
This combination ages well on forearm skin if the rose is scaled to avoid dense petals. Inexperienced requests often shove heavy petal shading into a small area which softens with time. Tell your artist you prefer outlining with selective stippling for depth. Expect a single session and low pain. For showing it off consider pairing with a thin silver chain bracelet on the opposite wrist for balance.
18. Minimal Outline Heart on the Thigh
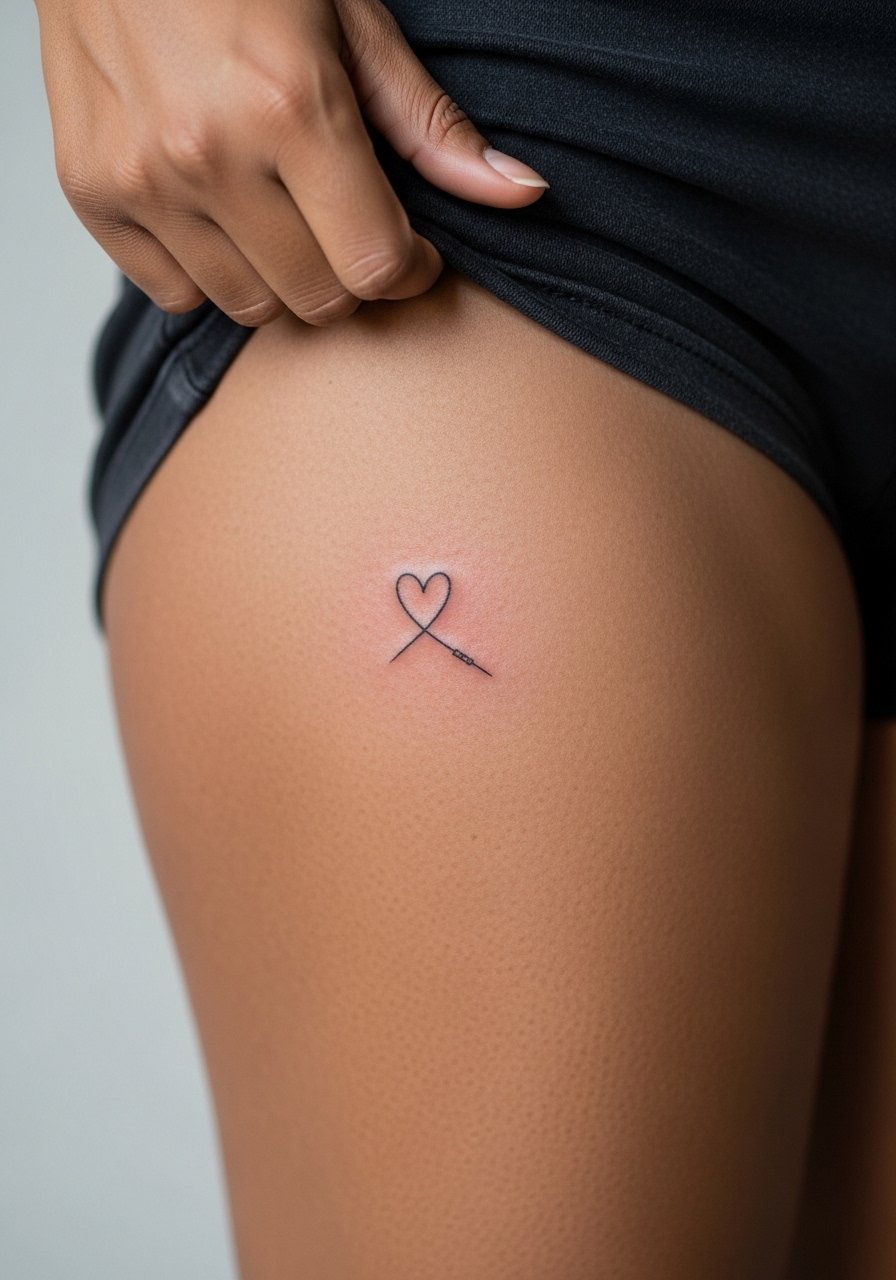
Thigh placements are forgiving and hold single-needle work well if the size is reasonable. A typical error is placing an ultra-fine micro on an area that sees friction from clothing. Choose a slightly larger outline and avoid dense shading. Session time is comfortable and pain moderate. For private aesthetics keep the thigh placement if you prefer select visibility.
19. Heart and All-Seeing Eye on the Inner Thigh
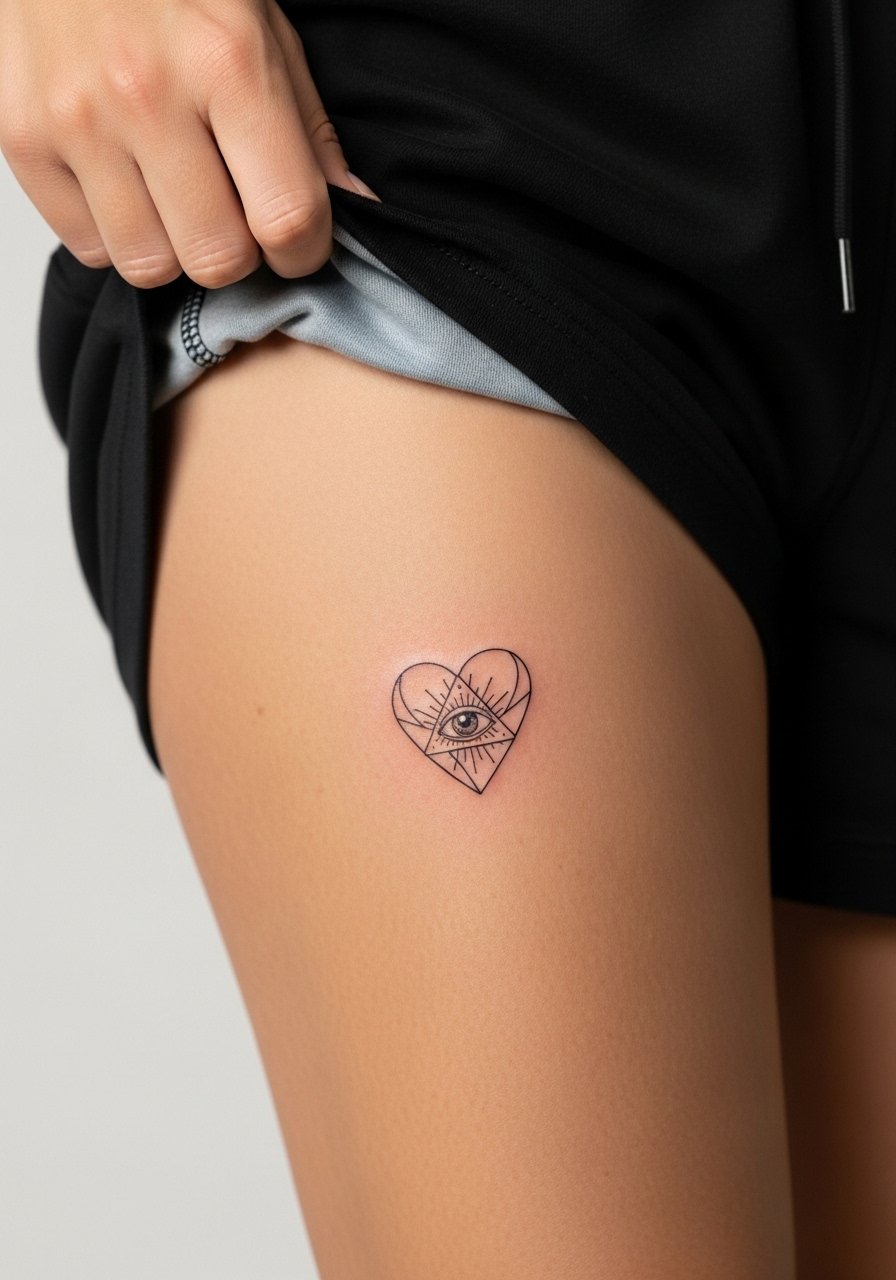
This esoteric pairing reads protective and hidden. The eye needs enough area to avoid merging lashes into a gray smudge. A common mistake is shrinking the eye too much to stay discreet. Larger negative space helps the motif last. Inner thigh work needs a calm environment and an artist experienced with intimate placements.
20. Heart Pierced by a Tiny Dagger on the Wrist
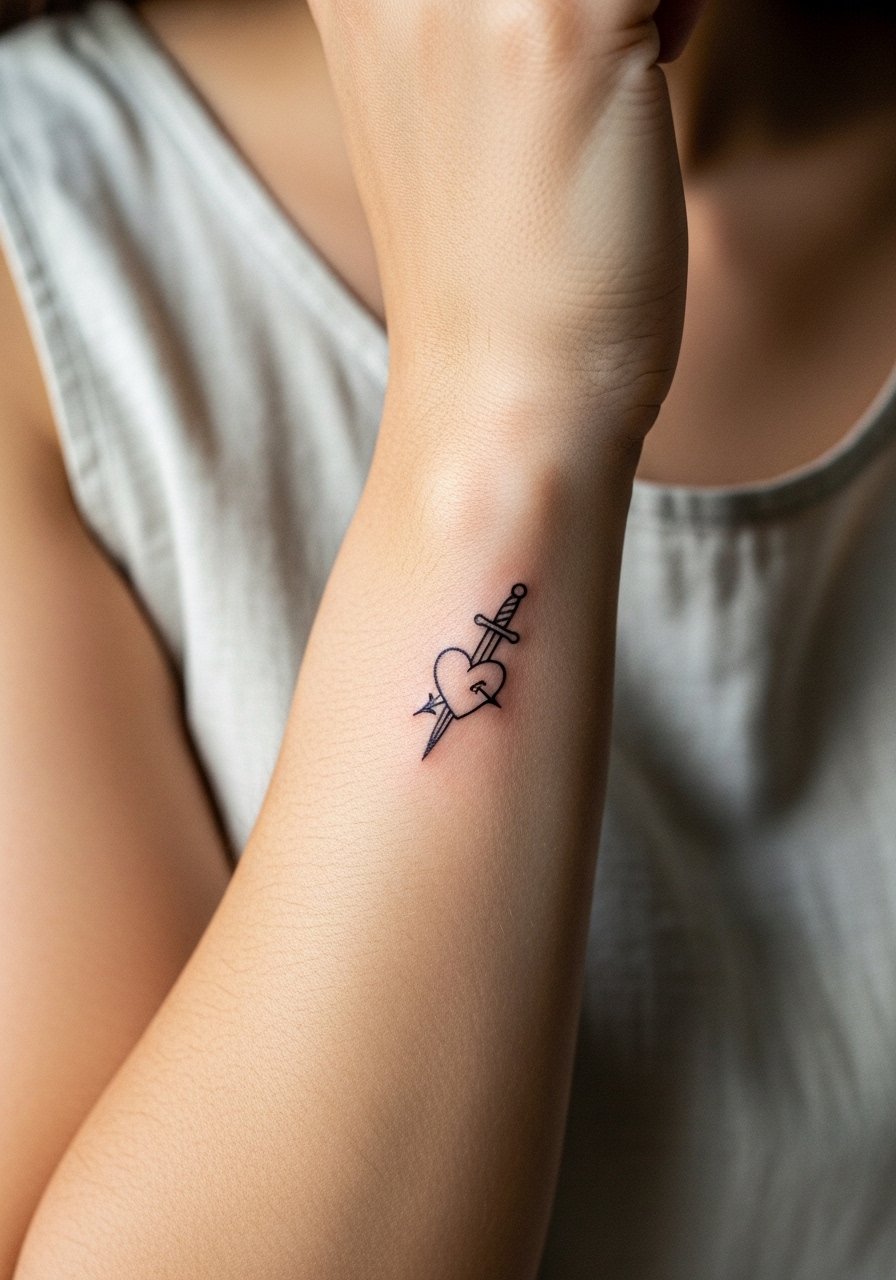
Wrist tattoos face constant washing which thins lines over time. The safe approach is a slightly heavier contour and minimal interior detail. If you put this tiny dagger on the wrist, expect a touch-up recommendation at one year. For session comfort wear a sleeveless linen tank so the artist can access the wrist without jewelry.
21. Classic Heart with Cross Motif on the Upper Chest
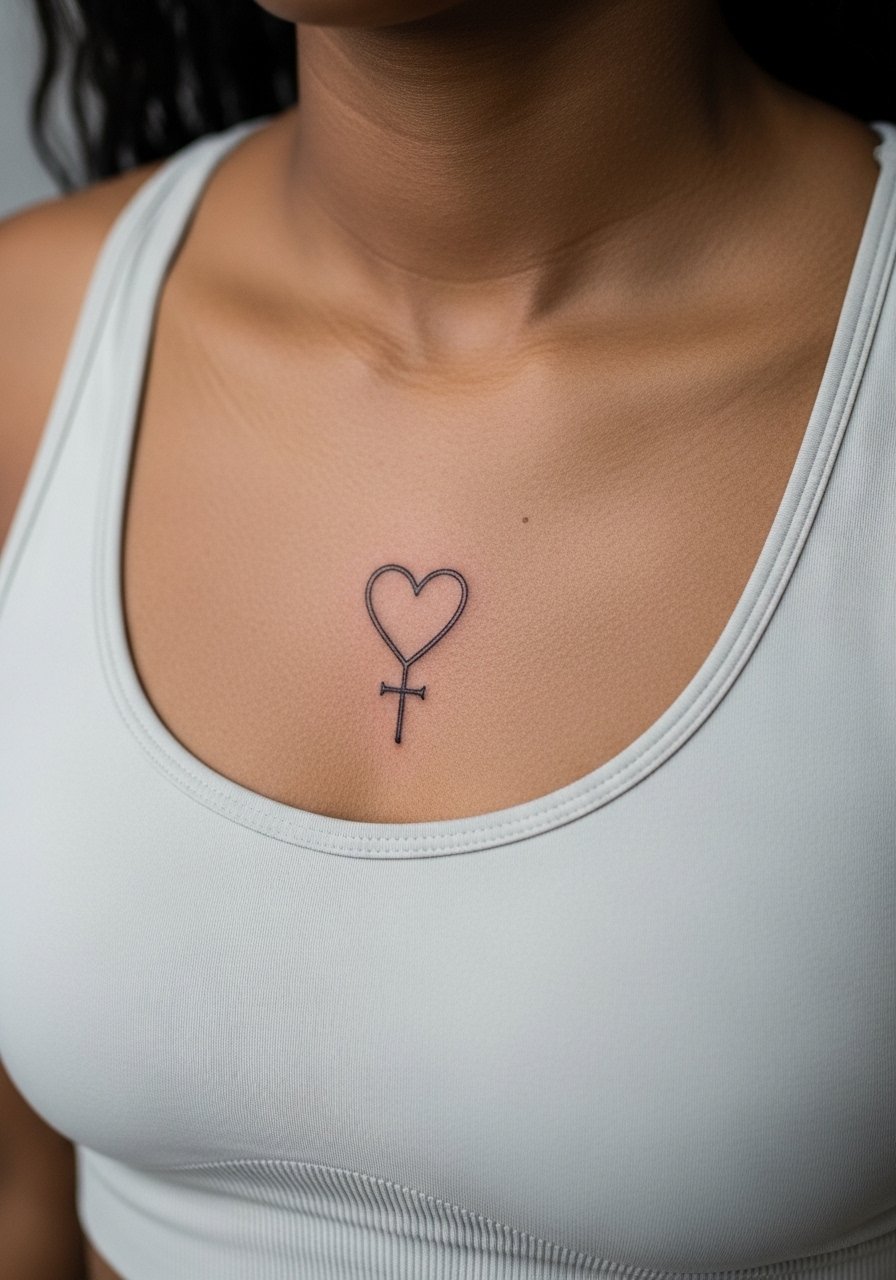
Sternum and upper chest can be sensitive and may shift with breathing. A cross motif looks dignified here when kept small and centered. The debate among artists is whether single-needle can handle chest motion. One camp warns of softening in two to three years. The other says careful spacing and slightly stronger line anchors mitigate drift. If you go here, expect a longer session and plan clothing that gives the artist clear access.
22. Tiny Heart on the Neck Side
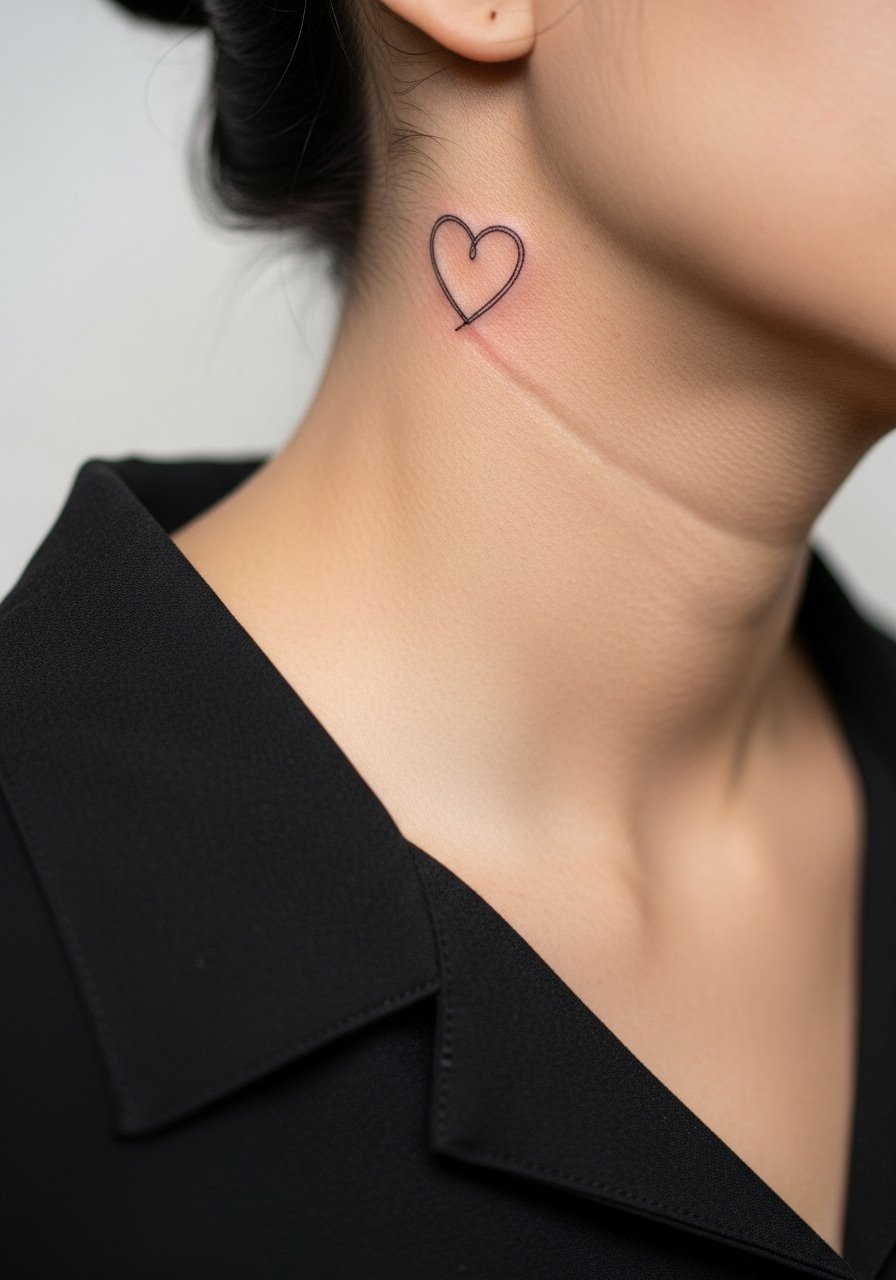
Neck placements are visible and can affect first impressions in some workplaces. Keep this tiny and simple. The common error is over-detailing a neck spot that will need frequent touch-ups because of constant sun exposure. Ask for UV-safe placement planning and be honest about how often you wear collared clothing.
23. Layered Heart and Rays on the Shoulder Blade
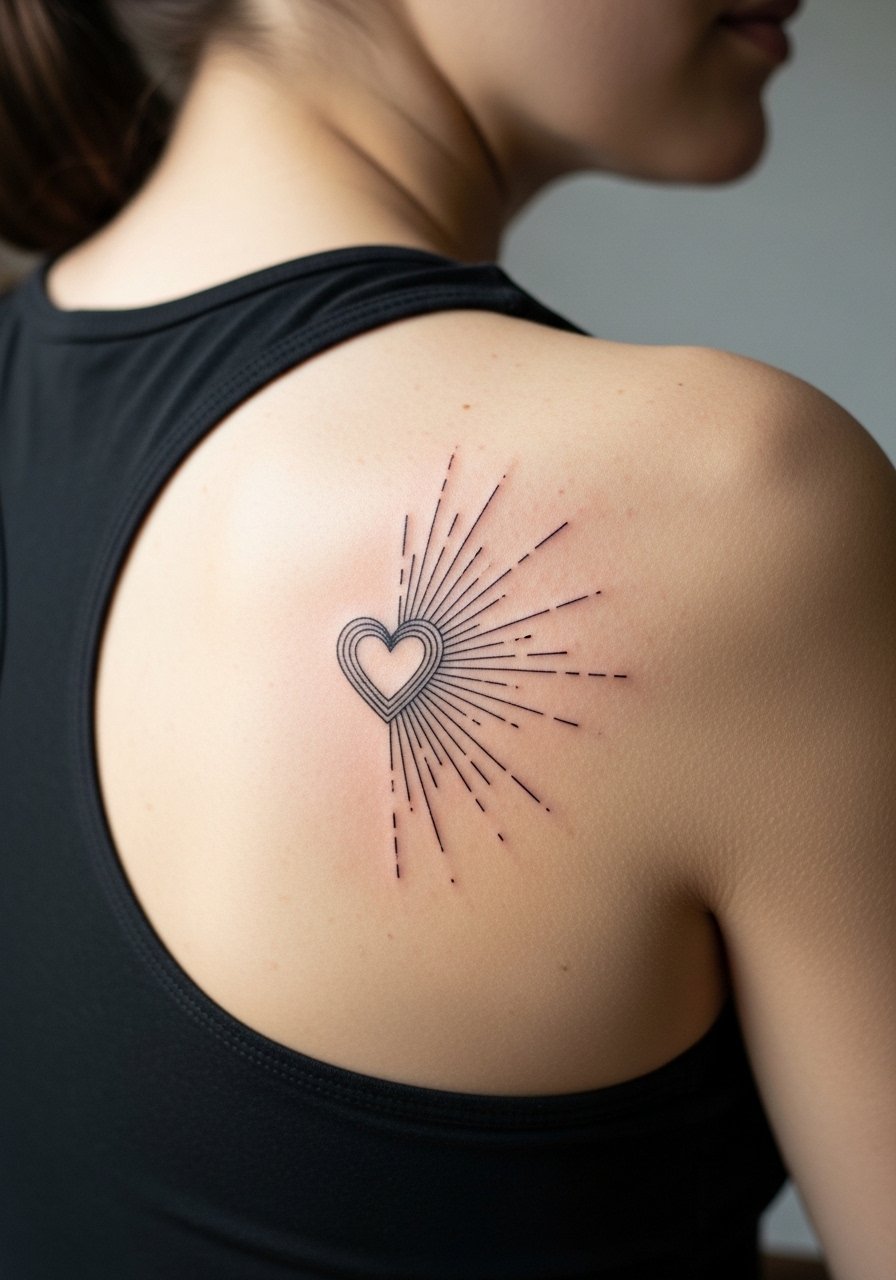
Shoulder blade skin settles gently, which helps thin rays keep their spacing. A mistake is crowding the rays into a dense halo. Tell your artist you want airy rays and minimal shading. For sessions wear a racerback tank so the artist can access the blade area without adjusting clothing repeatedly.
24. Micro-Realism Heart with Dagger on the Behind-the-Arm Area
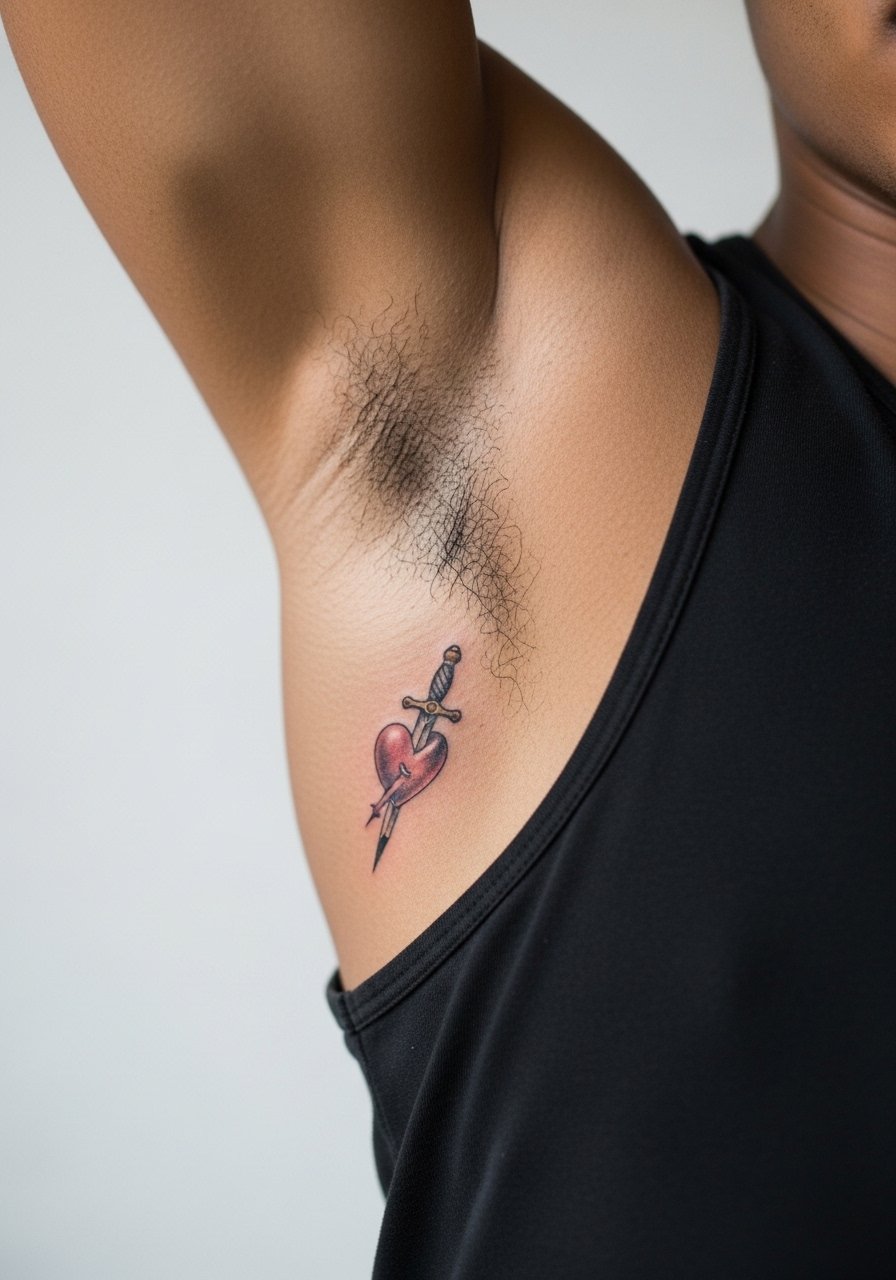
Inner tricep and tricep-adjacent areas vary with muscle tension. The dagger needs clean anchors so its tip does not blur into the heart with movement. A common mistake is compressing the dagger anatomy into a too-small piece. Book a consult and ask for a mockup on skin so you can flex gently to test the flow. Session pain is moderate and the area heals predictably.
25. Heart Wreath with Small Script on the Ribcage
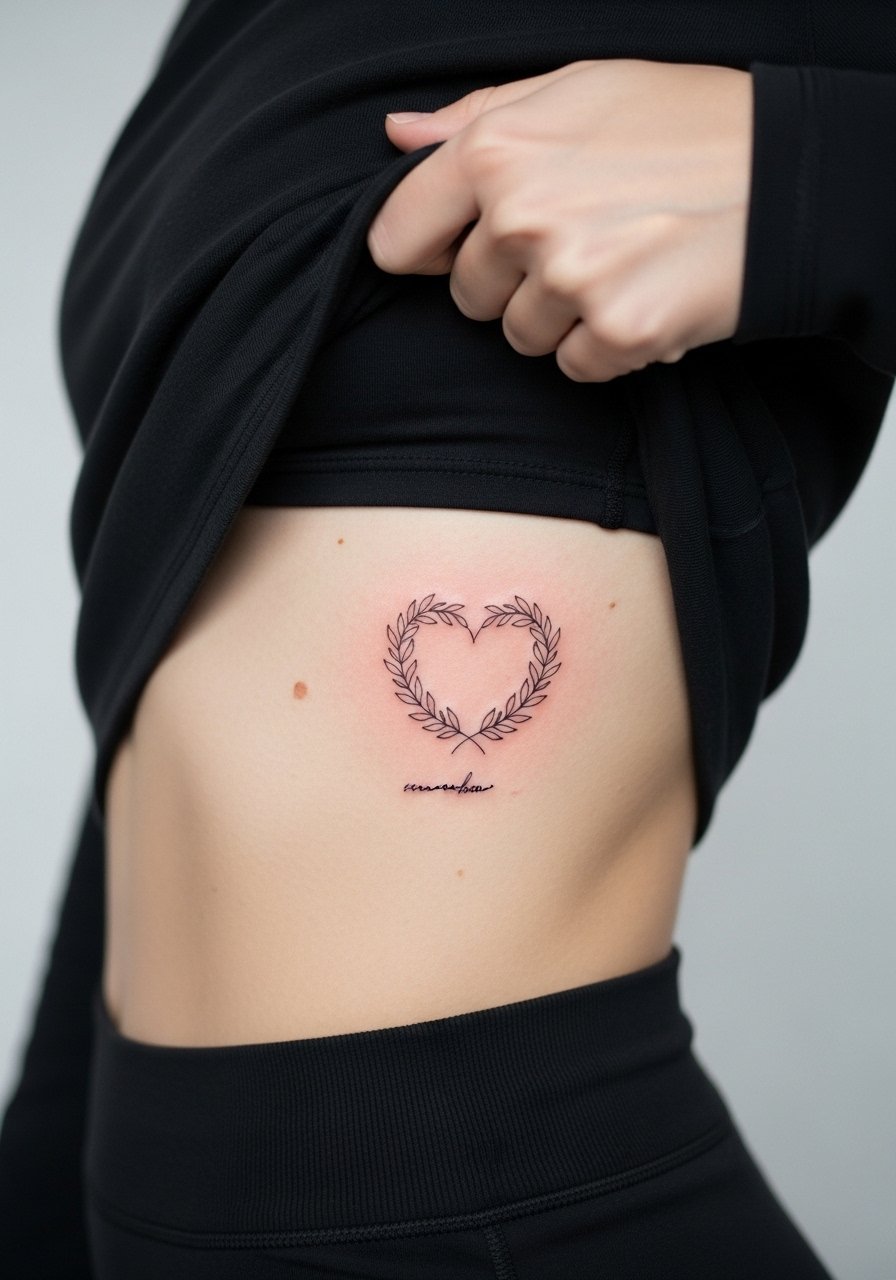
Ribcage text combined with linework needs generous spacing. Text placed too close to thin elements often becomes illegible in a couple of years. Request a font that reads well at small sizes and ask the artist to space the script slightly below the wreath. Pain is higher than forearm but the visual payoff is intimate. Plan recovery time and avoid tight clothing that rubs the zone while it heals.
26. Heart with Radiant Dotwork on the Calf
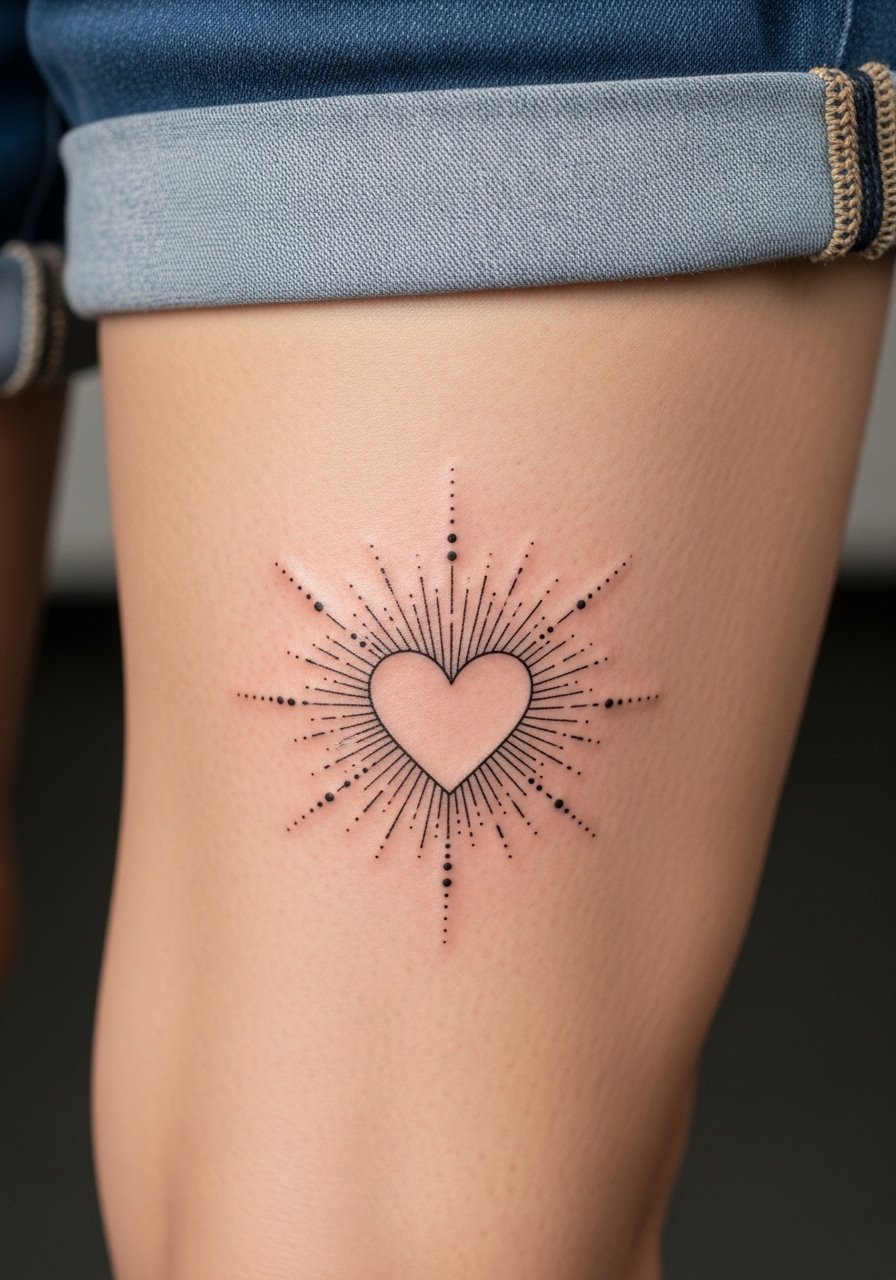
Dotwork radiance can add texture without heavy fills, but it needs controlled spacing. Too many dots close to the heart line makes the piece look like a gray smudge over time. Ask for gradual dot density and test how it photographs on your skin tone. The calf tolerates detail well and is a lower-pain area.
27. Hidden Heart Behind the Ear with Tiny Rays
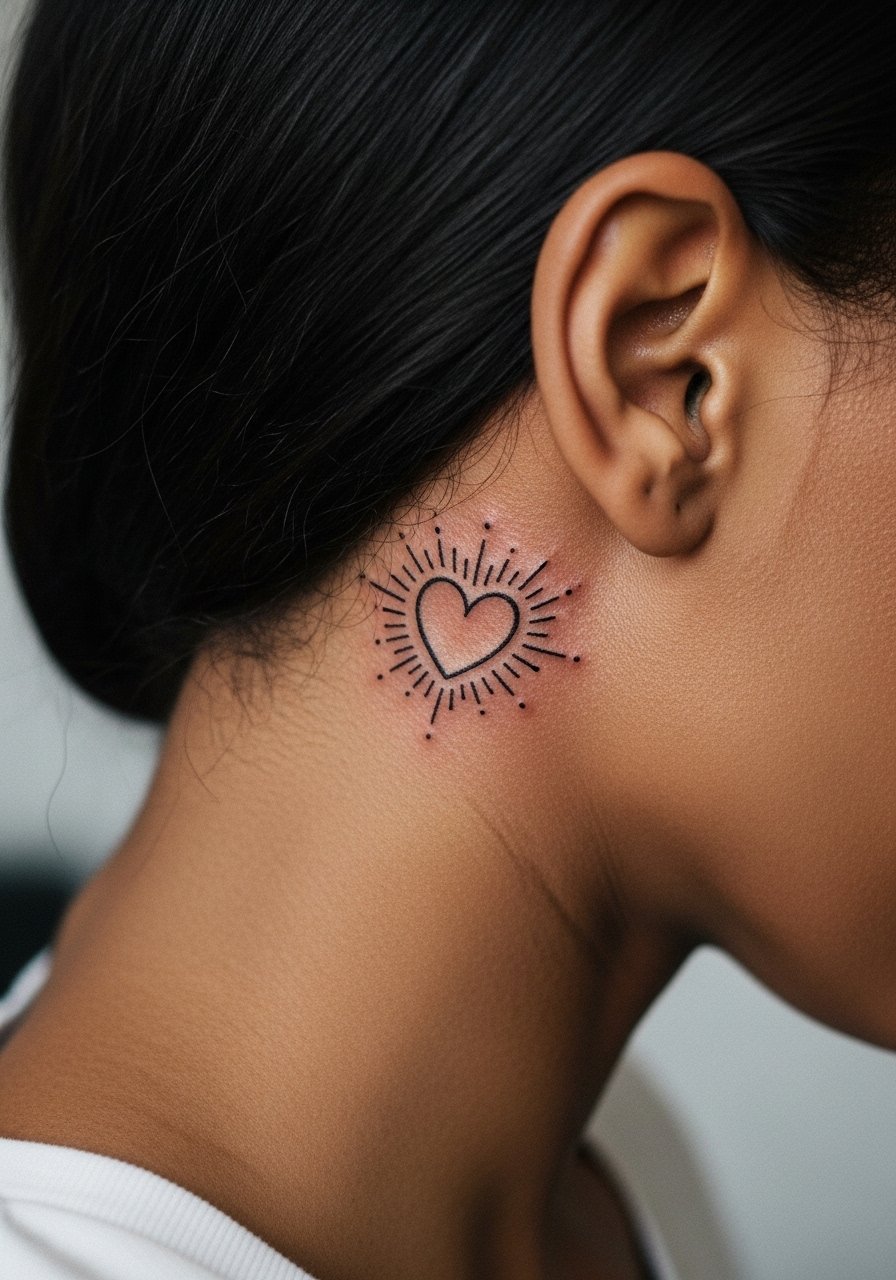
Hidden placements are perfect for small devotions that you do not always want on display. The behind-the-ear spot needs careful scale control. The rays should be minimal and spaced so they remain readable. This area heals quickly. Expect a short appointment and bring a hairstyle plan so the artist can work without obstruction.
Frequently Asked Questions
Q: Do fine line sacred heart tattoos fade faster than bolder styles?
A: From what I have seen, finer single-needle work can soften sooner because there is less mass to hold pigment. One group of artists says proper depth and spacing keeps them stable. The other group argues thicker anchors age more predictably. Plan for a touch-up at 1 to 3 years if you want the piece to stay crisp.
Q: Which placements hold up best for single-needle heart motifs?
A: Forearm, calf, and upper arm tend to be the most dependable zones because the skin is stable and sun exposure is easier to control. High-friction spots like the wrist, fingers, and ankle usually need more frequent touch-ups. Your lifestyle and clothing choices matter as much as the artist's technique.
Q: How should I prepare clothing-wise for a collarbone or shoulder session?
A: Wear tops you can pull aside without fully undressing. For collarbone work choose an off shoulder linen blouse or a wide-neck shirt you can shift. For the shoulder, a sleeveless fitted tee or racerback tank is easiest for the artist and keeps the area clean.
Q: What are realistic touch-up expectations for a micro dagger or tiny wrist heart?
A: Expect at least one touch-up window between six months and two years for very small pieces on high-wear zones. If you work with your artist to set slightly heavier anchor lines up front, you may lengthen the interval, but plan touch-ups as part of the design budget.
Q: How can I find artists who avoid making these designs look too "girly"?
A: Use discovery routes like searching #finelinesacredheart and related tags, filter for "fine line specialist" on studio booking apps, and scan portfolios for unisex compositions. Ask to see healed photos and the same placement on varied clients so you know how their work reads across styles.
