
Fine line trends on social feeds look delicate, but behind-ear work needs design choices that actually last. Neo-traditional pieces bring bold outlines and saturated color to a pocket of skin that sees hair, pillow friction, and sun at odd angles. Choose line weight, spacing, and contouring that follow the ear helix, and you get a tiny piece that settles gracefully over time. First up, a classic neo-traditional rose-dagger to show the approach.
1. Neo-traditional rose with dagger behind the ear
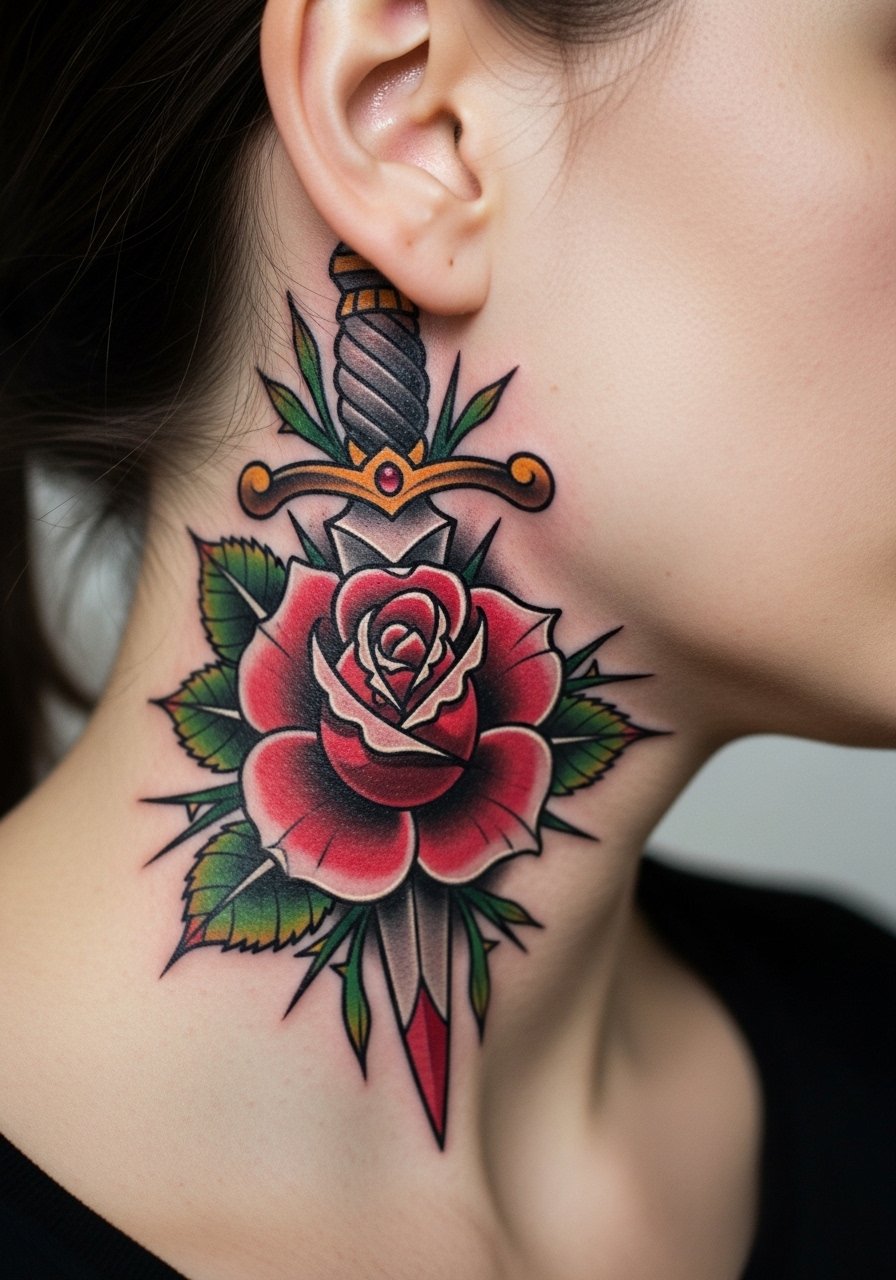
When I recommend a rose-and-dagger for behind-ear placement, I ask for slightly thicker outlines than a full-size chest piece. That prevents early feathering and keeps the silhouette readable at six months and two years. Tell your artist to follow the ear curve so the dagger tip aligns with the helix, not perpendicular to it. Expect a short session and moderate pain because the area is thin. Common mistakes are cramming too many petals into a micro space and using ultra-fine linework that loses separation. For showing it off, sweep hair into a loose updo and wear gold hoop earrings medium to balance the peek.
2. Neo-traditional swallow in flight
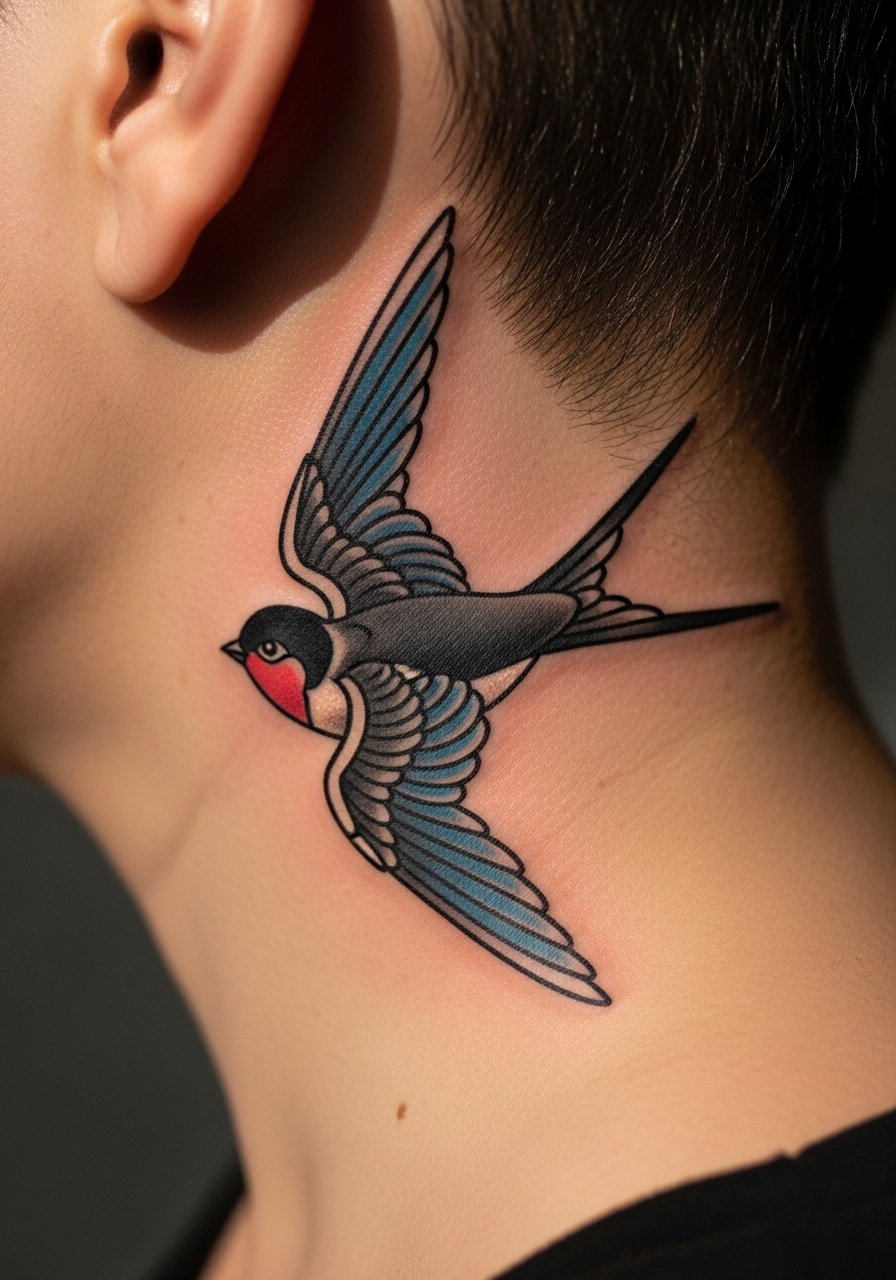
Personal observation: swallow motifs read as movement even when tiny, and neo-traditional shading gives them depth without losing crispness. Ask for dynamic wing placement that follows the ear's upper curve so the bird looks like it is actually lifting off. Pain is mild but the upper behind-ear skin can feel more tender. A common aging error is choosing too many small hatch marks for shading; instead request modest stipple shading and solid color fills so saturation holds. For session comfort, tie hair back and bring a low ponytail holder so the artist has a clear field.
3. Curved anchor with ribbon banner
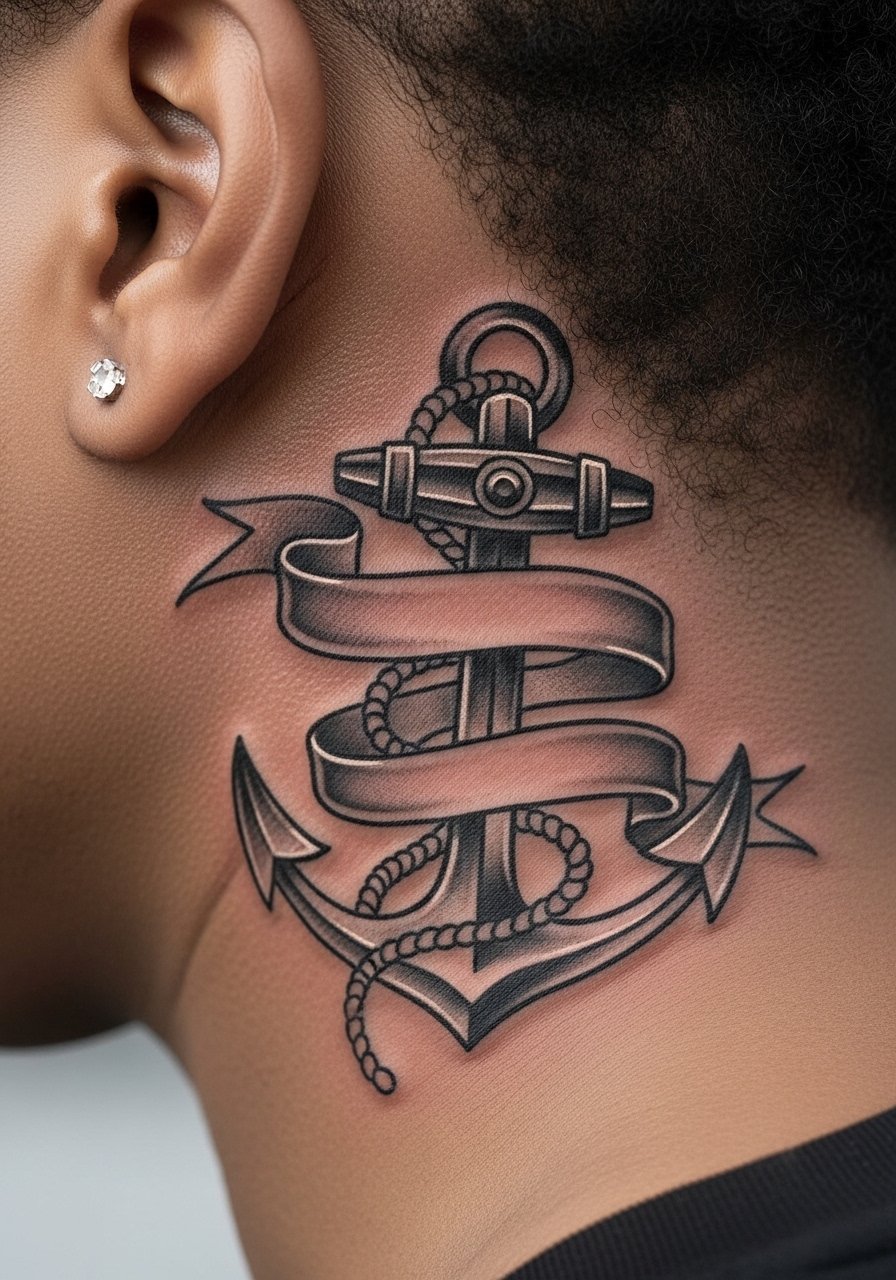
The visual impact lead: an anchor reads instantly even at small scale thanks to bold black outlines and a compact silhouette. When you consult, specify that the ribbon should hug the ear curve rather than run straight across. That way the text, if you choose any, sits legibly and avoids stretching with movement. Expect a single session and a low to moderate pain level. Watch out for blowout risk if the artist goes too deep with tight script. Pair this piece with an asymmetrical haircut or a stud earring set to let the anchor peek without competing accessories.
4. Orion's Belt constellation
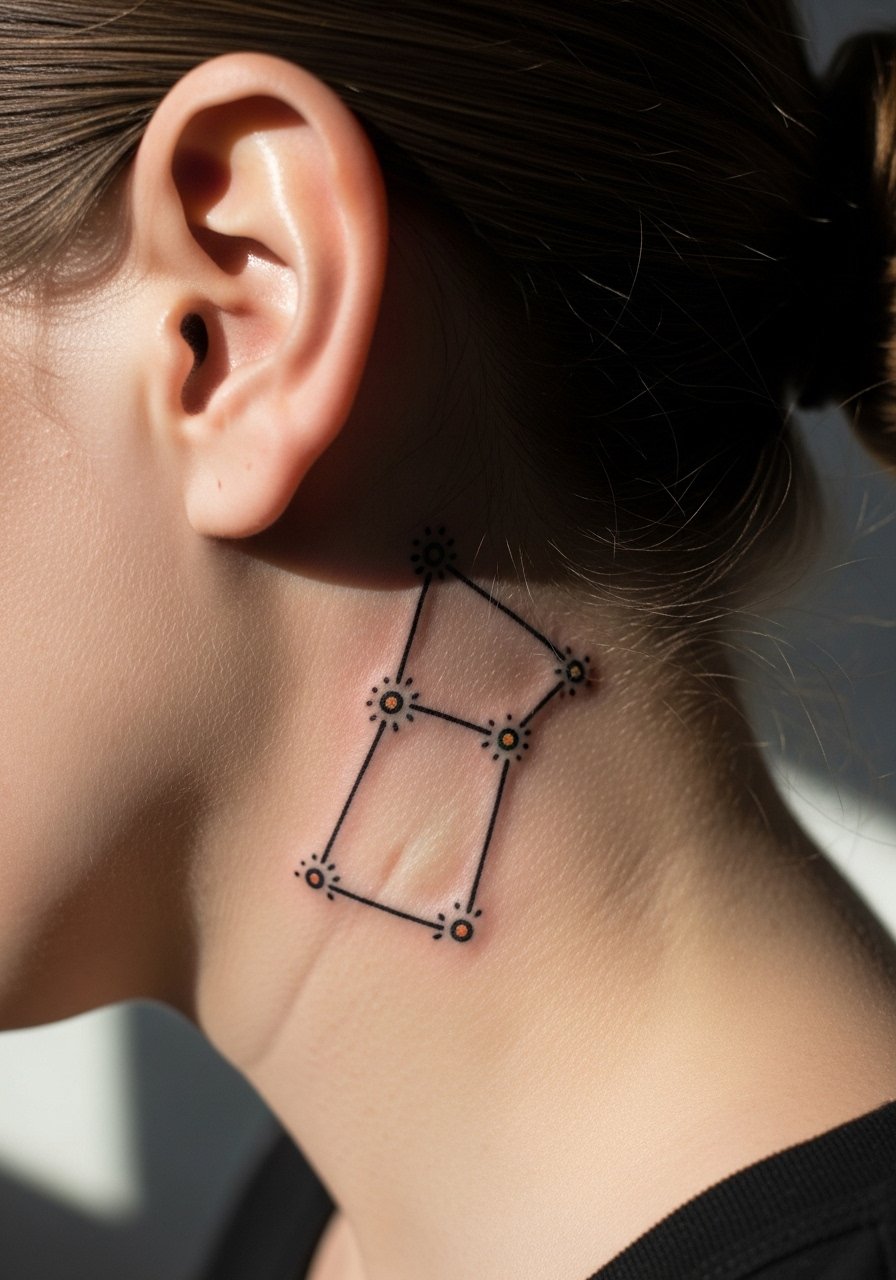
Aging/healing lead: constellations with slightly bolder dots fare better than ultra-fine pinpoints. Tell your artist you want the dots sized so they read at arm's length, and ask for connecting lines that are lightly pigmented instead of hairline. The session is quick and the pain is low, but tiny dot work can blur if the spacing is too tight. One practical display trick is a side-parted hairstyle or a side part hair clip to reveal the line of stars when you want it visible.
5. Floral sprig with bee
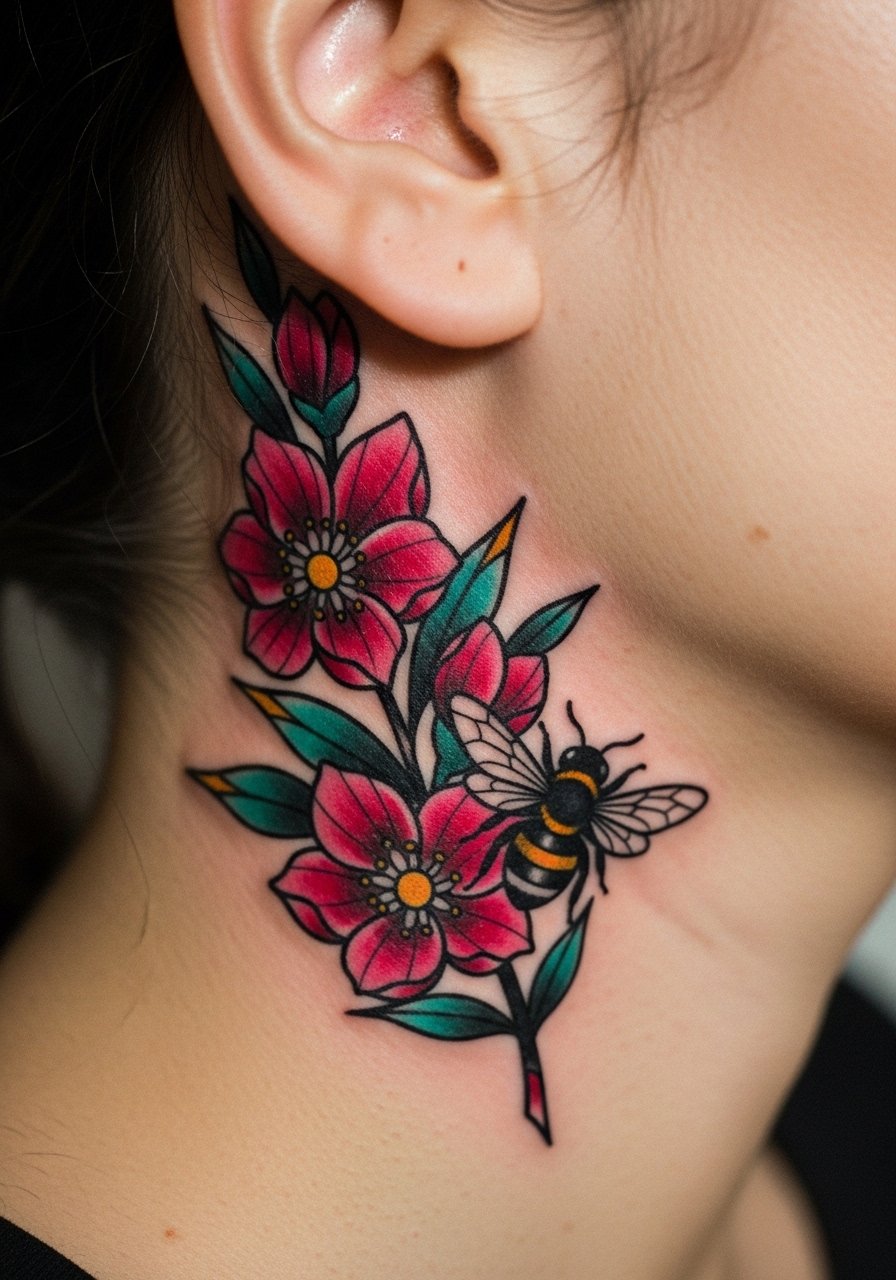
Consultation lead: bring reference photos that show petal color and the bee's scale so your artist balances saturation and negative space. A vertical 1.5-inch sprig positioned mid-behind the ear follows the neck line and avoids hair interference. Most mistakes come from over-detailing the bee at tiny scale. Ask for a slightly simplified bee with blackwork wings to keep contrast strong over time. For showing it off, try dangling earrings and a vintage bandana tied away from the tattoo during healing.
6. Tiny heart pierced by an arrow
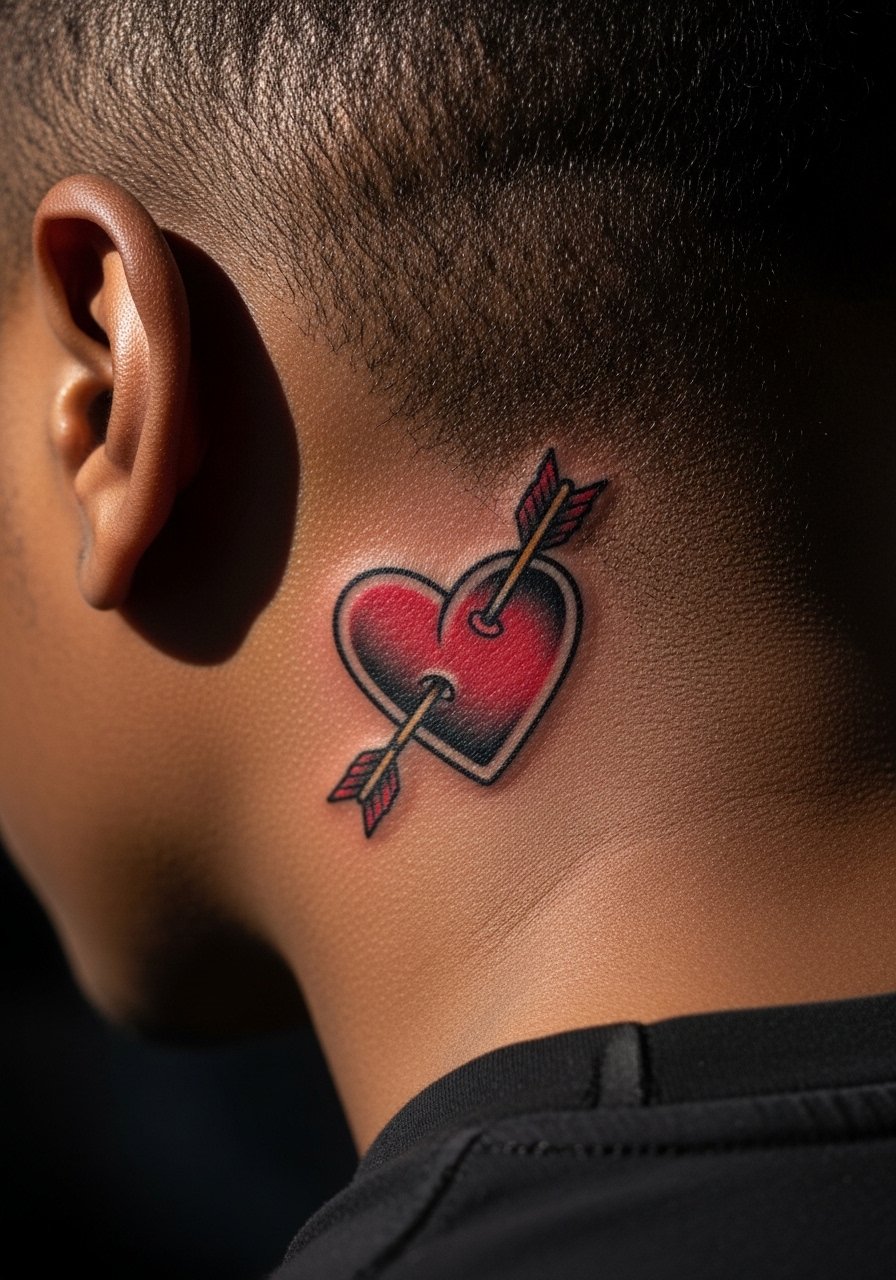
Mistake lead: the biggest error with micro hearts is picking a heart shape that is too soft in outline. Ask for a confident black outline and a saturated red fill so the compact silhouette holds. Pain is low near the lobe area, but the curved placement can feel sharp when needles pass close to bone. Expect one short session and a likely touch-up in a couple of years for saturation. Pair it with dangling stud earrings when you want the design visible.
Studio Day Picks
Those first six designs sit in zones that see hair friction and pillow contact, so a few smart items smooth the appointment and the first week of healing.
-
Stencil transfer paper kit. Lets you preview placement on the neck skin and adjust the curve so the rose, swallow, or anchor follows the helix.
-
Topical numbing cream. Useful for behind-ear sensitivity if you and your artist agree, especially for denser shading near the skull.
-
Thin protective film roll. Helps keep hair and sweat off small behind-ear pieces during the first 48 hours.
-
Fragrance-free body wash. Gentle cleansing matters when small tattoos sit next to hair that shed into the area.
-
Aquaphor healing ointment. A thin layer for the first few days reduces scabbing and preserves color in micro neo-traditional fills.
7. Skull with flowers tucked behind the ear
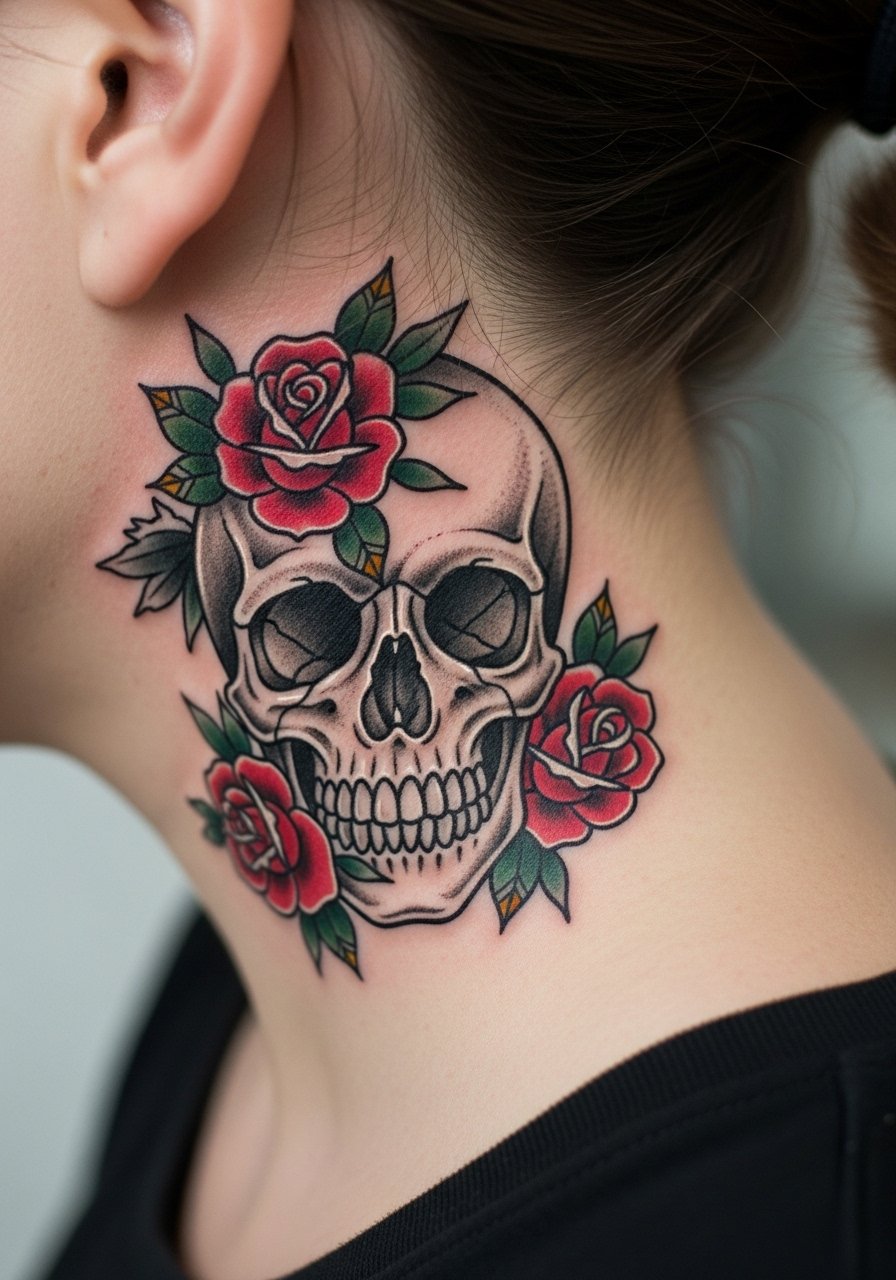
Visual impact lead: pairing memento mori with blooms reads like a small story rather than a single icon. For this rounded two-inch composition, ask the artist to center the skull so the roses wrap toward the helix. The session may run longer and pain level rises slightly near the mastoid bone. Controversy note: artists split on intensive aftercare methods. One camp favors protective films to reduce scabbing. The other camp warns over-moisturizing can trap bacteria. Ask the artist which they prefer and why. Expect a touch-up at year two to refresh the color contrast.
8. Crescent moon with surrounding stars
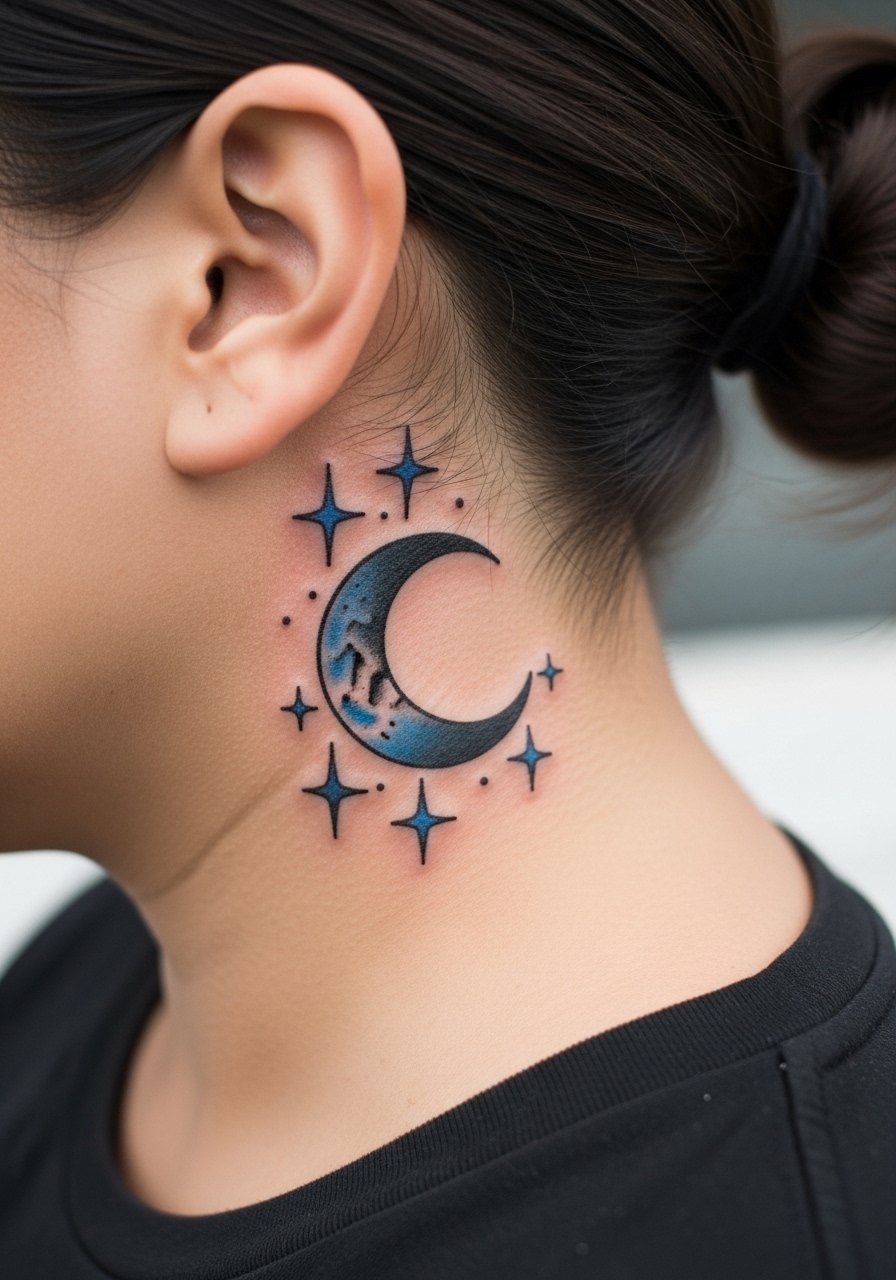
Mistake lead: moons that lean on ultra-fine gradient washes often lose their depth on thin behind-ear skin. Request a modest blue-black gradient with a slightly thicker outer line for the crescent. This holds better at six months and beyond. The session is brief and pain is low. Styling tip: a sleek low ponytail or a wide neck tshirt during the appointment keeps the neck area clear and comfortable.
9. Snake coiling along the ear edge
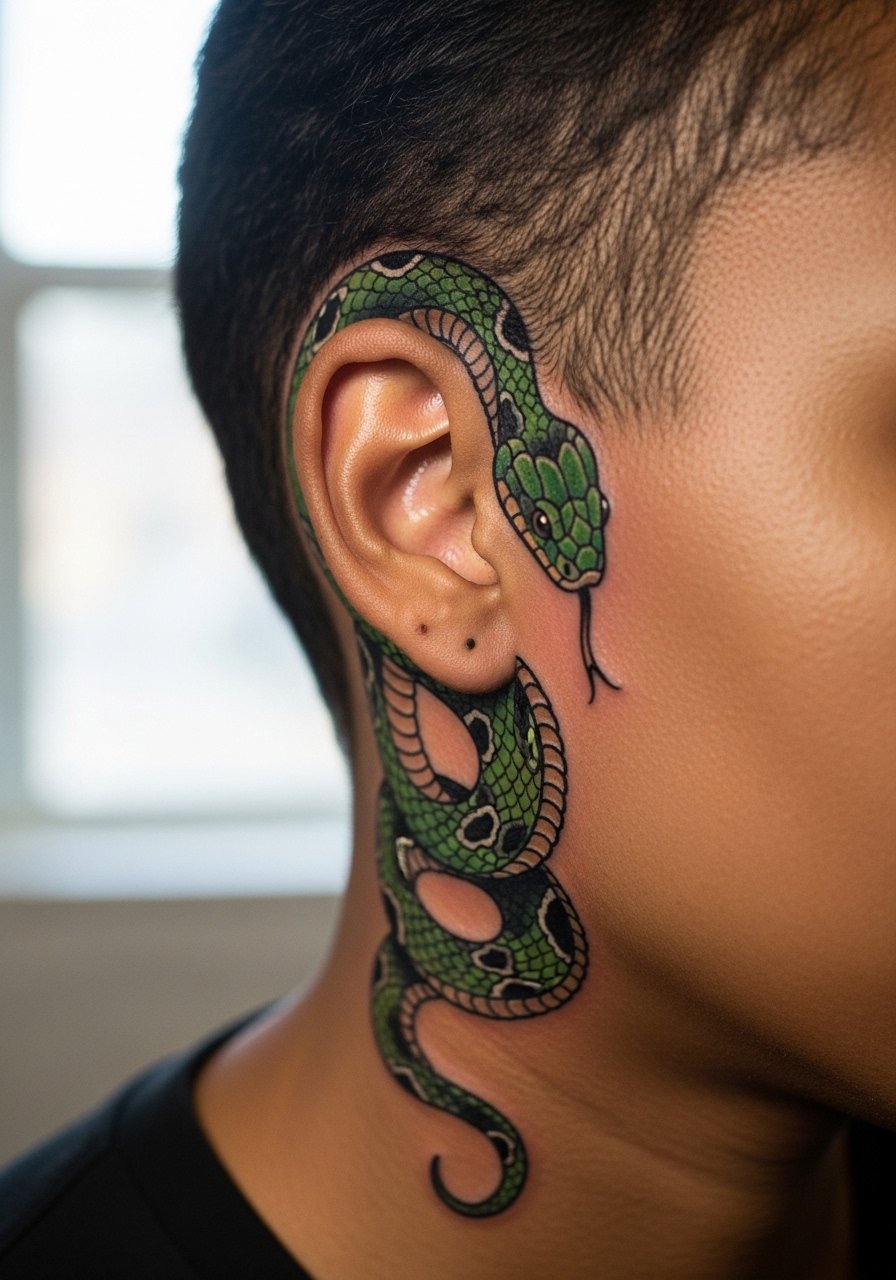
Consultation lead: specify scale pattern and how much of the snake wraps toward the upper ear so the motion feels natural. Thin wraparounds risk blowout if lines are too close to cartilage. The area can be tender where the needle crosses near bone, so topical numbing comes up in discussions. Expect moderate session time if the snake curves more than two inches. Show-off tip: an asymmetrical haircut or a stud earring set keeps the design visible without overpowering it.
10. Butterfly emerging from behind the ear
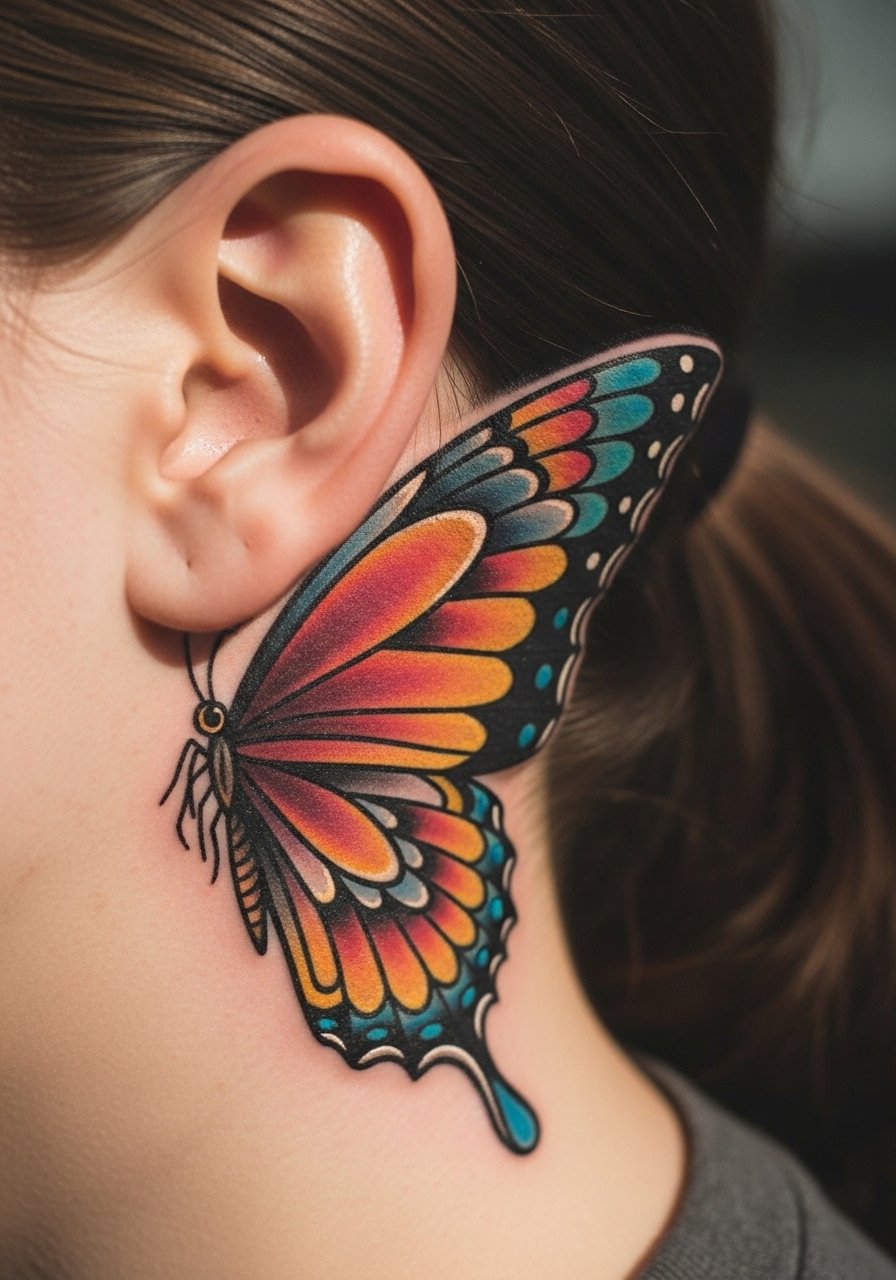
Personal observation: butterflies at this scale work well with neo-traditional saturation because color blocks age more cleanly than fine gradients. Ask for slightly simplified wing veins and solid color fills so the silhouette stays strong. The session time is short and pain is manageable. A common mistake is overly intricate wing details that blur into each other after a year. For showing it off, wear a thin chain pendant necklace on the opposite side for balance.
11. Clock face with micro roses
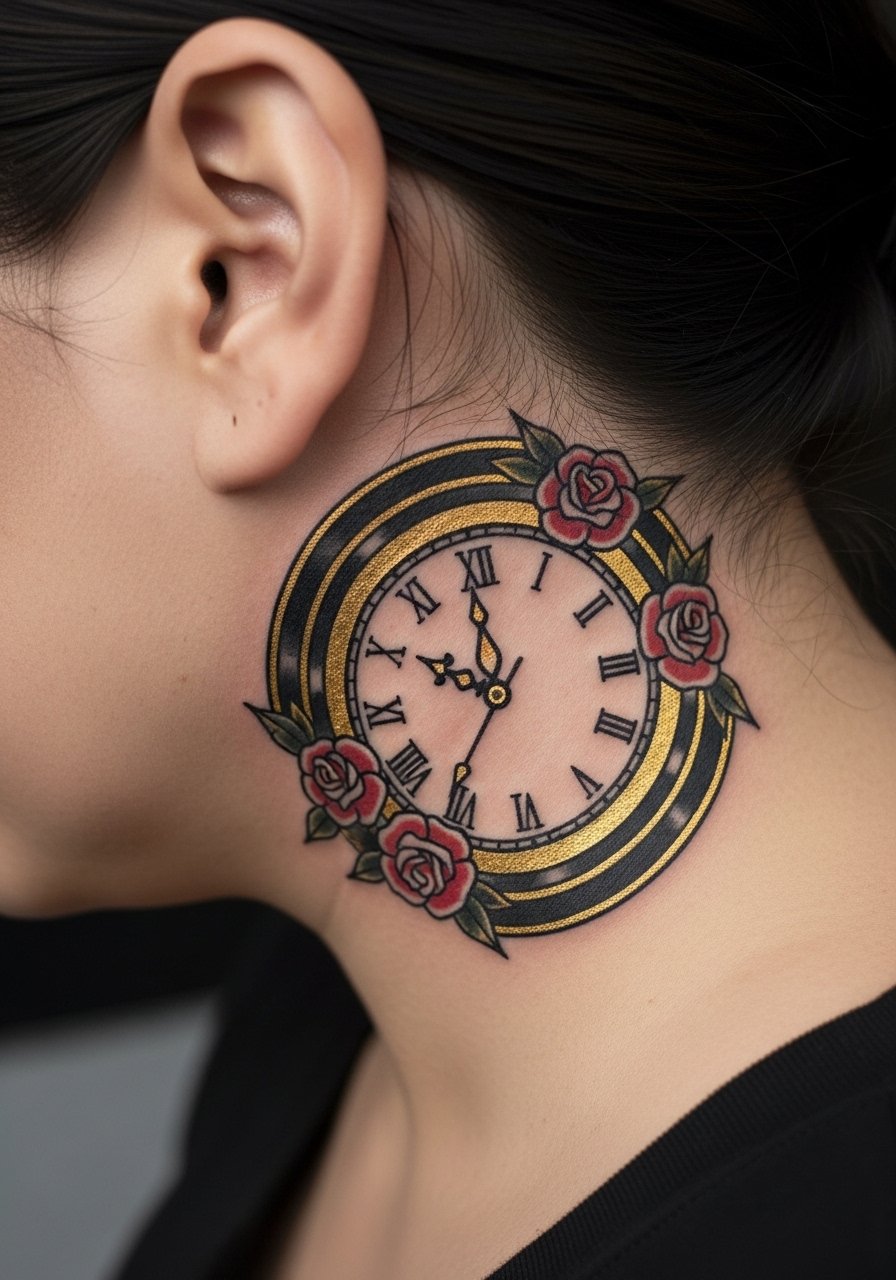
Aging/healing lead: tiny clock faces need room between numerals and hands to avoid merging as the skin ages. Ask your artist for simplified numerals and bold hands. Two sessions might be needed if you want gold accents plus shaded blooms. Expect moderate tenderness near bone. Common mistake: packing too many tiny elements into a round one-and-a-half-inch design. Session-day wear: pull hair up and wear a wide-neck tee so the artist can angle comfortably.
12. Feather with an eye motif
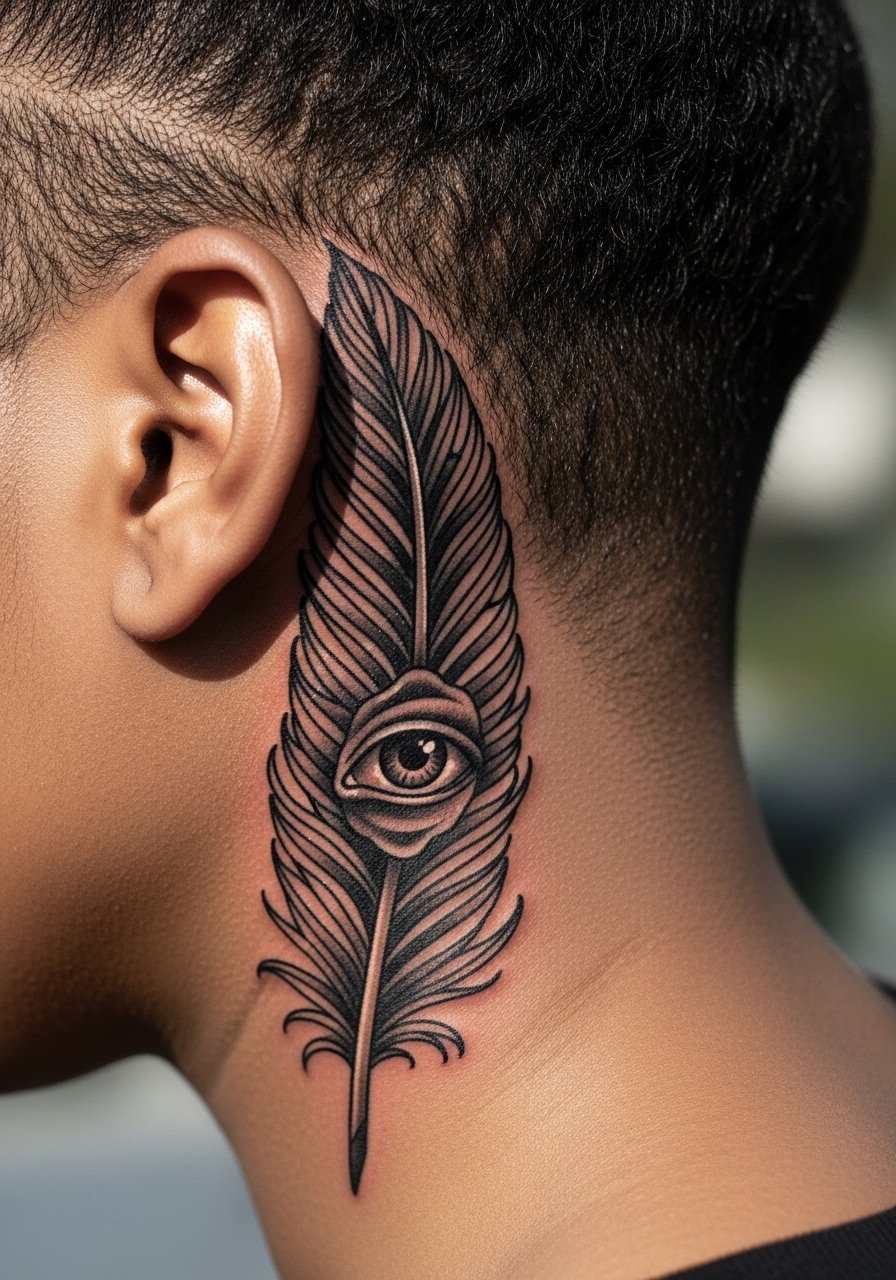
Mistake lead: long vertical feathers can look thin when placed too close to the hairline. Position the top of the feather slightly lower so it follows the neck slope. Ask for stipple shading and a bold quill to anchor the piece. The pain is low to moderate and one session usually covers the work. Consider pairing with minimal jewelry like a thin chain pendant necklace when showing it off.
13. Miniature clockwork key
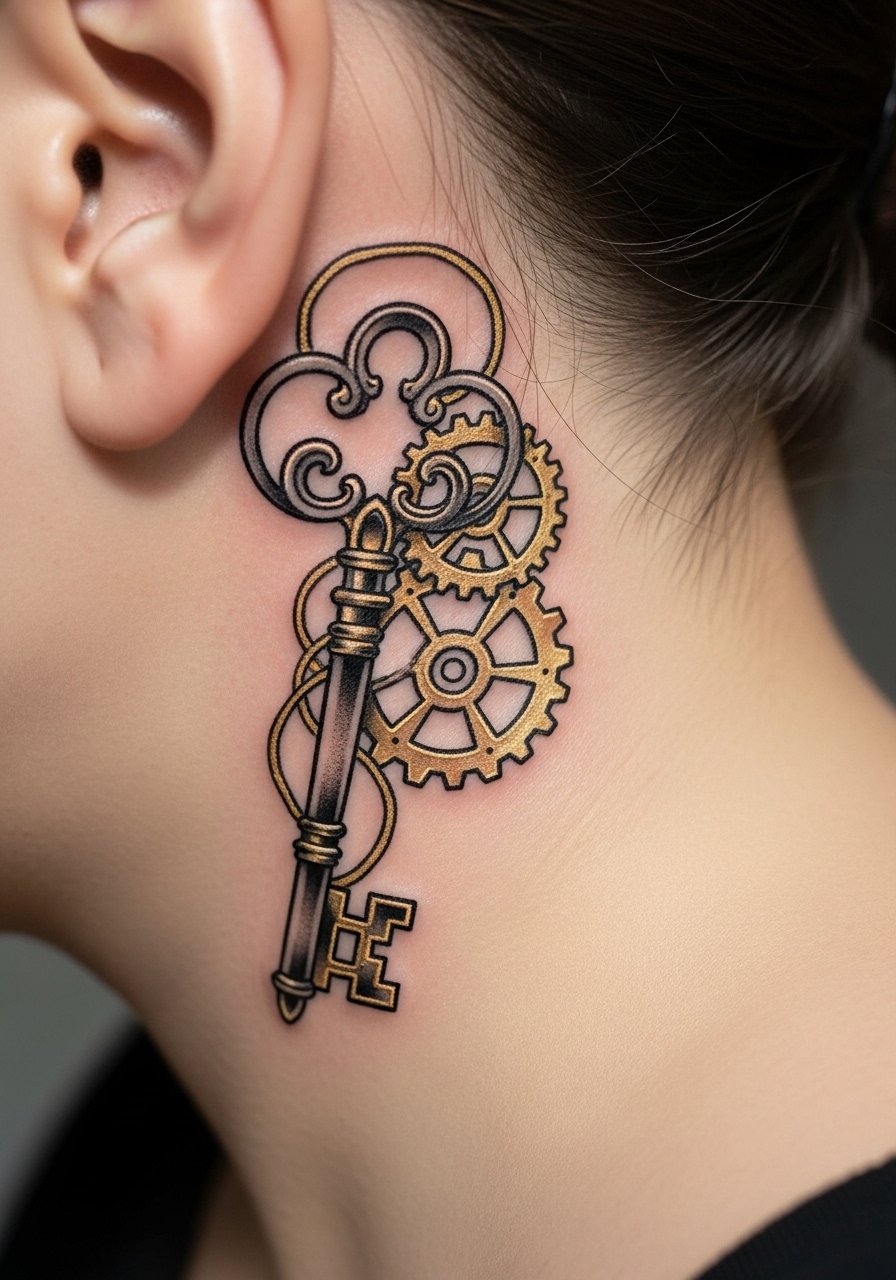
Consultation lead: tell your artist which element should dominate the negative space so the key reads at a glance. Fine gear teeth in a tiny area blur quickly, so ask for simplified gear forms and solid black anchors. Expect a short appointment and a likely touch-up in three to five years for tiny metallic tones. For session comfort, wear a loose button-down shirt you can pivot aside without tugging.
14. Tiny banner with a single word
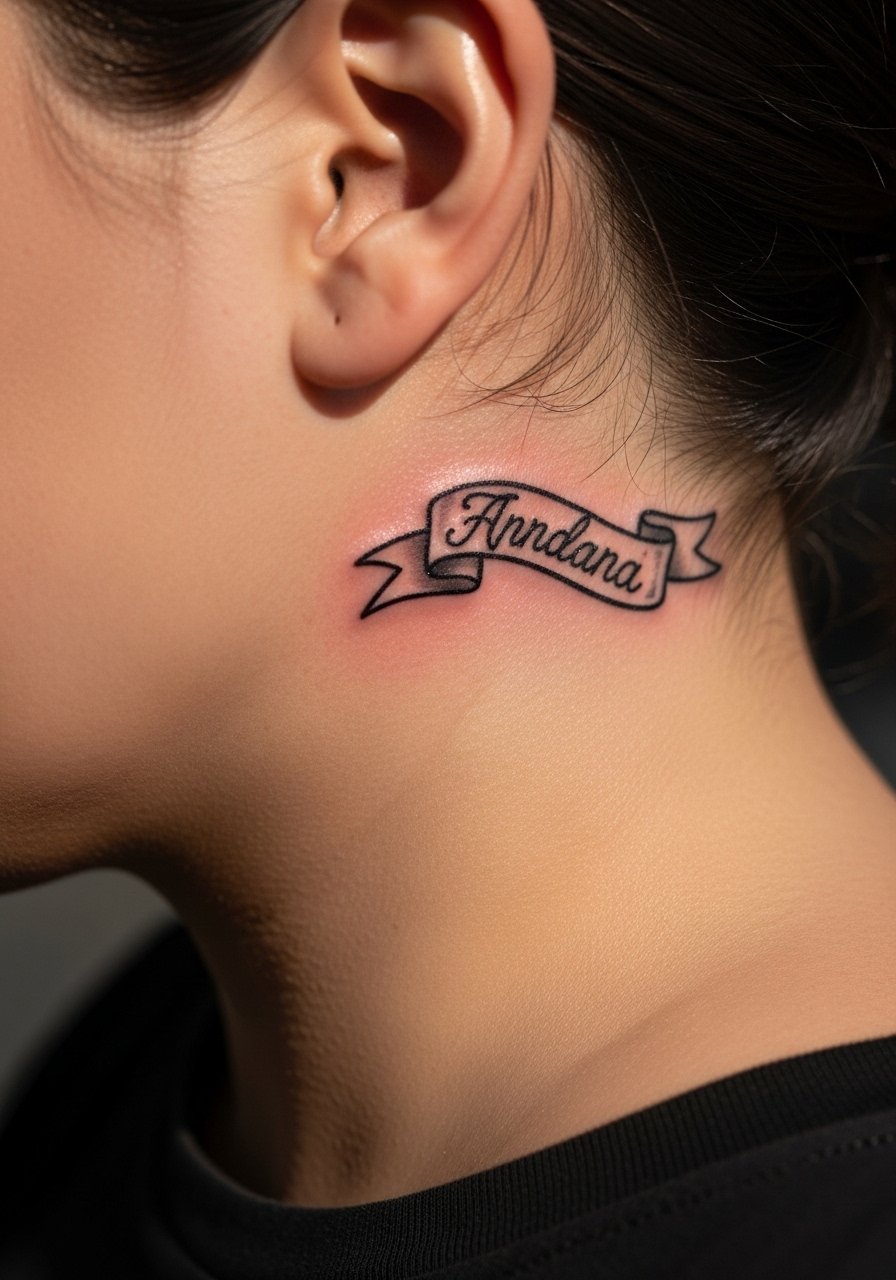
Mistake lead: lettering at micro scale is the fastest way to regret. Choose thick, readable lettering and limit the banner length to one brief word. Consult on placement so the ribbon curves with the ear instead of cutting across it. Pain is low and the session is quick. If you plan to show it, pair with a dangling stud earring on the opposite side for symmetry.
15. Tiny anchor peeking from hairline
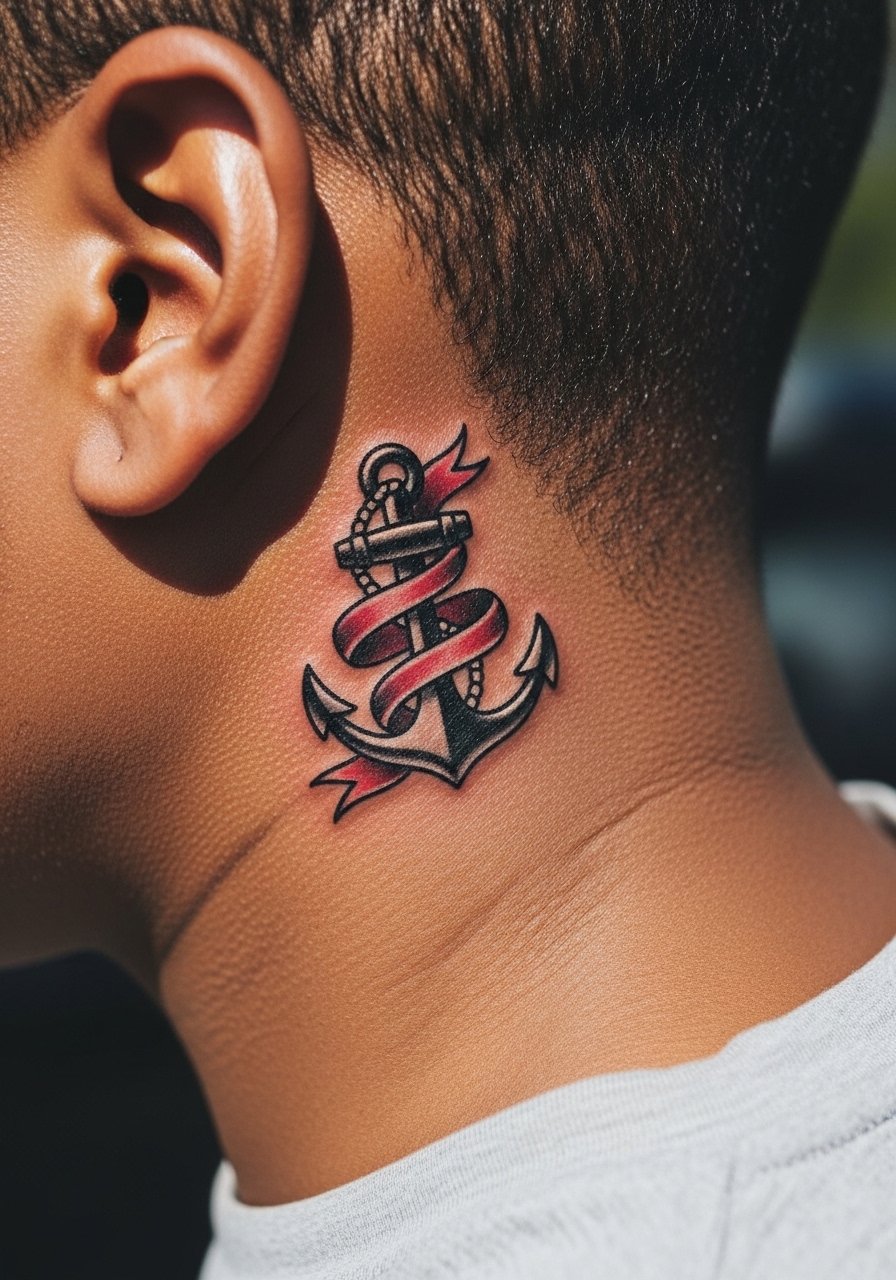
Personal observation: anchors benefit from horizontal composition so they peek naturally from hair or behind a collar. Specify a 1.5-inch horizontal design and ask for a strong black outline with a single color ribbon. The session is short and the area feels tender if the needle brushes close to the bone. For the appointment, wear a collared shirt with open neckline so the artist can access the area without disrupting hair.
16. Small geometric sunburst
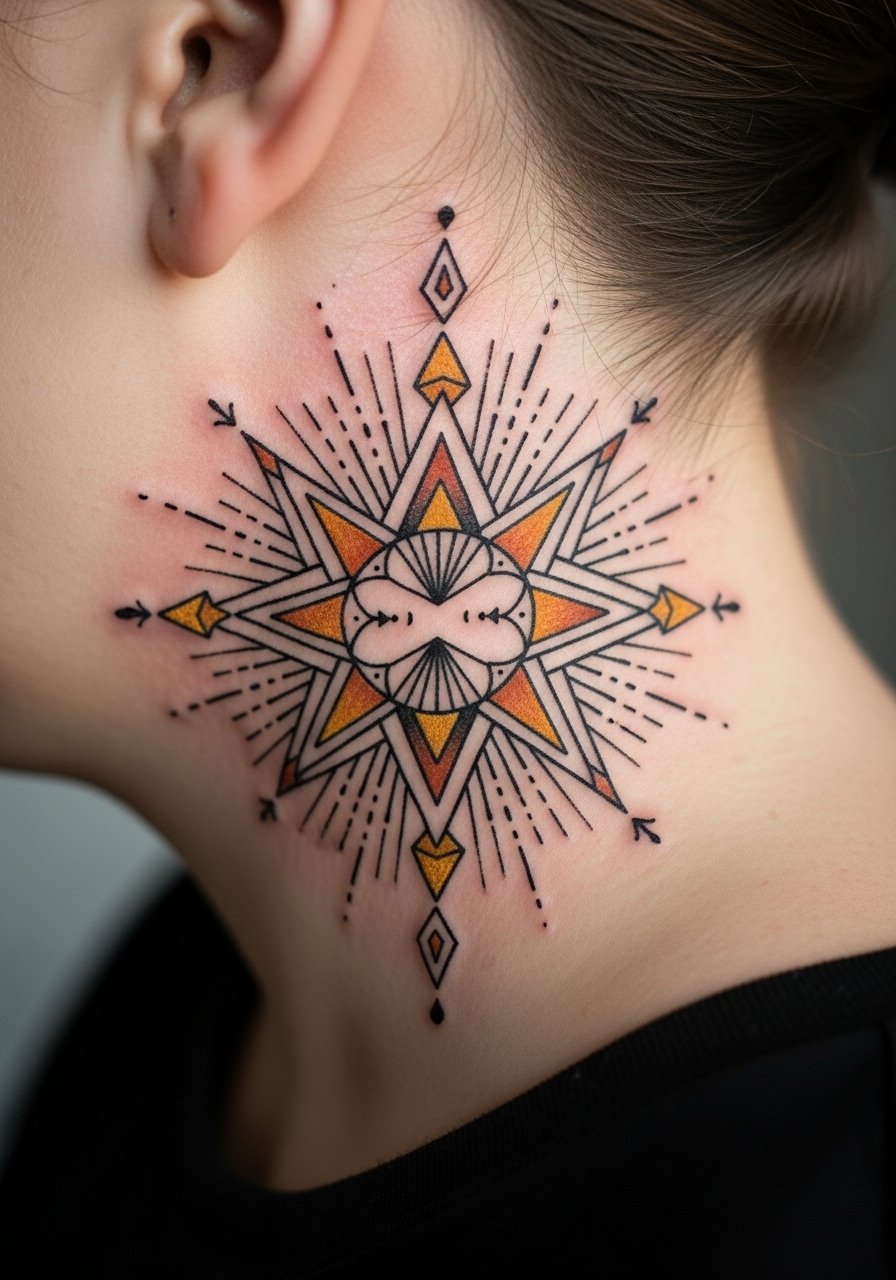
Mistake lead: too-dense geometry on thin skin turns into a blur as edges soften. Ask for spacing between rays and modest black anchors so the sunburst reads from a short distance. This placement is low pain and a quick session. A styling tip is a short bob or side braid and a layered gold necklace that draws the eye upward without overlapping the tattoo.
17. Micro-realism eye with lashes
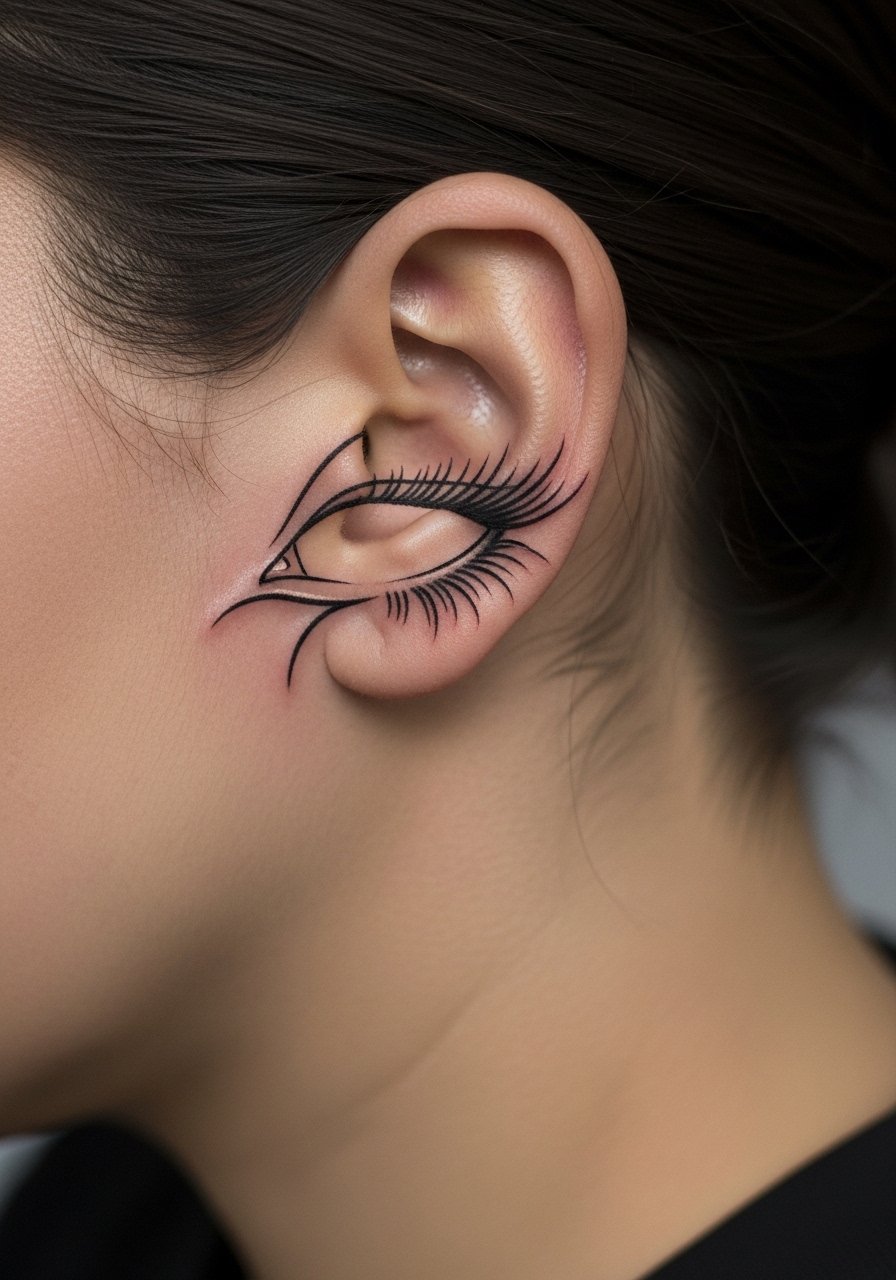
Consultation lead: micro-realism needs an artist comfortable at small scale. Discuss lash density and ask for minimal gray wash so the iris keeps contrast. The area can sting near cartilage. Request a touch-up plan at booking because fine detail tends to soften sooner. When showing this piece, wear a low ponytail holder or tuck hair behind the ear to let the detail read.
18. Tiny script word tucked under the helix
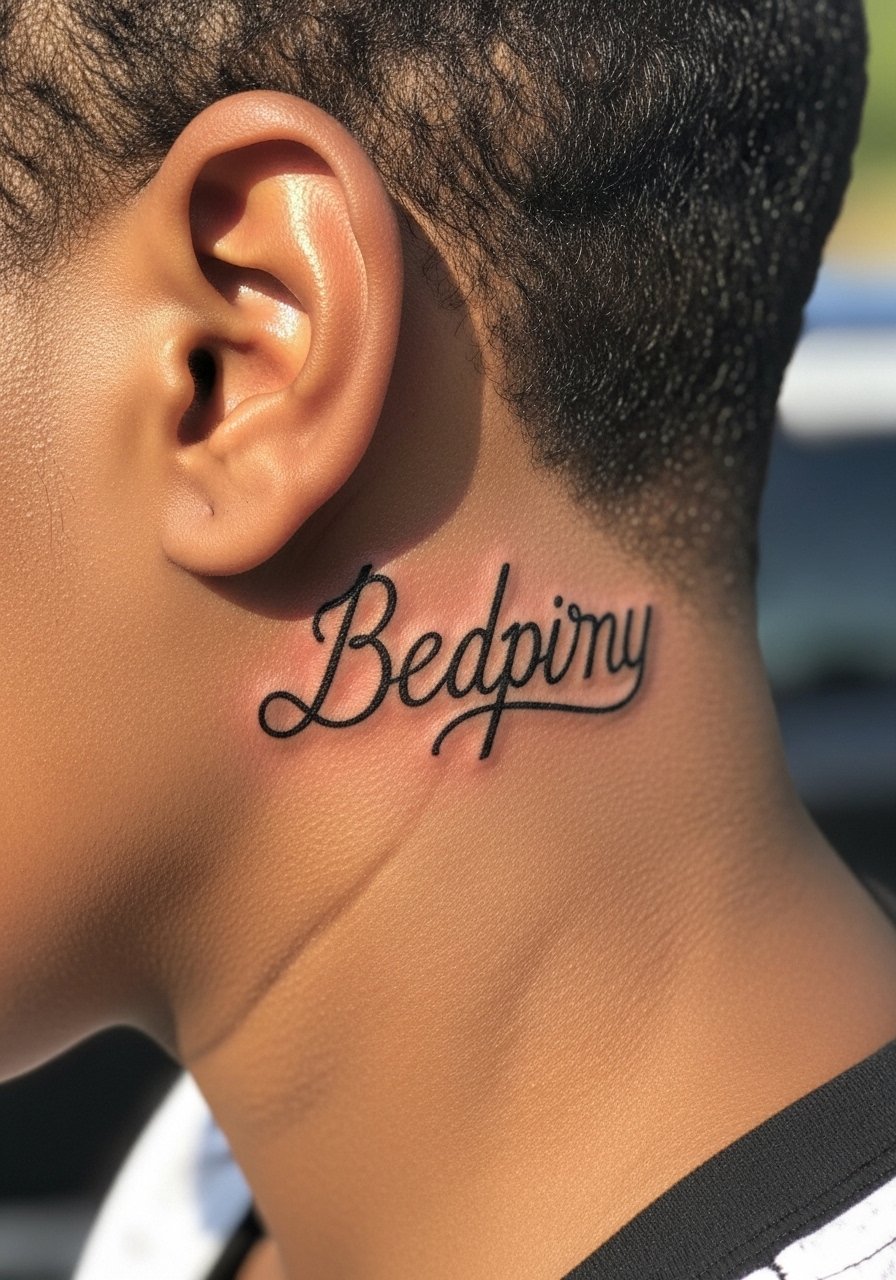
Mistake lead: choosing cursive loops at tiny scale creates merging lines within a year. Choose a minimalist lowercase font with generous spacing. The session is short and pain is mild near the lobe. For session wear, pull hair forward or clip it up with a side part hair clip so the artist can stencil the exact curve.
19. Floral crescent hugging the ear
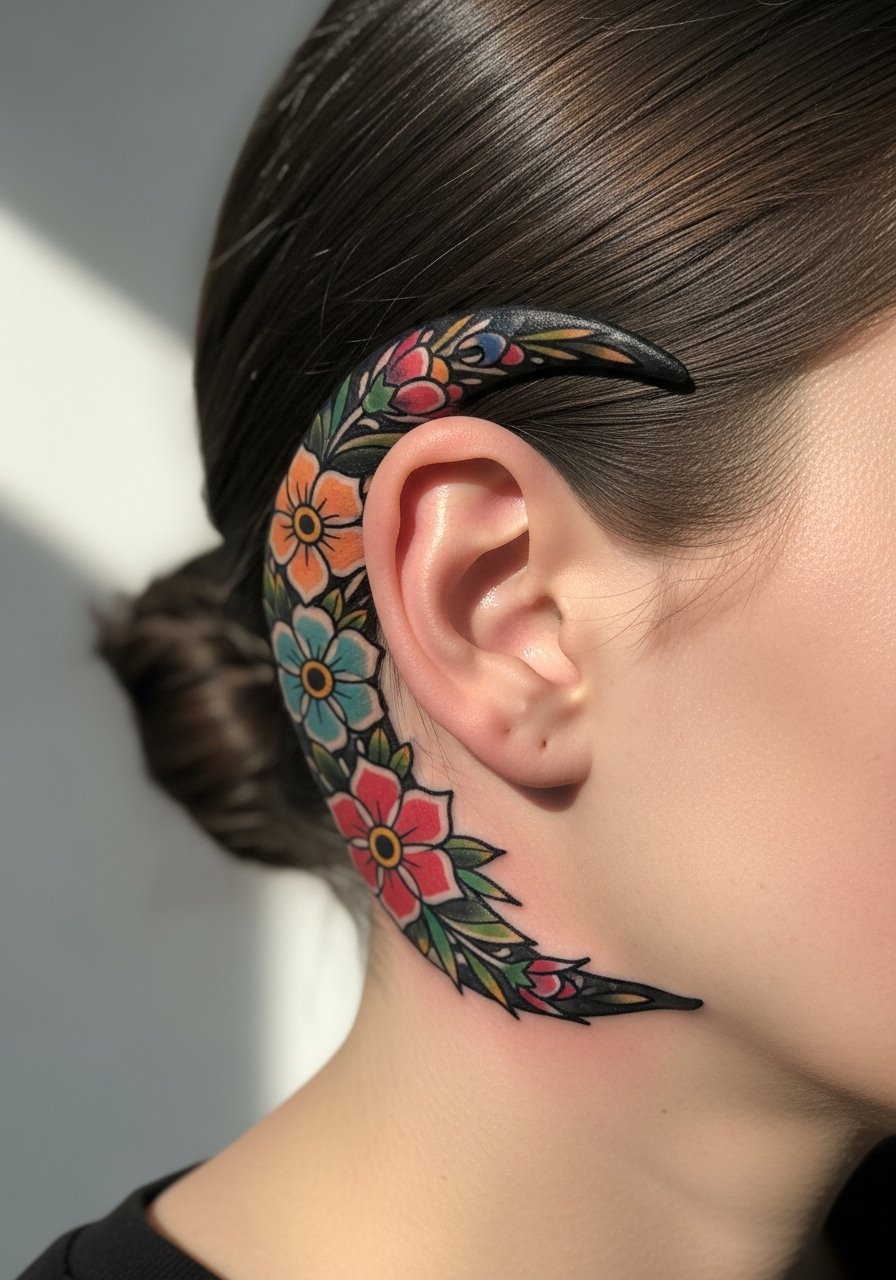
Visual impact lead: a crescent of tiny blooms follows the ear shape naturally and avoids direct hairline contact when placed slightly lower. Ask for simplified petal shapes so color blocks remain strong over time. The session takes a bit longer for multiple colors and the area can feel tender. For show-off styling, pair with gold hoop earrings medium on the other side to create balance.
20. Small dagger tip pointing toward nape
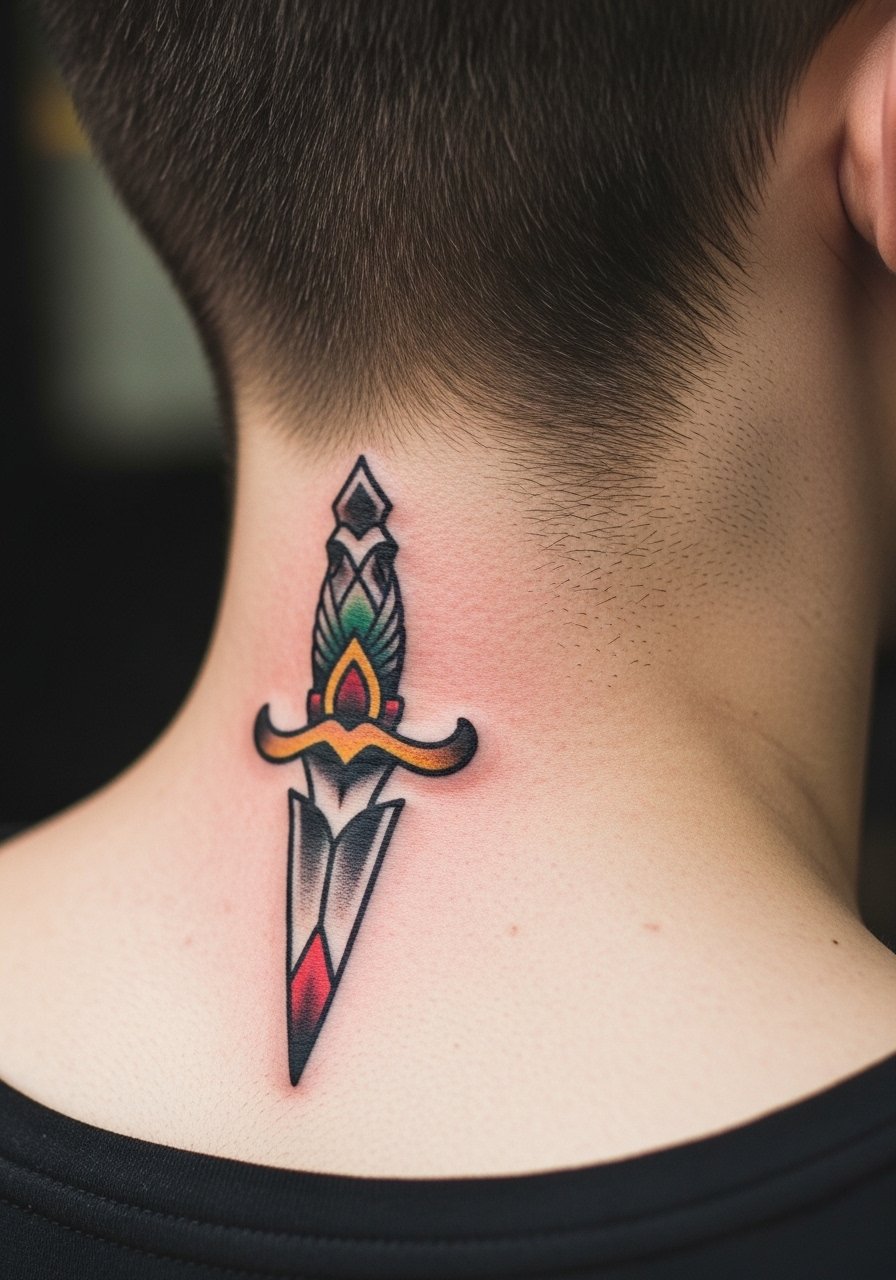
Mistake lead: daggers that run perpendicular to the ear can look awkward. Instead, request the tip angle to follow the neck line so it reads as a continuation of your silhouette. Expect moderate pain when ink crosses near bone. For session ease, wear a loose button-down shirt that you can shift aside.
21. Tiny botanical sprig with delicate berries
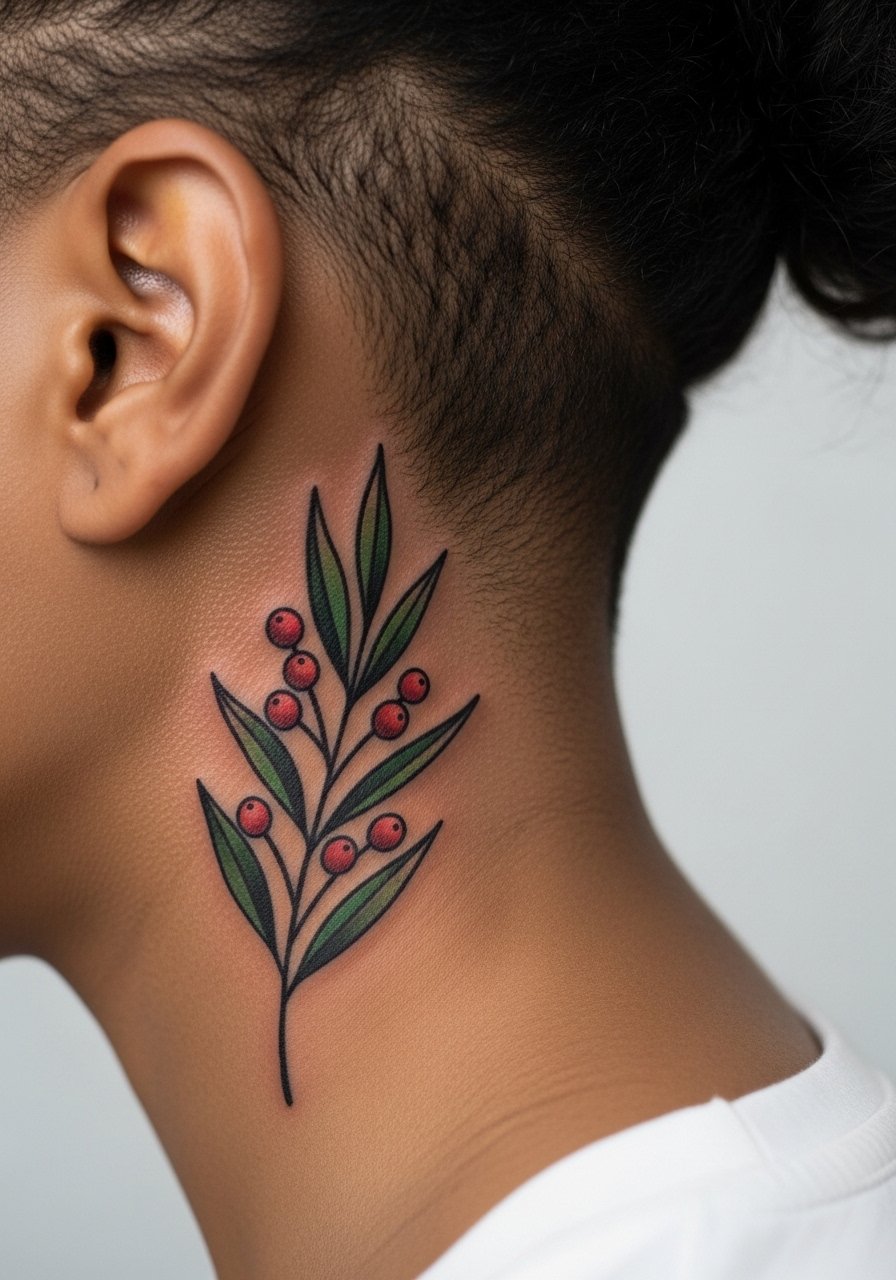
Personal observation: berries and small color nodes keep their shape better than ultra-fine leaf veins. Ask for solid color dots and a bold stem line. One common mistake is over-detailing the leaves; simplified shapes age better and need fewer touch-ups. Pair with a vintage bandana when you want a retro reveal or wear a vintage bandana to protect hair off the area while healing.
22. Tiny compass rose tucked low behind the ear
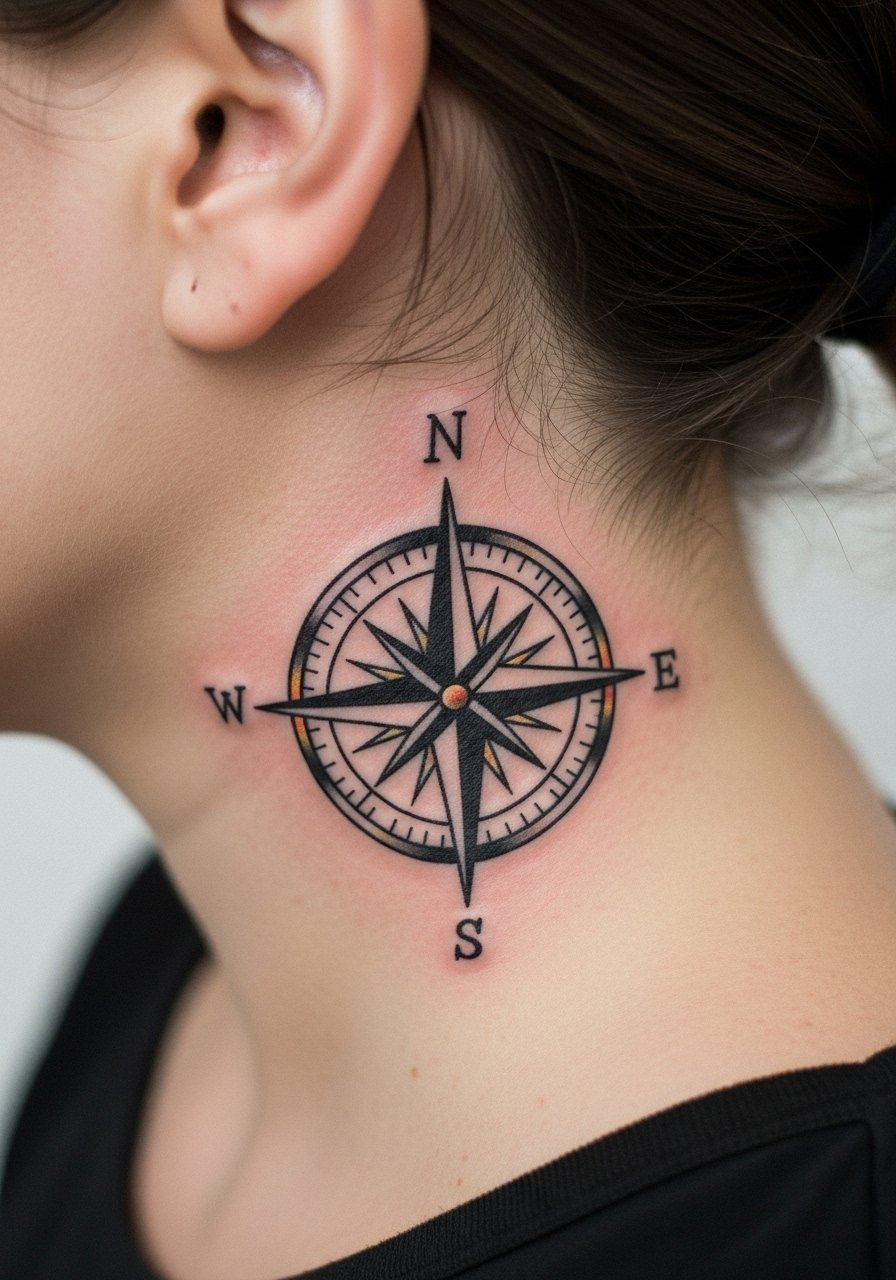
Consultation lead: tell your artist which direction you want the primary point to face so the motif reads correctly when hair is swept aside. Keep the points bold and reduce interior filigree for longevity. The session is quick and pain is low. For showing off, a sleek bob or a layered gold necklace sitting opposite brings attention to the neck area.
23. Tiny moth with textured wings
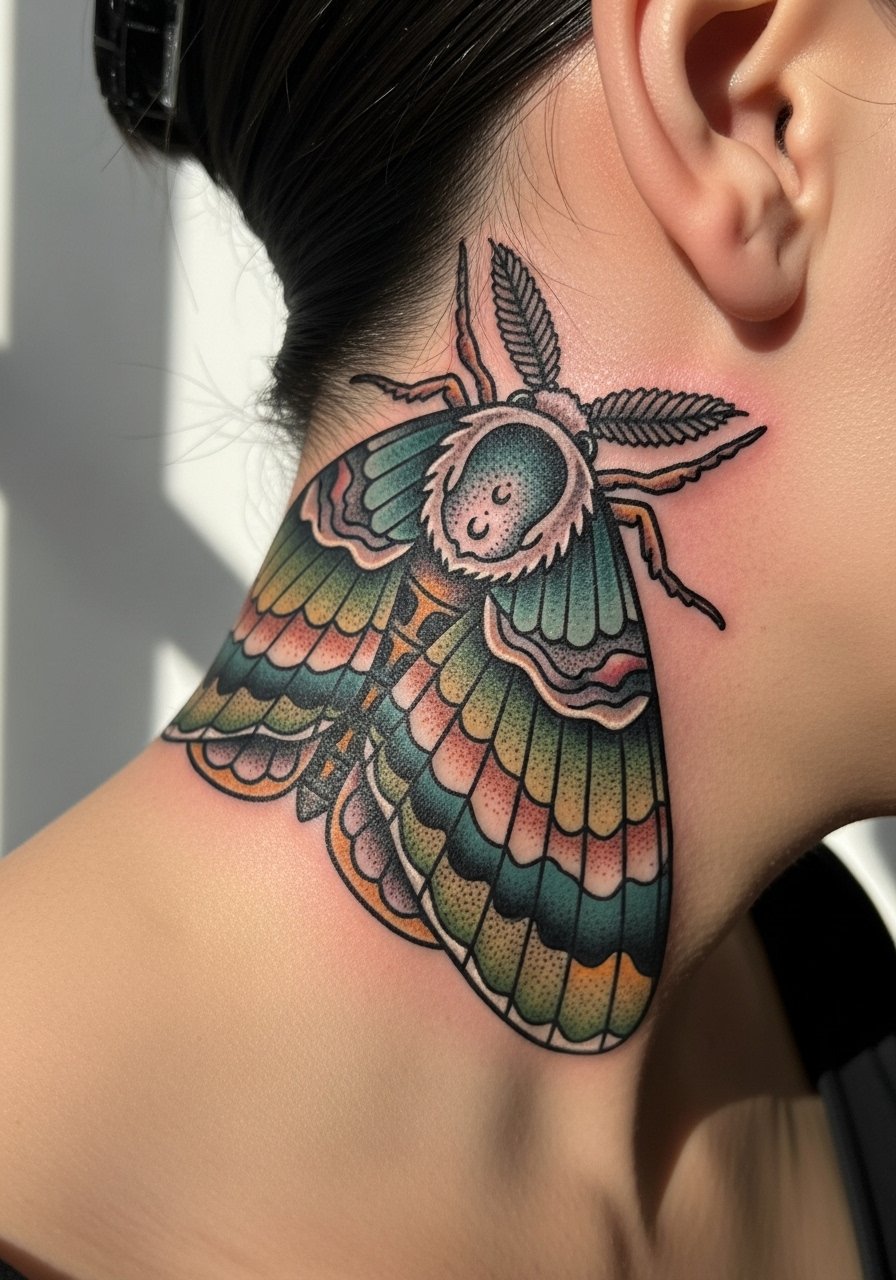
Aging/healing lead: stipple shading offers texture that softens gracefully, unlike dense gradients that can patch out. Ask for dot work in shaded areas and solid outlines for the wing edge. Expect a medium-length session and plan for a touch-up if you want color refresh later. Pair the reveal with simple studs and a thin chain pendant necklace.
24. Micro skull keyhole
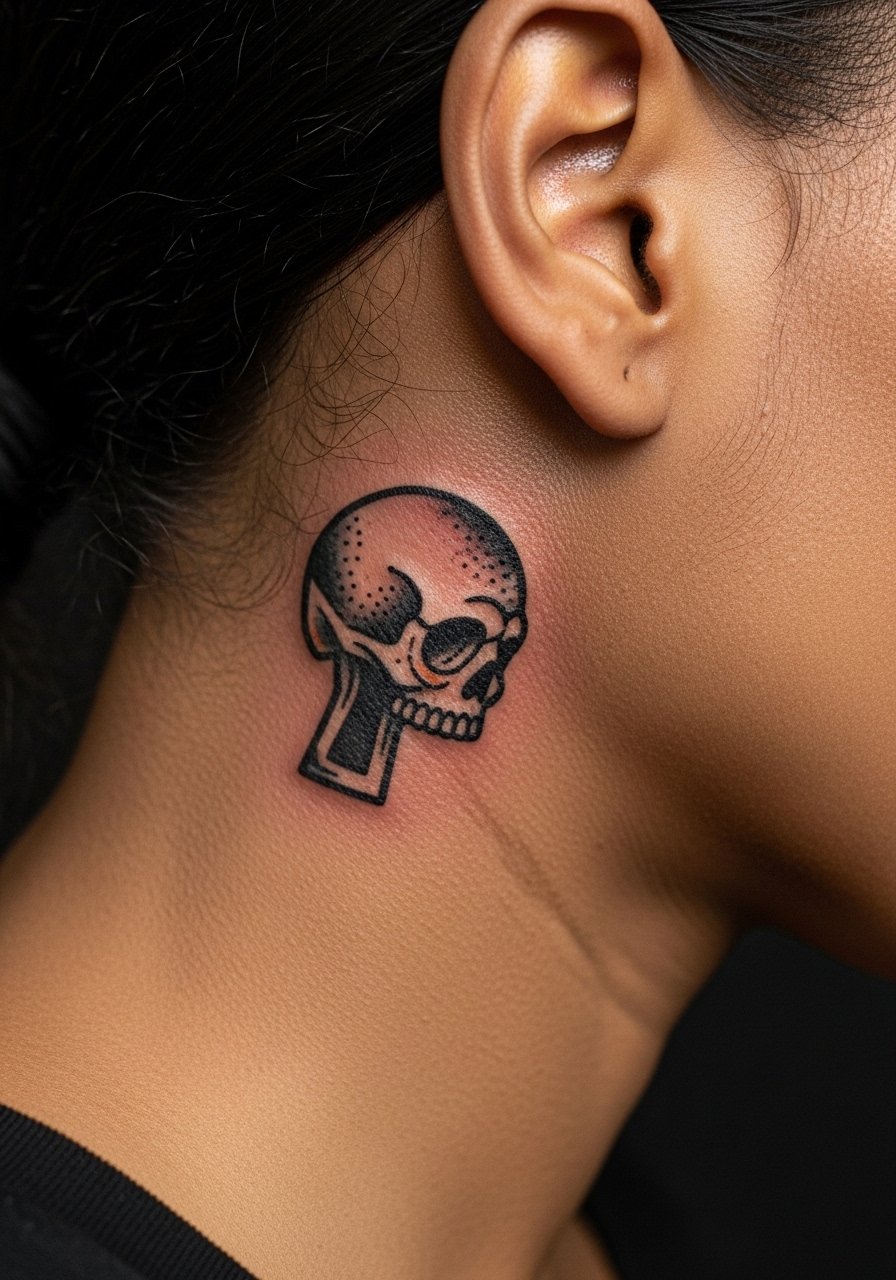
Mistake lead: overly intricate fill inside a tiny keyhole becomes visual noise. Keep the interior clean with strong black anchors. Pain is moderate if ink sits close to bone. Discuss a scheduled touch-up at booking because small negative spaces sometimes need reinforcement at year two. For the session, wear a loose button-down shirt for easy access.
25. Tiny stag silhouette with floral accents
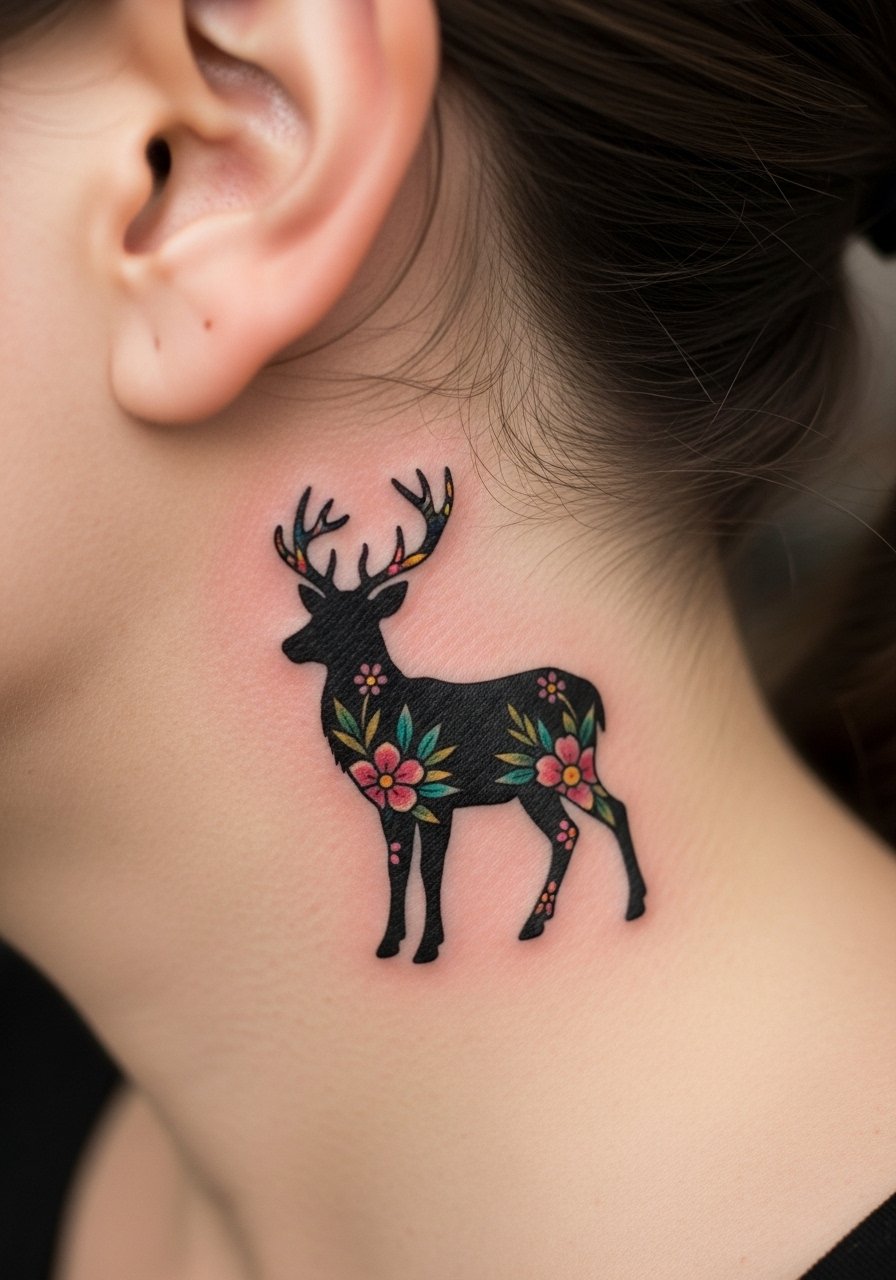
Consultation lead: silhouettes depend on crisp linework and solid fills. Ask the artist to map the silhouette against your ear curve to avoid awkward cropping. This piece is one session and fairly low pain. A common error is adding too many tiny antler details that blur. For showing off, try a side sweep haircut and a gold hoop earrings medium.
26. Tiny lightning bolt with color flash
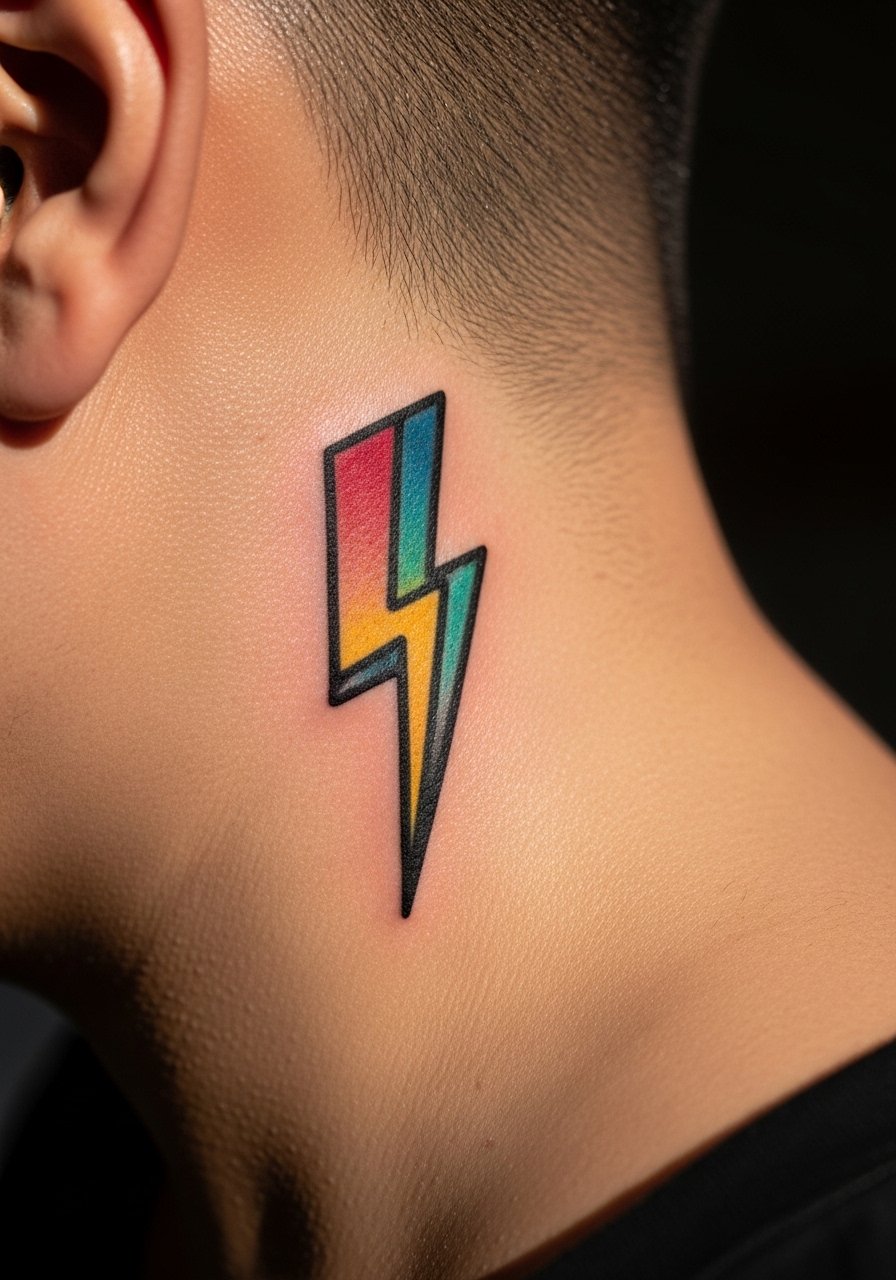
Visual impact lead: a lightning bolt is graphic and reads well at small scale if the outer edge is solid. Ask for one clean color flash rather than multiple tiny highlights. The session is brief and the pain is low. For appointment comfort, use a low ponytail holder to keep hair from sticking to fresh ink.
27. Delicate vine wrapping toward the nape
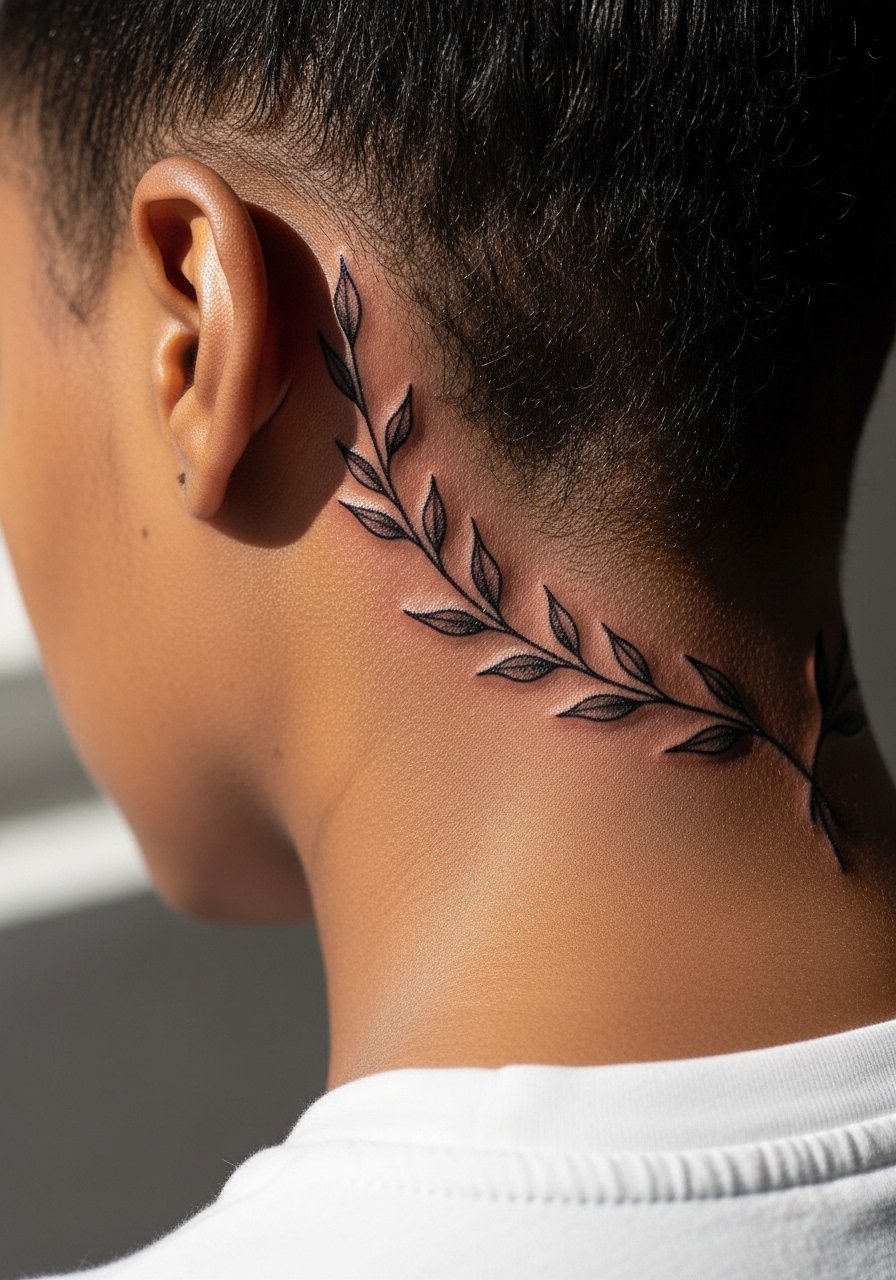
Consultation lead: vines need breathing room so leaves remain distinct when healed. Ask your artist to space leaves and use stipple shading for depth rather than tiny hatch marks. The session is short and pain is mild. For session wear, pull hair into a clip and use a side part hair clip to keep the area accessible without tugging.
Frequently Asked Questions
Q: Will a neo-traditional piece behind the ear need touch-ups sooner than the same design on my forearm?
A: It depends on placement and sun exposure. Behind-ear skin sees more friction from hair and pillows, which can soften linework faster. Designs with bold outlines and solid color fills generally hold up better. Plan a possible touch-up around years two to four, depending on how your skin accepts the pigment.
Q: Is numbing cream okay for behind-ear tattoos and does it affect the linework?
A: Artists split into two camps. One group uses topical numbing cream for sensitive zones to make the session tolerable. The other group worries that heavy numbing can change skin texture and make linework less predictable. Ask the artist how they manage it and follow their timing instructions if you use a cream.
Q: How should I manage hair during the healing window to protect a behind-ear tattoo?
A: Tie hair back or use soft clips and avoid sleeping with loose hair covering the area for the first week. Silk pillowcases reduce friction. If your hair is curly and prone to shedding, consider loosely braiding or clipping it away from the tattoo while it heals.
Q: Which wardrobe choices work best for showing off small behind-ear neo-traditional tattoos?
A: Side-parted styles, sleek low ponytails, or cropped bobs reveal the area without pulling at the tattoo. Simple accessories like gold hoop earrings medium on the opposite side create visual balance without crowding the small design.
Q: Are there design choices to avoid because of blowout risk behind the ear?
A: Avoid packing dense, ultra-fine lines into a tiny area. Very tight stippling and micro script are higher risk for spreading. Favor bolder outer linework, slightly larger dot sizes for stipple, and simple fills that let the design age gracefully.
