
Fine line micro sleeves look impossibly delicate in photos, but the reality is more complicated. Fine line pieces dominate feeds while many need touch-ups by year two, artists cancel or reshuffle bookings at the last minute, and darker skin tones are often underrepresented in healed galleries. These are real annoyances, not fluff, and the list below pairs 21 micro half arm sleeve ideas with what to ask, how they age, and how to style them for work or weekends.
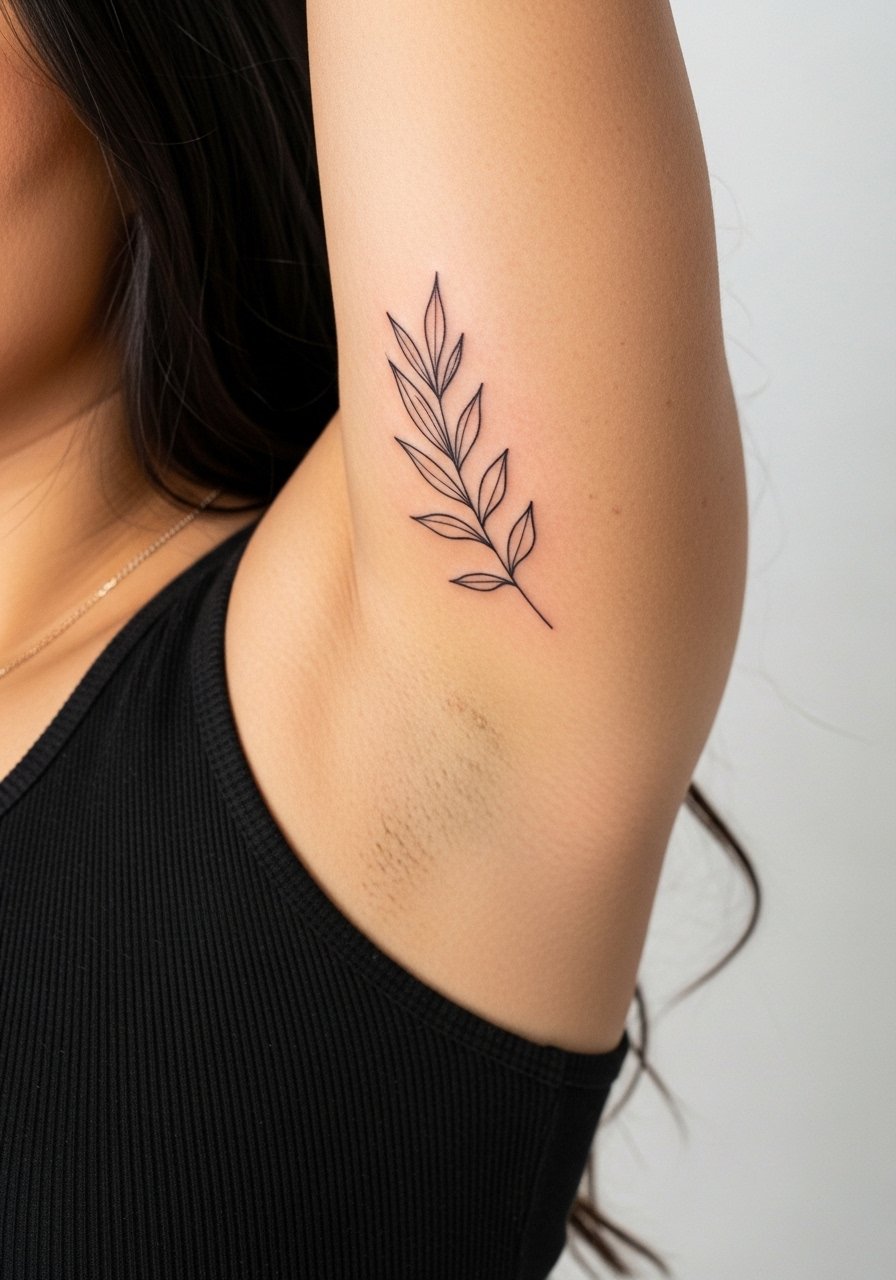
1. Fine Line Botanical Band on Inner Upper Arm

This classic reads like a discreet bracelet when your sleeve drops down. Recommend slightly larger spacing between leaves and stems so the linework has room to age. In consultation tell your artist you want confident linework with stipple shading for depth, not hairline filler that will fade into blur. Expect moderate pain for the inner bicep and plan for a 45 to 90 minute session. A common mistake is asking for every petal as a hairline detail, which often loses definition by year two. Pair with a racerback tank to show the wrap without overpowering workplace attire.
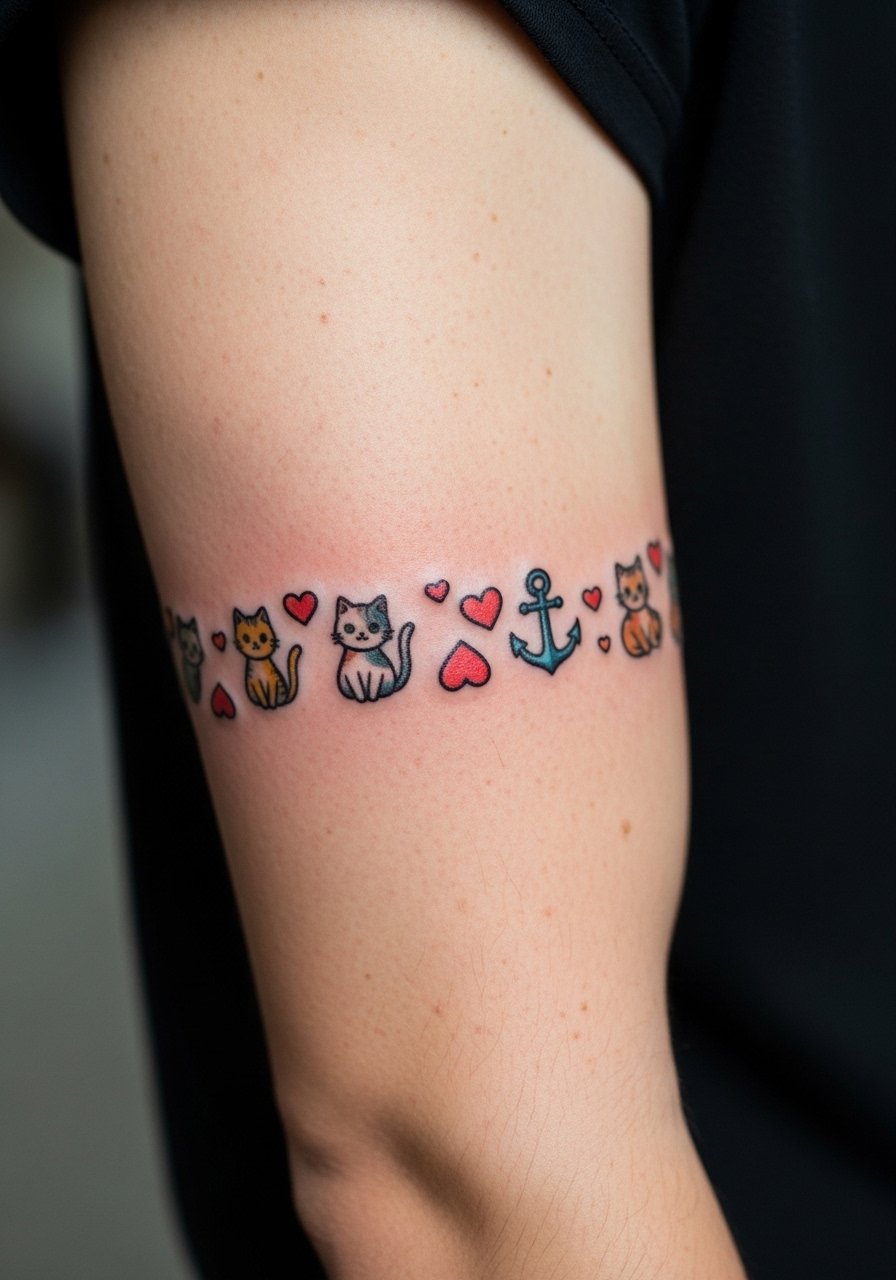
2. Neo-Traditional Micro Band with Anchors and Roses on Outer Upper Arm
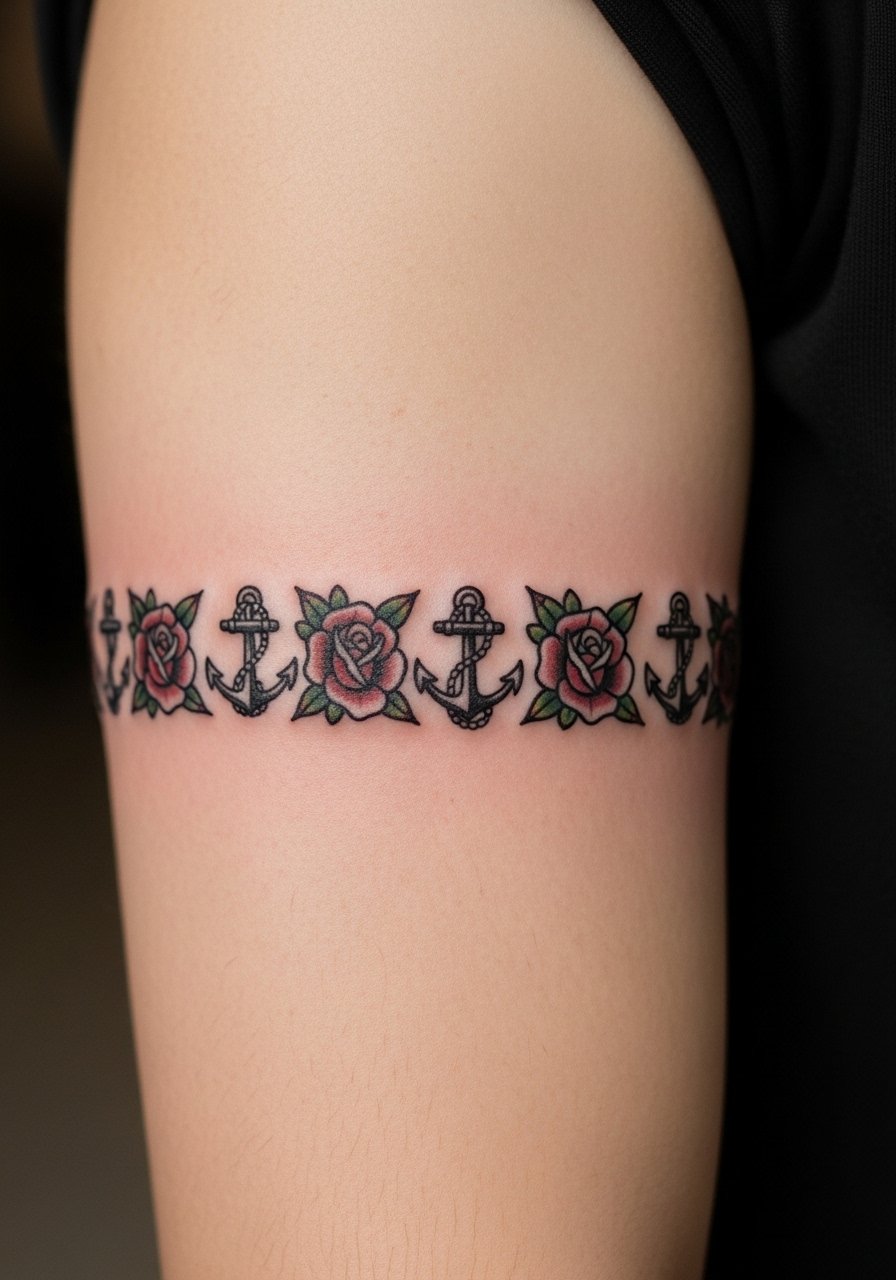
If you want color but not a full sleeve, this compresses classic motifs into a tidy band that still reads from a distance. Tell the artist you want bold linework and controlled saturation so the reds settle without feathering. Outer arm placement is lower on the pain scale and often done in one to two sessions. The aging advantage is clearer saturation compared with hairline color washes, but avoid tiny color dots inside petals because they tend to migrate. Wear a loose button-down shirt you can roll to the shoulder on session day so the artist has clean access.
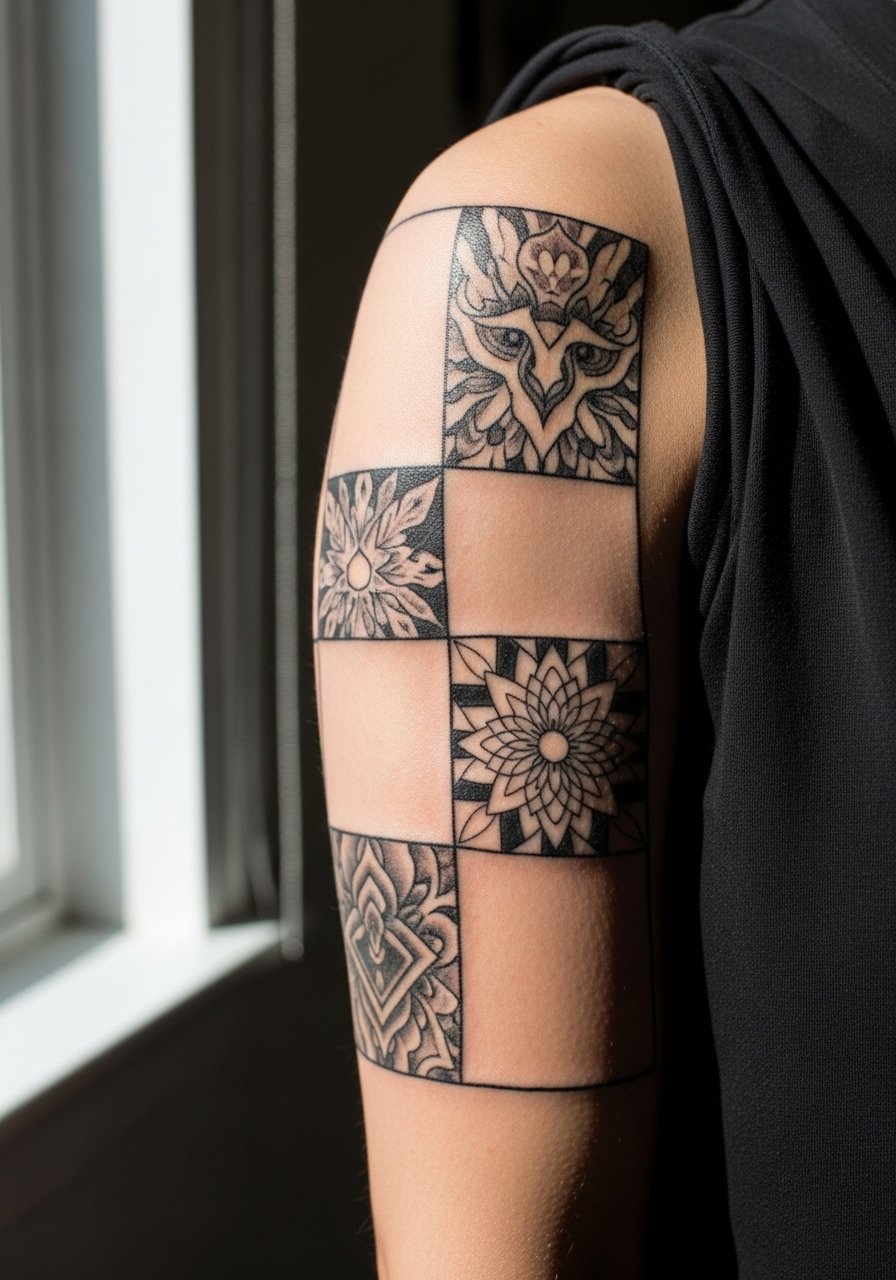
3. Ornamental Geometric Forearm Band
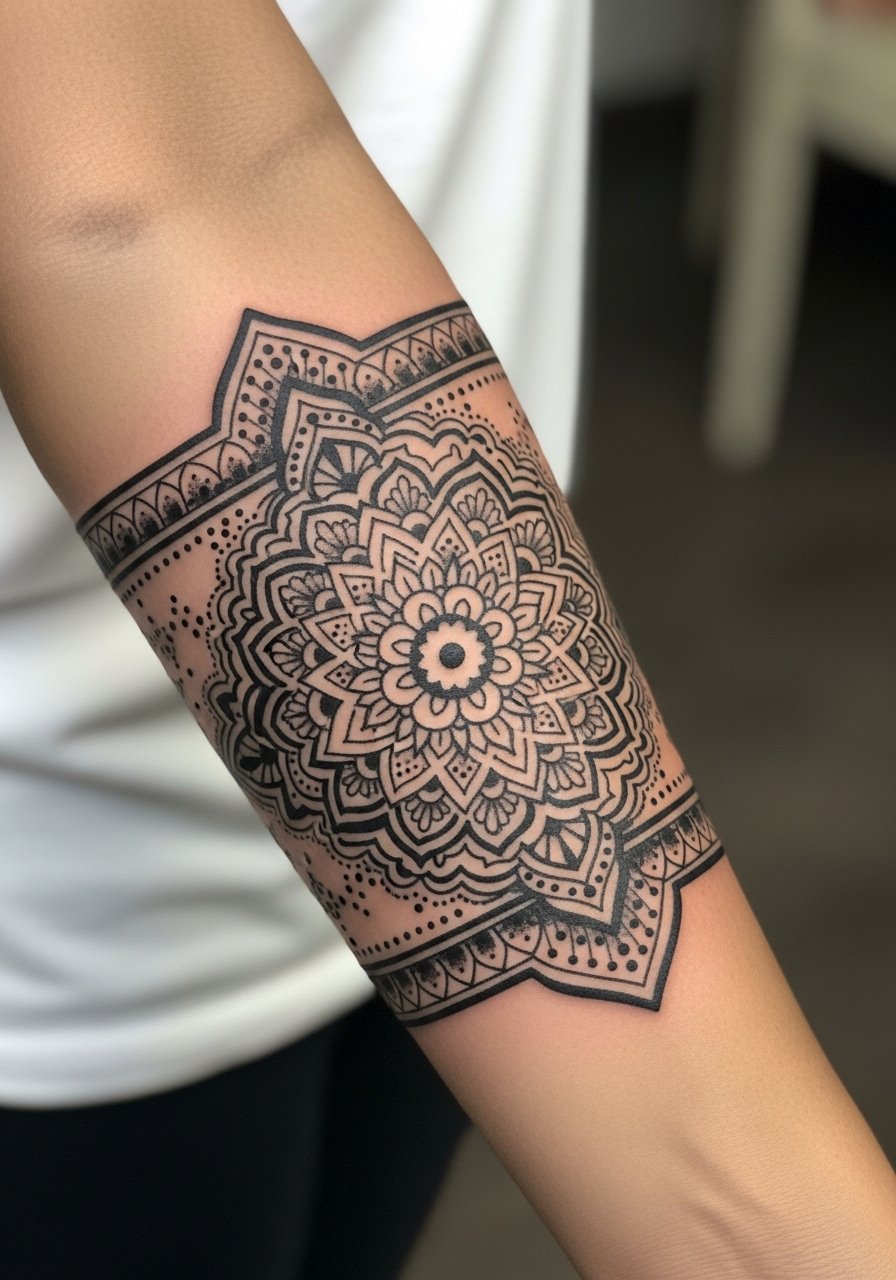
Repeating mandala motifs give a continuous blackwork band that reads like jewelry. The main error is compressing too many concentric rings into a small diameter. Ask for slightly wider negative space between layers and stipple shading instead of dense solid fills. Forearm placement is forgiving for fine geometry but requires precise stencil placement to avoid rotation when the arm moves. Expect two sessions if the band covers elbow to mid-forearm. Pair with rolled sleeves or a minimalist gold cuff bracelet to frame the band without competing with the pattern.
4. Minimalist Constellation Band on Inner Forearm
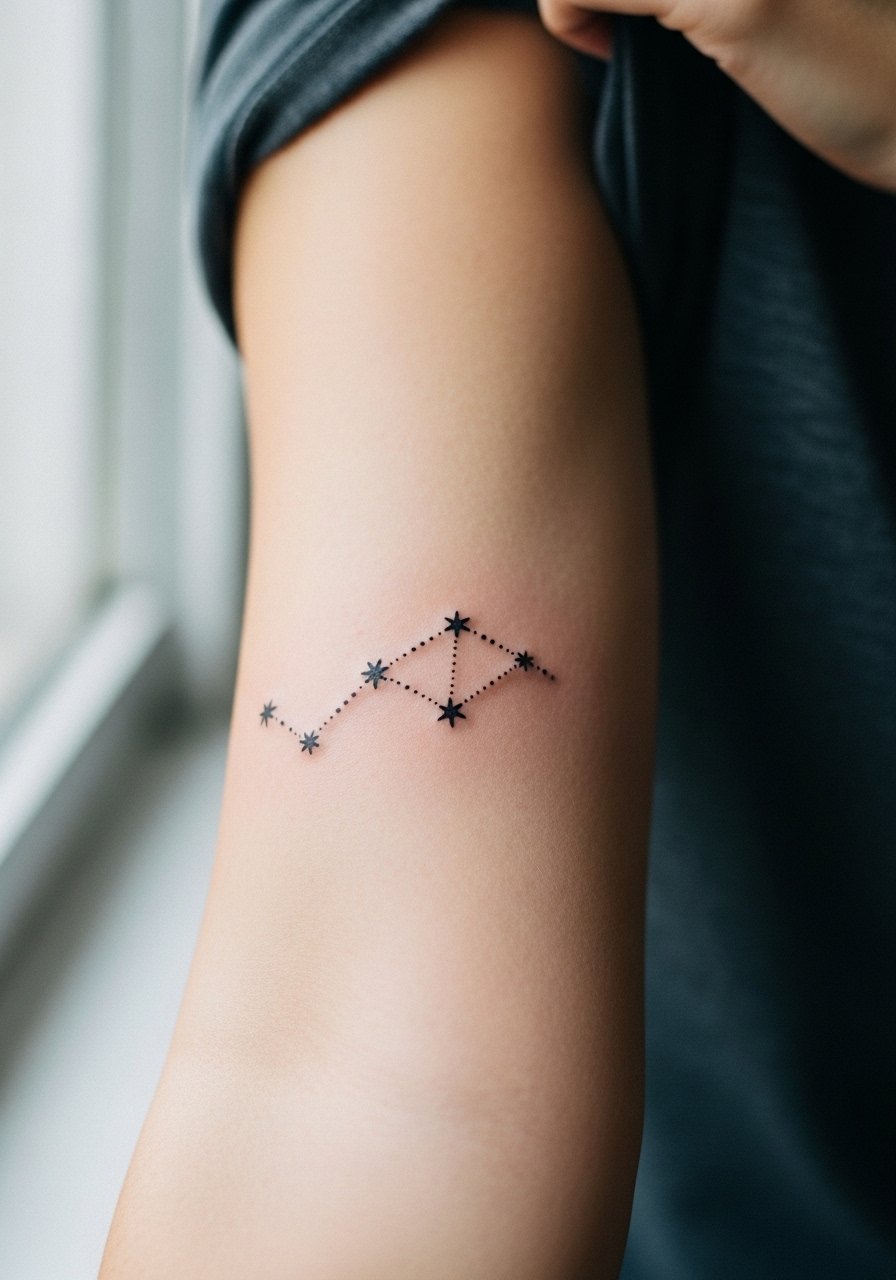
This reads like a subtle wristband but runs along the inner forearm for more canvas. Artists split on fine line longevity in this position. One camp argues fine line fades faster on sun-exposed forearms and that touch-ups are inevitable. The other camp says that with correct needle depth and spacing it can hold for years. Ask your artist where they land and plan for a two-year touch-up window if you spend a lot of time outdoors. Common mistakes include multiple tiny connecting lines that blur together. For showing it off, a thin chain pendant necklace sits above the band and balances the look.
5. Micro-Realism Animal Band on Upper Arm
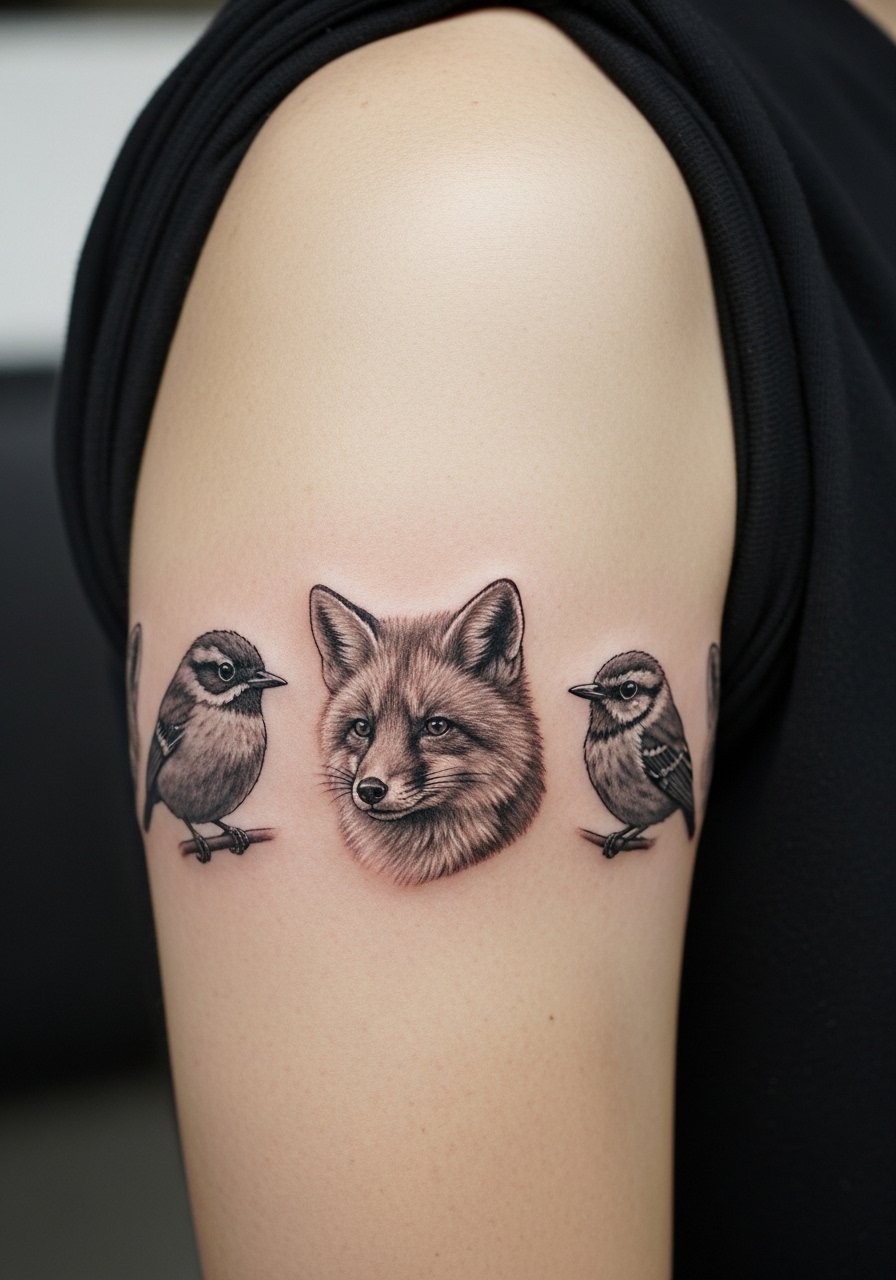
Tiny portraits of animals can look astonishing when executed with crisp micro-realism, but the detail level matters. Ask your artist to prioritize recognizable silhouettes and slightly simplify feathers or fur so the form stays legible after two or three years. Outer upper arm placement lets you include small color accents without losing clarity. Sessions usually run longer for realism because shading takes time. A real mistake is inserting too many micro details into a single 10 cm span, which loses contrast as it heals. For appointment day wear a short-sleeve tee the artist can easily roll without rubbing the fresh ink.
6. Patchwork Micro-Cluster on Inner Forearm
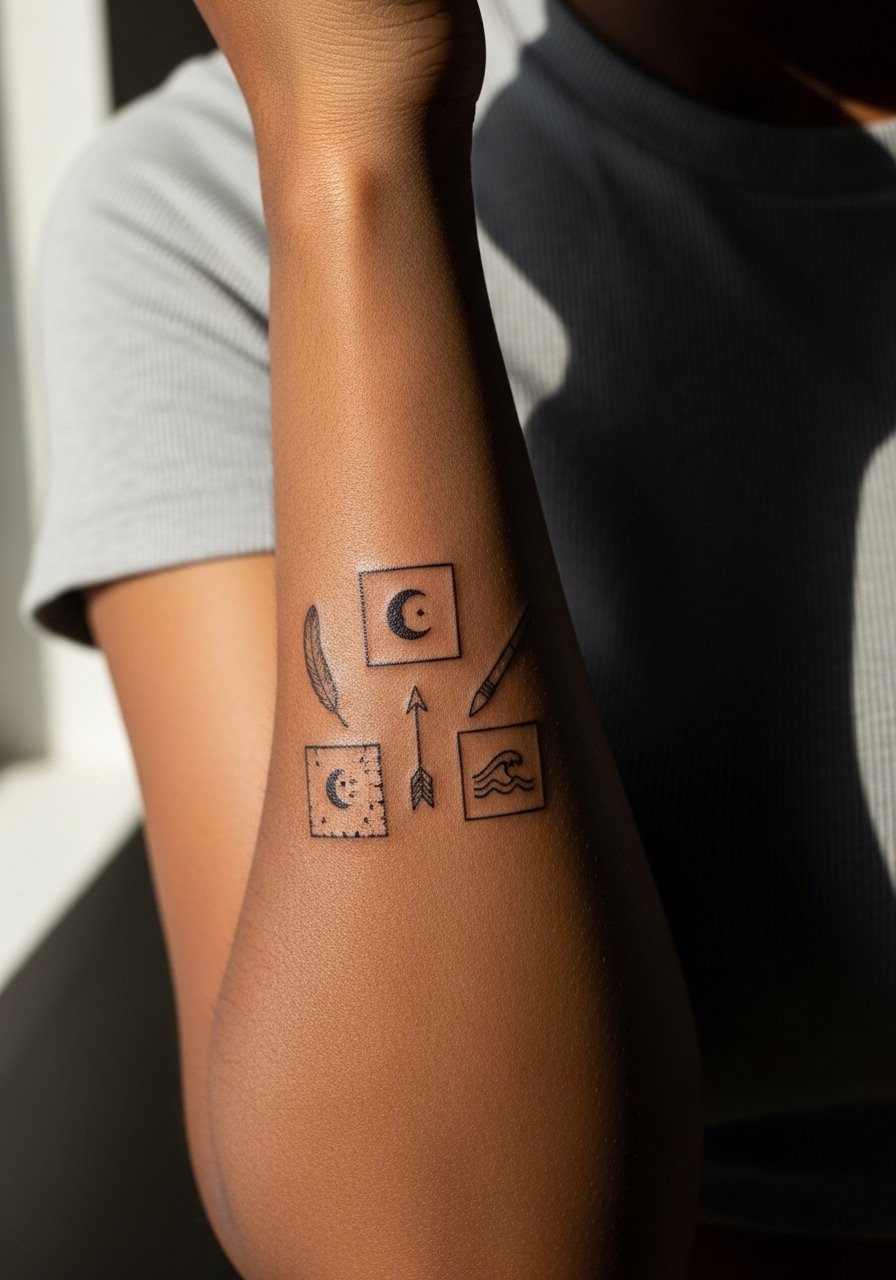
This starter-sleeve approach is excellent for building over years. When booking, tell the artist you plan future additions and want consistent line weight and spacing for expansion. One practical debate here is Saniderm versus dry healing. One group supports Saniderm for reduced friction and cleaner healed lines. The other group cautions about trapped sweat and irritation in warmer climates. Ask your artist which method they prefer and why before you book. A common mistake is treating the cluster as separate pieces rather than a composition that can knit together later. Wear a loose tank top so the artist can rotate the arm freely during the session.
Studio Day Picks
These first six arm and inner forearm designs often need different prep than larger sleeves, so a few targeted items smooth the session and the first week.
-
Stencil transfer paper kit. Lets you preview the linework on skin before the needle meets it, useful for bands that must read continuous on the arm.
-
Topical numbing cream. Applied per product instructions it eases sensitivity on inner-arm sessions without adding session time.
-
Thin protective film roll. Useful for areas that rub against clothing during the first 48 hours, especially inner forearm clusters.
-
Fragrance-free gentle body wash. Cleans healing bands without irritating delicate linework in the first week.
-
Aquaphor healing ointment. Thin layers on day one help protect fine line work while the skin begins to seal.
7. Thin-Line Mandala on the Bicep
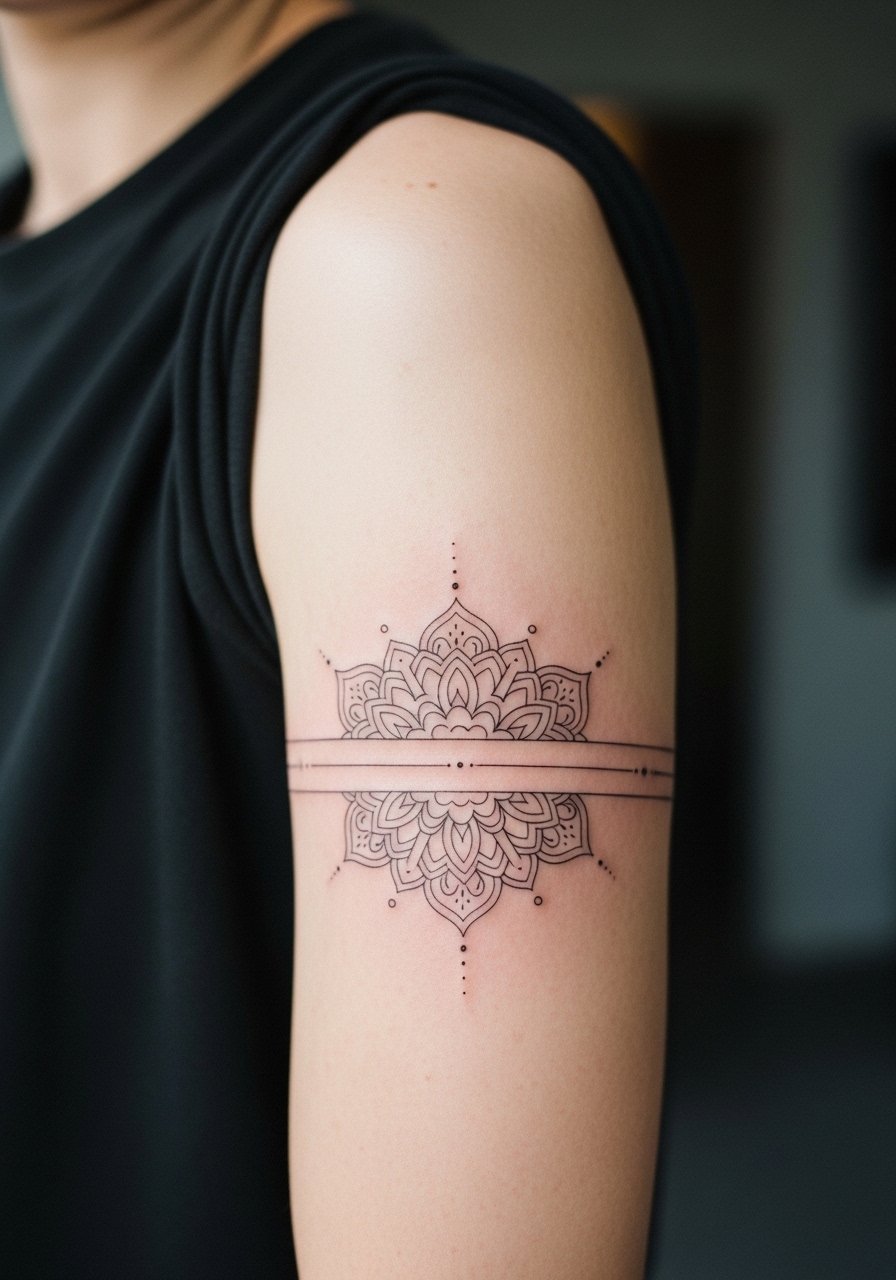
A single mandala ring on the bicep reads like a cuff that sits higher on the arm. Bicep flesh is forgiving and the piece tends to age well if the lines are slightly bolder than the faintest hairline. In discussion request stipple fills rather than dense black because dense fills can look heavy on the curved bicep. Sessions are often 60 minutes or so. Mistakes include overloading the inner rings with micro detail that blurs as skin stretches. Show off the piece with rolled sleeves or a short-sleeve button shirt that frames the cuff without hiding it.
8. Japanese-Inspired Koi and Wave Micro Band on Forearm
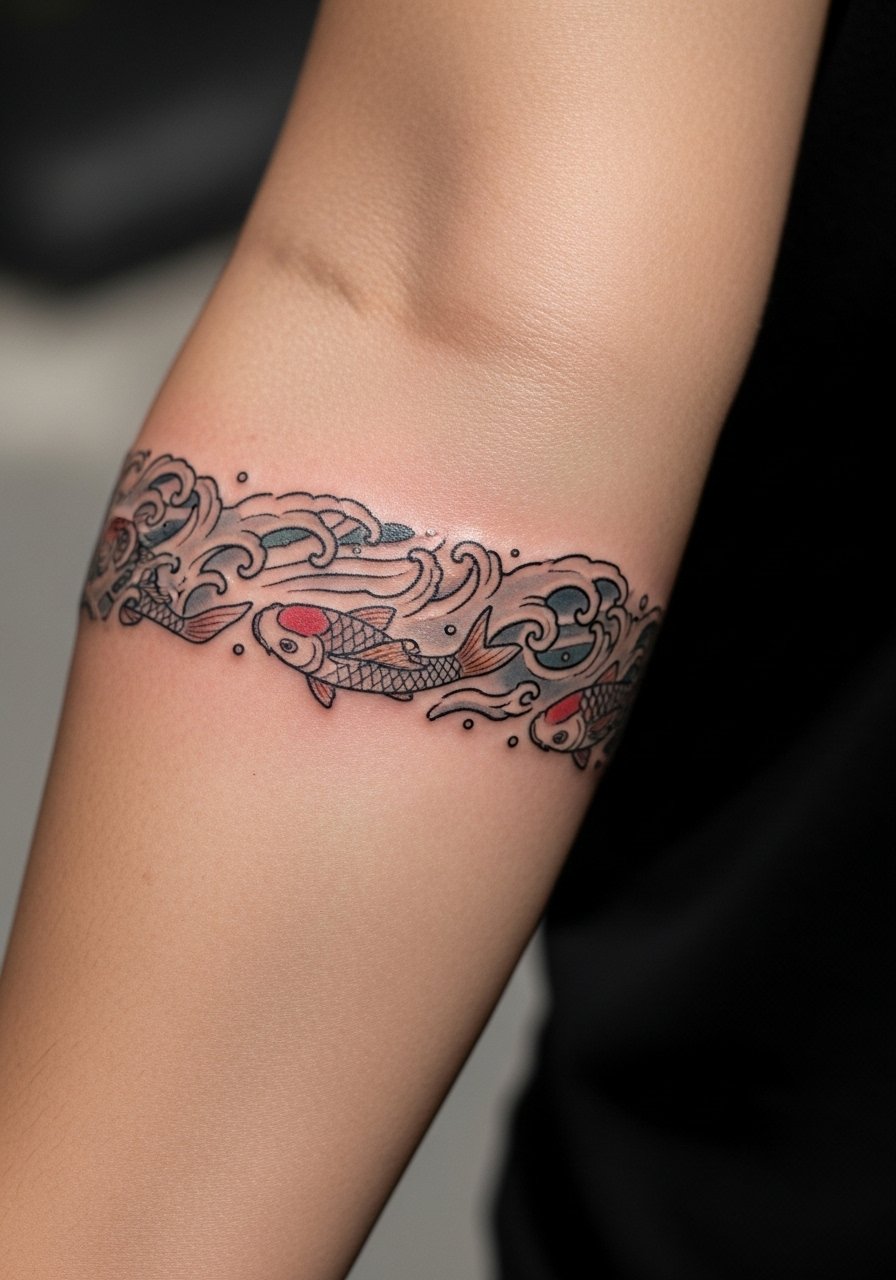
Borrowing elements from Irezumi at micro scale requires respect for the source. Ask for abstracted koi fragments and wave elements rather than a direct cultural replica. The outer forearm handles color well if saturation is controlled. Plan for two sessions if color fills are included. A common error is compressing full-scale motifs into too small a band which loses the dynamic flow that koi and waves rely on. For session comfort wear a loose cotton tee you can roll up without creating friction on fresh ink.
9. Celtic Knotwork Upper Arm Band
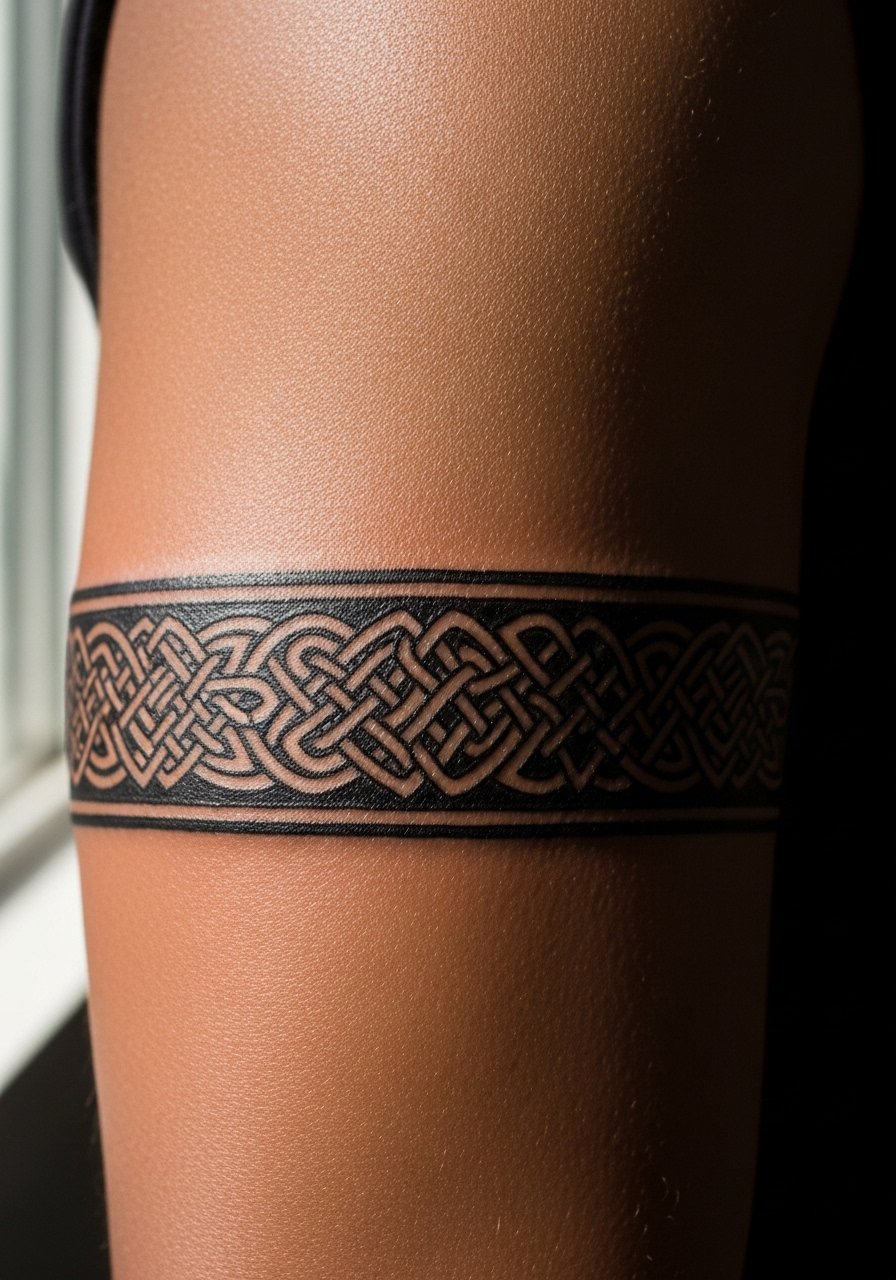
Interlaced knotwork looks striking as a full-loop band at upper arm height. The key is even spacing and avoiding tiny crossover lines that will fill in. During consultation ask for slightly thicker knot stems and clear negative space inside the loops so the pattern keeps its identity over years. Upper arm placement has low blowout risk but demands precise stencil alignment for full rotation. A mistake is requesting a single fine-line knot that becomes a blurred mess after healing. Pair with a simple silver signet ring to echo the looped forms when you roll your sleeve.
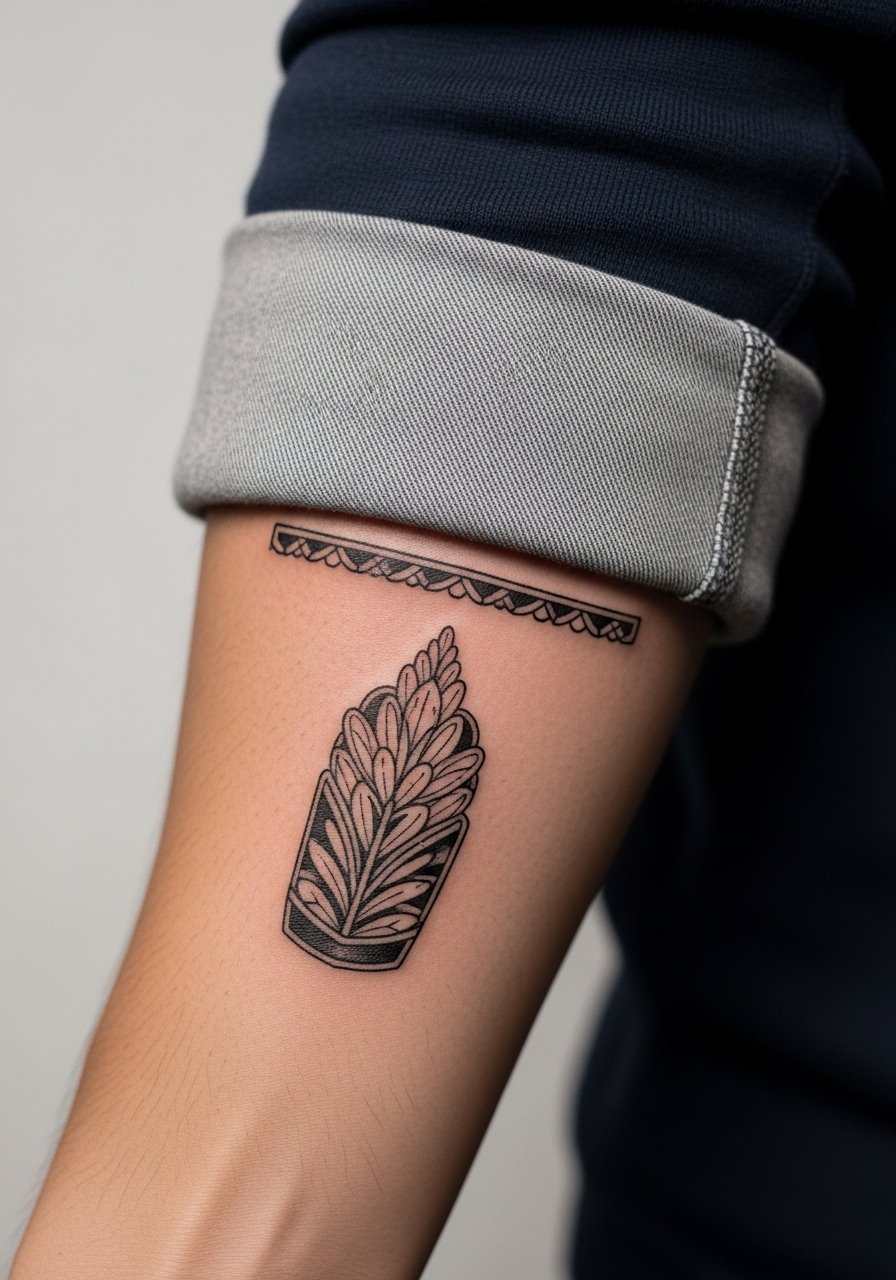
10. Subtle Line-Art Leaf Cluster on Inner Upper Arm
This minimal botanical cluster reads soft and private. For longevity ask for confident single-pass linework rather than multiple micro strokes that sit too shallow. Inner upper arm skin moves more with the body so composition should avoid tight symmetry that can distort with weight changes. Sessions are short and often completed in one appointment. A typical mistake is insisting on hairline veins inside leaves that disappear into skin texture. For appointment day wear a loose tank top so the artist can access the area cleanly.
11. Tiny Nostalgic-Flash Band on the Bicep
Shrinking classic flash motifs into a compact band lets you carry tradition without committing to a full theme. Tell the artist which vintage flash panels you like and ask them to unify scale and lineweight for cohesion. The bicep is a forgiving canvas so color tends to hold. Mistakes include mixing disparate flash eras and line weights which reads patchy rather than intentional. Think about future additions from the start so later pieces can tie into the flash language. On session day a linen short-sleeve shirt keeps you cool and avoids fabric rubbing.
12. Single-Line Graphic Mountain Band on Forearm
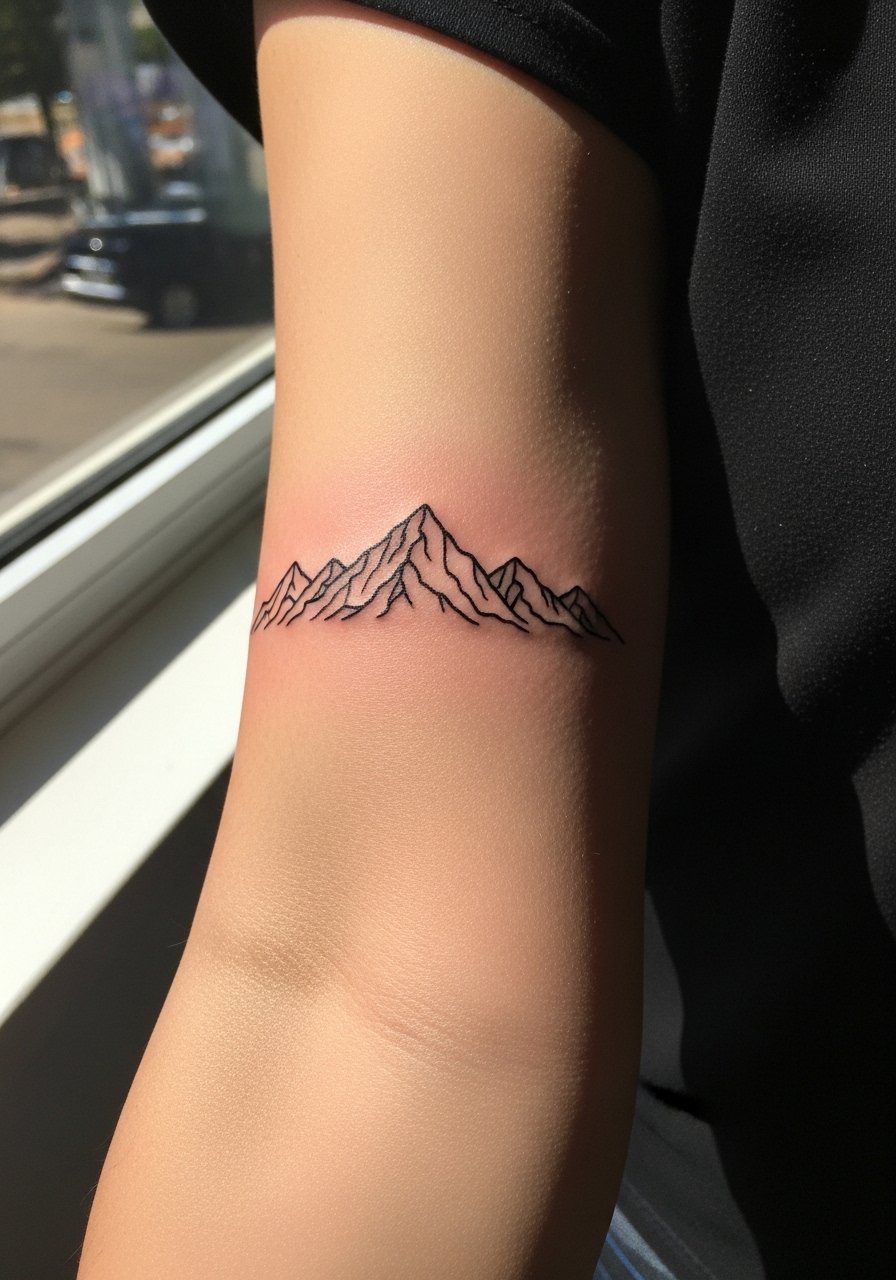
A continuous single-line graphic feels modern and scales down beautifully. Ask for a single pass with slightly heavier terminal points so peaks remain legible as linework softens. Outer forearm placement is great for visibility and has lower blowout risk than softer areas. One mistake is making the continuous line so thin that tiny inconsistencies read as gaps when healed. Wear a canvas field watch when showing the band, the watch frames the range without crowding it.
13. Dark-Grey Ornamental Spine-to-Shoulder Band
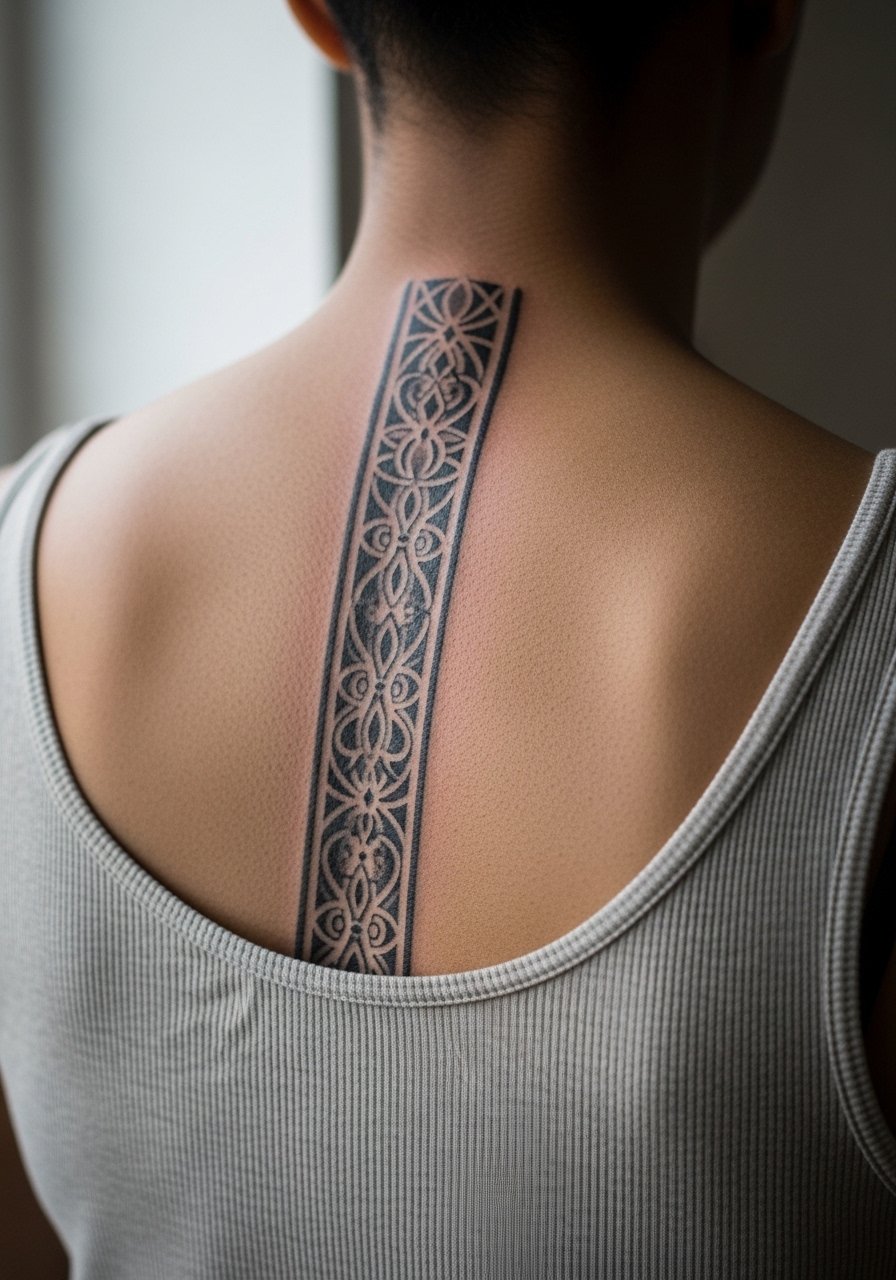
Vertical ornament bands can read like a micro back-sleeve and give a strong silhouette under clothes. Sternum, spine, and back placements can stretch, so request softer grey gradients and ornamental spacing designed to hold up with movement. This placement usually needs two sessions and honest talk about pain. A common error is asking for dense black fills near the spine which can accentuate stretching. For show-off wear an open-back dress that frames the vertical line without excessive fabric contact.
14. Micro-Text and Symbol Band on Inner Forearm
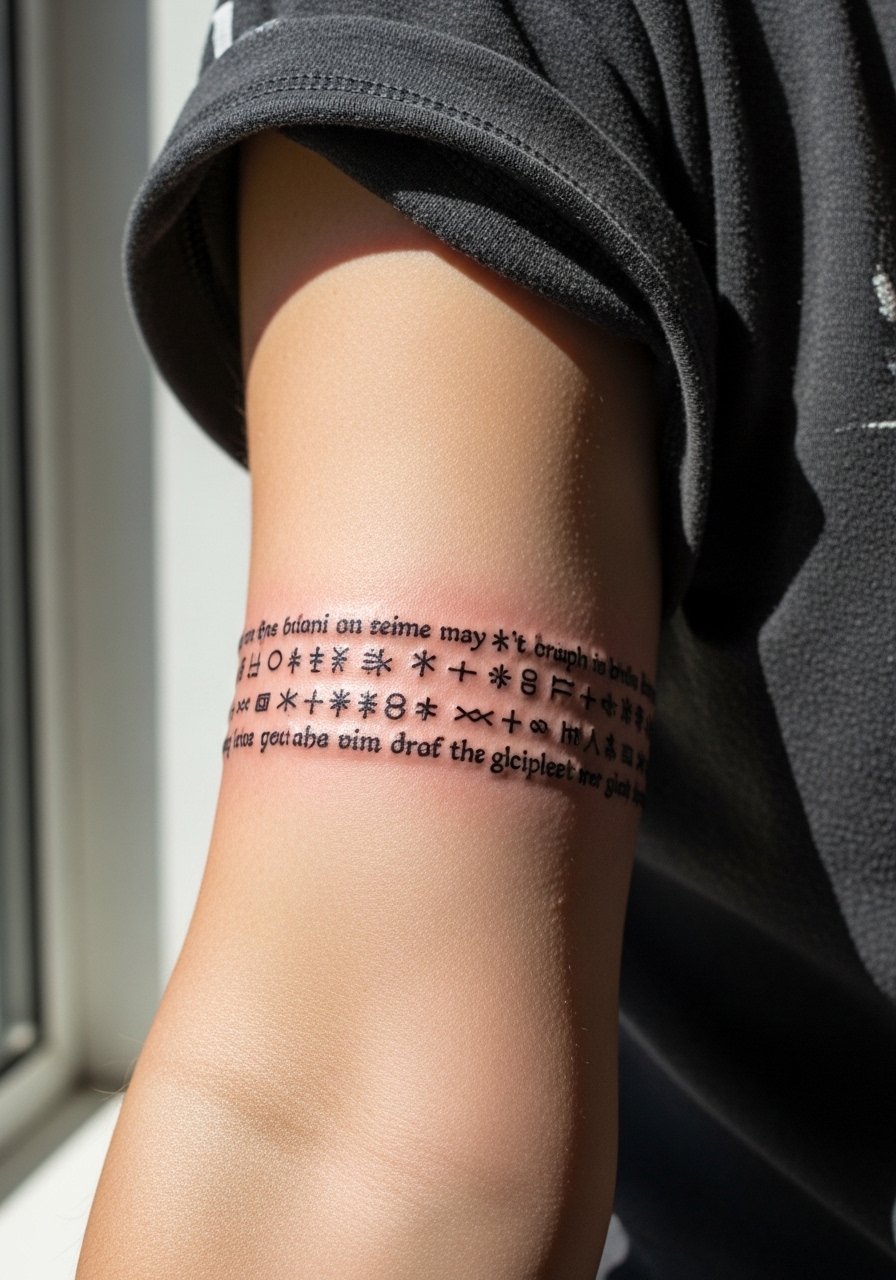
Tiny script and symbols look intimate but can suffer legibility loss. When you show references, bring the exact font size example and specify which letters must remain bold. Inner forearm is good for script but expect touch-ups sooner if the letters are hairline. A common mistake is asking for long prose in micro type without accounting for future stretching. For session comfort, wear a soft cotton tee you can slide up easily and that does not rub the fresh ink.
15. Hidden Micro-Sleeve Zoned for Shirt Cuffs
Designs expressly sized to hide under a cuff are underrated. Map the band so its top edge lands just below typical cuff lines and so watch straps do not sit directly on the ink. Tell your artist to size elements so they read when partially covered by fabric. This planning reduces the risk of composition distortion when clothing shifts. A mistake is centering a motif where a watch will always obscure it. Pair with a minimalist leather watch strap that complements the band without constant friction.
16. Growth-Planning Patchwork for a Future Full Sleeve
If you plan to expand a micro-sleeve into a full sleeve, the design approach changes. Ask for built-in negative space and recurring motifs that can tie new pieces into a cohesive whole. Discuss timeline expectations with the artist so future sessions can reference original lineweights. The biggest mistake is random additions that ignore scale or patterning, which yields a collaged look. For session day wear a button-down shirt you can take off without rubbing the arm area.
17. Fine-Line Script & Coordinates Micro Band on Inner Arm
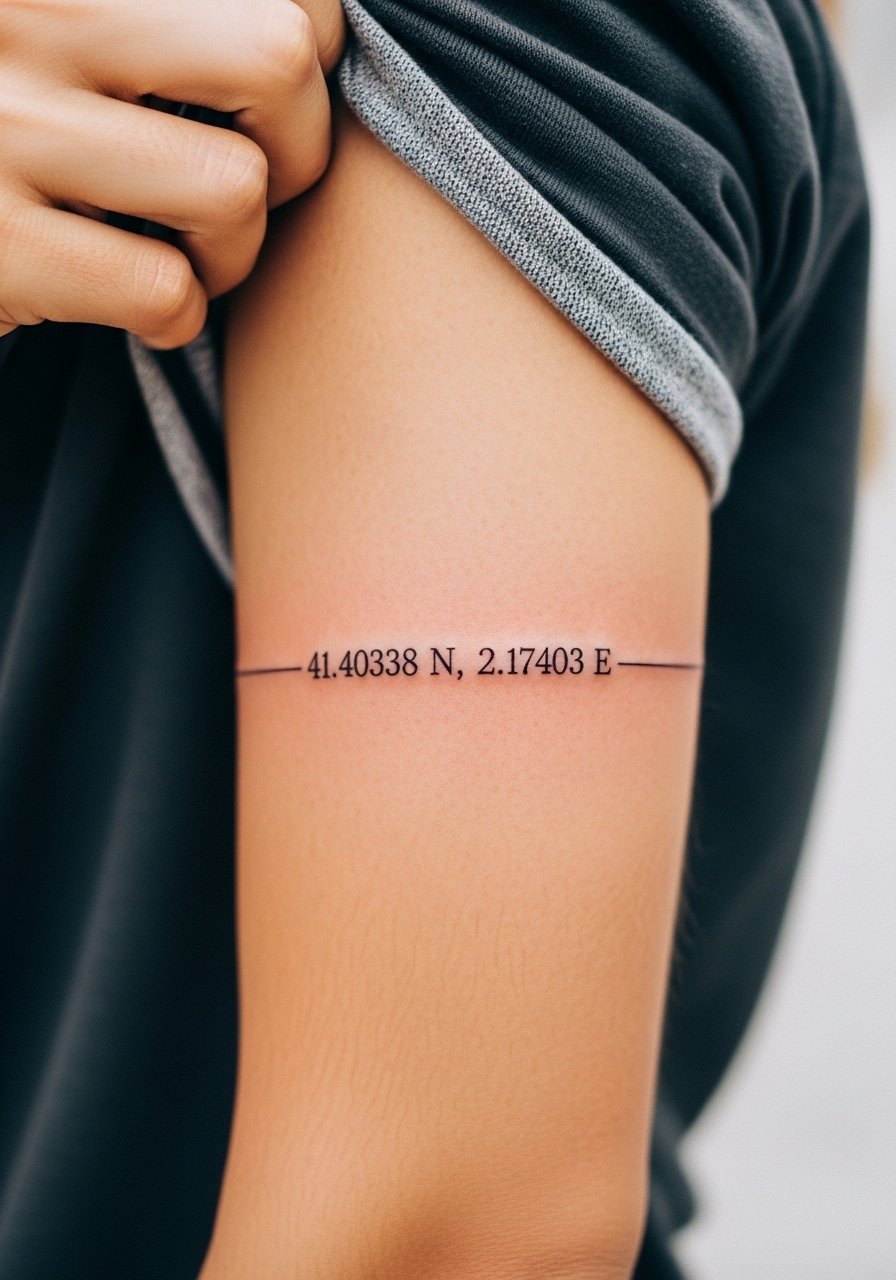
Coordinates or short script carry weight while staying discreet. When including text, specify exact characters to avoid generator gibberish in reference stencils and to ensure the artist knows the spacing. Inner arm script fares well but expect softer edges over time. Avoid overly ornate scripts at micro scale and prefer clear serif or monospace for longevity. Wear a thin chain bracelet to balance the typography when the arm is bare.
18. Micro Dot Work Transition Band Around the Elbow
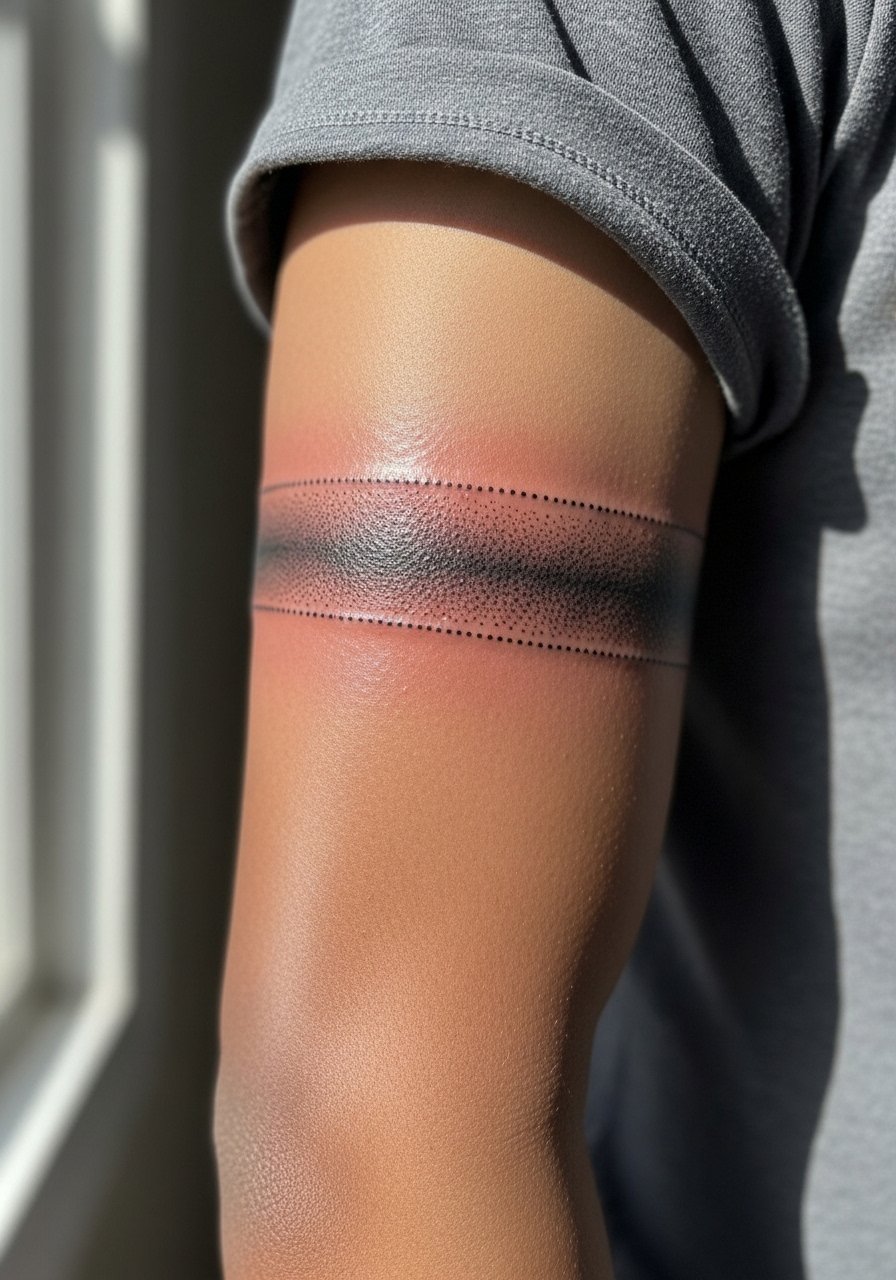
The elbow zone is mobile and tricky for detail. Dot work that transitions into negative space avoids heavy lines that break when skin creases. Ask for a test stipple gradient and expect two short sessions rather than one marathon. A common mistake is centering the design directly on the elbow crease which causes distortion when the arm bends. For session comfort choose a stretchy sleeve shirt you can adjust without irritating the area.
19. Minimalist Chain-Link Band That Reads Like Jewelry
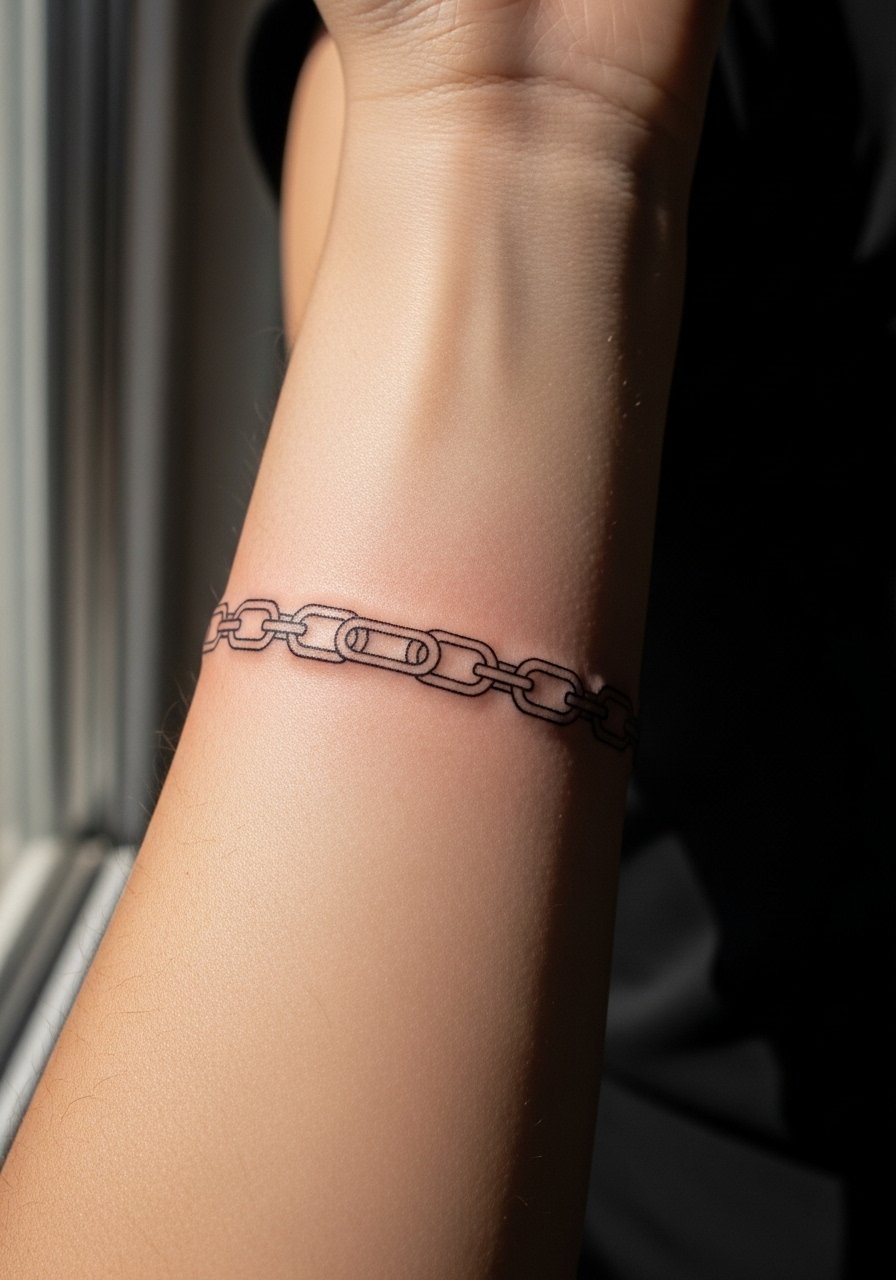
Chain-link bands imitate bracelets but in ink form. Request slightly bolded link ends so the pattern remains crisp rather than a thin, featureless loop. Forearm placement keeps visibility and lowers blowout risk. A mistake is making the links so fine they seem to disappear under camera flash or after a year in sun. Complement this design with a thin metal bracelet that echoes the ink without pressing against it.
20. Micro Floral Wreath Half-Arm Wrap on Outer Arm
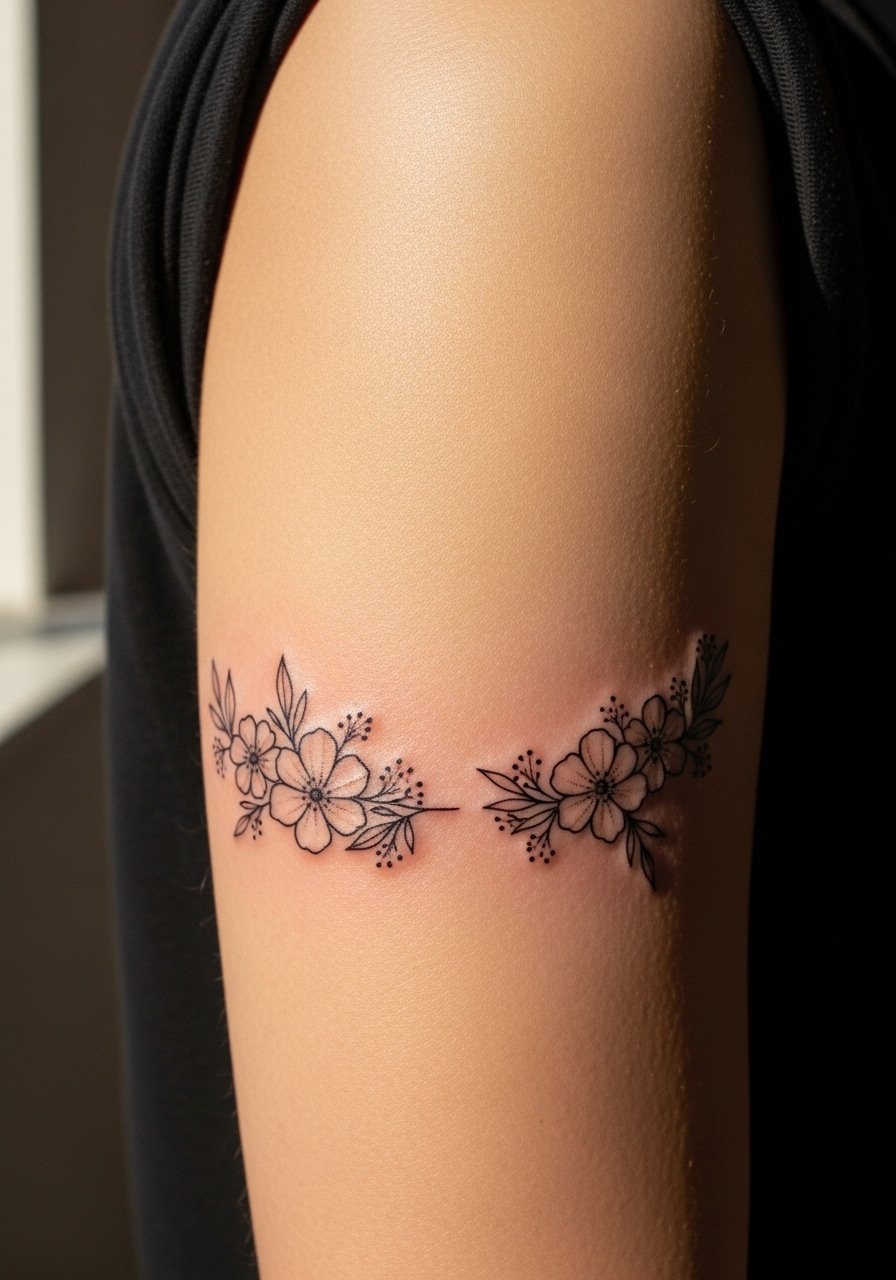
A wreath-style wrap balances ornament and openness. Ask the artist for slightly varied bloom sizes to avoid a repetitive rhythm that reads flat. Outer arm curvature helps the wreath read as a continuous piece. Expect one to two sessions depending on wrap length. Common errors include repeating the exact flower shape, which can look mechanical after healing. For show-off moments wear a short-sleeve linen shirt with the sleeve rolled to frame the wreath.
21. Negative Space Chevron Band for Contrast
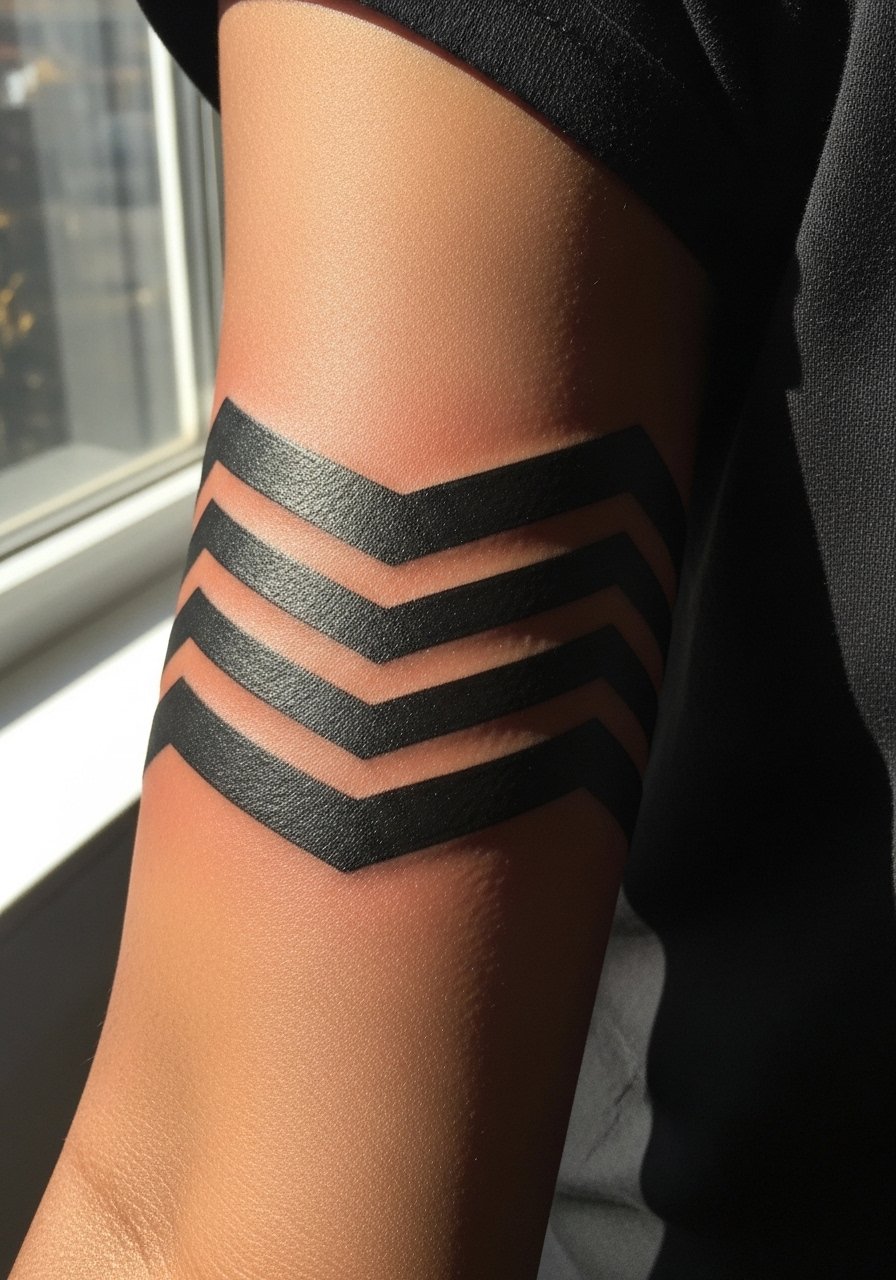
Negative space bands use the absence of ink for design impact and age differently than filled bands. Ask for crisp edge control and slightly larger negative chevrons to prevent narrow skin bridges that fill over time. Bicep placement holds this graphic well with low blowout risk. The usual mistake is making the chevrons too narrow which invites softening. For easy exposure wear a rolled short sleeve shirt that frames the negative space without covering it.
Frequently Asked Questions
Q: Will fine line micro sleeves blur faster than bolder work on forearms and biceps?
A: Fine line can soften sooner because the ink sits in thinner channels, especially on sun-exposed forearms. One group of artists argues fine line needs more frequent touch-ups. The other group says correct needle depth and spacing prevent early blur. Plan for a likely touch-up window around year two to three if you are often outdoors.
Q: How should I plan a micro cluster if I want to expand into a full sleeve later?
A: Design with intentional negative space and repeating motifs so future pieces can tie into the original cluster. Ask your artist to leave anchor points and consistent lineweight. Treat the first cluster as a chapter, not a finished book, and make a rough plan for where additional elements will sit.
Q: My skin is dark and I worry micro work will vanish in photos. What should I ask for?
A: Request healed examples on darker skin from any artist you consider and ask them to show close-ups in natural light. Ask for slightly bolder line endpoints and dot work contrast. Camera flash often flattens healed ink, so rely on in-person healed references when possible.
Q: Are there special booking or deposit expectations for micro sleeve bands?
A: Many studios require a deposit that covers stencil time and discourages last-minute cancellations. If you have a history of rescheduled artist matches, start with a small cluster session to test reliability. Ask about guest spot calendars if you want a specific style from a traveling artist.
Q: Does Saniderm help fine line healing on inner arms or can it cause issues?
A: There are two camps here. Pro-Saniderm users praise reduced friction and cleaner healed lines. Opponents warn of trapped sweat and irritation, especially in hot climates. Follow your artist's preference and be ready to switch to a lighter balm if the patch reacts.
Q: What should I wear to my appointment for an inner arm or bicep micro sleeve?
A: Comfortable clothing that gives the artist clean access is best. For inner arm work a loose tank top or short sleeve tee works well. For upper arm or back-adjacent pieces a button-down you can remove easily keeps fabric from dragging across fresh ink.
