
Fine line tattoos dominate saved boards, but the pieces that still look clean after years are often the ones planned with cover-up potential in mind. Small minimalist cover ups work best when the new design adds texture, contrast, or deliberate negative space so the old lines do not reappear. Below are practical, wearable ideas you can bring to a consultation, plus what to ask for so the cover up settles well and stays readable over time.
1. Fine Line Arrow on Inner Forearm
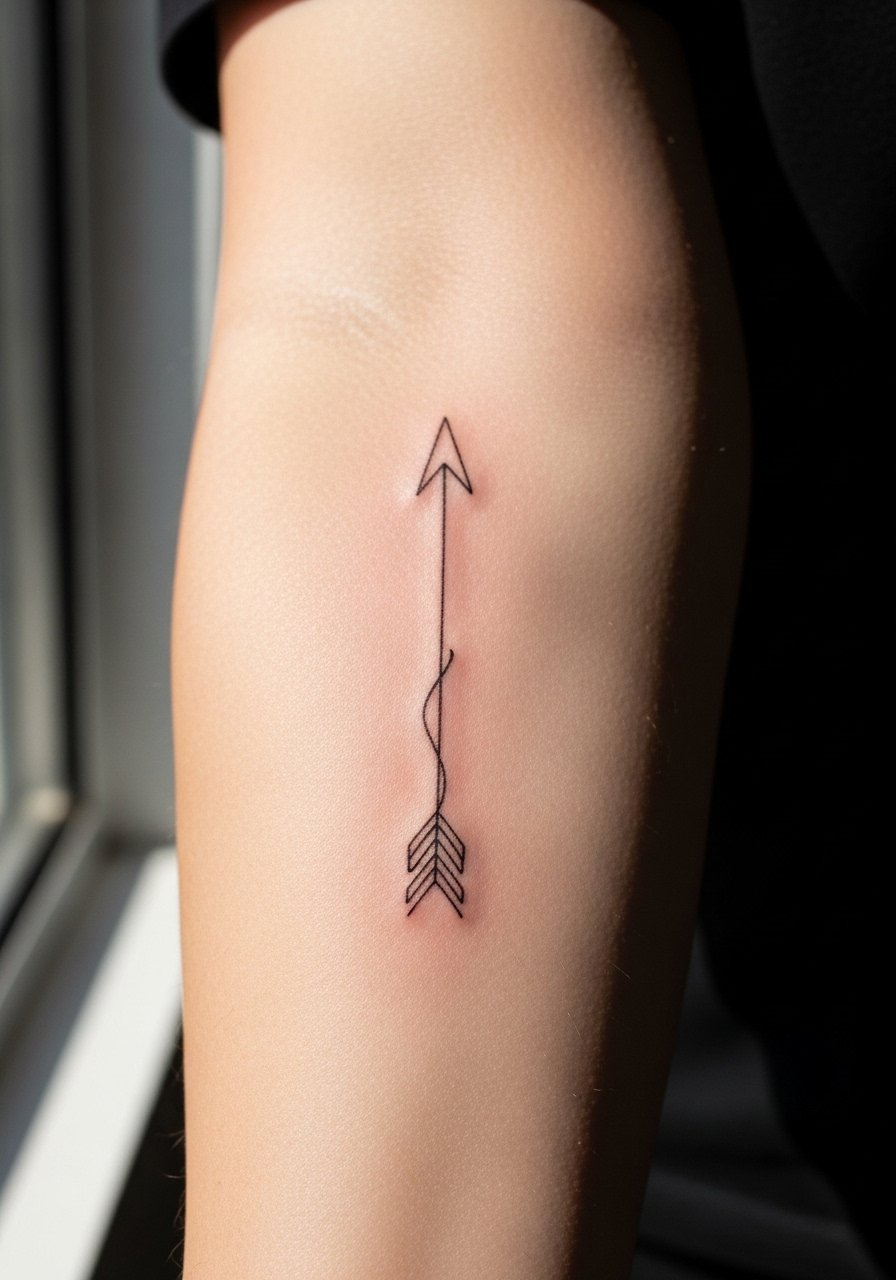
I recommend this when the original mark is a thin, faint script or a small symbol. The arrow uses a single clean vector line that overlaps the old ink in places where lineweight can be increased without creating a bulky patch. Tell your artist to thicken the shaft subtly where it crosses the old tattoo and to use slightly heavier linework at the tail for contrast. Common mistakes are asking for an arrow too small or with too many tiny details that will blur. Expect a low pain level and a short session under an hour. After six months most of the fine line will still look crisp if the area avoids heavy sun. For showing this off, roll sleeves and pair with a rolled-sleeve linen shirt so the arc reads clearly with casual outfits.
2. Tiny Constellation Cluster on the Wrist
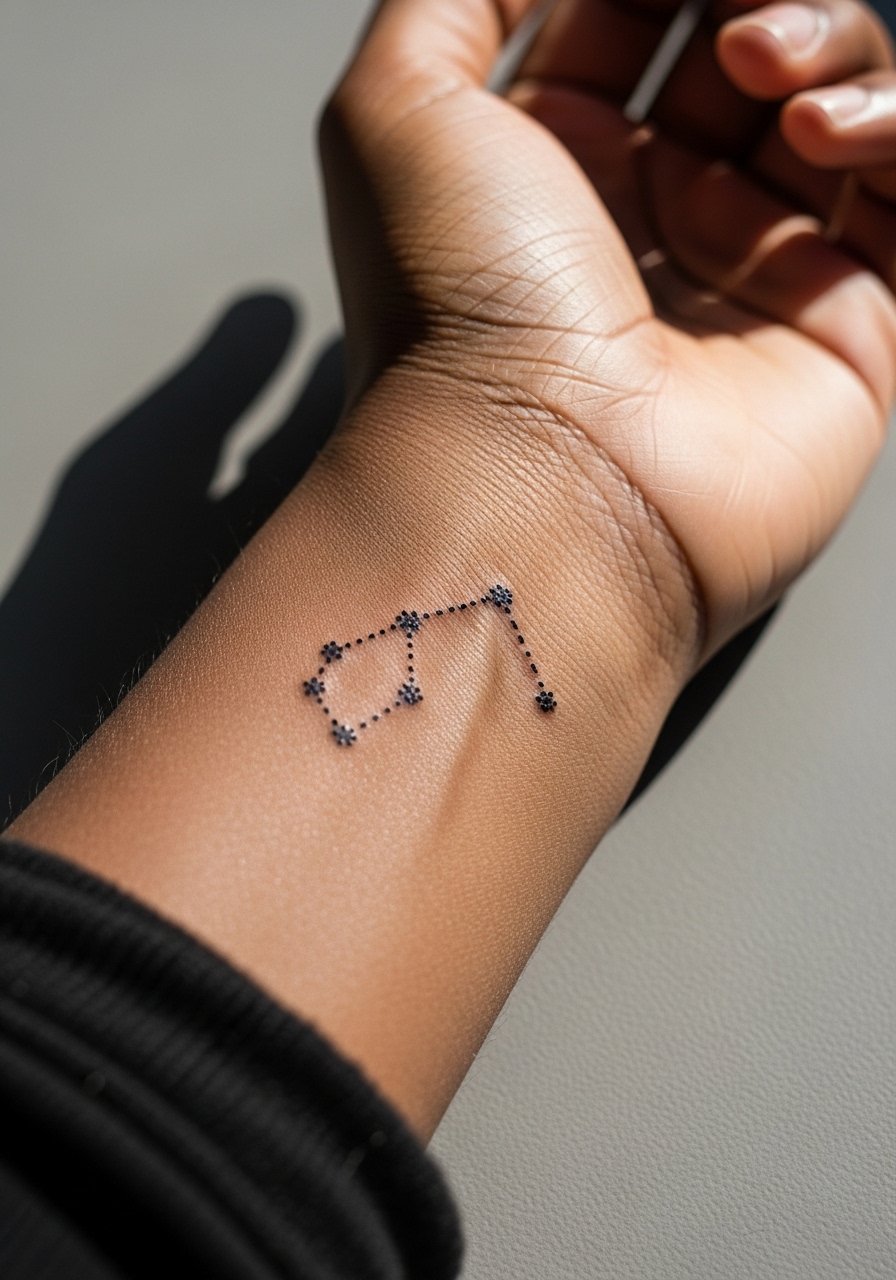
I've seen this cover work well when the original was a darker, irregular scrap of ink. A cluster of tiny dots and short connecting lines distracts the eye from the old shape and creates texture that photographs well. Tell the artist you want stipple dots with varied sizes and occasional thicker anchor points. The big mistake is packing dots too tightly. Spacing helps the design age without merging into a smudge. Wrist skin is mobile and washes often, so expect touch-up at year three for most fine detail. For the session, wear a slim watch strap you can remove easily and avoid bracelets that rub the fresh work.
3. Micro-Lettering Script along the Collarbone
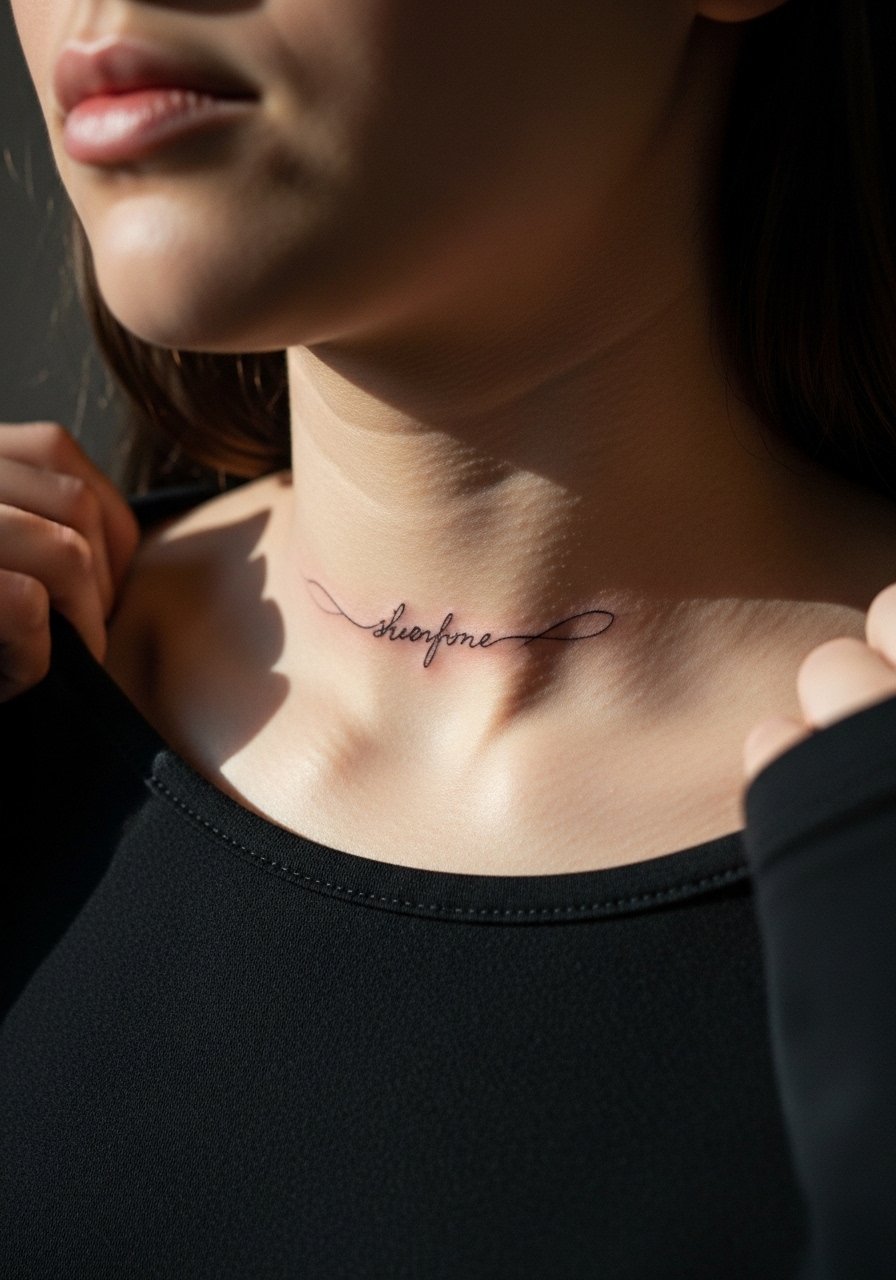
This is a good swap when a previous collarbone tattoo faded unevenly. Micro script reads best when letters have tiny counters and slightly increased spacing. In consultation, show exact font weight you want and ask the artist to map the spacing on your skin before inking. A common error is requesting letters that are too narrow, which close up as the piece heals. Collarbone skin can feel sensitive and buzzing near bone, so expect short breaks during a 45 to 90 minute session. Over two years, micro script can lose crispness if placed too low on the chest. Pair this with delicate necklaces but avoid heavy pendants that sit directly over the ink. A thin chain pendant necklace sits above the line without competing.
4. Tiny Blackwork Rose on the Ankle
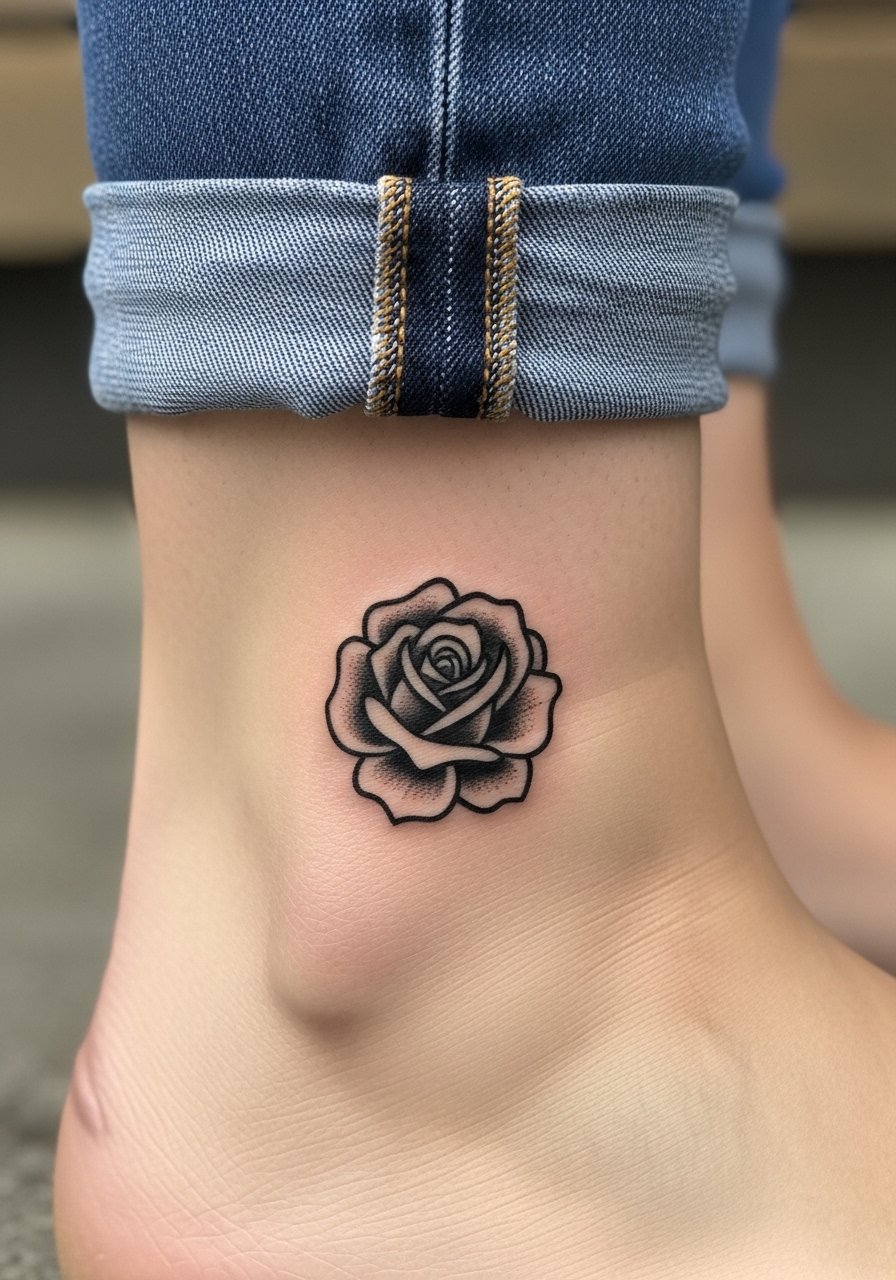
Choose this when the old mark is a faded band or random dark blotch. A compact blackwork rose gives you saturated coverage that obscures underlying tones, while the petals offer placement for denser shading. Tell the artist you prefer heavier saturation in the core petals and stippled outer edges so the design reads as floral rather than a blob. People often make the mistake of asking for too much fine detail in a tiny ankle piece. Ankle skin sees rubbing from socks and shoes, so expect a touch-up window around year two. Session pain can be higher here because of thin skin over bone. Show it off with sandals or rolled jeans and a pair of leather sandals that keep the ankle visible without friction during healing.
5. Minimalist Wave on the Side Rib
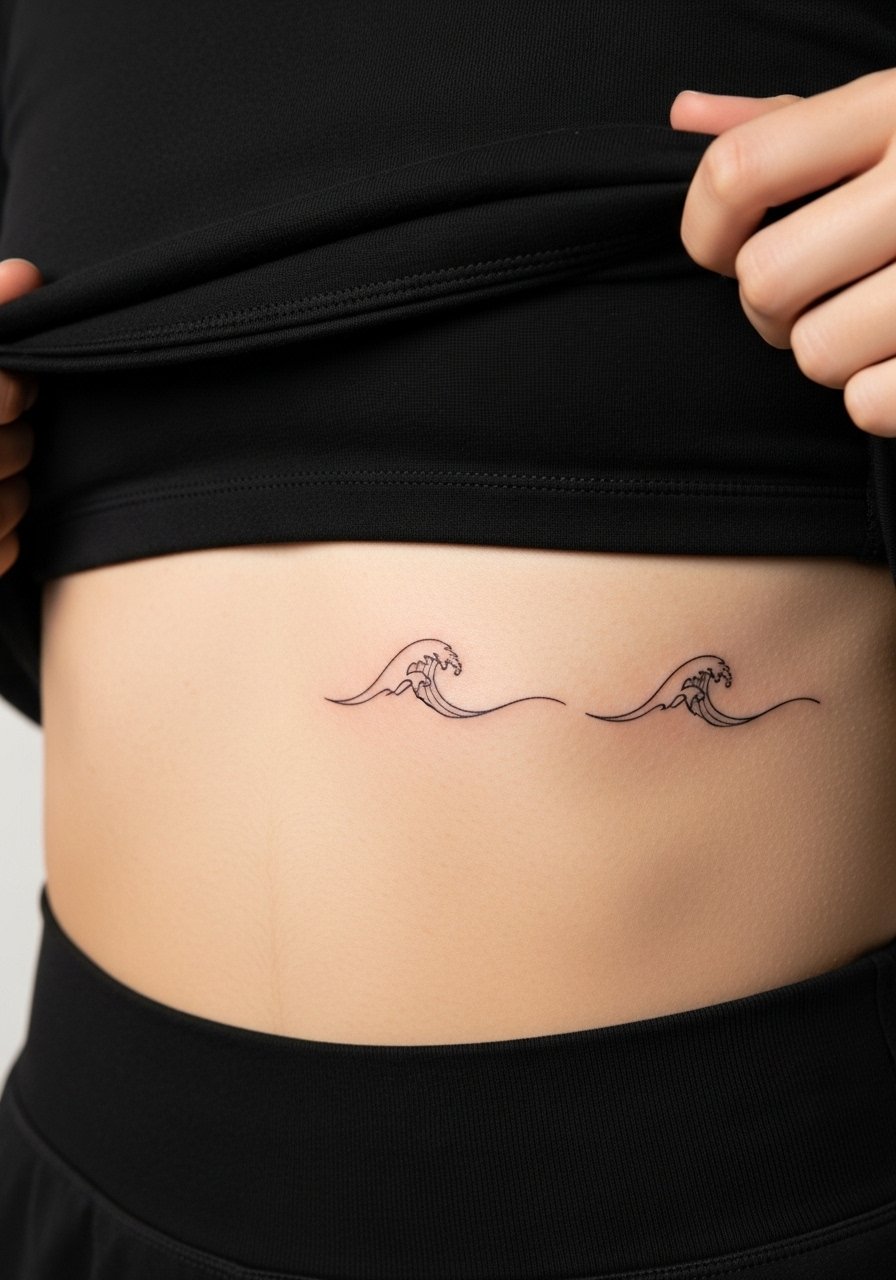
Fair warning, ribs are a sensitive canvas and the skin moves. I suggest this when the covered mark is a small dark motif that sits along the side torso. A single flowing line with strategic anchor points helps mask the old silhouette while keeping the piece light. During the consultation, ask for a test stencil and request that the line crosses the old ink in multiple shallow passes rather than one deep stroke. Artists split on fine line on ribs. One camp says the stretch and motion blur lines within two years. The other camp argues that with controlled depth and spacing it holds. Ask your artist where they land before booking. Expect a longer appointment and realistic touch-up possibilities down the line. For the session, wear a cropped tee or sports bra you can lift easily.
6. Geometric Dot-Matrix on the Upper Arm
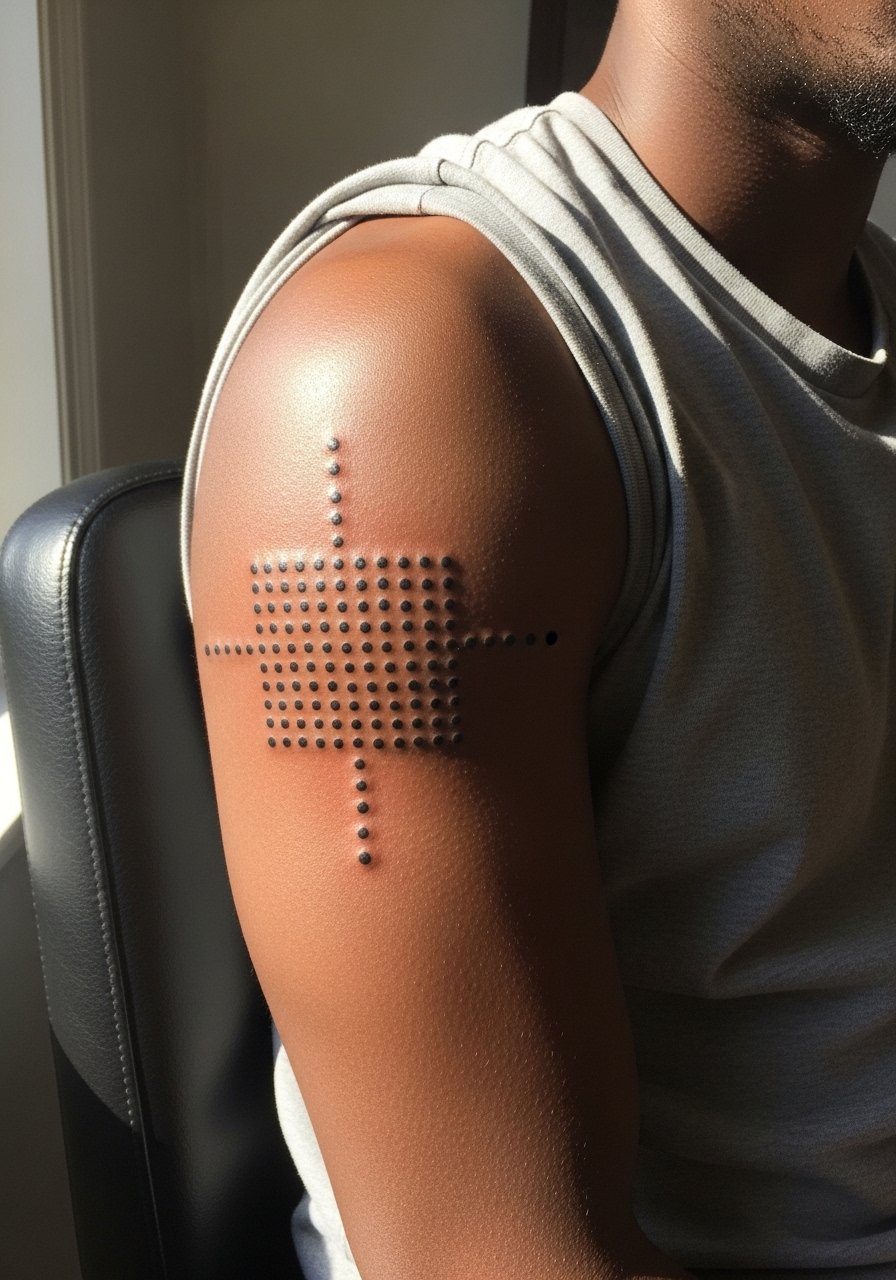
A dot-matrix or grid pattern is ideal for disguising irregular old ink because it replaces negative space with intentional texture. Ask the artist for a gradient of dot density so the old mark sits under heavier stippling zones. A common mistake is demanding identical dot sizes throughout. Varying scale helps the eye accept the piece as deliberate. Upper arm skin is forgiving and touch-ups are usually minor at year three. The session is moderate in pain and can run one to two hours depending on coverage. Pair this look with sleeveless tops to show off the pattern and add a loose button-down shirt you can roll up when you want to reveal the design.
Pre-Session Essentials
The wrist, ankle, and rib pieces above each present different session needs, so a few targeted items smooth the appointment and the first week.
-
Stencil transfer paper kit. Lets you preview the placement and line weight on your skin before the needle starts, which is helpful for small geometric and script cover ups.
-
Topical numbing cream. Applied 45 minutes beforehand it takes the edge off for sensitive rib or ankle sessions without interfering with linework.
-
Thin protective film roll. Keeps wrist and finger tattoos protected from daily friction during the first few days of healing.
-
Fragrance-free gentle body wash. Cleans the area without stripping tiny lines or irritating new stipple work on the arm.
-
Aquaphor healing ointment. A thin layer in the first 48 hours locks in moisture for delicate fine line and small blackwork without clogging the channels.
7. Tiny Botanical Sprig on the Wrist
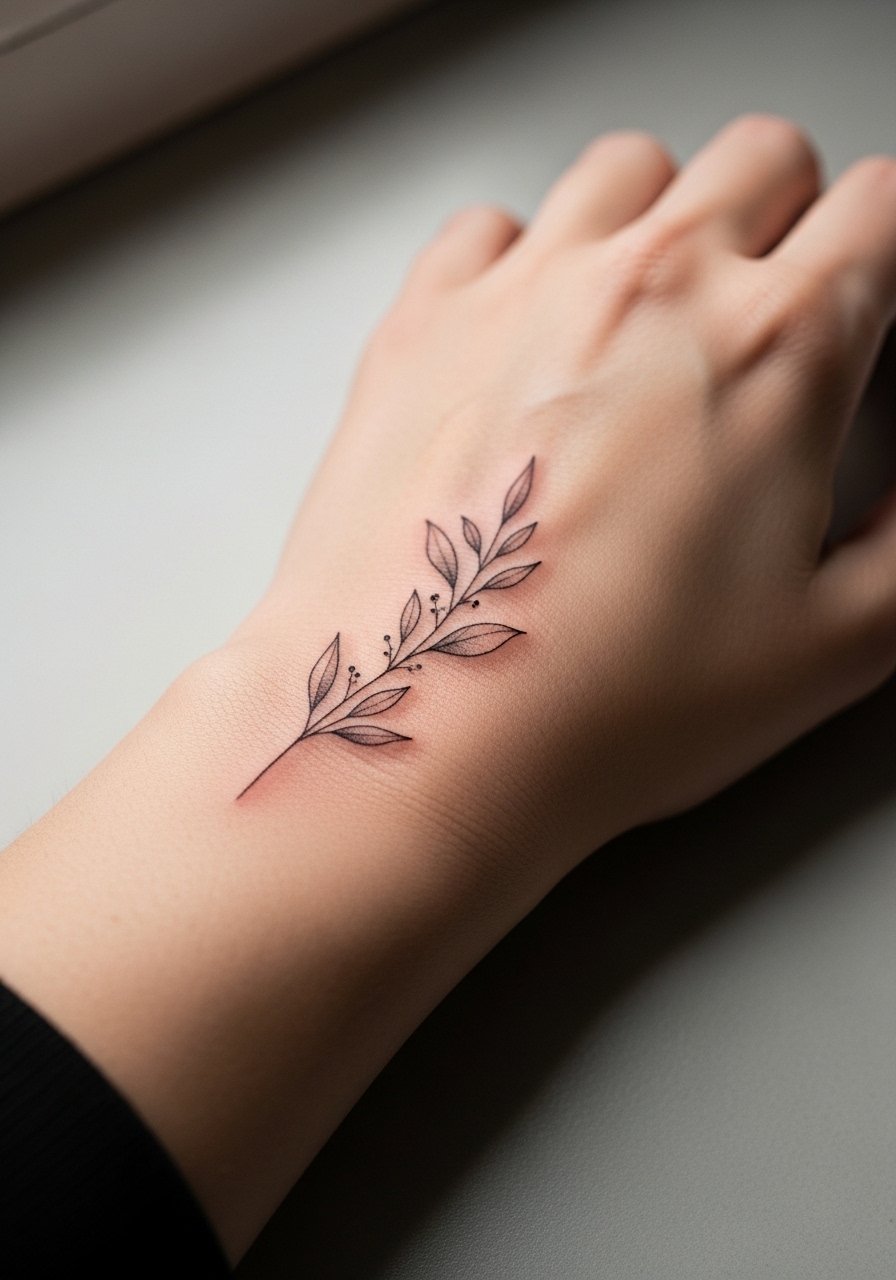
This works when an older wrist design is faded but still visible. A short sprig with spaced leaves overlays old marks and offers natural negative space between leaves to avoid merging. Tell the artist you want leaf spacing of at least 2 to 3 millimeters and a slightly heavier stem line where it crosses old ink. People often ask for too many tiny veins inside leaves, which blur over time. Wrist skin moves and washes frequently, so plan for a possible touch-up at year two or three. Pain is low to moderate and sessions for this size are usually brief. Style it with stacked dainty bracelets or a minimalist leather strap watch that can be removed during healing without rubbing the fresh ink.
8. Micro-Realism Moon on the Back of the Neck
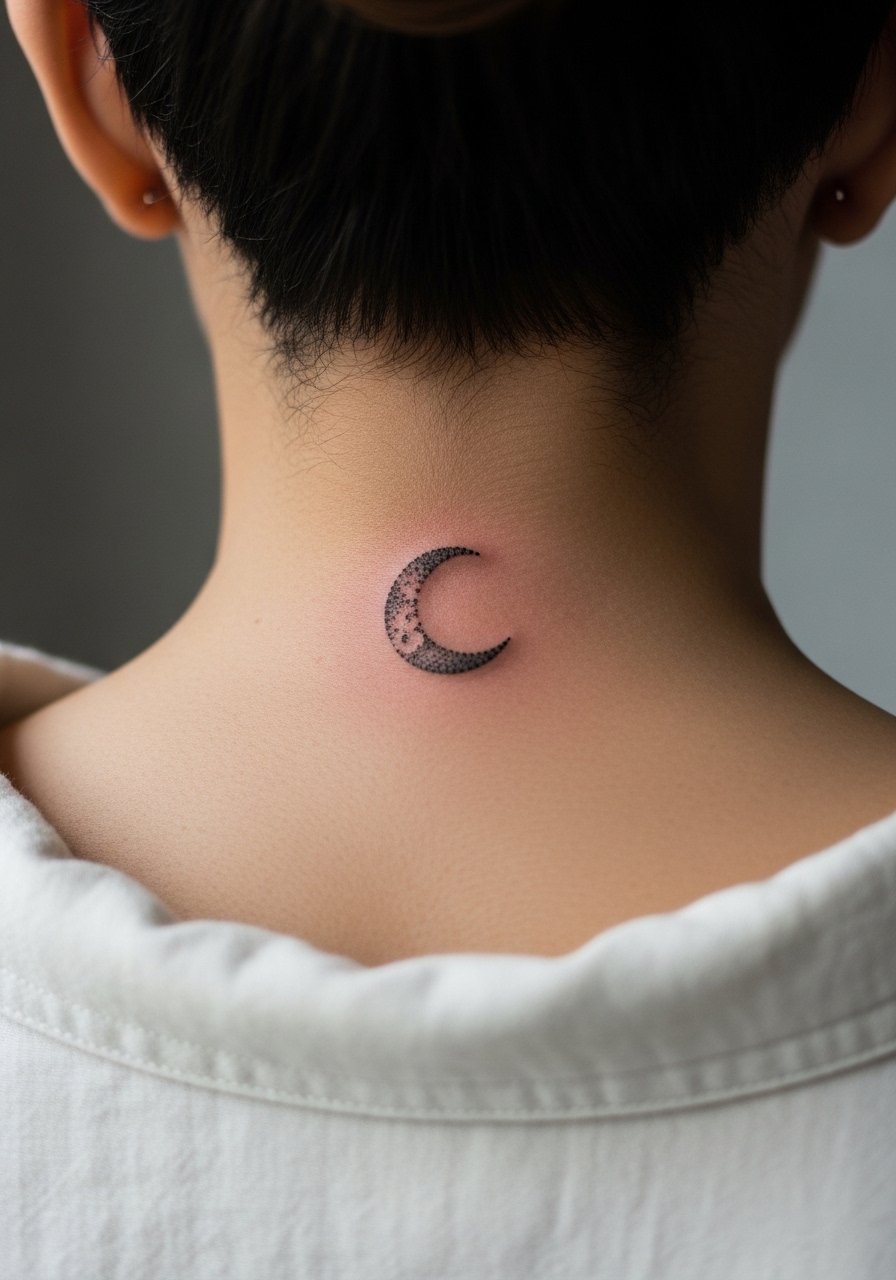
Choose this when a previous small mark sits near the nape. Micro-realism uses tight dot work and tiny gradients to make the new image read as a distinct motif, not a patch. During consultation, ask to see healed examples of micro-realism on similar skin tones and neck placement. A mistake is picking ultra-fine gradients on skin that tends to thicken, which can muddy detail. Neck skin is mobile and exposed, so expect possible touch-ups at year three. Sessions are short but can feel vibration-heavy because of proximity to the spine. If your workplace is image-conscious, consider placement visibility before booking.
9. Single-Line Mountain Range on the Forearm
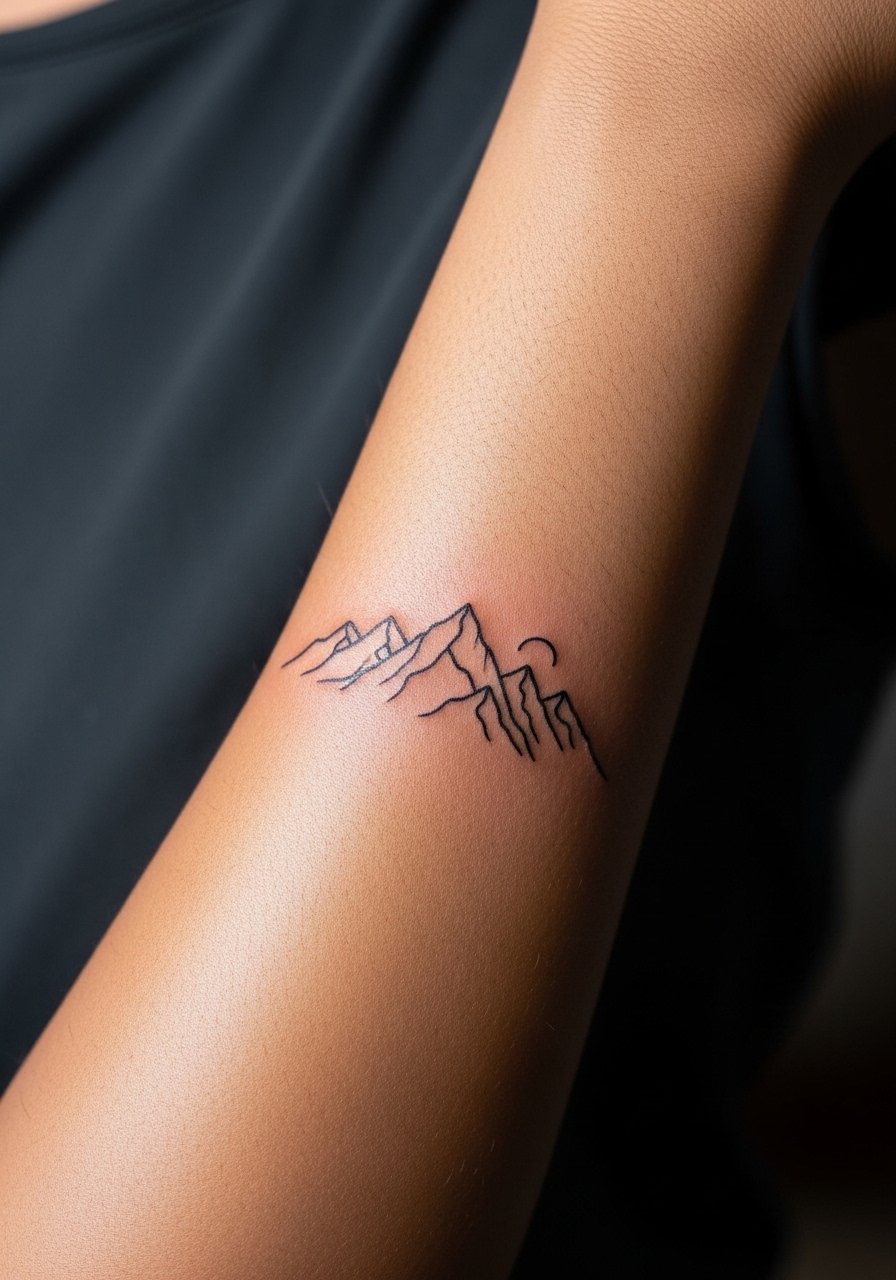
I often suggest this when the old artwork is a dark medallion or thick shaded patch. A continuous single-line mountain with occasional thicker peaks provides contrast where needed to hide underlying tones. Tell the artist you want slightly varied lineweight at peaks and valleys so the design breaks up the old shape. People sometimes ask for too many miniature peaks that register as noise. Forearm skin is stable and the design ages predictably, with most lines still readable at five years if protected from sun. Sessions are comfortable to moderate and typically under an hour. Show it off by rolling sleeves or wearing a racerback tank that frames the forearm.
10. Tiny Mandala Dot on the Back of the Hand
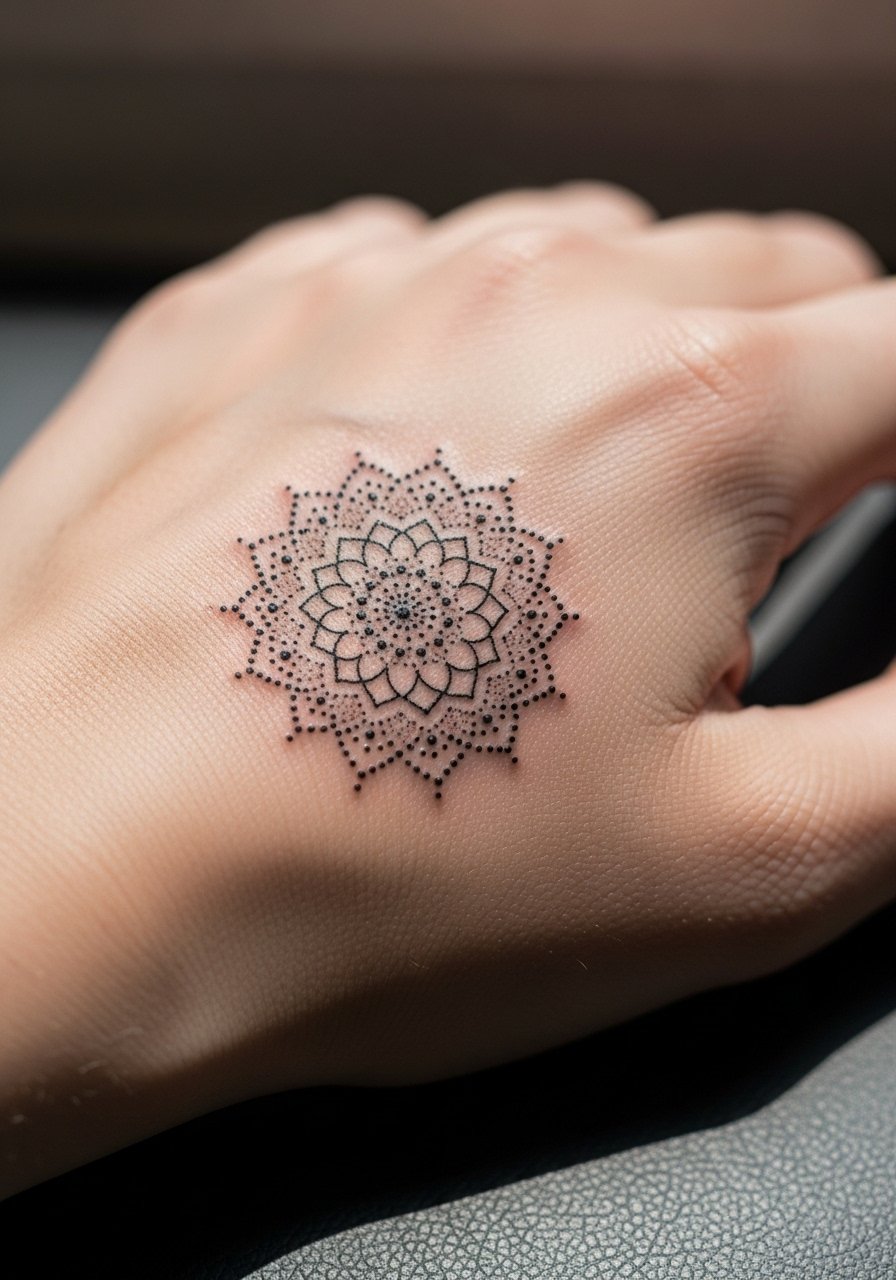
Hand tattoos are high visibility and higher risk. Use a compact dot-focused mandala when covering a small blotchy mark on the hand back. Ask the artist to place the densest dots over the darkest old ink and to keep the outer rings airy. A common mistake is asking for dense linework across the knuckles or joints. Hands face constant washing and friction, so expect more frequent fading and touch-ups beyond year two. The session stings more than arm work because of thin skin and proximity to bone. Consider how a hand tattoo might affect jobs or client-facing roles before deciding.
11. Tiny Anchor Behind the Ear
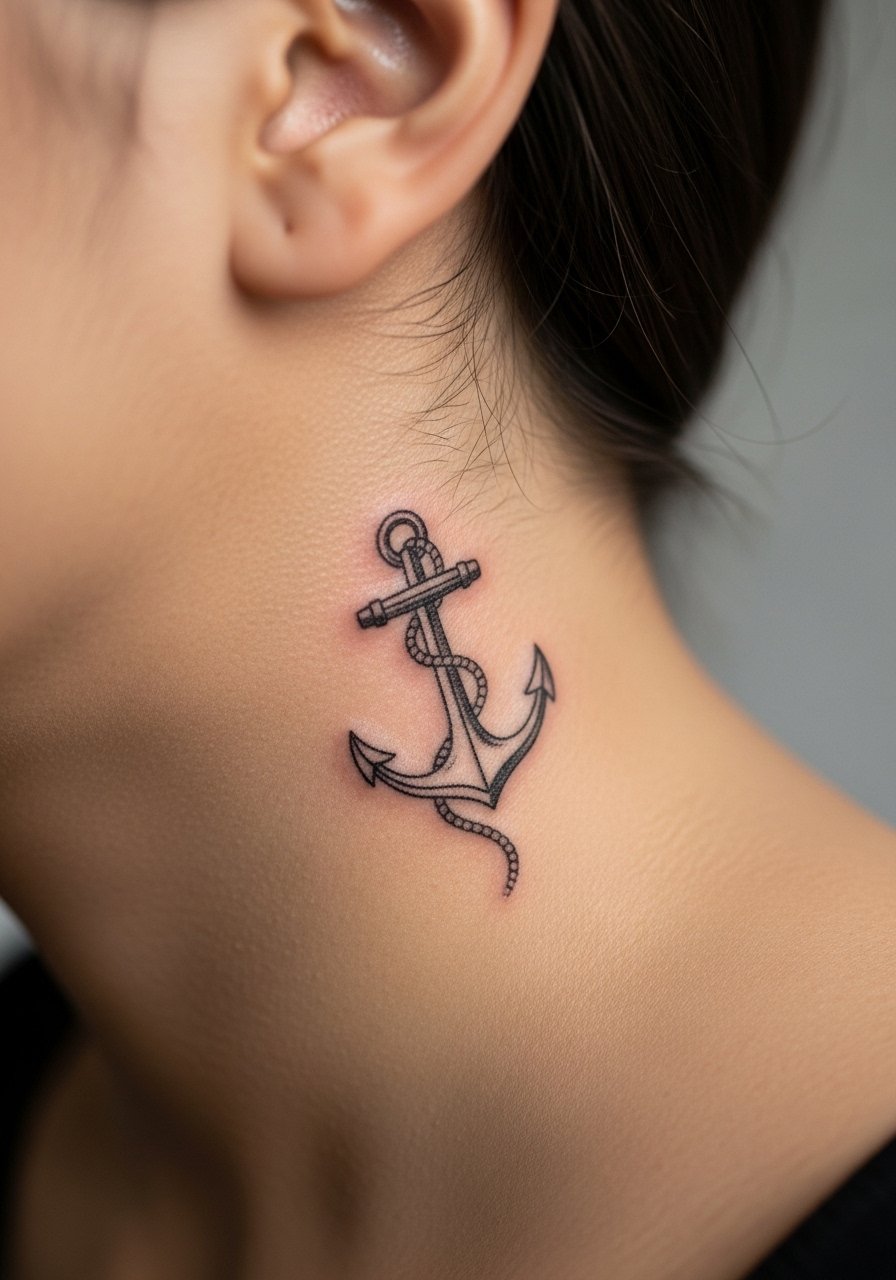
This location is good for small cover-ups of faint logos or tiny symbols near the hairline. A simple anchor uses negative space to disguise the old mark while remaining discreet. During consultation, request the stencil be placed below the hairline so the artist can cover the exact old spot. The mistake is choosing too much fine detail in a tiny area where the hair and movement will interfere as it heals. Behind-the-ear skin is delicate and sessions are quick but sensitive. If you need access to show it off, plan hair or updo styles. For the session wear, a collared shirt you can unbutton helps the artist reach the area without disturbing your hair.
12. Minimalist Crescent Above the Ankle
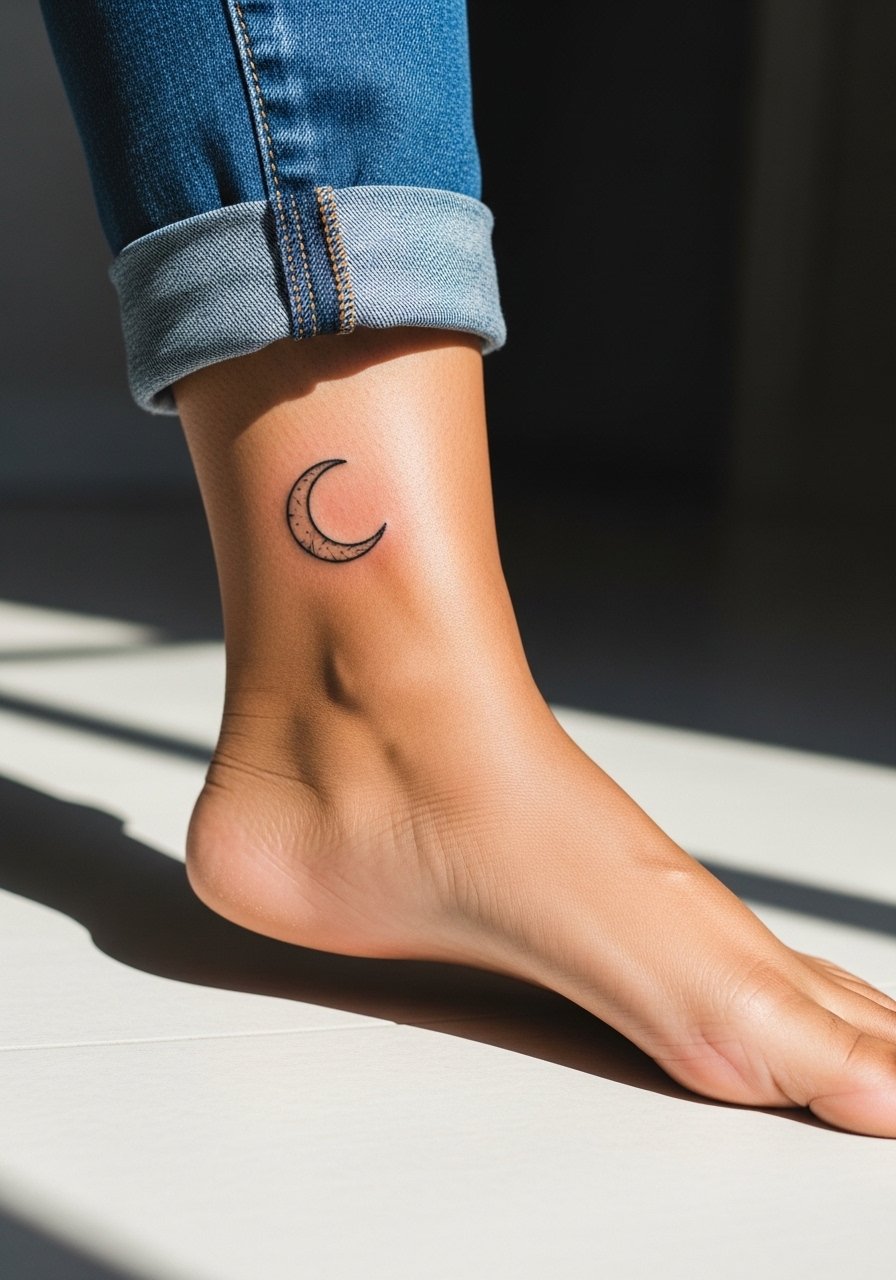
This is a tidy option for covering a thin horizontal scar or linear mark. A small crescent provides curved coverage and gives the artist room to layer subtle shading over the old line. Tell the artist to anchor the crescent so its heaviest shade sits over the most noticeable part of the previous mark. A typical error is asking for shading that is too heavy across the whole crescent. The ankle sees shoe and sock friction so early healing needs protection, and touch-ups can be expected around year two. Sessions are short and the pain is higher than on fleshy areas. Pair with sandals or roll-your-jeans looks to let the crescent show.
13. Micro Geometric Bar on the Finger
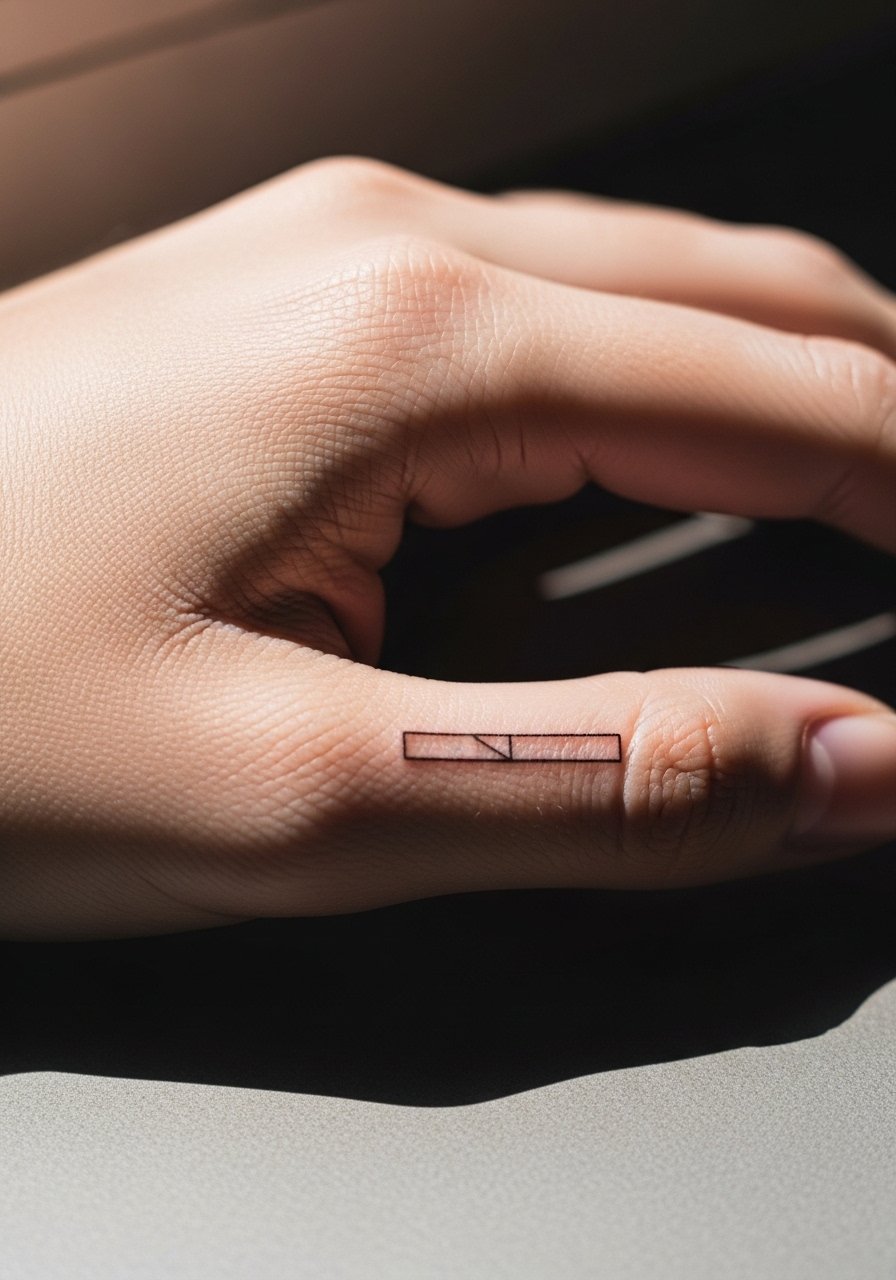
Finger cover ups are tricky because skin renews quickly there. A short geometric bar that overlaps the old mark with increased lineweight at junctions can hide shallow faded lines. Ask the artist for a depth plan and to avoid tiny filled areas that trap ink and blur. The mistake many make is wanting complex shapes on a fingertip canvas. Expect significant fade by year two and possible yearly touch-ups for crisp edges. The session is brief but painful. For showing off, keep rings minimal so they do not sit directly over the new ink while it settles.
14. Small Black Circle on the Calf
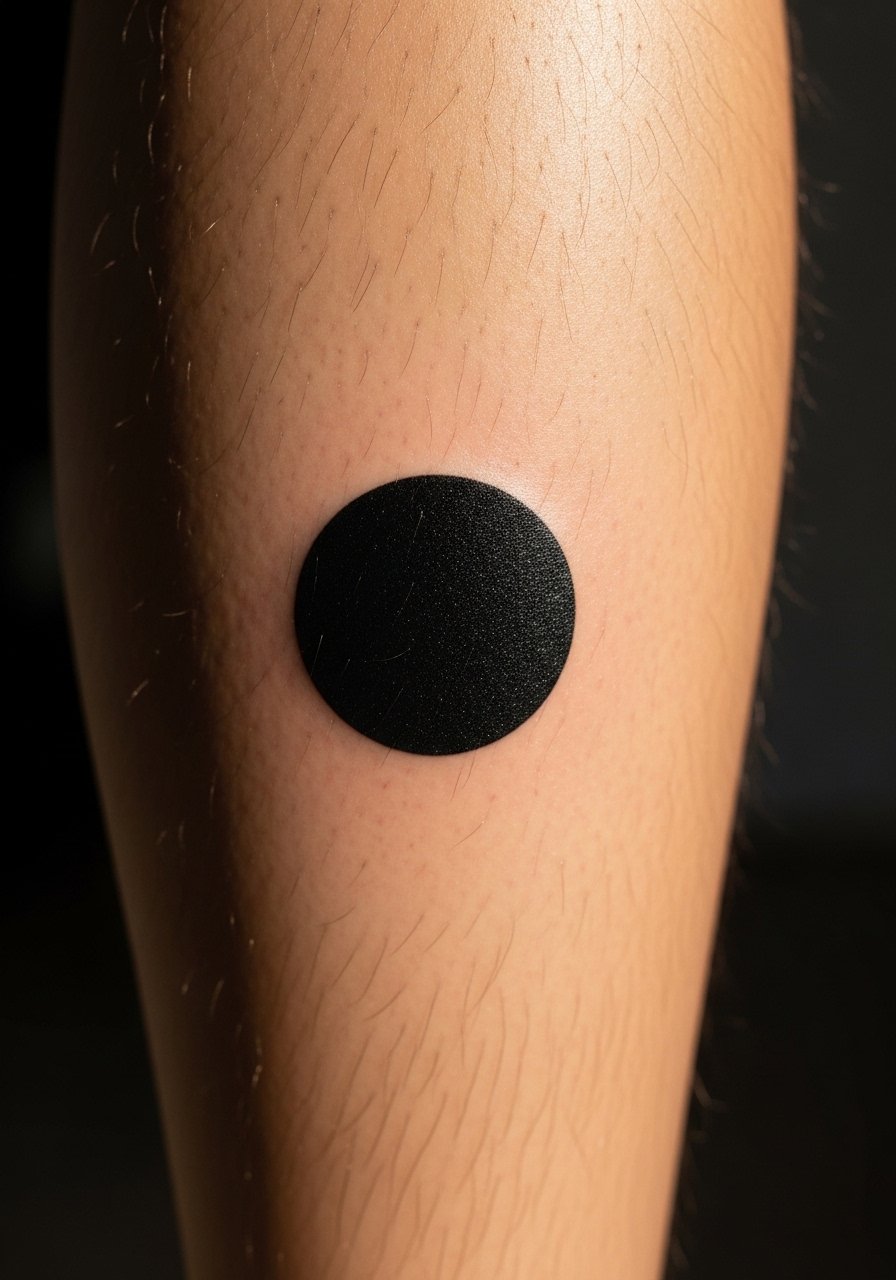
A compact solid black circle can be an elegant way to mask an asymmetric dark patch on the calf. The trick is to keep edges crisp and to place the circle so it shifts eye focus. Tell your artist you want a matte, even saturation with micro-stipple blending at the border so it does not read as a sticker. The common error is picking a circle too small for the old spot. Calf skin is forgiving and blackwork here can last many years with minimal touch-up. Sessions are moderate and usually under an hour. Wear loose shorts or a skirt to allow access and to show the piece when healed.
15. Minimalist Script on the Side Ribcage
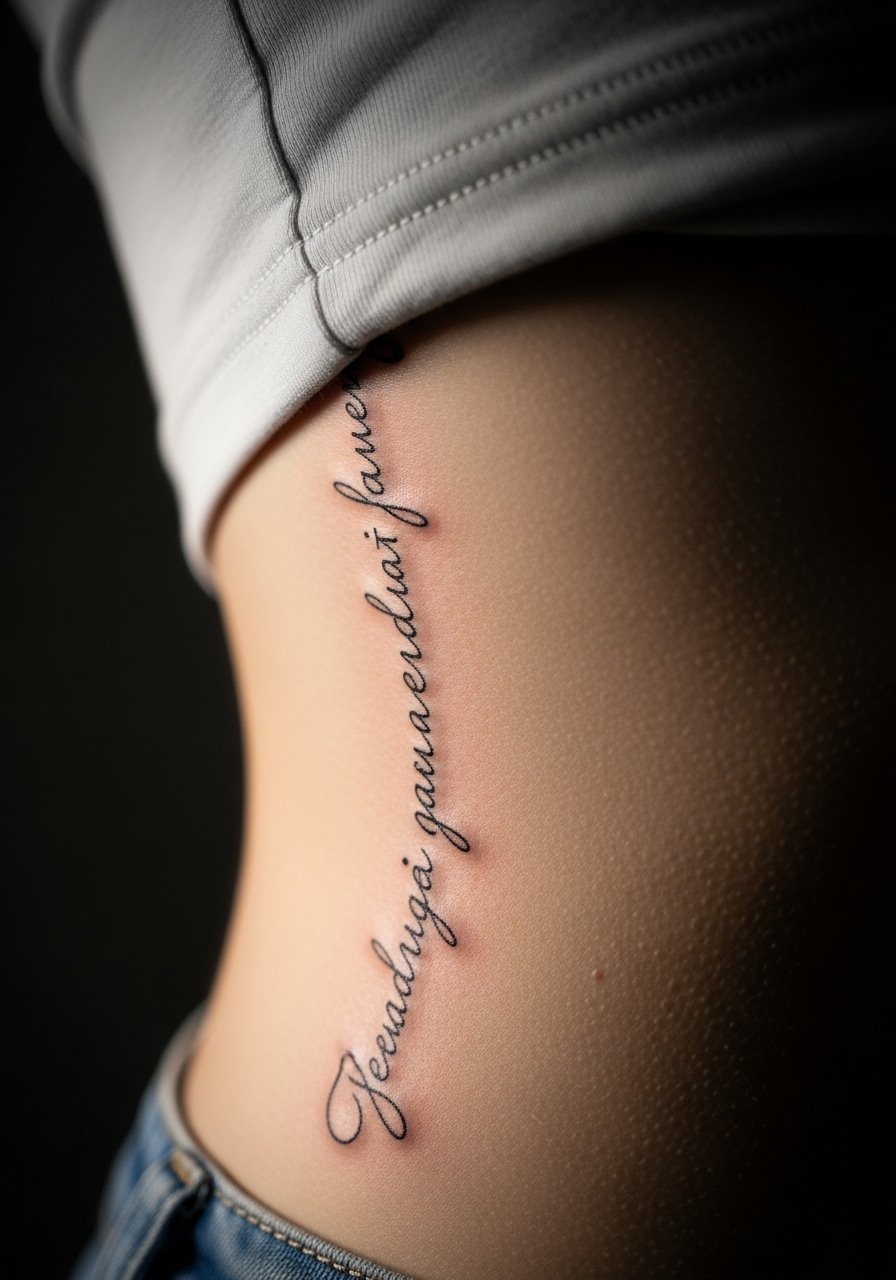
Script on the ribs can disguise a prior design if the letters are spaced and the baseline flows over the old ink. During consultation, ask your artist to map the script in motion so the line follows your body's curves rather than a rigid straight line. A mistake is requesting tiny tightly kerned letters that close up after healing. As with other rib work, artists split into two camps. One group says scripts on ribs distort quickly because of stretch. The other group says with the right depth and a looser spacing it lasts. Be explicit in the consult and ask for healed examples on similar skin. Pain is higher and the session may require breaks. For the appointment, wear a sports bra or zip hoodie so the area is easy to reveal.
16. Tiny Chevron on the Back of the Arm
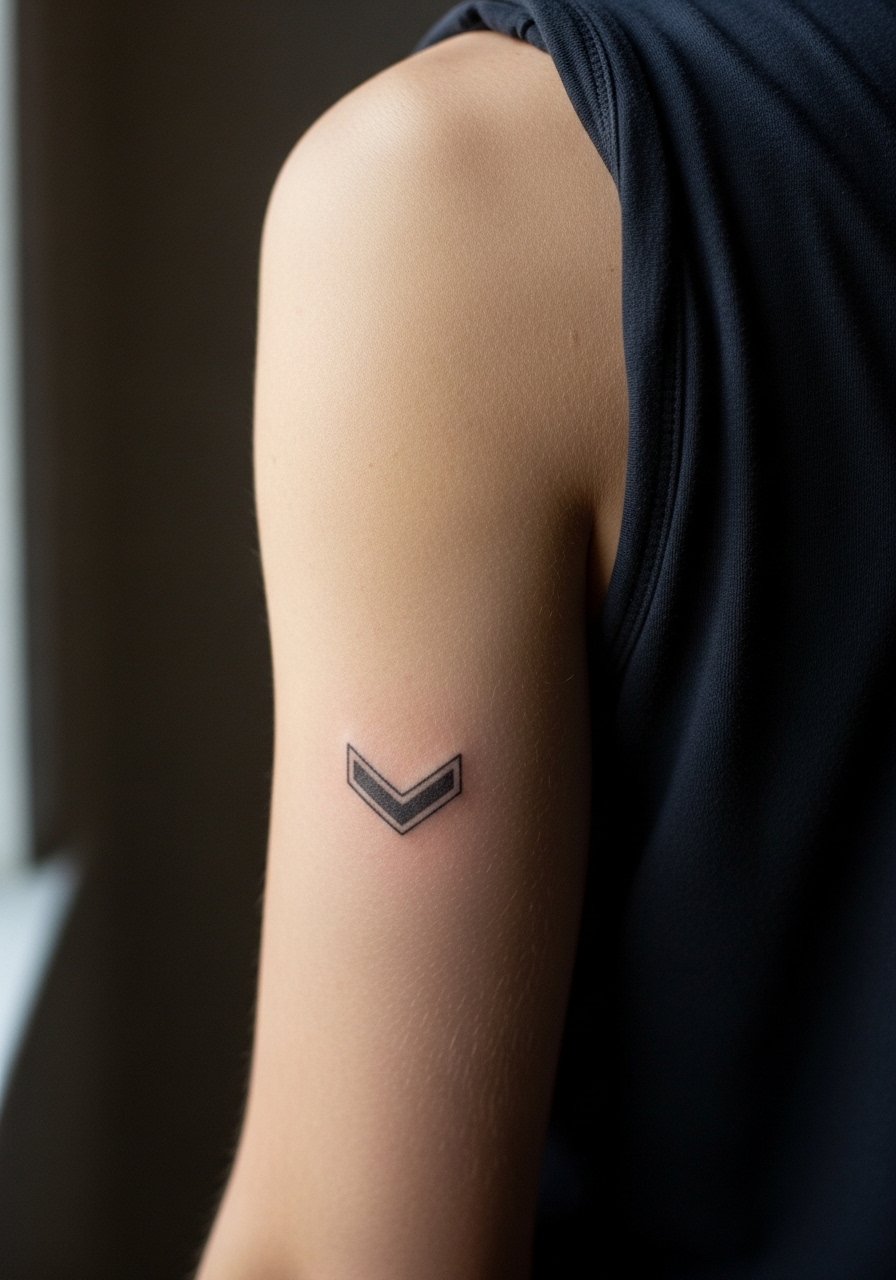
A chevron cluster is a good minimalist swap for a faded band or linear scar. The stacked chevrons place denser ink over the old mark while keeping negative space in the outer bars. Tell the artist you want graduated lineweight from the center outward to prevent a hard edge. The big mistake is overcomplicating with tiny interior lines that will blur. Back-of-arm skin is less exposed and ages well. Sessions are low to moderate pain and typically short. Display it with sleeveless tops and a loose linen tank when you want it visible.
17. Miniature Anchor on the Hip
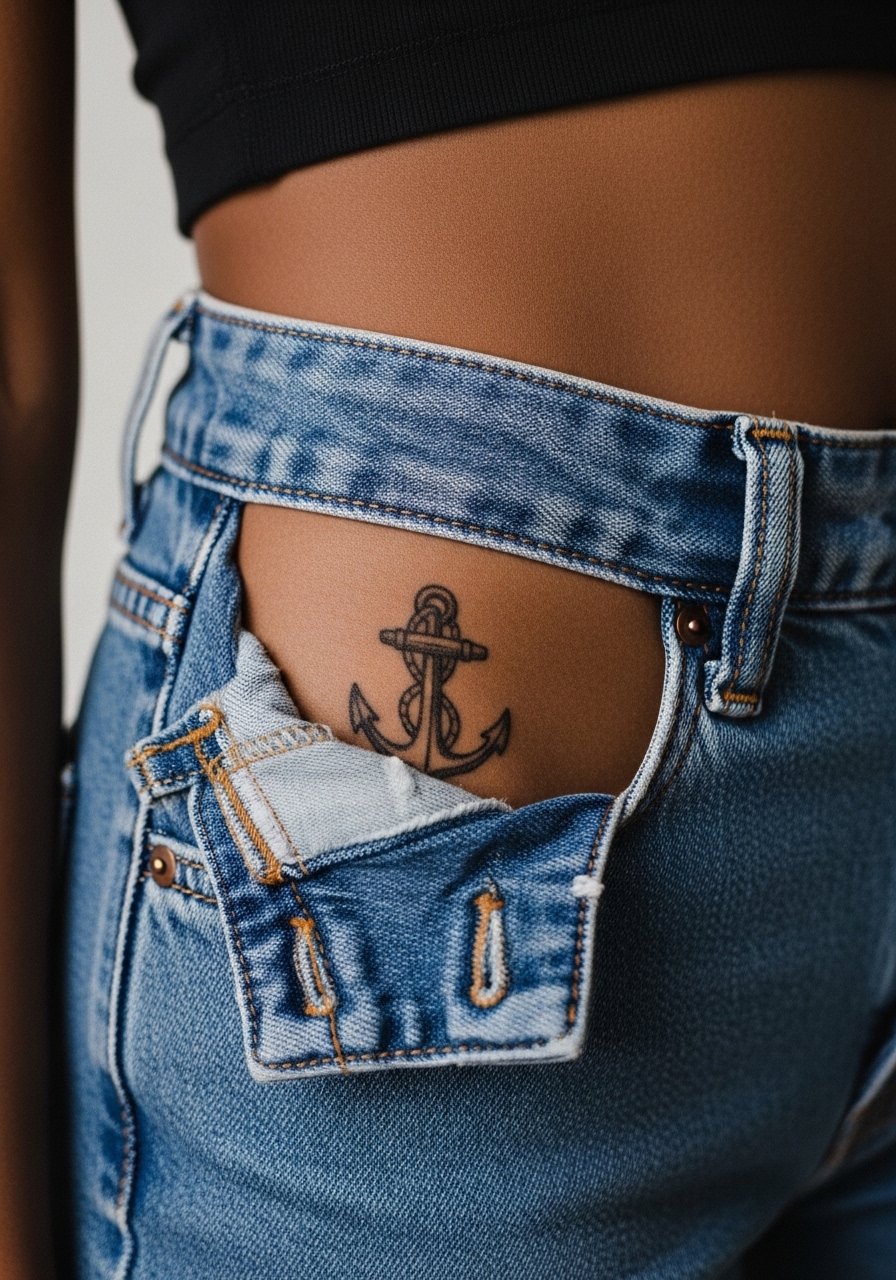
Hip placements are ideal when the old tattoo is near the pelvis or waistline. A small anchor with thicker base shading covers dark smudges while keeping the silhouette compact. In the consult, ask for mapping that aligns the anchor base over the most visible part of the old ink. People sometimes ask for too many tiny ornaments around the anchor which can complicate future touch-ups. Hip sessions are moderate in pain and usually under an hour. This area heals beneath clothing, so choose breathable high-waisted bottoms for the appointment. For nights out, pair with a high-cut brief or swim bottom to show the anchor when you want.
18. Single Dot on the Nape
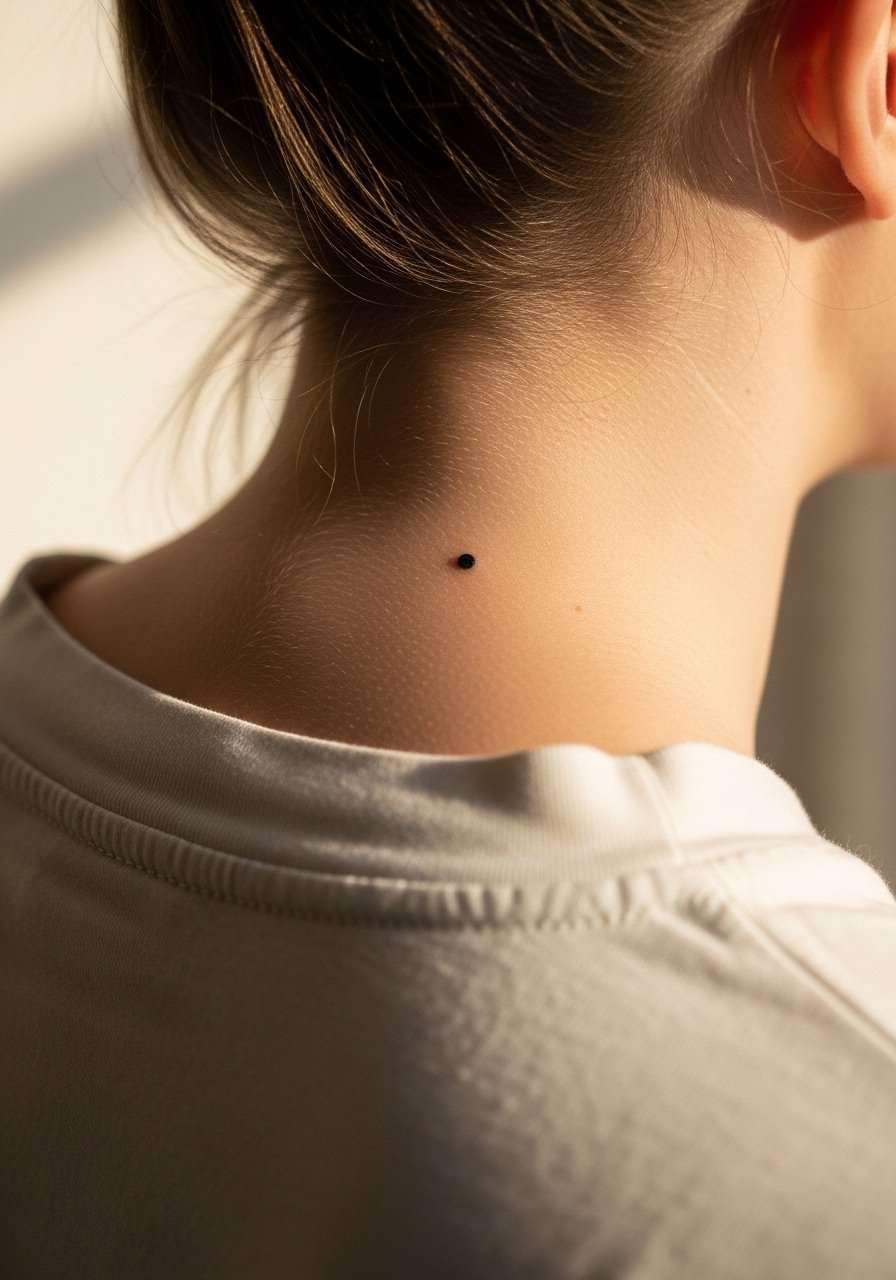
A single dot is deceptively good at hiding a tiny blemish or spot of old ink when placed precisely. Ask the artist to mark the dot and check symmetry with your posture before inking. The main mistake is assuming a single dot will fully hide a larger old mark. This works best when used as a focal point within a slightly larger planned piece. The nape is a sensitive area but sessions are very quick and healing is straightforward. If you want to show the dot, wear wide-neck tops or a hair updo that reveals the area.
19. Tiny Wave on the Inner Wrist
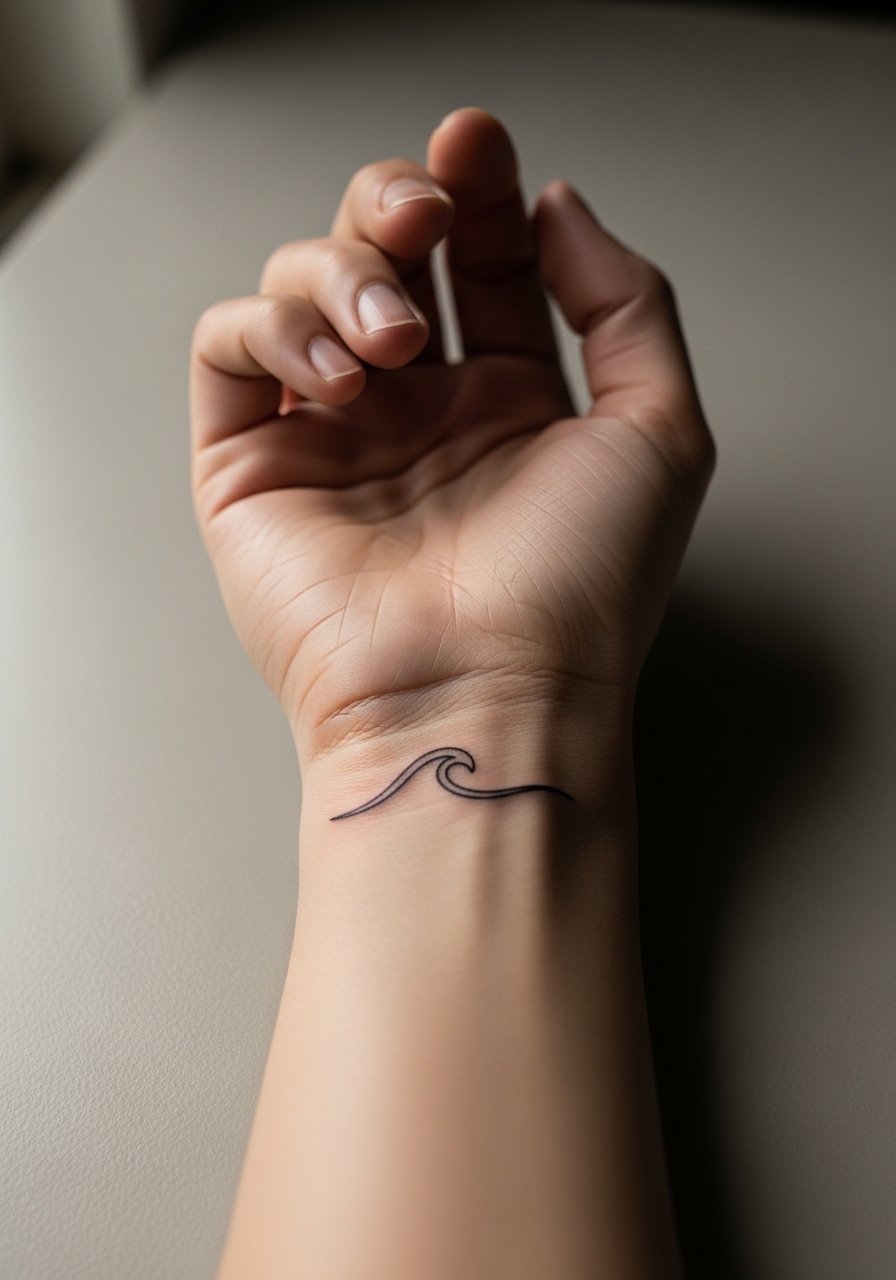
Inner wrist cover ups need respect for movement and washing. A short wave motif is effective for masking faint scripts or thin bands. Tell the artist to increase line contrast where the new line crosses the old ink and to avoid extra micro-detail. The mistake is asking for very fine curls that merge after healing. Wrist placements often require a touch-up within two to three years. Sessions are brief and pain is low to moderate. Style it with slim bracelets that you can remove during healing and a thin chain bracelet for when the area is settled.
20. Minimal Solar Symbol on the Sternum
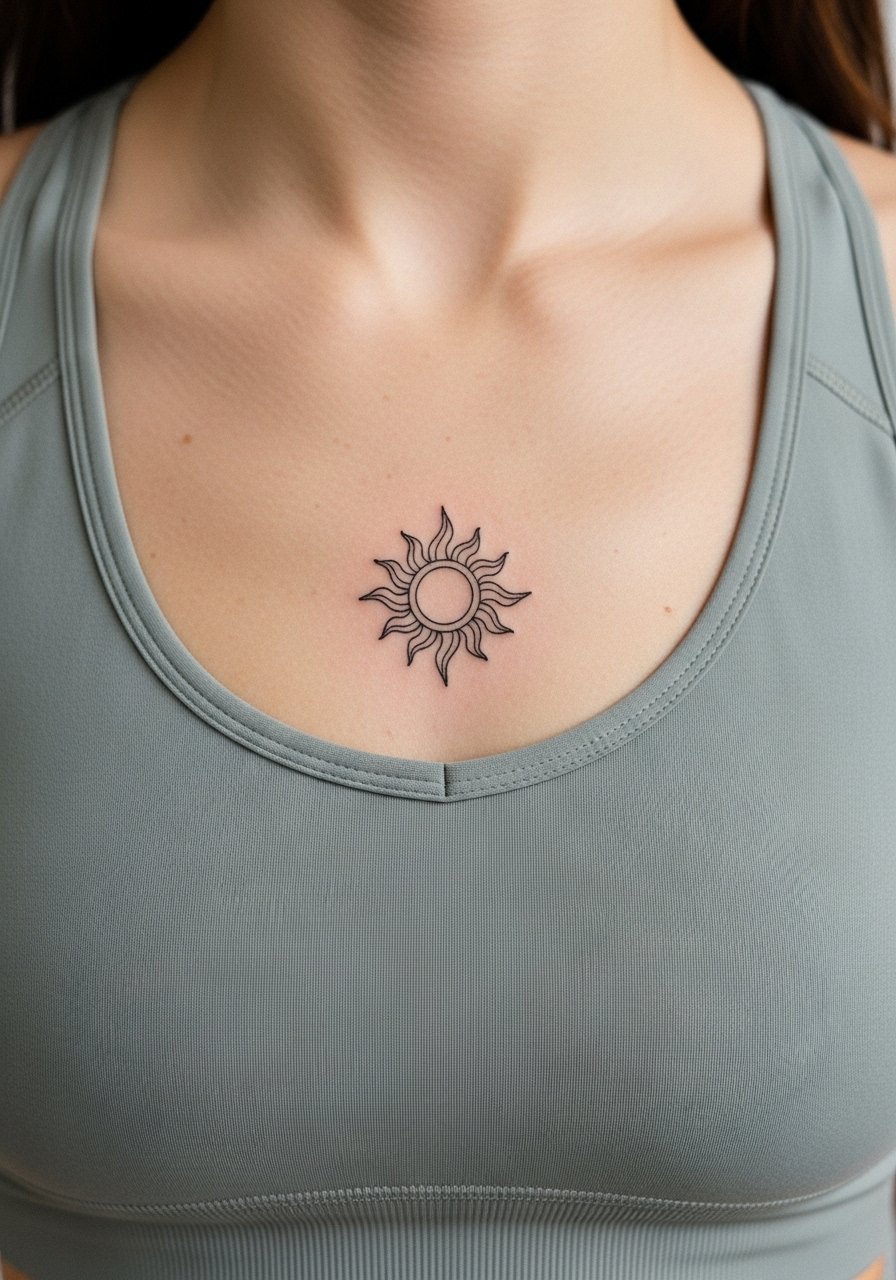
Sternum cover ups require careful planning because the skin moves with breath. A small solar motif with radiating short lines lets the artist place denser ink where the old mark sits and airy rays elsewhere. During consults request a test stencil while lying down and while standing so the artist sees how the piece shifts. The common error is wanting too many fine radial lines that blur as the skin stretches. Sternum sessions are sensitive and usually longer than you expect. For the appointment wear a fitted sports bra so the artist can access the area without full exposure. Post-session consider tops that do not press directly on the band during the first week.
21. Minimalist Spine Line on the Lower Back
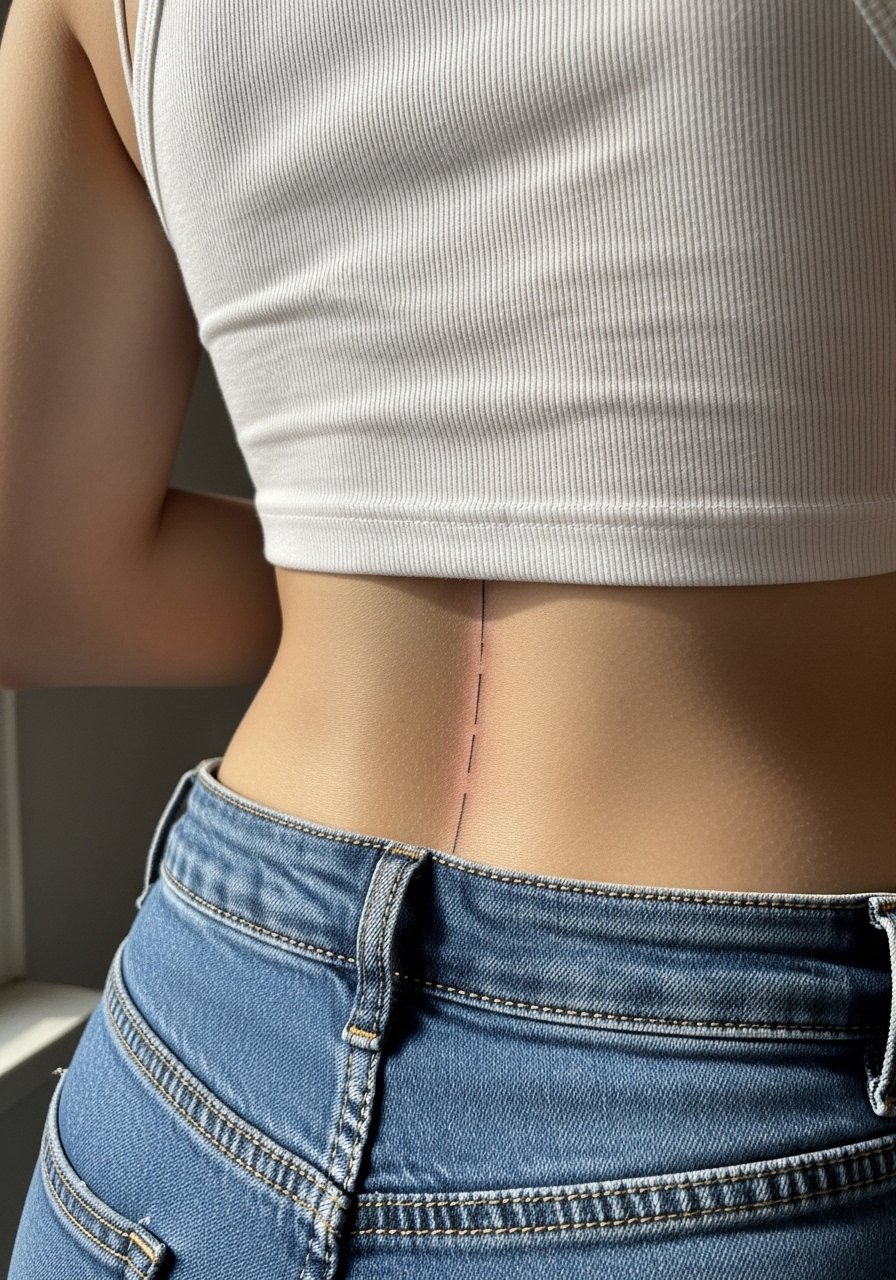
This vertical line or tiny spine motif is useful when an older lower-back design needs softening or partial coverage. Ask the artist to place the darkest saturation at the midpoint where the old ink is most visible and to taper toward the ends. The mistake is requesting a wide block of ink that competes with clothing lines. Lower back skin is relatively stable so touch-ups are often minor, and sessions are moderate in length. For the session wear a tank top you can pull up or a shirt you can tie so only the lower back is exposed. Pair the healed piece with low-rise or high-waisted bottoms depending on how much you want to show.
Frequently Asked Questions
Q: How do I know if a minimalist cover up will actually hide my old tattoo?
A: It depends on the old tattoo's size, saturation, and color. Dark, dense areas need either saturated blackwork or patterns that concentrate ink over the old lines. Lighter, thin marks often respond well to delicate designs that incorporate stipple or negative space. Bring clear photos and request a stencil preview at the consultation. Search local portfolios, hashtag feeds, and community forums to find artists who show healed cover-ups on similar skin tones.
Q: Will fine line cover ups on ribcage or sternum blur faster than blackwork?
A: Fine line on ribs or sternum can blur sooner than saturated blackwork because the lines are thinner and the skin moves. Some artists insist spacing and controlled depth make fine line last. Others prefer using slightly heavier lineweight or mixing stipple so the design reads long-term. Talk specifics with your artist and ask to see healed examples for that placement.
Q: Can I get a touch-up included when I book a small cover up?
A: Many shops offer an included touch-up window, but policies vary. Ask about touch-up timing and whether it is built into the price or offered as a separate appointment. Be clear about what you expect from longevity and how many touch-ups the artist recommends for your skin type and placement.
Q: How should I dress for a ribcage or sternum cover up session?
A: Wear a fitted sports bra or a cropped top you can lift that does not require full undressing. If the piece is lower on the ribs a loose tank that you can pull up is ideal. For ankle or calf sessions, loose shorts work best. One practical option is a zip-up hoodie you can open or remove without disturbing hair or makeup.
Q: Are there placements I should avoid for minimalist cover ups if I want low maintenance later?
A: High-friction zones like hands, fingers, and outer feet need more frequent touch-ups. Areas with thin skin over bone such as the ankle and ribs can also fade or soften faster. If low maintenance matters most, choose forearm, upper arm, or calf placements where skin is more stable and shading holds well.
Q: How do I find an artist who specializes in small cover ups without naming specific shops?
A: Use discovery pathways like searching local shop portfolios, hashtag searches for fine-line and cover-up tags, community forum threads where people post healed pictures, and walk-in days at reputable studios to ask for portfolios. Look specifically for healed cover-up photos and similar skin tones so you can assess real outcomes.
