Fine line and saturated Cheshire Cat designs are both all over feeds right now, and what looks flawless on screen often behaves differently on skin over time. Trends push people toward tiny, delicate grins and rainbow fades, but longevity depends on placement, spacing, and how bold the contrast is. The list below gives modern twists on the Cheshire Cat, the trade offs to expect, and specific wardrobe tips so your new piece reads the way you want it after it heals.
1. Fine Line Cheshire Grin on Inner Forearm
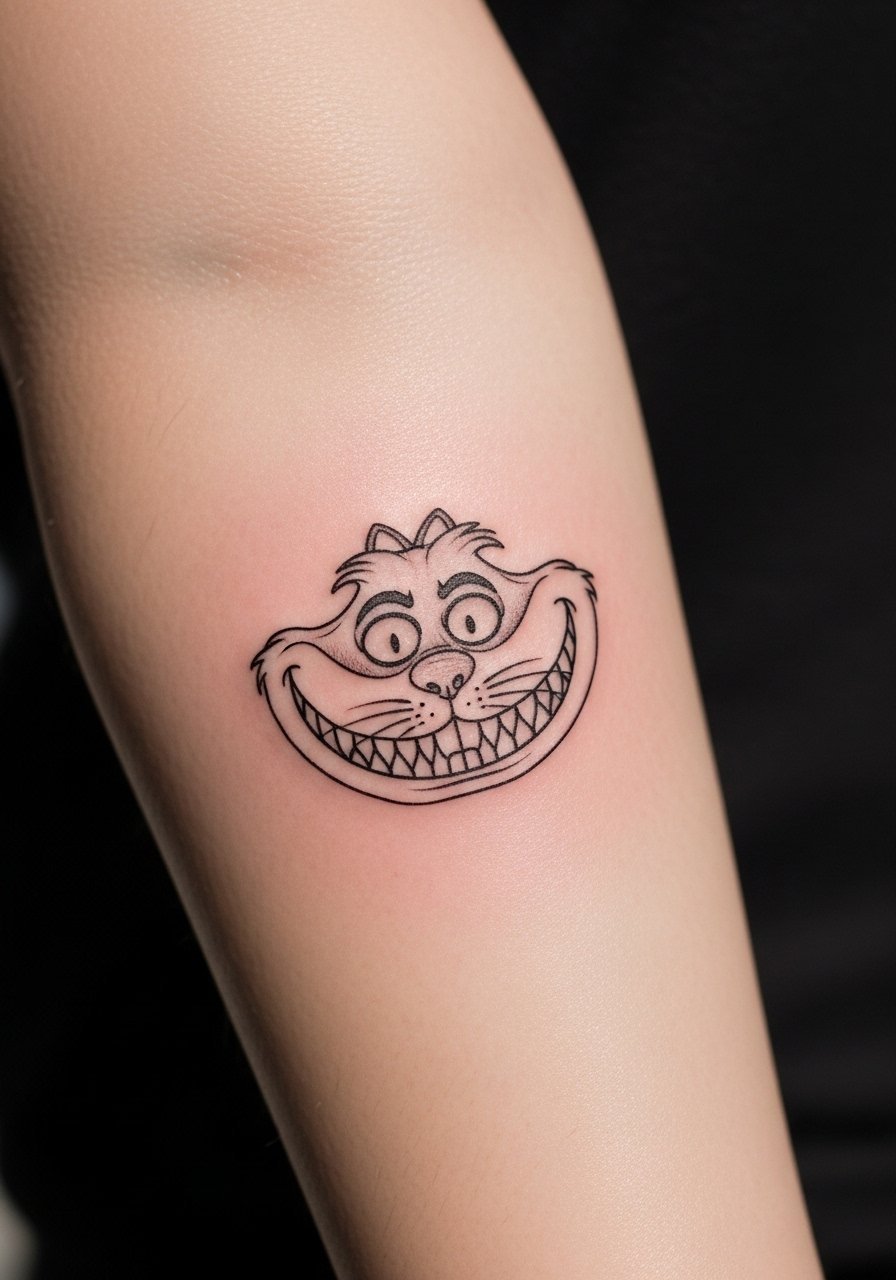
This tiny inner forearm grin is perfect if you want a discreet nod to the character without heavy color. Fair warning: the inner forearm reads extremely well when line spacing is generous. Ask your artist to scale the grin so the negative space between whiskers and teeth is at least a few millimeters. Common mistake is requesting ultrafine contour with tiny teeth, which tends to blur into fuzz by year three. Expect a one to two hour session for a small piece and a touch-up around year two if you spend time in the sun. For showing it off, roll sleeves and pair with a loose button-down shirt that frames the forearm without covering it.
2. Neo-Traditional Full Cat on Upper Arm
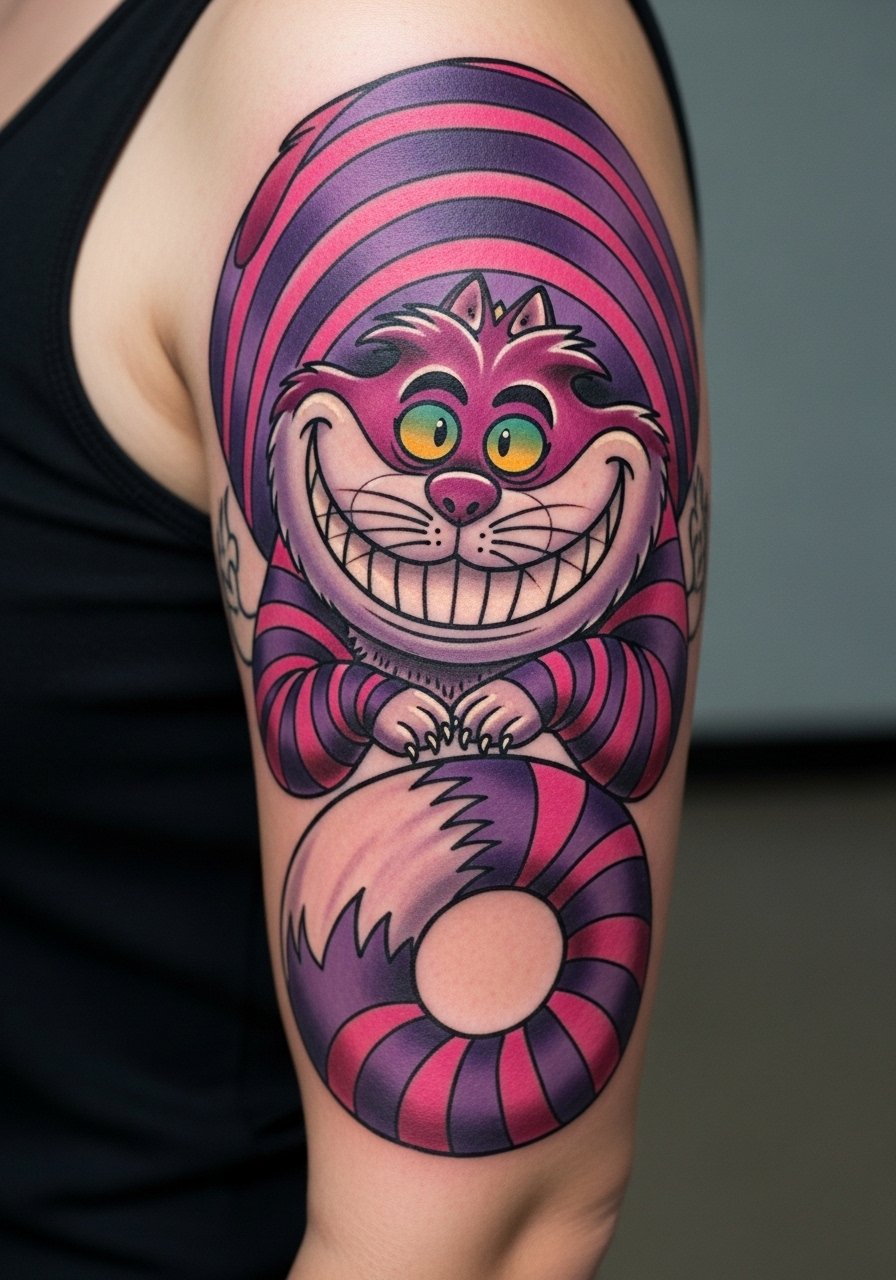
This version leans into bold outlines and strong saturation so the grin keeps its character from a distance. Upper arm sessions feel moderate on pain, often a three to four out of ten, and they let artists layer color for longevity. Tell your artist you want stronger outlines around the teeth and eyes so the features age into a readable silhouette. The mistake to avoid is asking for pastel fills without anchor lines. Pastel fades faster and makes the grin read as a blur in a few years. Pair the piece with rolled-up sleeves or a tank top when you want to show off the saturated colors.
3. Micro-Grin Behind the Ear, Below the Hairline
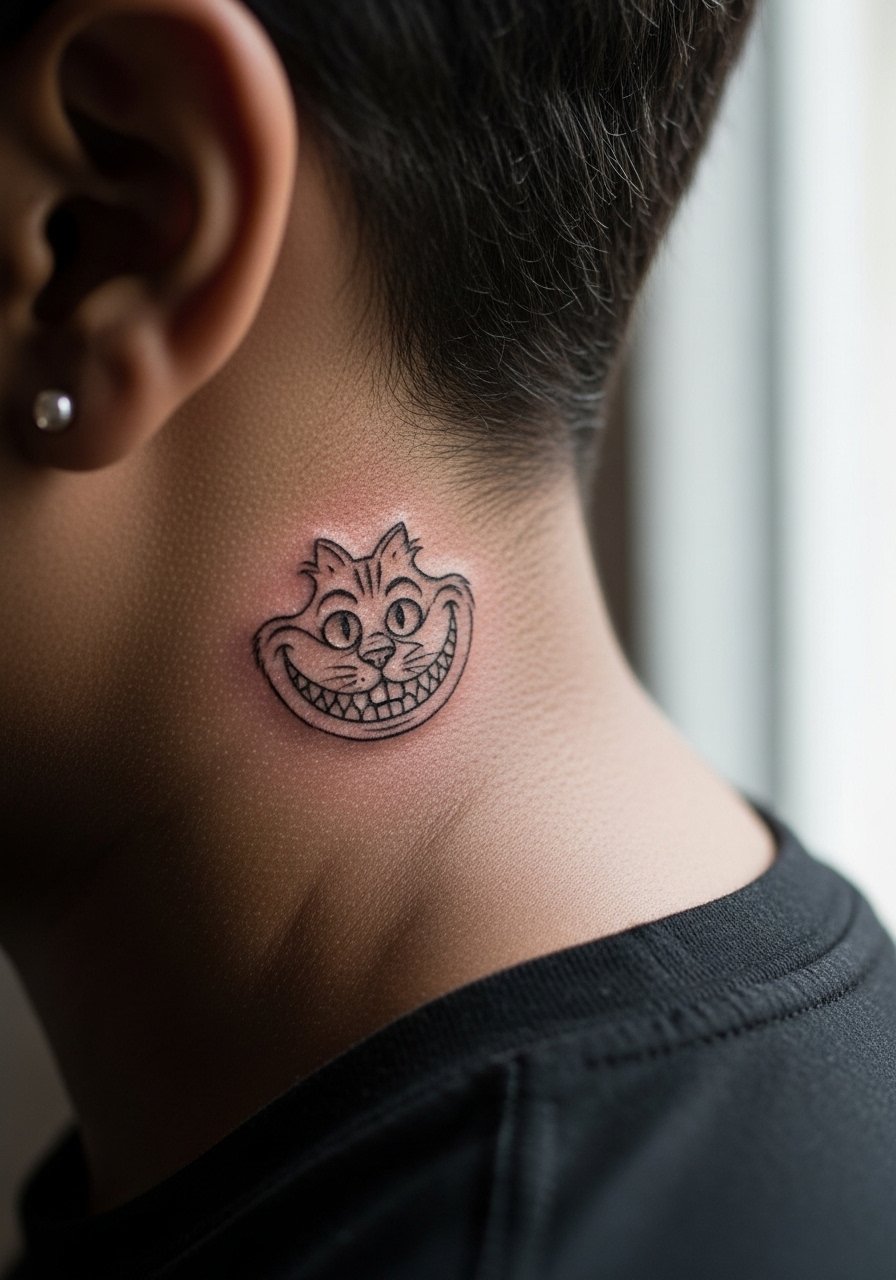
A behind-the-ear micro grin reads as a secret detail. The placement is sensitive for visibility rather than pain, and it needs careful stencil placement so the smile sits against the hairline naturally. Artists split on micro work in this zone. One camp argues the skin and hair growth make lines blur faster. The other camp says proper depth and slightly bolder linework keeps micro pieces stable. When you consult, ask the artist which approach they use and why. Wear an easy updo to the session so the artist can access the area. This tiny tattoo takes under an hour and usually needs a touch-up by year two.
4. Surreal Ribcage Cheshire with Whip Shading
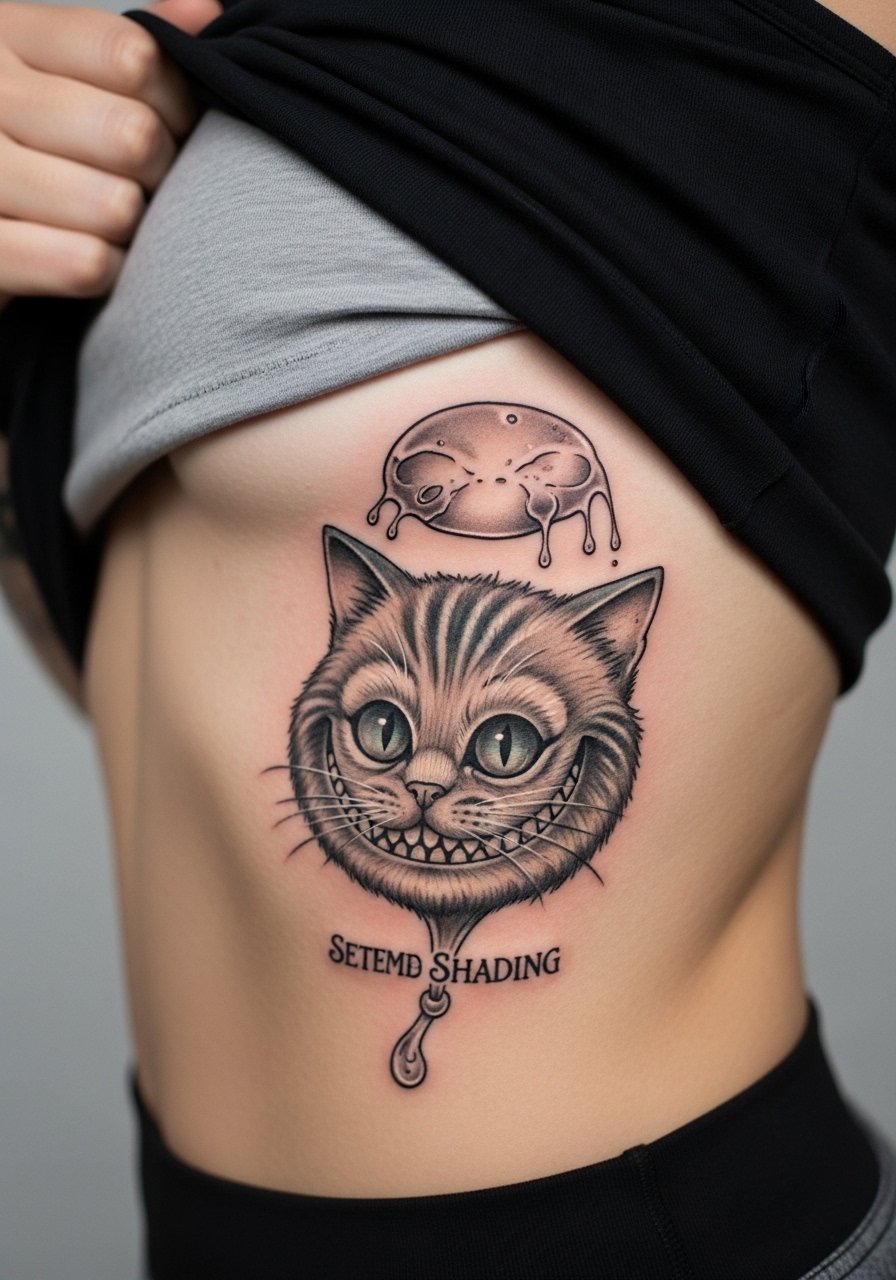
Ribcage designs let you go large and dramatic, but fair warning about pain. The ribcage is commonly a seven out of ten on most pain scales. That intensity matters because sections may require breaks, which affects how color and shading layer. For this surreal take, ask for whip shading instead of dense stipple in tight areas so the gradients stay readable as the skin stretches. A common error is packing too much tiny detail into the ribs. Dense detail loses clarity there. Session time can span multiple sittings. Wear a cropped top you can lift easily to keep the area accessible during breaks.
5. Minimalist Grin on the Ankle
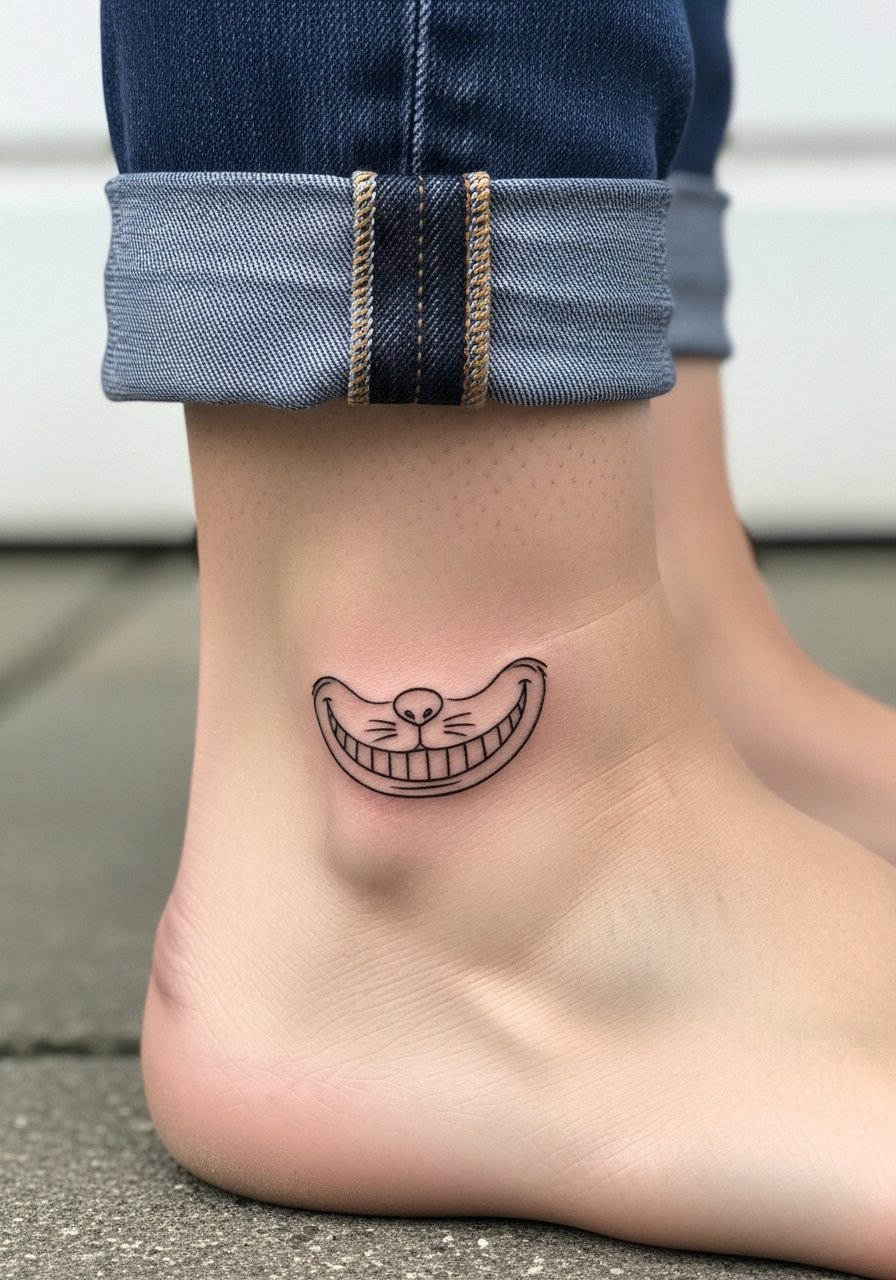
Small ankle pieces are great for subtlety and mobility. The spot takes short sessions but suffers from friction from socks and shoes during the first week. Ask for a slightly bolder outline than you think you need. The mistake I see most often is asking for hairline thin outlines that vanish within a year because of constant rubbing. Expect minor touch-ups at year one if you wear ankle boots daily. For showing the piece, roll jeans and wear sandals or low-top sneakers that keep the ankle visible.
6. Collarbone Smirk with Script Accent
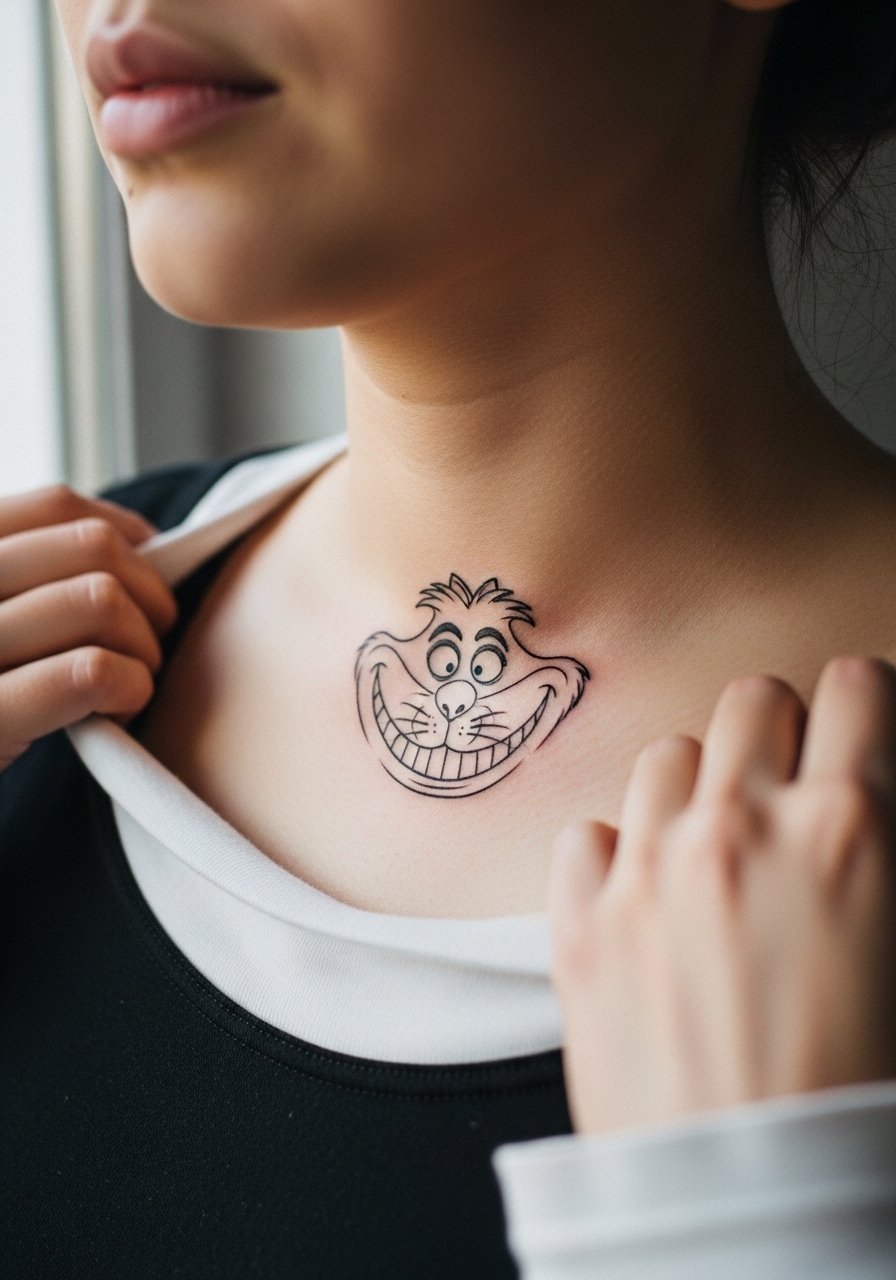
A collarbone grin sits beautifully with small script accents. Placement reads larger on skin than on reference images so try on a template during consultation. A common mistake is centering script too close to the collarbone line. Ask for the text to sit slightly below the bone so movement and clothing do not rub the letters. Sessions are comfortable and short. Pair the tattoo with an open-neck blouse or a thin chain necklace to draw attention to the area without competing with the linework.
Studio Day Picks
The wrist and collarbone pieces above need different prep than the ribcage and upper arm work, so these five items smooth the session and the first week.
-
Stencil transfer paper kit. Lets you test placement on skin before the needle touches you, which is key for the collarbone and forearm layouts above.
-
Topical numbing cream. Apply per instructions about 45 minutes before a ribcage or sternum session to reduce the initial spike of pain.
-
Thin protective film roll. Useful for ankle and finger tattoos where friction from clothing and hand use is constant in the first 48 hours.
-
Fragrance-free gentle body wash. Cleans the area during showers without stripping pigment from fine line work on the forearm and collarbone.
-
Aquaphor healing ointment. Thin applications over the first two days help lock in moisture for small linework pieces.
7. Full Back Spread Cheshire with Negative Space
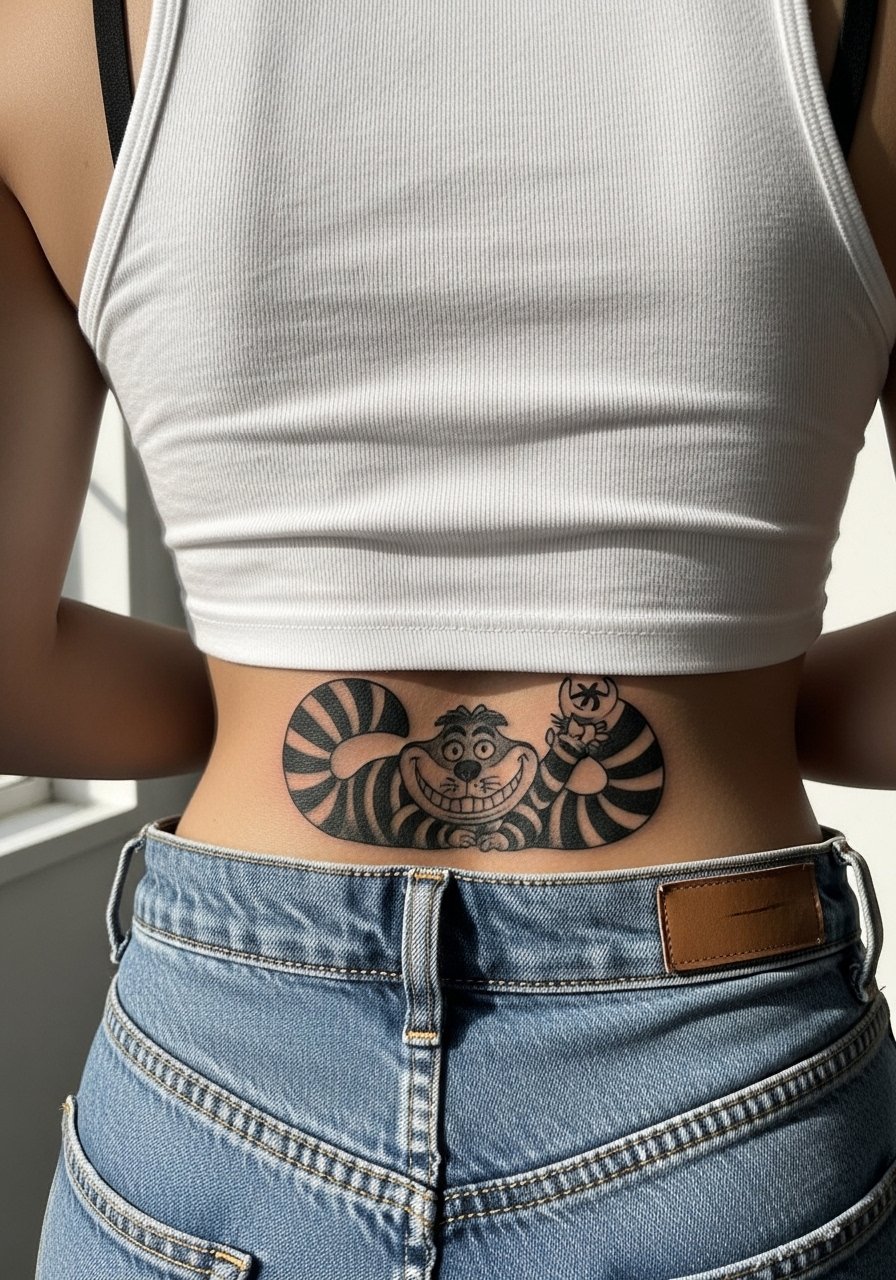
A full back layout lets negative space create the grin and the eyes. This style ages well when artists balance heavy black blocks with breathing room. The common version that ages poorly crams too many fine details into a single silhouette. When you consult, ask for tests of how the negative space reads at different distances so the composition holds up from several feet away. Back pieces require long sessions over multiple days. For showing it off in summer, opt for open-back dresses or halter tops that reveal the negative space without distraction.
8. Thigh-Side Cheshire with Floral Frame
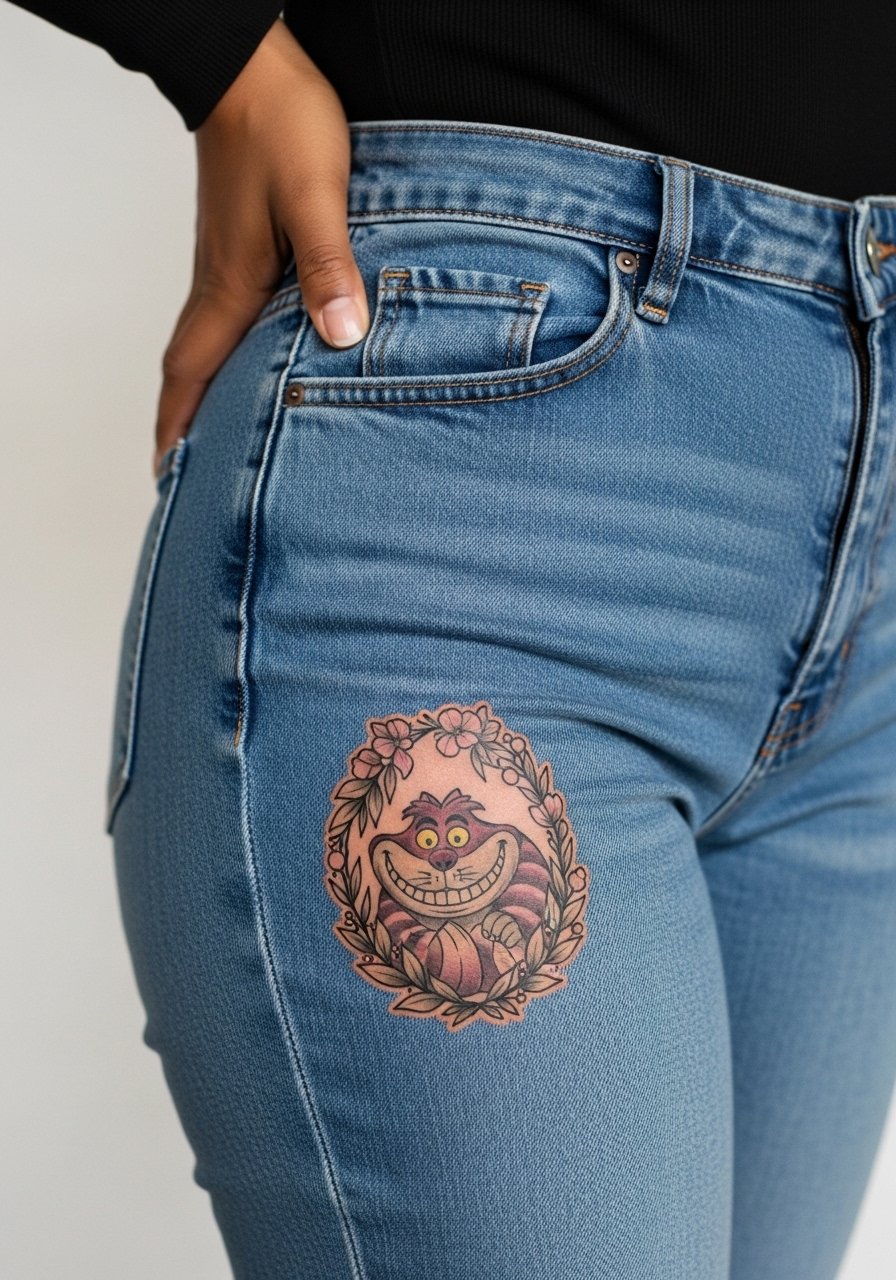
Thigh placements allow scale and floral framing that make a Cheshire Cat feel feminine or moody depending on color choice. The skin there tolerates detail well, so dot work and stipple shading are excellent options. A mistake is requesting too many micro details near the groin line where movement causes blurring. Session time can be long but manageable because you can sit or lie in ways that protect circulation. Wear high-waisted shorts or a wrap skirt to the appointment so the artist can access the upper thigh easily.
9. Tiny Finger Grin, Single-Session
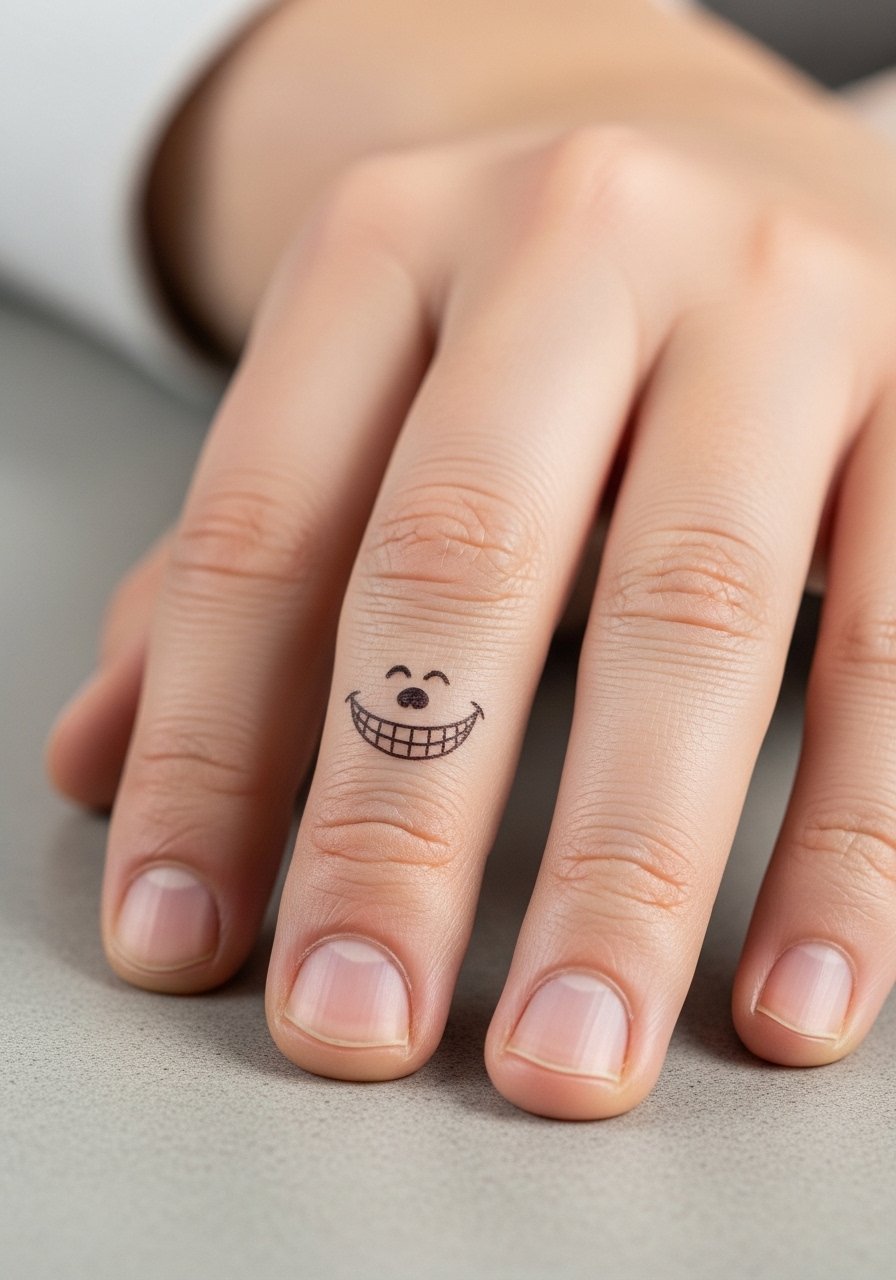
Finger tattoos read sharp at first and then soften quickly because the skin regenerates faster there. The biggest mistake is asking for dense detail on such a small canvas. Go for a bold tooth or a single whisker mark rather than a full-face composition. Expect a one-off session of 20 to 45 minutes and plan for touch-ups at year one or sooner. Finger placements also interact with jewelry choices. A slim stackable ring set can frame a small grin without overwhelming it.
10. Calf Playful Cheshire in Motion
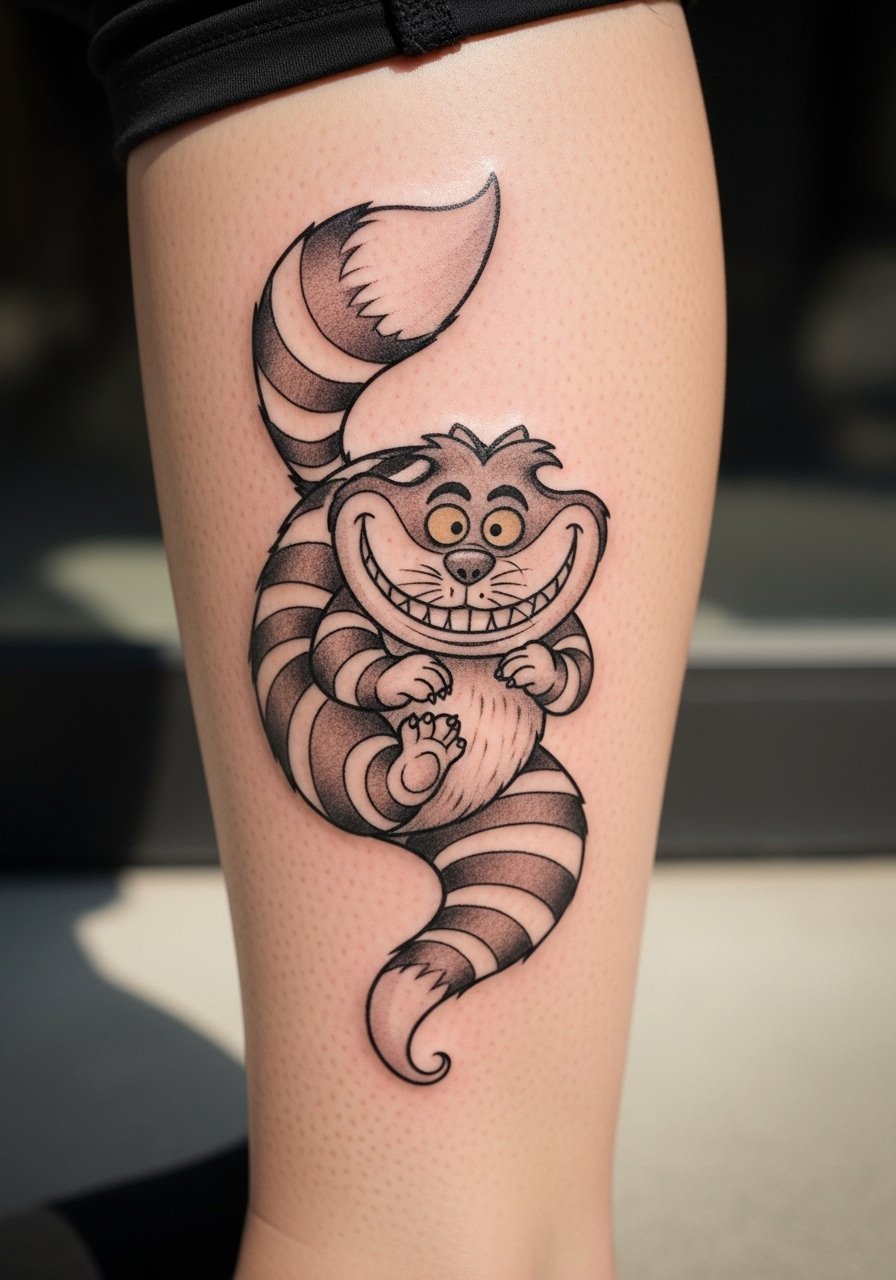
The calf handles movement well and lets artists create a sense of motion with the cat’s tail and grin. One practical note is that calves can hide well under pants, which helps if you want the option of concealment. A common error is placing the main focal point on the back of the knee where bending causes distortion. Tell your artist you prefer the outer calf for a steady canvas. Sessions here are mid-length and usually under three hours. Pair the piece with cropped trousers or loose linen shorts when you want the motion to show.
11. Sternum Cheshire with Minimal Color
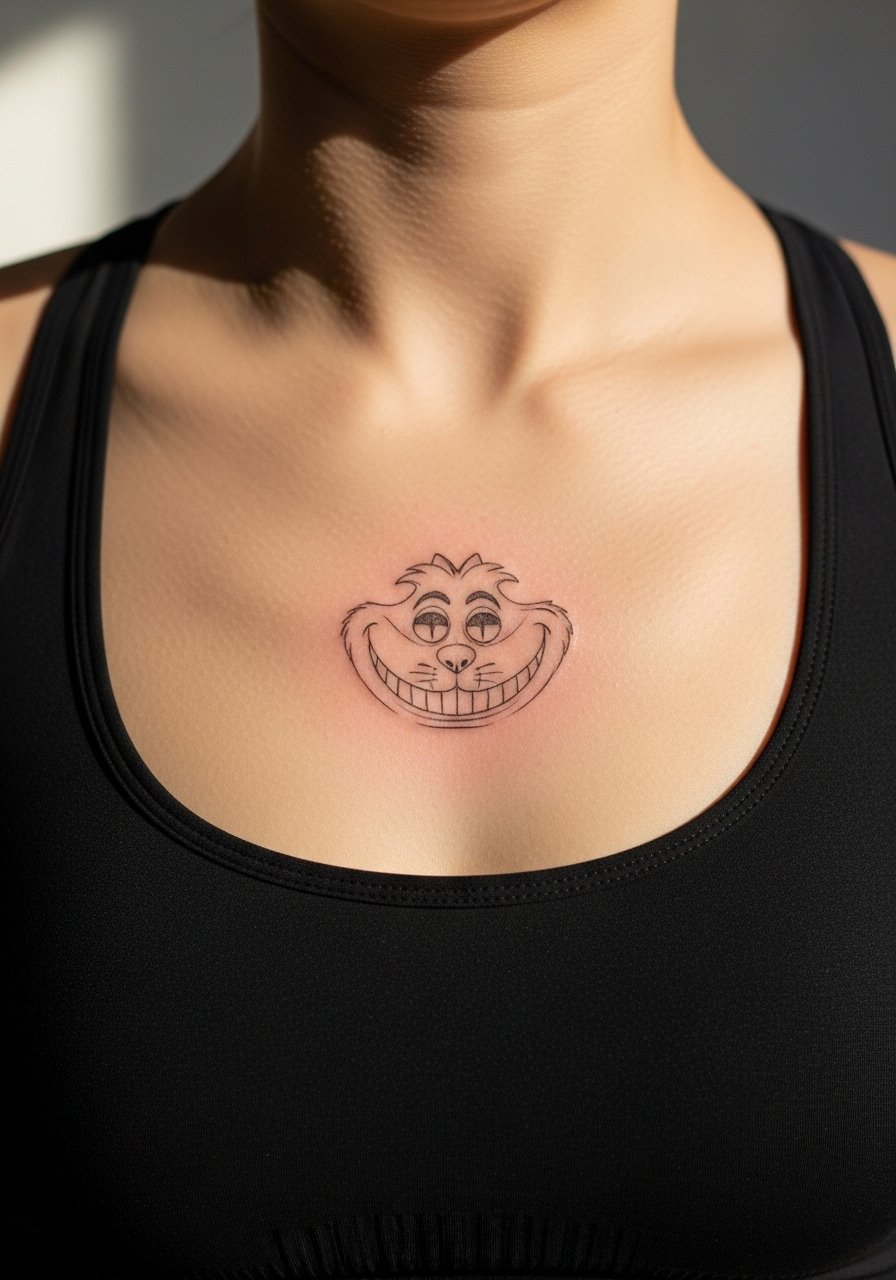
Sternum tattoos carry a visual punch but require sensitive handling during consultation. The skin there can be tricky for thin linework. One camp of artists pushes finer lines and lighter pressure for healing, and the other camp recommends slightly stronger linework to account for stretch and chest movement. Name both approaches during your consult and ask which fits your skin type. The piece is intimate and sometimes visible under low necklines, so consider wardrobe choices during the healing phase. Sessions can be intense but short if kept minimalist.
12. Inner Bicep Cheshire with Micro-Realism Eye
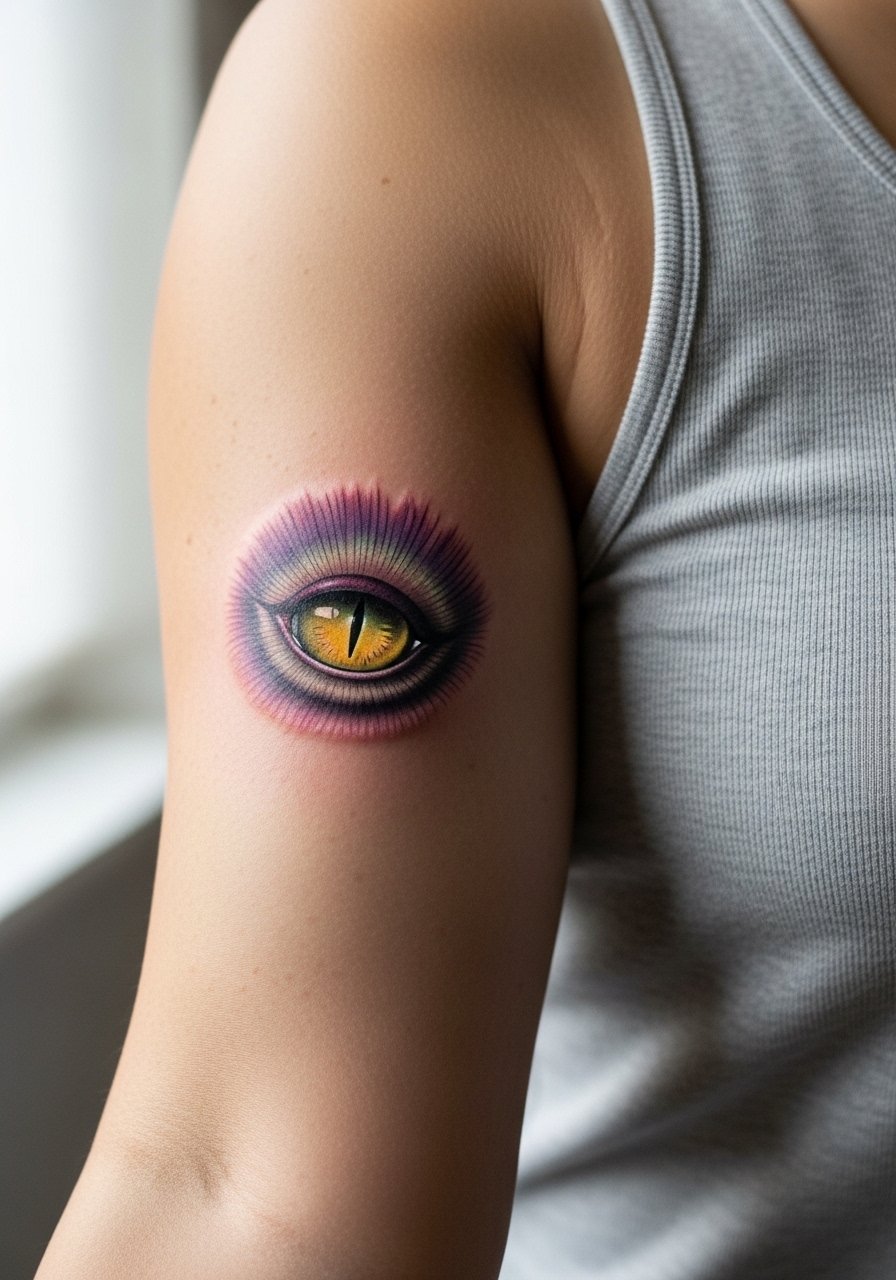
The inner bicep is a soft zone that holds micro-realism nicely because it does not experience constant friction. Tell your artist to keep the shading soft and the contrast high around the pupil so the eye remains legible as it heals. A common error is overworking contrast in tiny areas which can lead to patchy healing. Sessions are moderate in length and can be scheduled in a single sitting. For the appointment wear a tank top you can move the strap aside.
13. Forearm Pocket Watch Cheshire Combining Script
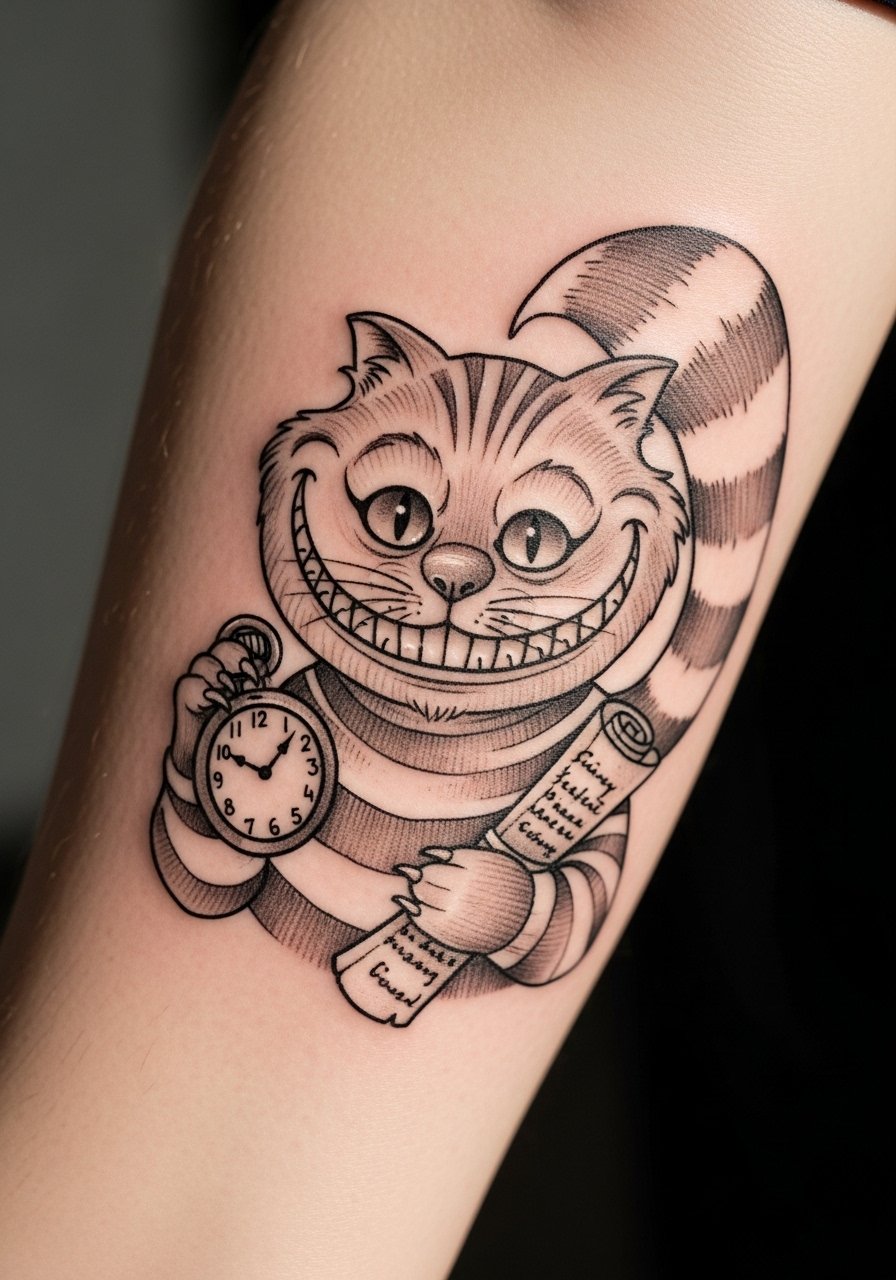
Combining a pocket watch with the Cheshire Cat creates a narrative arm piece that suits the forearm well. The forearm ages favorably when spacing and lineweight are planned to avoid dense lettering near the wrist. A mistake is embedding tiny script in shaded zones where legibility drops as the ink settles. Ask your artist for a layout mockup that shows the script scale on your arm. Sessions can last two to four hours. Show it off with rolled sleeves and a slim leather bracelet to balance the vintage vibe.
14. Geometric Mandala Cat on the Shoulder Cap
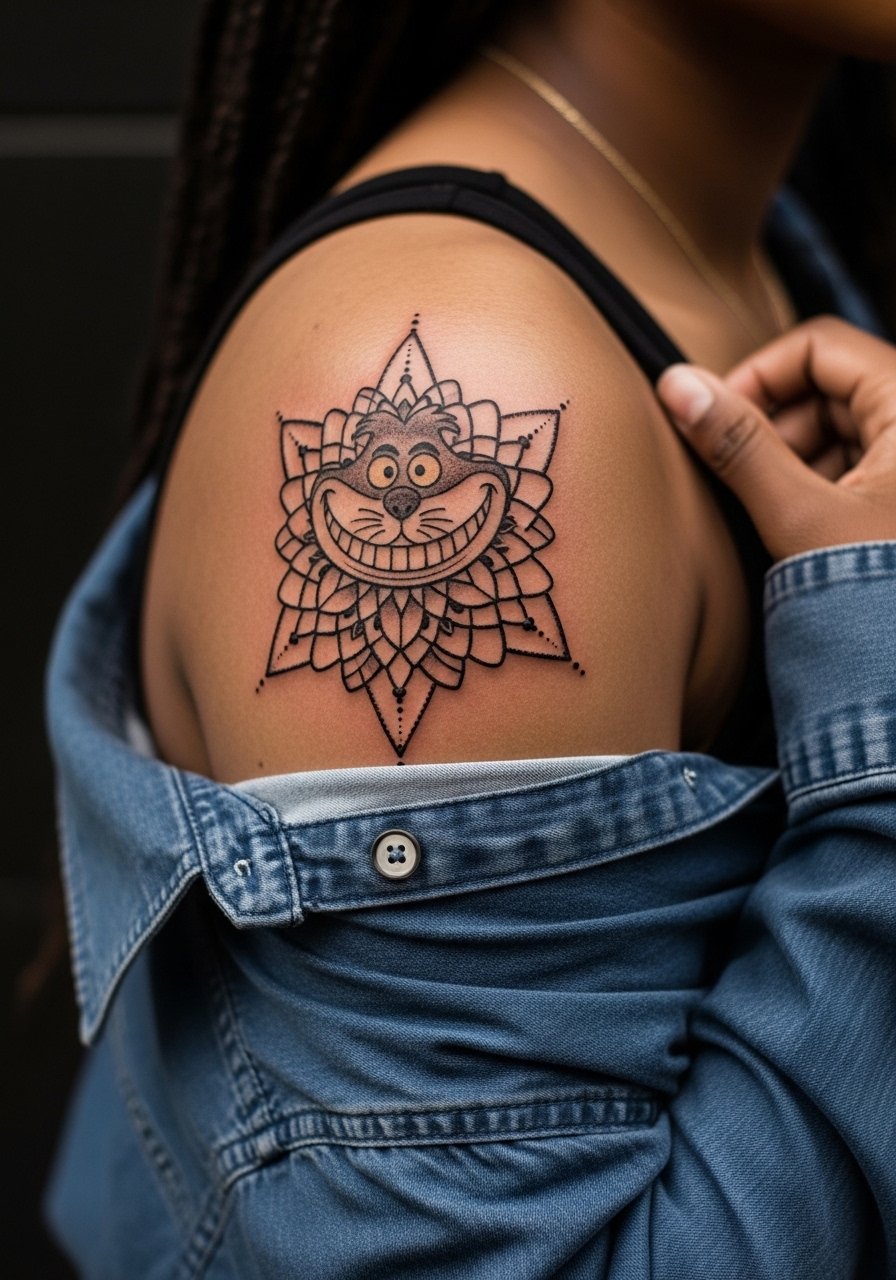
A shoulder cap mandala that incorporates the grin relies on precise spacing and dot work. There is a stylistic controversy here. One camp favors strict geometry with tiny dot work because it photographs stunningly. The other camp warns that very tight dot work on rounded shoulders can bleed into a muddle as skin shifts. The practical approach is to keep the dot spacing readable and to test a stencil curvature before committing. Sessions are often split into two for symmetry work. Wear a loose button-down you can slide off the shoulder for easy access.
15. Watercolor Wash Cheshire on the Calf
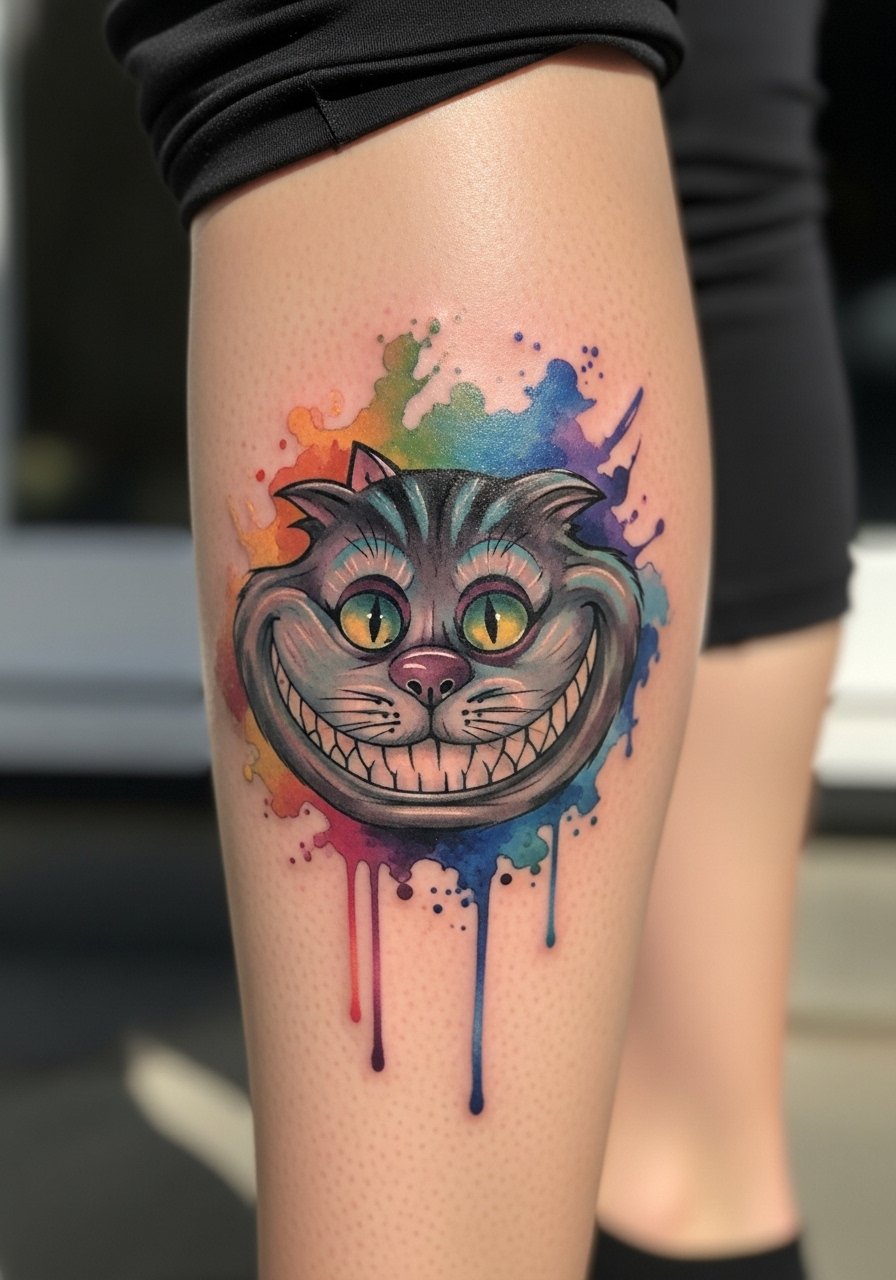
Watercolor effects look ethereal on the calf and allow the cat to feel otherworldly. Watercolor pieces age differently than lined work because they rely on pigment dispersion. The common mistake is skipping anchor lines around crucial facial features. Ask your artist to include subtle anchors so the grin survives into year three and beyond. Calf sessions are comfortable and can layer color over a couple of sittings. Pair the design with cropped trouser styles or slip-on sneakers for a casual reveal.
16. Micro-Realism Eye at the Nape of the Neck
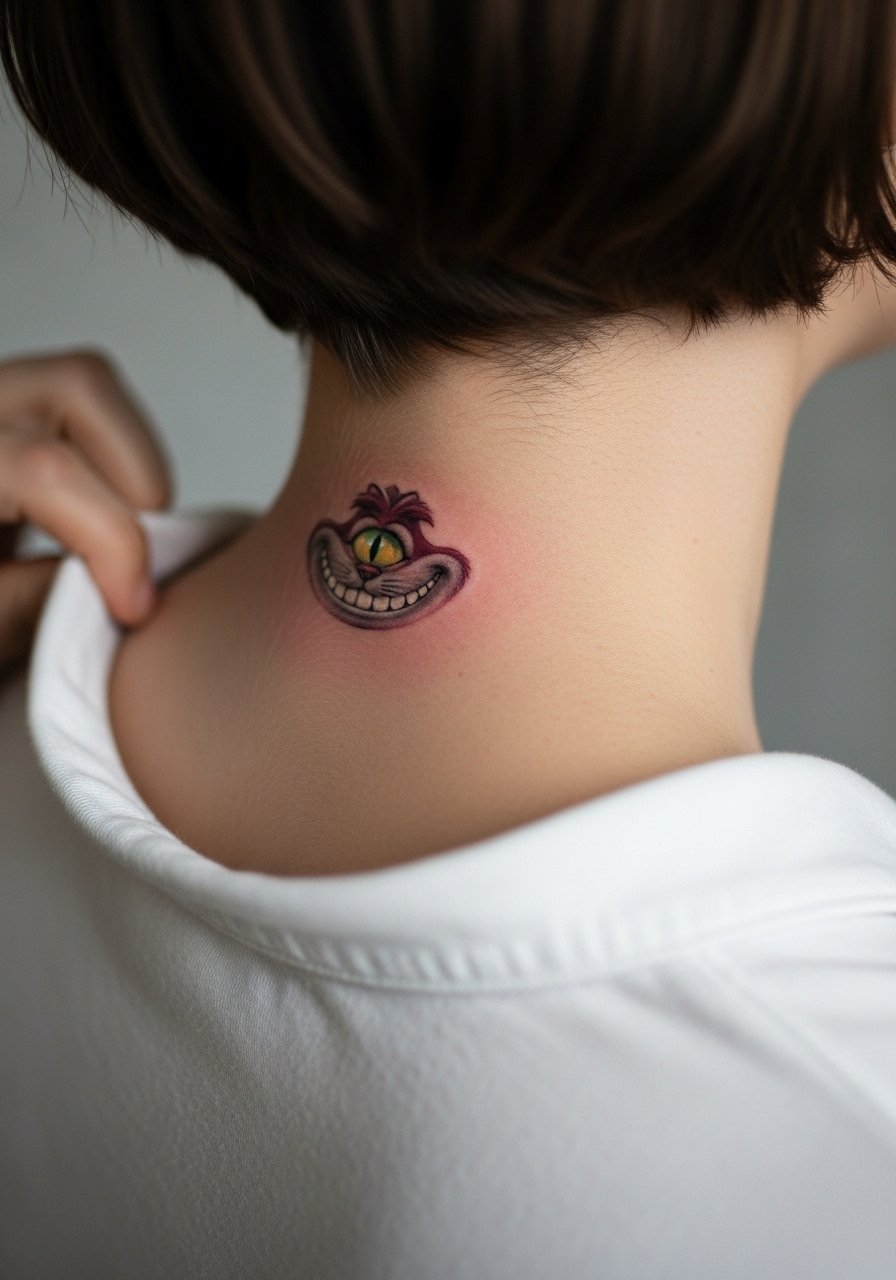
Nape placements are discreet and ideal for micro-realism as long as you plan for hair coverage during healing. The main mistake is using overly delicate shading that disappears under hair oils and constant friction from collars. Ask for slightly stronger contrast and schedule touch-ups in your consultation if you expect heavy hair contact. Sessions are relatively short. Wear a wide-neck shirt so the artist can access the area without you getting cold.
17. Half-Sleeve Cheshire Narrative with Dot Work
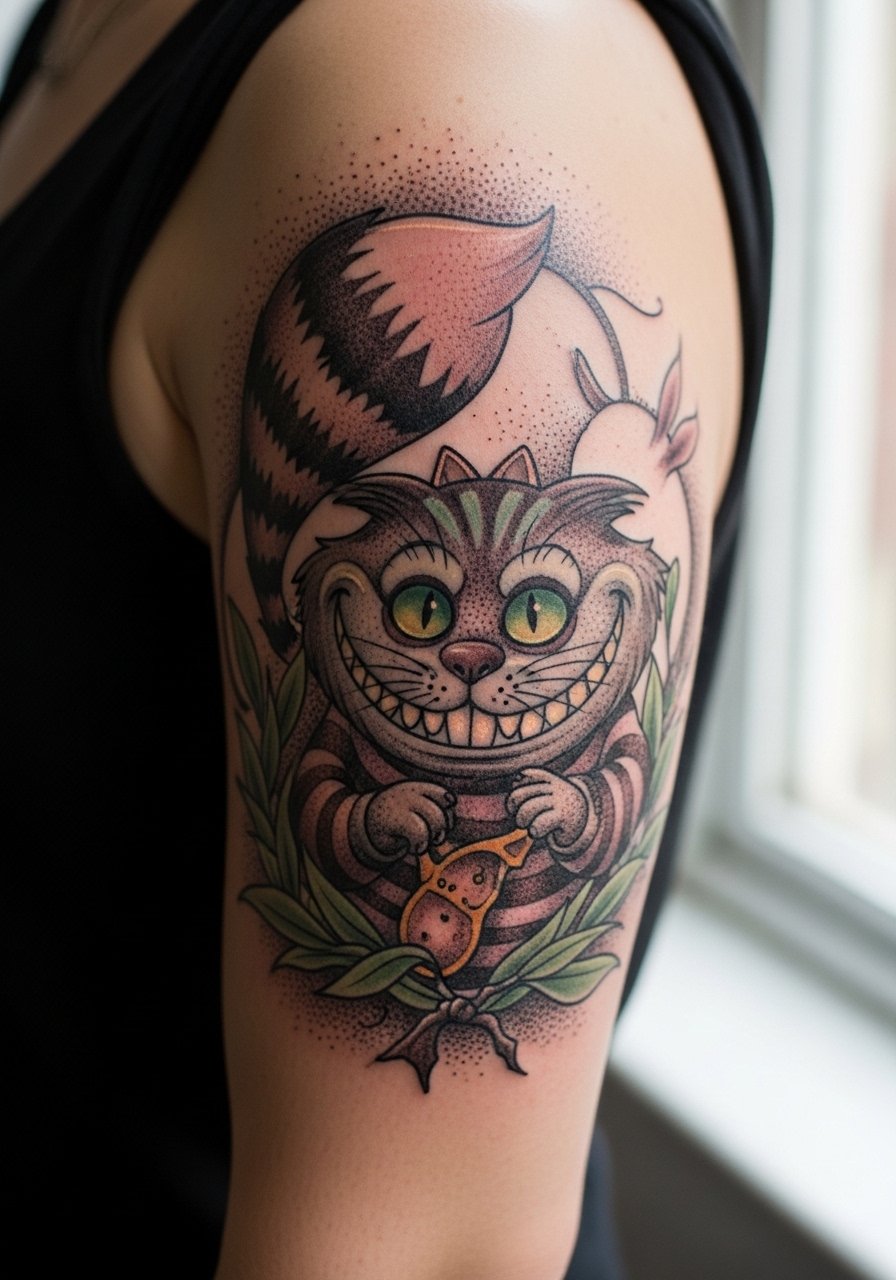
Half-sleeves let you tell a story across the arm and incorporate stipple shading to give the grin texture. The sizing and flow matter because arms twist and bend. A frequent error is starting the composition without mapping how the elbow fold affects continuity. Request that your artist mock the wrap in different arm positions. Expect multiple sessions across months. For the appointment wear a loose button-down shirt you can roll up to the desired sleeve length.
18. Tiny Wrist Grin with Bracelet Pairing
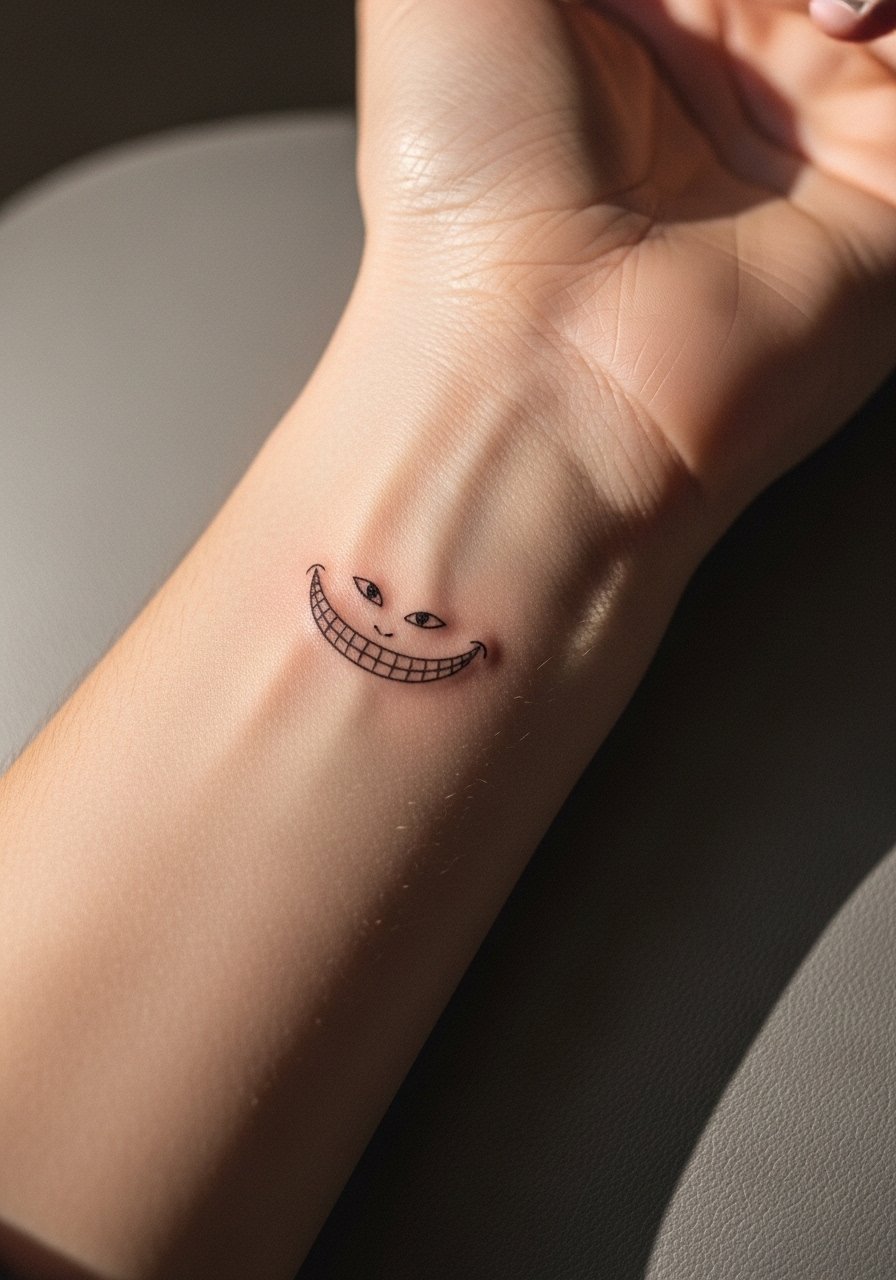
Wrist pieces are excellent for subtle visibility. The wrist takes frequent washing and sun exposure so linework must be bold enough to survive the daily life of hands. A mistake is choosing hairline strokes that vanish under daily wear. Ask for slightly higher saturation around the key points of the grin. Session time is brief and touch-ups common by year two. Style with a thin chain bracelet to draw gentle attention to the area.
19. Hip Curve Cheshire with High-Waist Pairing
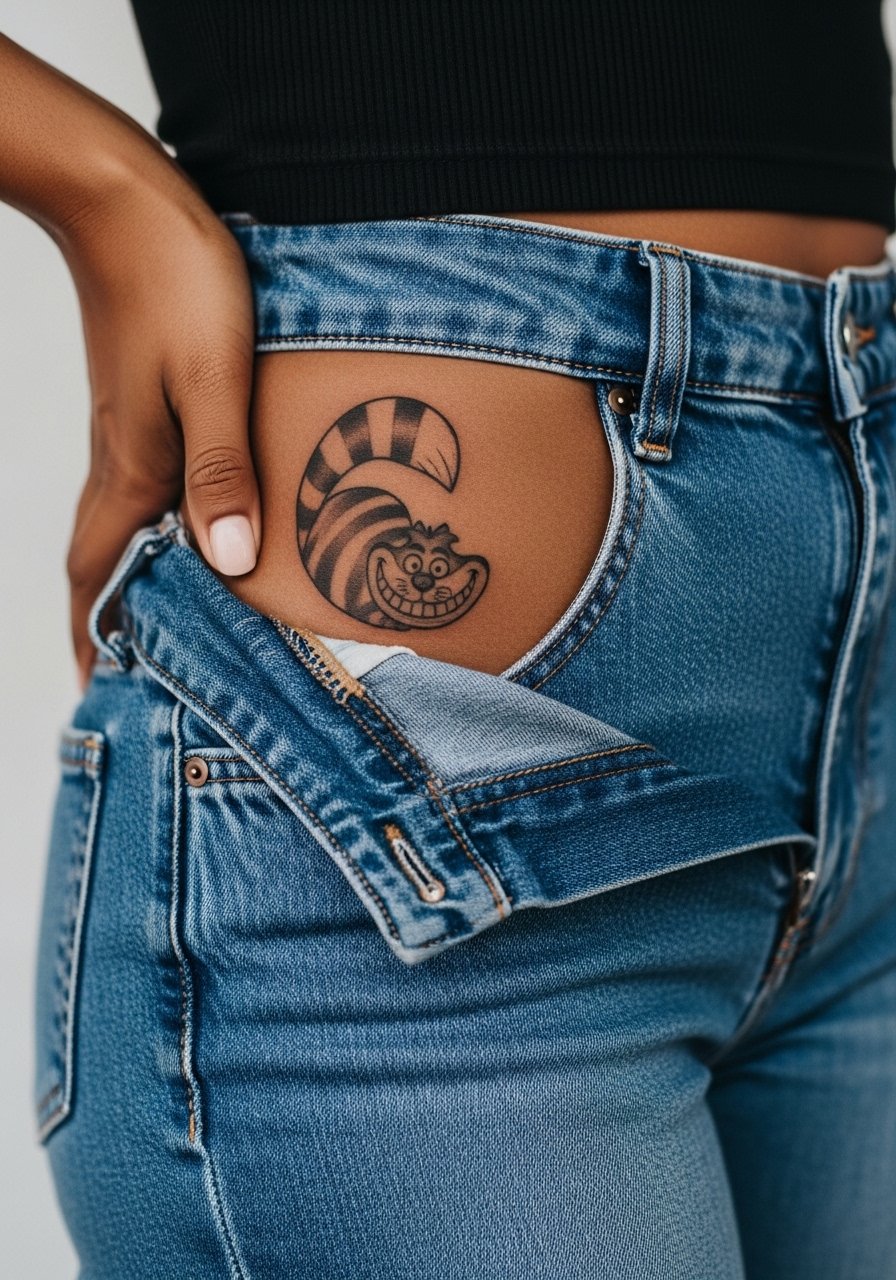
Hip pieces look great in curves and can follow the waistline for a flattering arc. The skin moves when sitting and bending so spacing is crucial. Ask your artist to test the stencil while you sit and stand so the curve reads in both positions. A common mistake is placing focal details too close to the waistband where friction is constant. Sessions are comfortable and can be done in one visit for a small piece. For showing the work choose high-waisted cuts or a bandeau top that highlights the arc.
20. Subtle Negative Space Tooth on the Lower Back
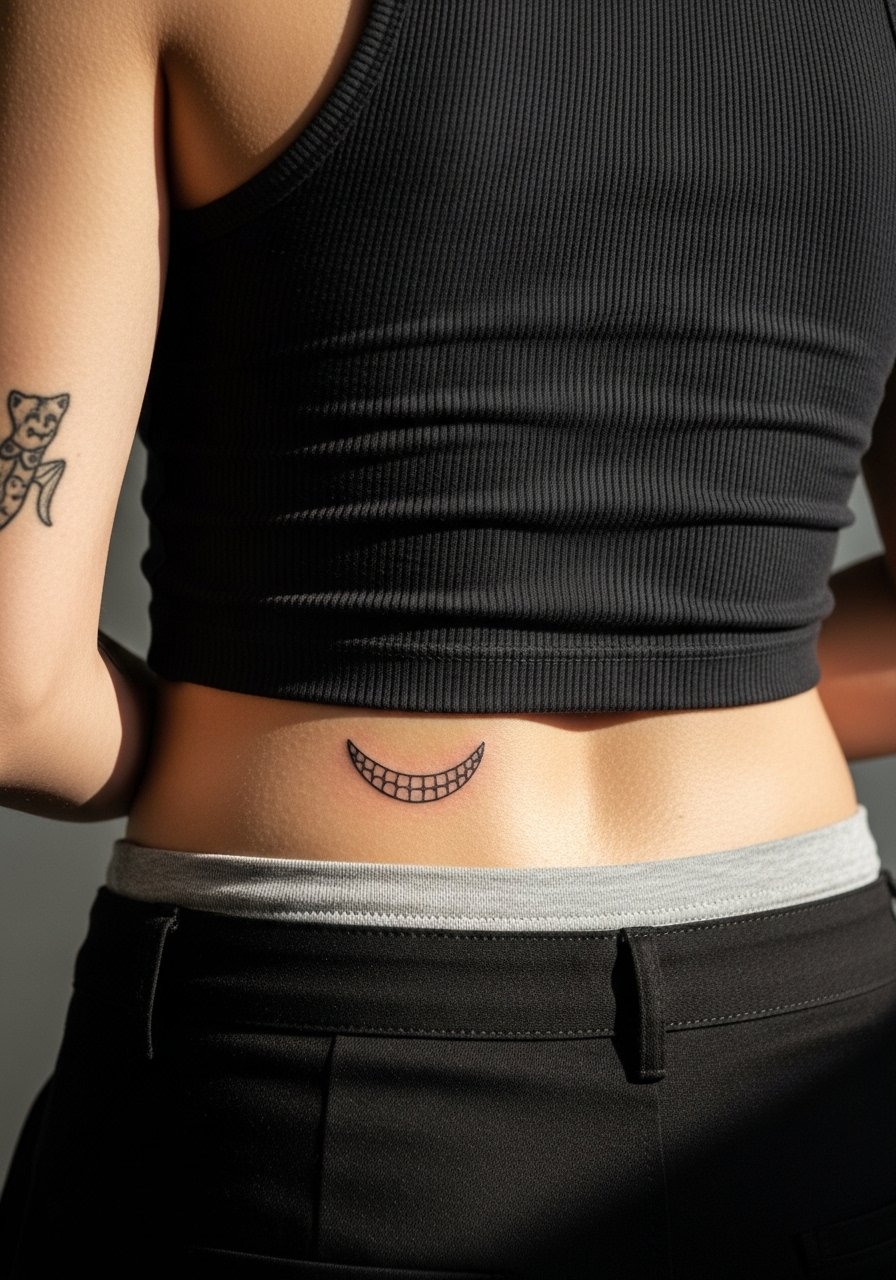
A single negative space tooth on the lower back is playful and minimal. The main practical issue is placement relative to pant waistlines and belts. Ask for the tooth to sit a half inch above your usual waistband to avoid constant rubbing. This piece heals quickly and usually needs minimal touch-up. Pair with low-rise summer dresses or a cropped top for a discreet reveal.
21. Chest-Upper Sternum Cheshire with Subtle Color
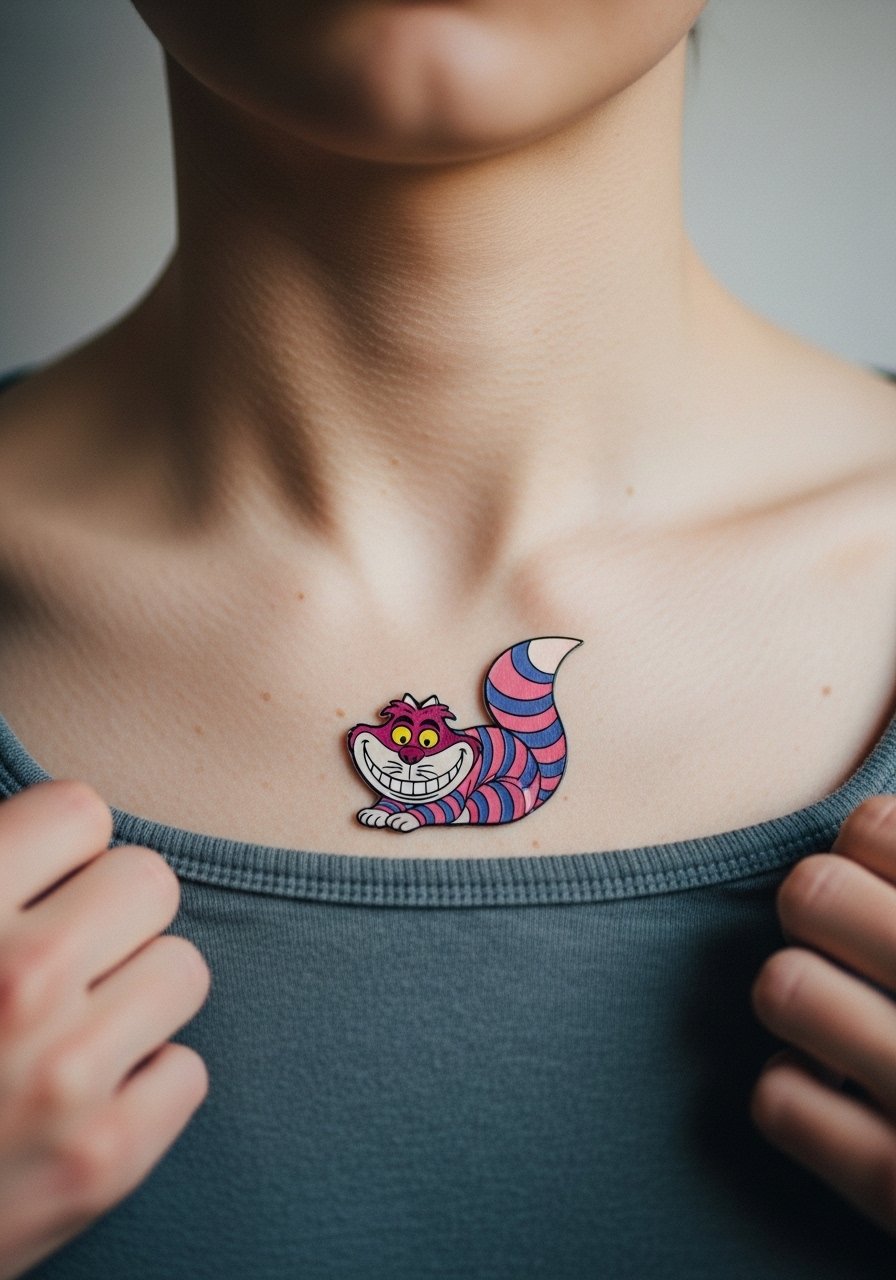
Upper chest placements are visible and age with movement and sun exposure. The common mistake is over-saturating with thin layers that bubble or fade unevenly. For a chest Cheshire, request thin, even passes and subtle color anchors around the grin so the face keeps definition. Sessions can be short if the piece is small. Consider a wide-neck top during healing and pair with a thin chain pendant that sits above the design for evening looks.
Frequently Asked Questions
Q: Will fine line Cheshire Cat tattoos blur faster than bold color ones on the forearm?
A: From what I have seen, very fine linework on areas with frequent sun exposure and movement tends to soften sooner than bold outlines. The fix is to scale up line spacing slightly and ask for a modest outline around key features. Sun protection and periodic touch-ups also help keep the design legible.
Q: Are Disney-inspired Cheshire designs risky from a copyright or ethical standpoint?
A: Artists and clients split into two camps on this. One camp avoids exact Disney likenesses completely and prefers original, book-inspired or stylized versions. The other camp will adapt recognizable traits in a clearly custom composition. If you care about originality, ask the artist to sketch a version that nods to the idea without copying a specific depiction.
Q: How should I dress to get a ribcage Cheshire done in a single session?
A: Wear a cropped athletic top you can lift without removing your bra or being fully exposed. A sports bra or a bandeau that the artist can tuck under briefly works well. Bring a loose zip hoodie to keep warm during breaks.
Q: Do watercolor Cheshire tattoos need different long term care than black linework?
A: Watercolor depends more on fading because the pigments are often less saturated. Protect the area from UV and consider occasional color refreshes if the washes are important to how the piece reads. For display, lightweight layers like a sheer scarf can protect the area while staying stylish.
Q: How do I find an artist who understands the look I want without naming specific people?
A: Use discovery pathways like convention guest lists, local studio portfolios, subreddit galleries, and hashtag searches for the style you want. Ask to see healed photos with similar placement and scale. Meeting artists in consultation will show how they approach spacing and longevity.
Q: What should I expect for touch-ups on finger and ankle Cheshire pieces?
A: Fingers and ankles often need touch-ups sooner because of friction and skin regeneration. Plan for a touch-up within the first 12 to 18 months and expect minor yearly to biennial refreshes if you want the lines to remain crisp.