
Fine line red flowers look fragile in saved photos, and they can hold that soft look for a year or two. What I keep seeing in consultations is the surprise when a tiny red stem that read crisp at day one softens faster than expected. This list gives thirty options that actually consider placement, pigment behavior, and how you can show the work off so it still looks intentional after a few seasons.
1. Fine Line Single Red Rose on Inner Forearm
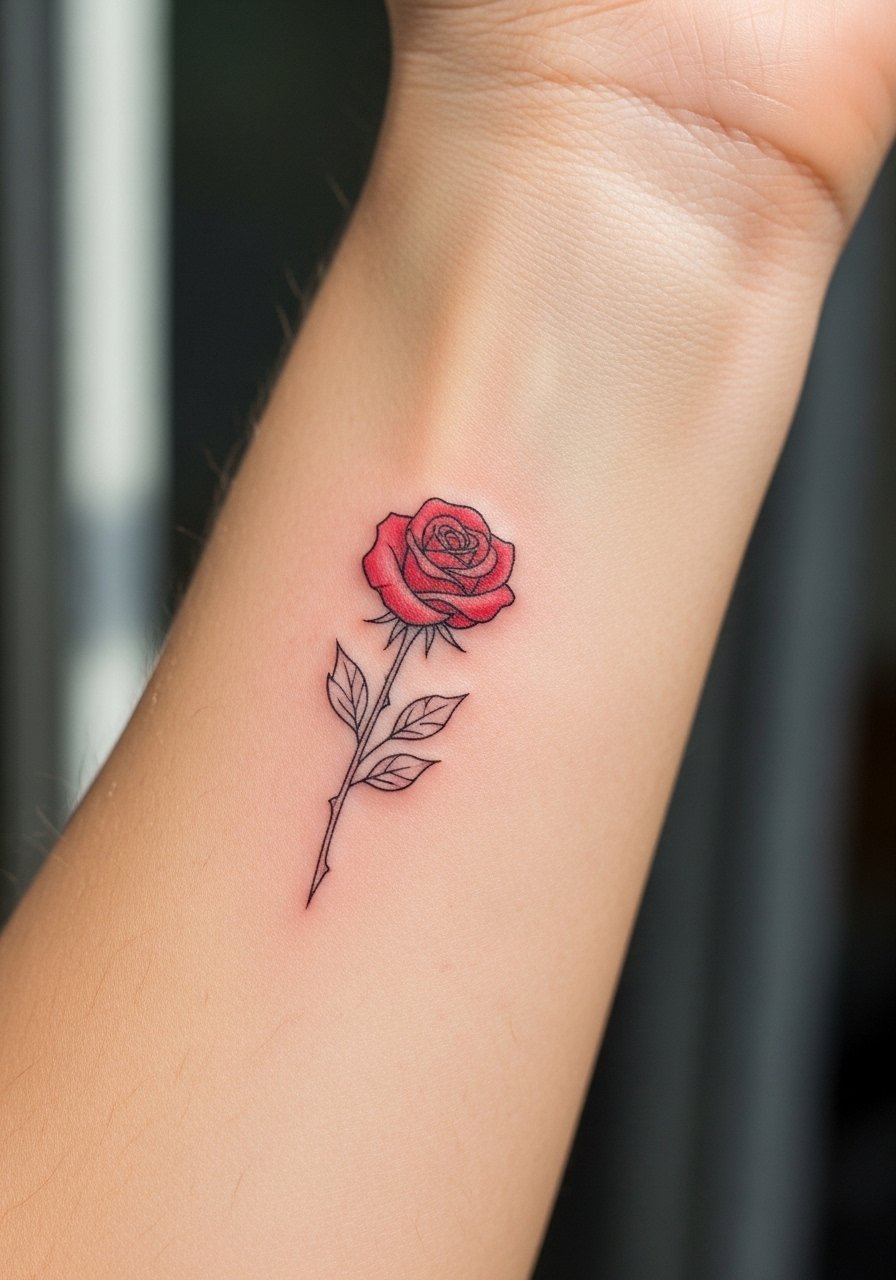
I recommend this when you want a small, readable floral that ages predictably on a surface that does not stretch much. Tell your artist you want a slightly heavier primary stem line and a shallow secondary line for the petals so the piece keeps its shape as it softens. Common mistake is asking for near-microscopic detail and expecting it to stay sharp for years. Pain on the inner forearm is low to moderate and most sessions finish in under an hour. Expect a touch-up window around year two if you want the exact original saturation restored. For showing it off, pair it with a rolled cuff chambray shirt and thin silver bangles on the opposite arm.
2. Neo-Traditional Red Poppy Bouquet on the Shoulder
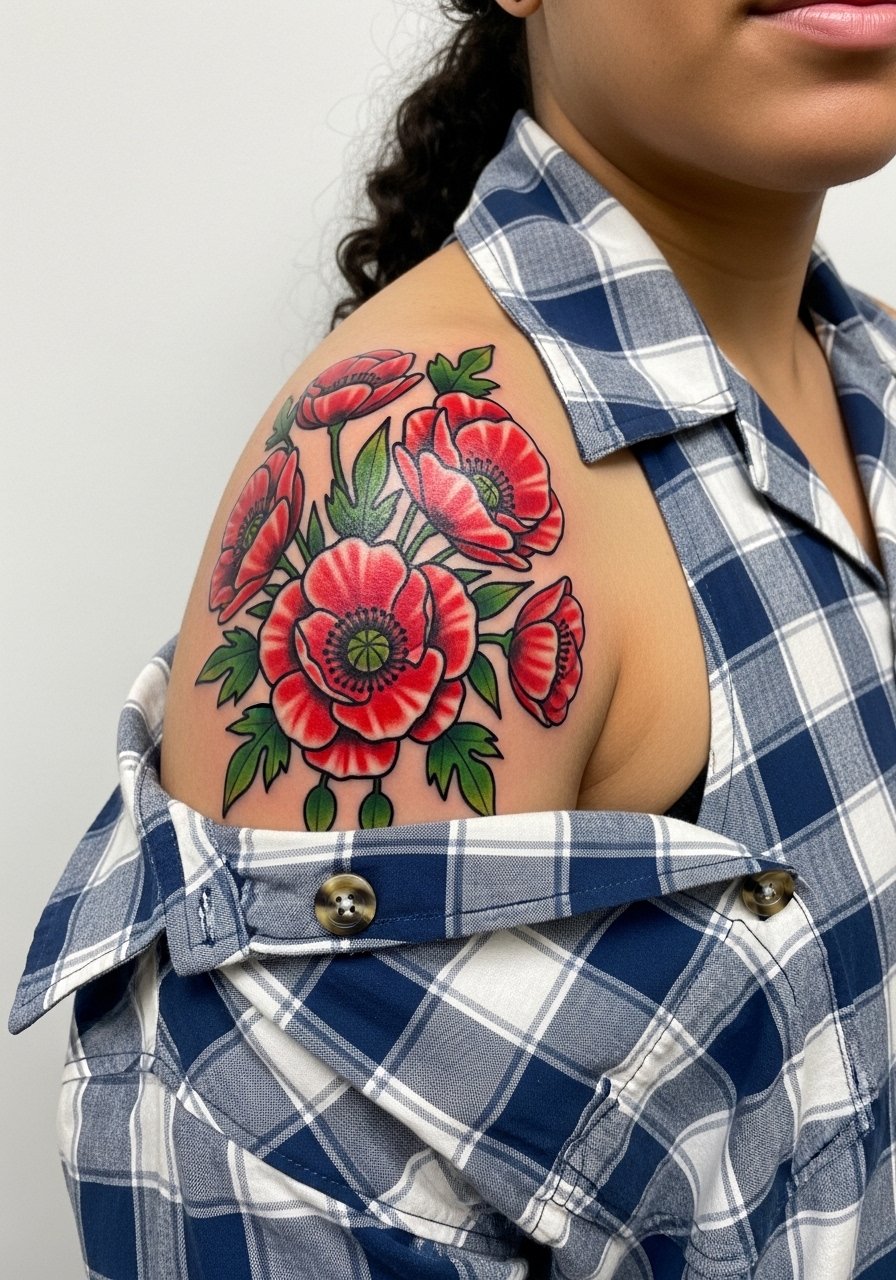
Neo-traditional poppies work well when you want bold color and graphic outlines that resist early fade. During consultation ask for saturated red fills with a reliable black outline to protect the edges, and mention you sweat in summer so the artist can recommend pigment density. The shoulder gives a forgiving canvas and the session usually takes two shorter sittings rather than one long day. Watch out for oversized filler leaves that can age into visual noise. When you wear this, off-shoulder tops in dark tones make the reds pop. For the session wear a button-front camp shirt you can pull aside without rubbing the area.
3. Watercolor Red Lotus on the Ribcage
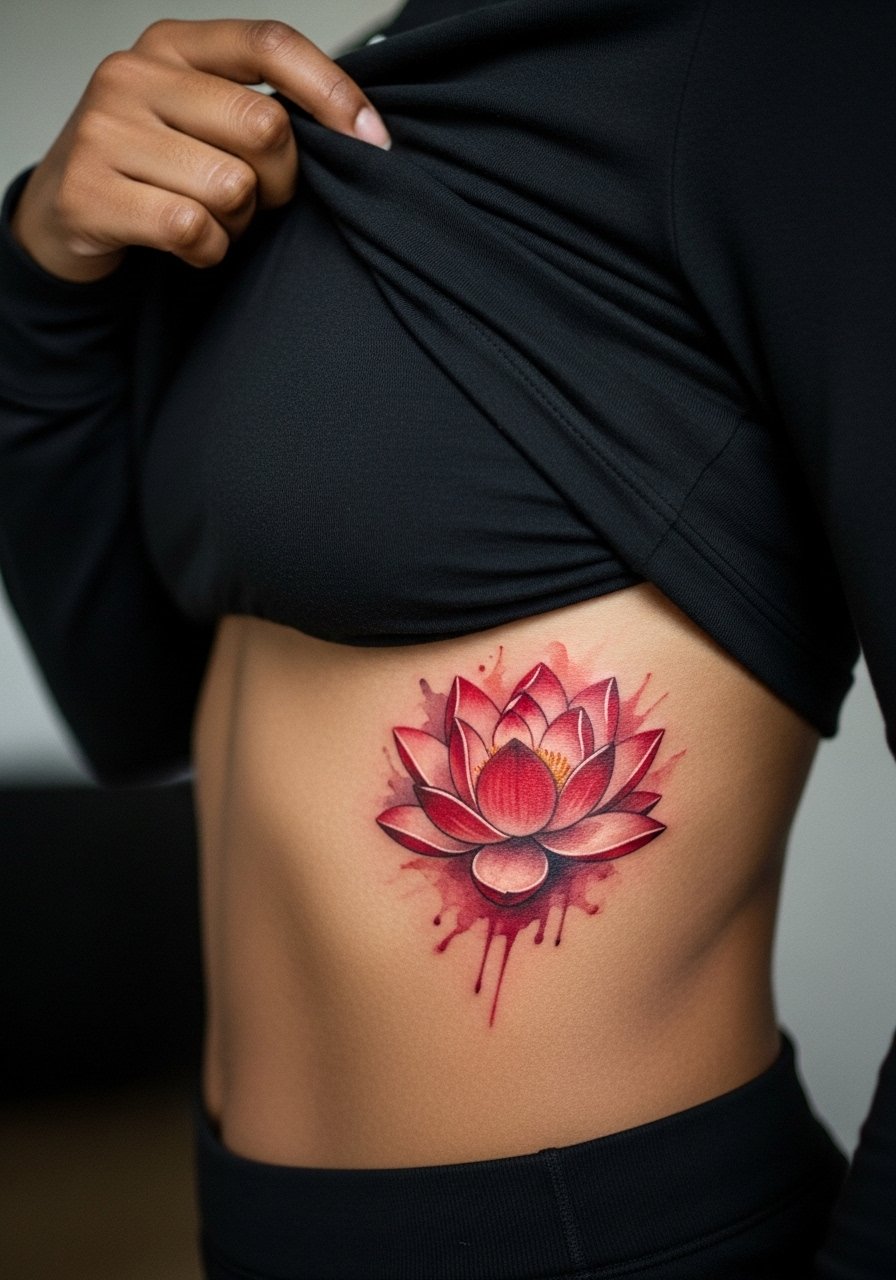
Ribcage watercolor reads beautifully in photos but many people see early ghosting if pigment sits too shallow. Artists split into two camps on Saniderm and dry healing for color work. One camp prefers protective film to limit friction and moisture. The other camp favors a dry heal for red pigments to form a stable scab. Name the debate when you book so you and the artist pick a consistent aftercare path. Pain here is high so expect numbing discussion and 1 to 2 sessions for a 3-inch piece. The main mistake is shrinking the composition to avoid pain. Give it the space it needs and the color will age more gracefully than a cramped version.
4. Blackwork Red Anemone with Solid Fill on Upper Arm
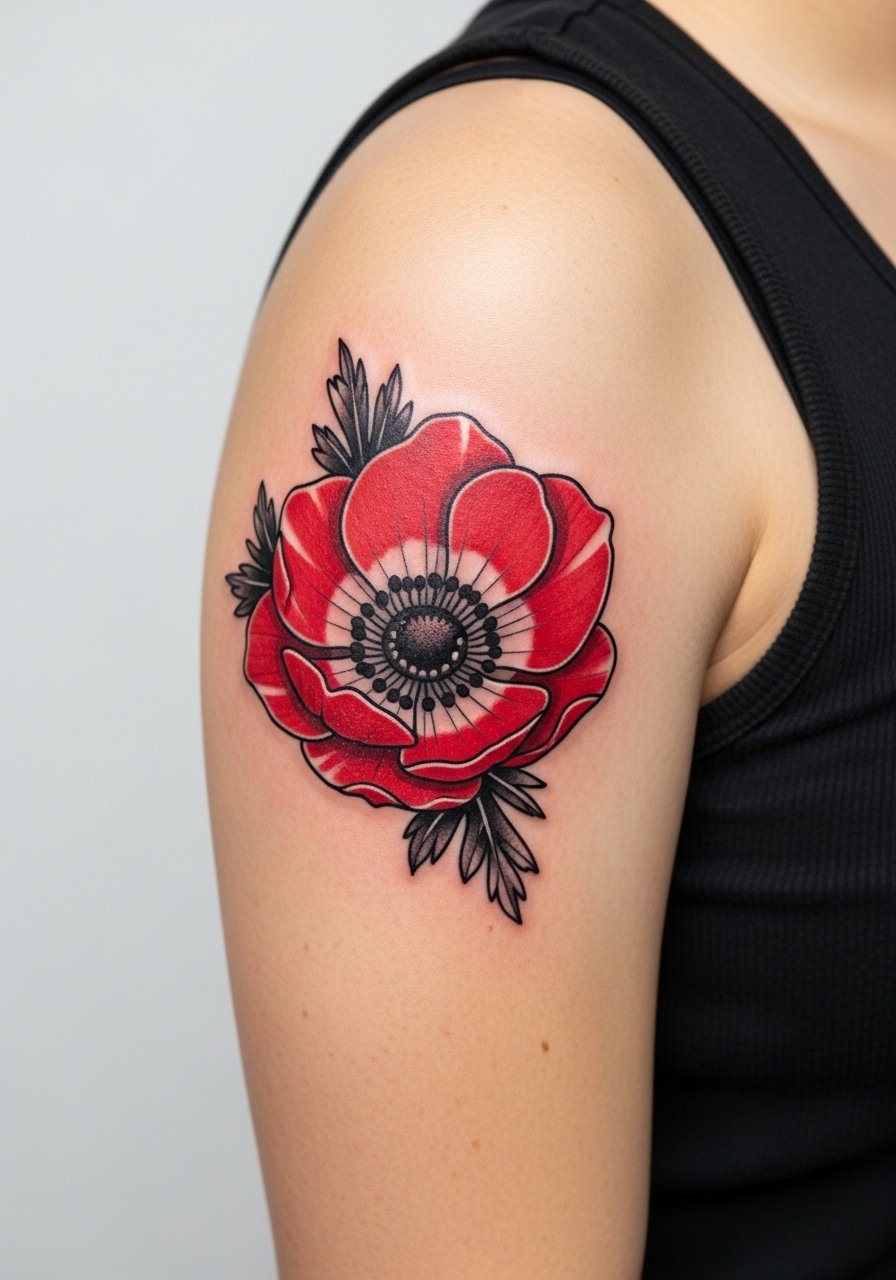
If you prefer a dramatic contrast, pair dense blackwork outlines with a saturated red fill. This combo keeps the red visible longer against lighter skin. Tell your artist you want even saturation and ask how many passes they plan to make so you understand session time. The upper arm tolerates longer sessions with moderate pain and usually takes two sittings if you want complete saturation. A common error is faint outlines that let the red drift into the surrounding skin. Wear fitted sleeveless tops to show this placement off without covering the work.
5. Minimalist Red Tulip Silhouette on the Ankle
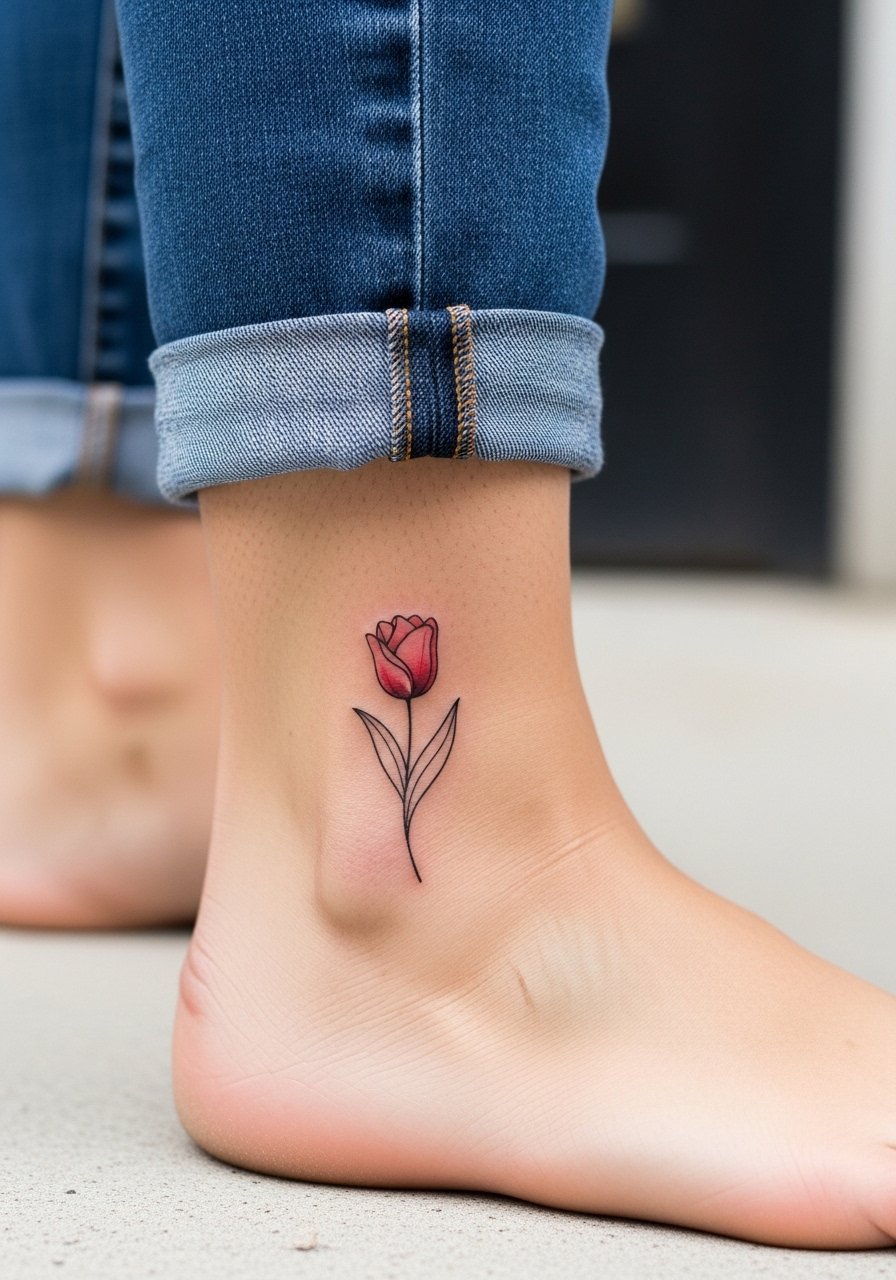
This is a great pick for first-timers who want something tidy and small. Ask for a slightly thicker silhouette line than you might think so foot friction and socks do not erode the edge too fast. The ankle is a lower-pain placement for some people but watch for extra healing irritation from footwear. People often ask for hairline thin lines and then complain about rapid loss of definition because the area experiences constant rubbing. For showing it off, strappy sandals or cropped jeans highlight the piece. Put on loose joggers or shorts for the session so the artist can work comfortably.
6. Micro-Realism Red Cherry Blossom Branch on Inner Bicep
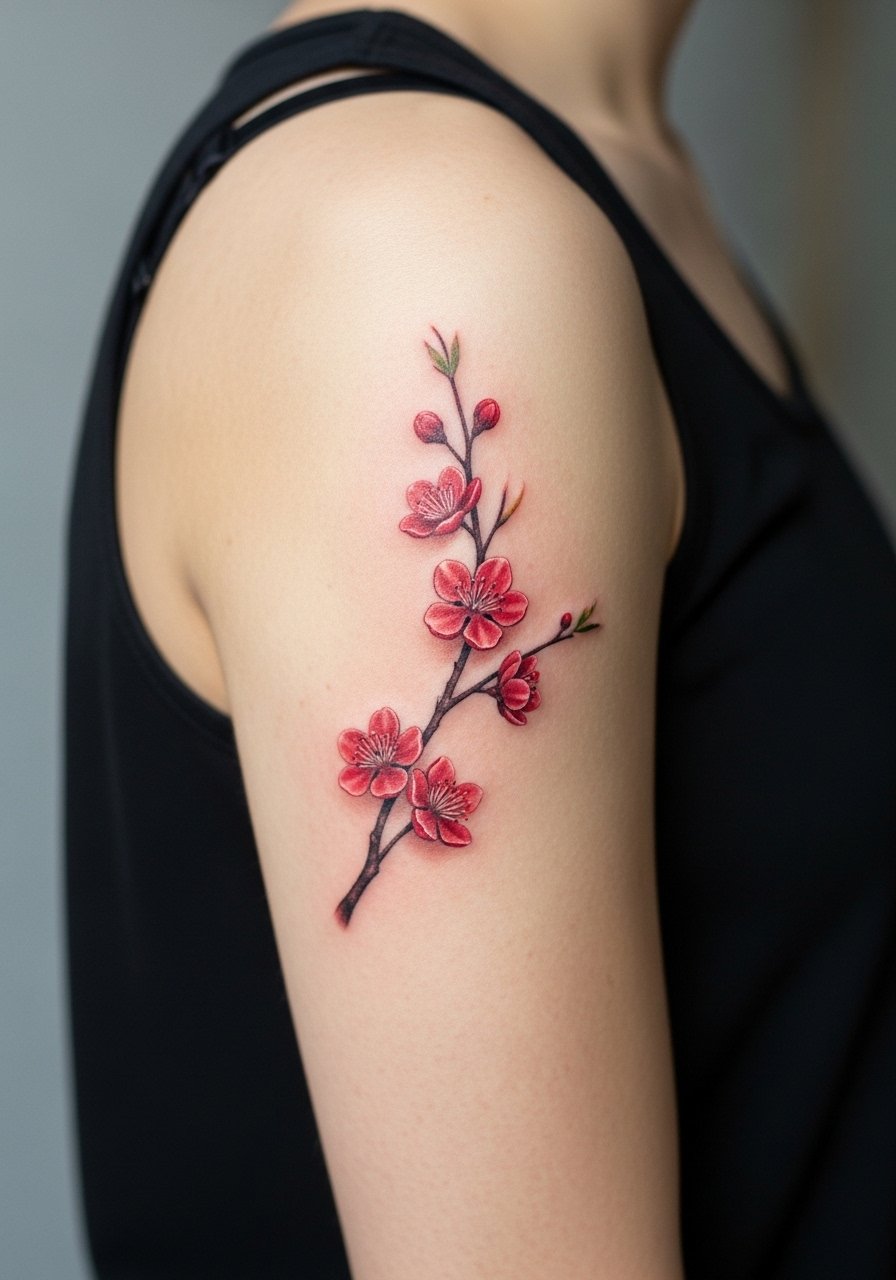
Micro-realism thrives on tonal shifts rather than heavy outlines so ask for layered red shades and crisp negative space. The inner bicep heals well if you avoid tight sleeves during the first two weeks. Pain is moderate and a 4-inch piece can take multiple sessions depending on detail. A common mistake is trying to compress a branch into a tiny area and losing the sense of movement. Think about how the arm bends because placement affects how the branch flows. For session comfort, wear a loose fit tank you can move without fabric rubbing the area.
Studio Day Picks
Those first six pieces cover a range from wrists to ribs so a few practical bits smooth the appointment and the initial healing window.
- Frida Kahlo Ink Balm. This balm is non-comedogenic and many people use it during the scab phase for humid climates, which helps red pigments hold color without excess shine.
- Australian Tattoo Goo. A thinner balm that absorbs quickly, useful for keeping small ankle and wrist pieces from feeling greasy under socks or bracelets.
- Cetraben fragrance free cream. Gentle and fragrance free, it helps people with sensitive skin who notice irritation around fine line work on forearms and inner biceps.
- Hada Labo hydrating lotion. Lightweight hydration after film removal is helpful for fine line ribs and collarbone pieces that dry out in winter.
- Aquaphor healing ointment. A thin layer during the first few days can protect small, exposed linework on hands or wrists from excess friction.
7. Ornamental Red Hibiscus Mandala on the Thigh
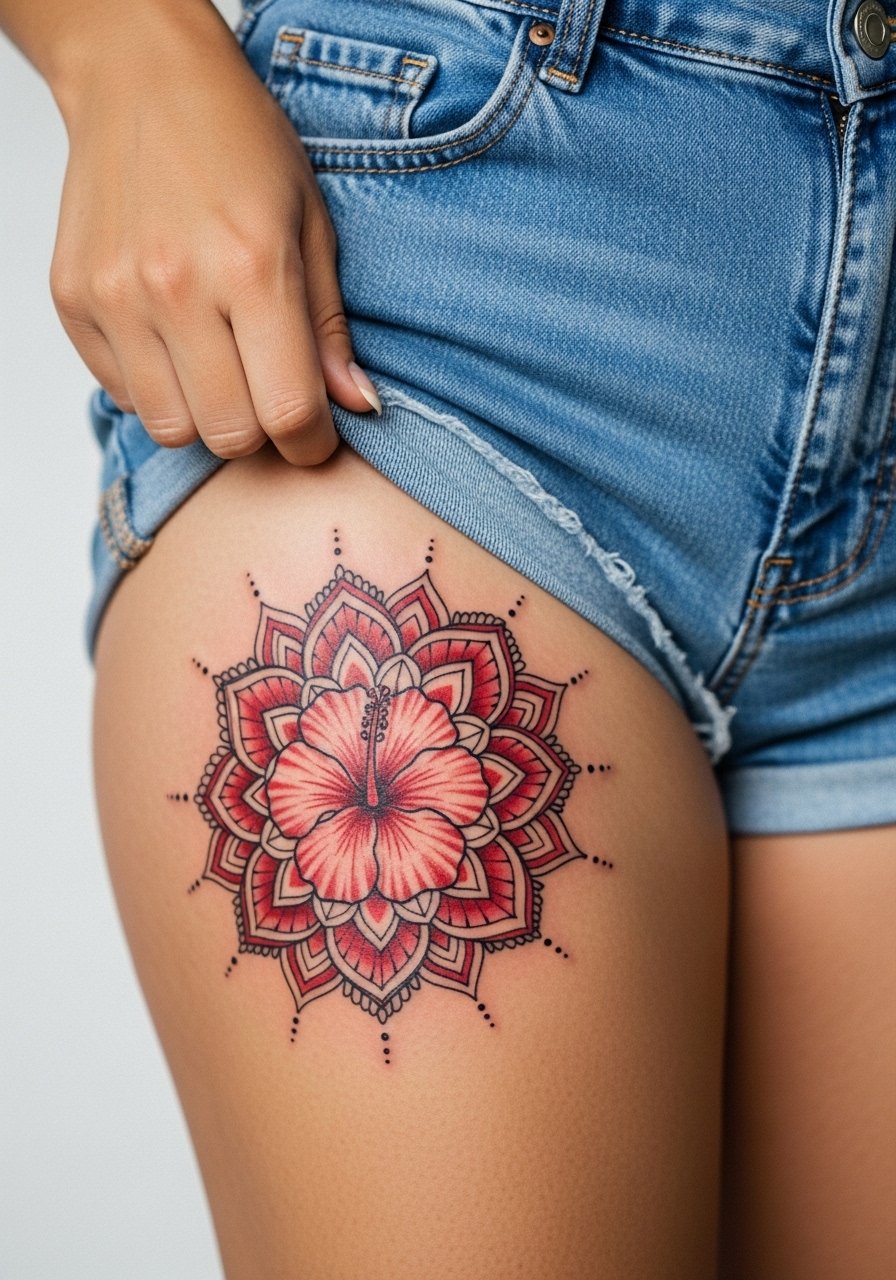
Ornamental mandala work on the thigh benefits from scale and symmetry, so ask for spacing that allows stipple and repetition to settle without merging. The thigh is forgiving for sessions and can handle longer stretches of work with moderate pain. A frequent mistake is compressing intricate dot work into a six-inch circle. That collapses with time. When healed at six months the stippling reads delicate and at two years it keeps texture if spacing was generous. Show it off with high-waisted shorts or a side-slit skirt. For the session, bring loose shorts you can hike up easily.
8. Ignorant Style Red Daisy Cluster on the Forearm
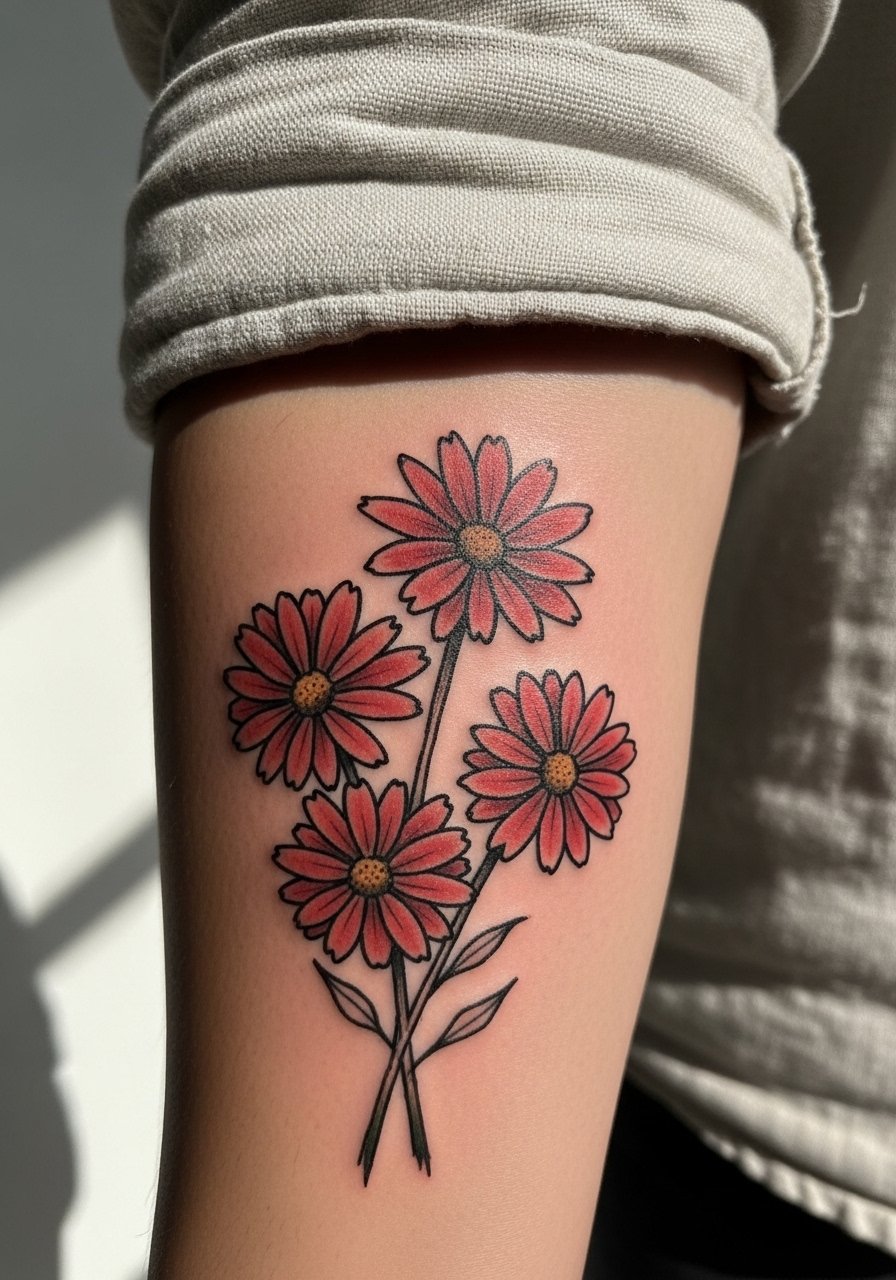
This playful, imperfect approach looks like a quick sketch and holds a lot of personality. Artists disagree on whether fine line or slightly thicker mark-making holds better for this naive look. One camp says thicker shorthand lines weather better and keep personality. The other says true ignorant work must mimic pen pressure to stay authentic. Be explicit about the aesthetic you want in consults. The forearm is easy to care for, and a 3-inch cluster usually finishes quickly. Avoid asking the artist to over-clean the edges. Keep the spontaneity.
9. Traditional American Red Rose with Banner on Outer Bicep
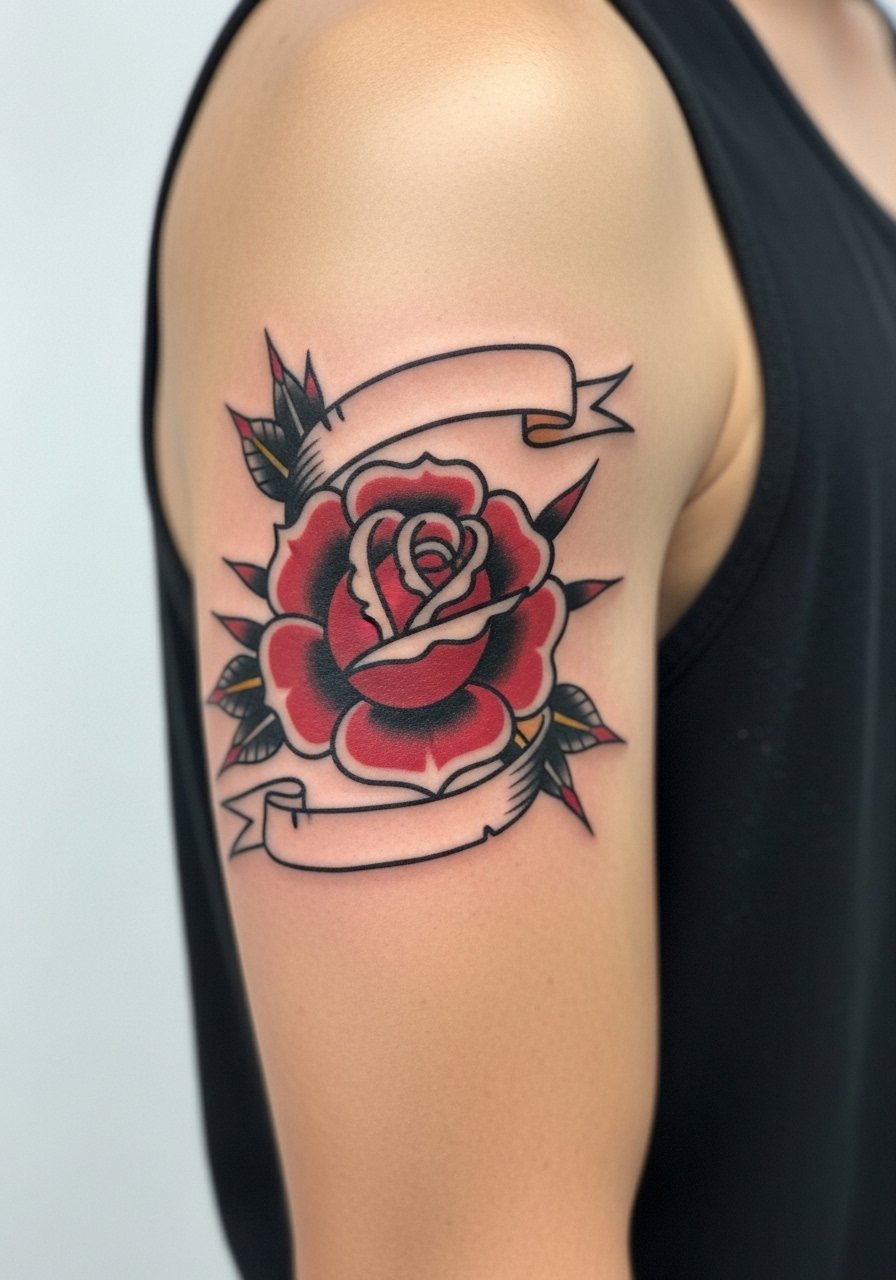
Traditional pieces age into a classic look because the heavy outlines protect the color. Ask your artist for thicker outer lines and slightly softer interior shading to allow the red to breathe. Outer bicep sessions are low to moderate pain and are good for multi-session fills. A common misstep is trying to cram script into the banner at too-small a size. If you want text, enlarge the banner area. Pair with fitted tees or tank straps to display the silhouette.
10. Dotwork Red Peony Accent on the Shoulder Blade
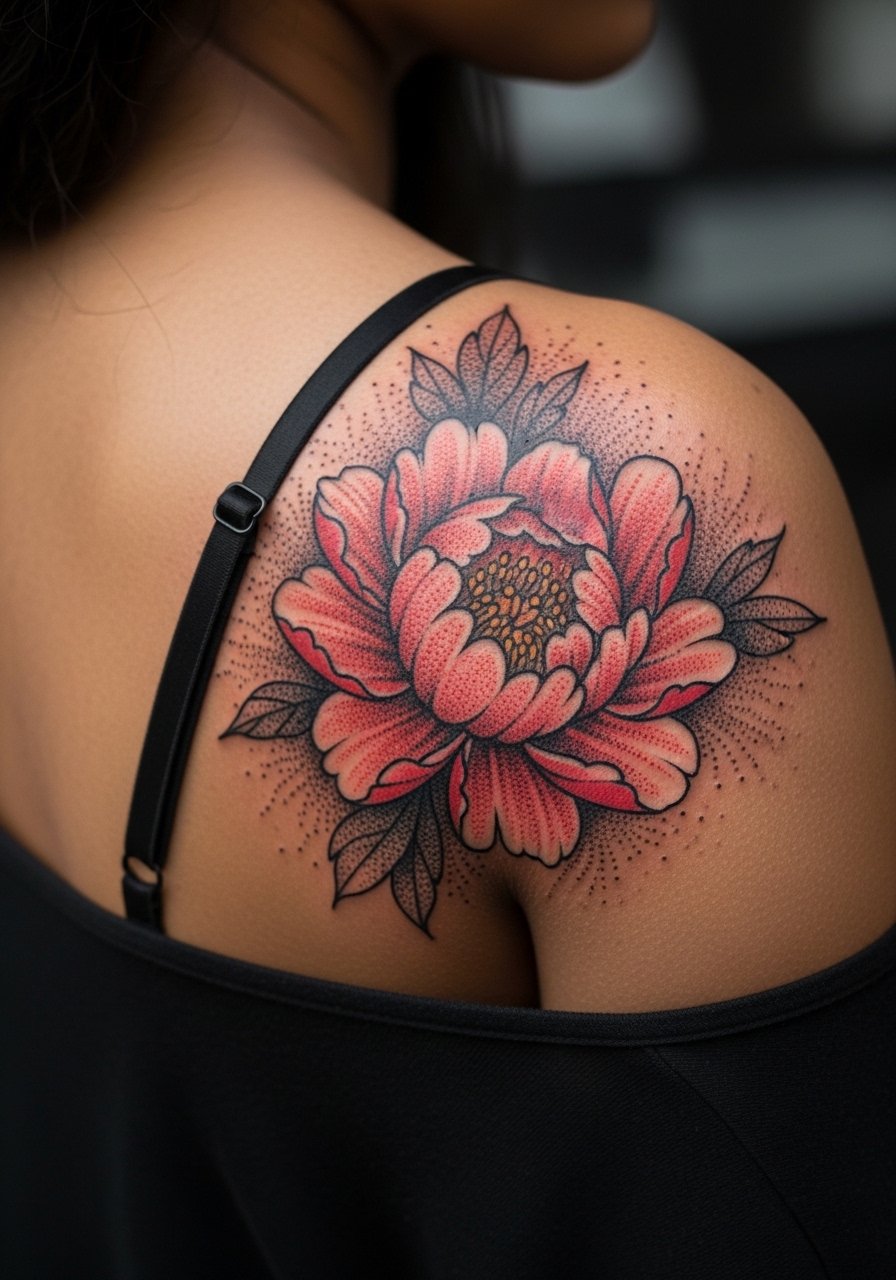
Dotwork demands patience in both session time and healing. Tell the artist you want gradual stippling rather than heavy block shading so the texture remains readable at two and five years. Shoulder blade placements get less friction, which helps dotwork preserve contrast. People sometimes ask for dense stippling at a small scale and then regret the muddy look after a year. Expect longer session windows and plan for multiple visits if the piece is seven inches or more. For outfits, open-back or thin strap tops frame the design without competing.
11. Realism Red Camellia Portrait on the Calf
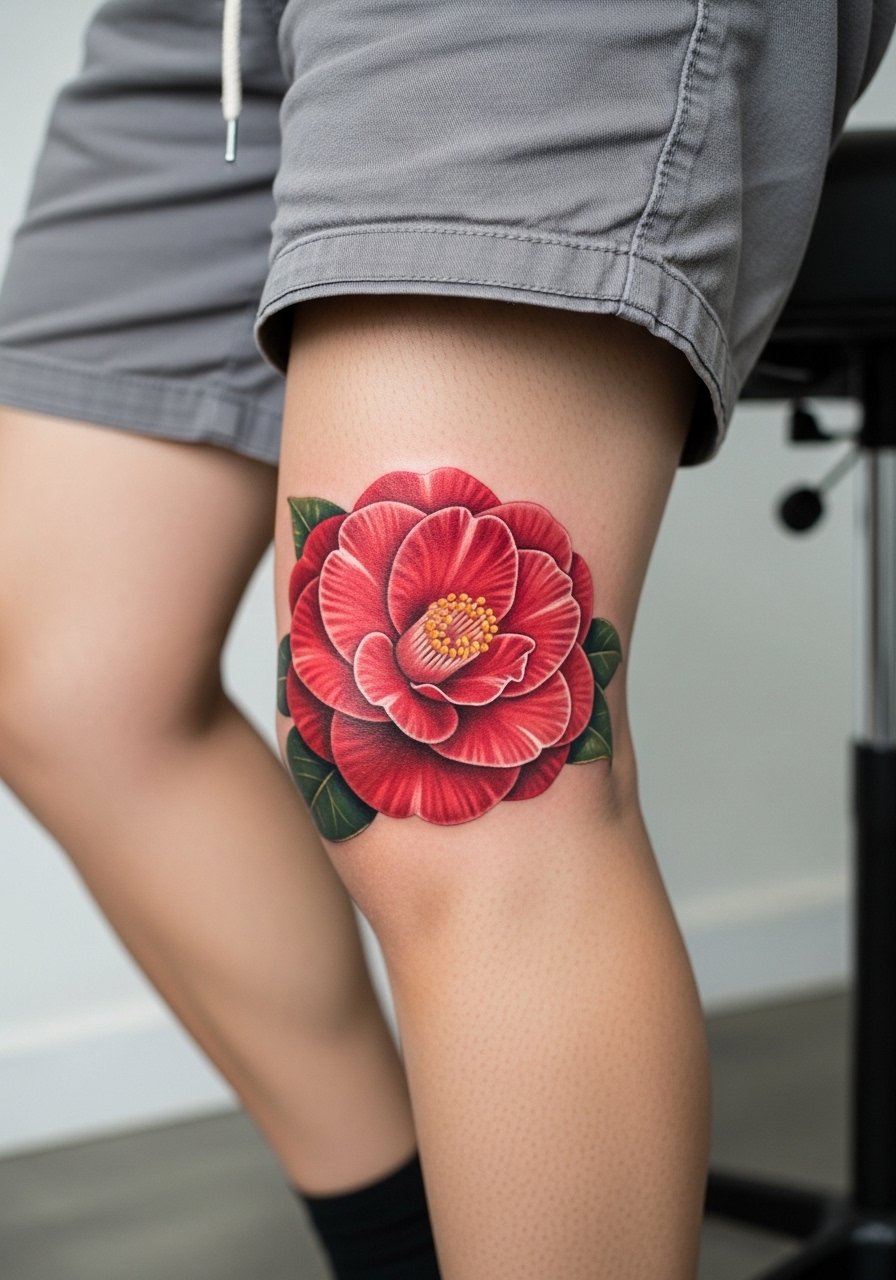
Realism needs tonal layering so plan for multiple sessions depending on size. The calf takes color well and allows for larger scale so texture reads from a distance. Tell your artist you want a healed reference photo to preview depth after a month. A common mistake is pushing too much micro-contrast into a small area which later becomes muddy. Weight fluctuation can distort a long calf piece, so consider placement slightly off-center if you anticipate changes. For showing it off, midi skirts and ankle boots create a frame that directs attention to the portrait.
12. Geometric Red Lily Wrist Wrap
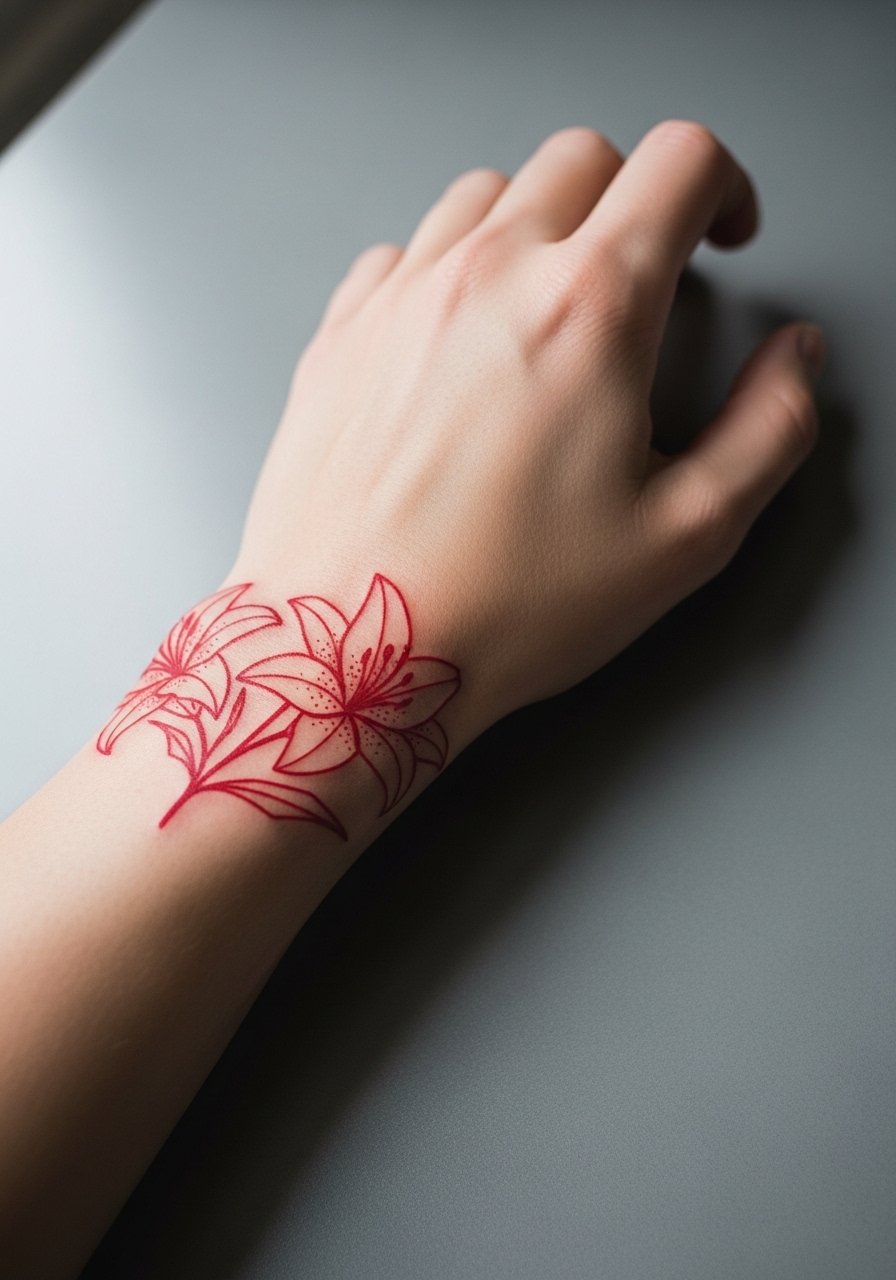
Wrist wraps need room to breathe otherwise the parallel lines will blur into one another. Ask for spacing adjustments in the consult and for the artist to map how the wrap reads when your hand is relaxed. The wrist is a sensitive spot and some people choose numbing for longer sessions. A common error is compressing too many geometric elements into a narrow band. If you want this visible day to day, stack with a dainty bracelet or thin watch but avoid wide cuffs that compete. For the session wear a sleeveless top and avoid bracelets.
13. Patchwork Red Orchid Filler on Lower Leg
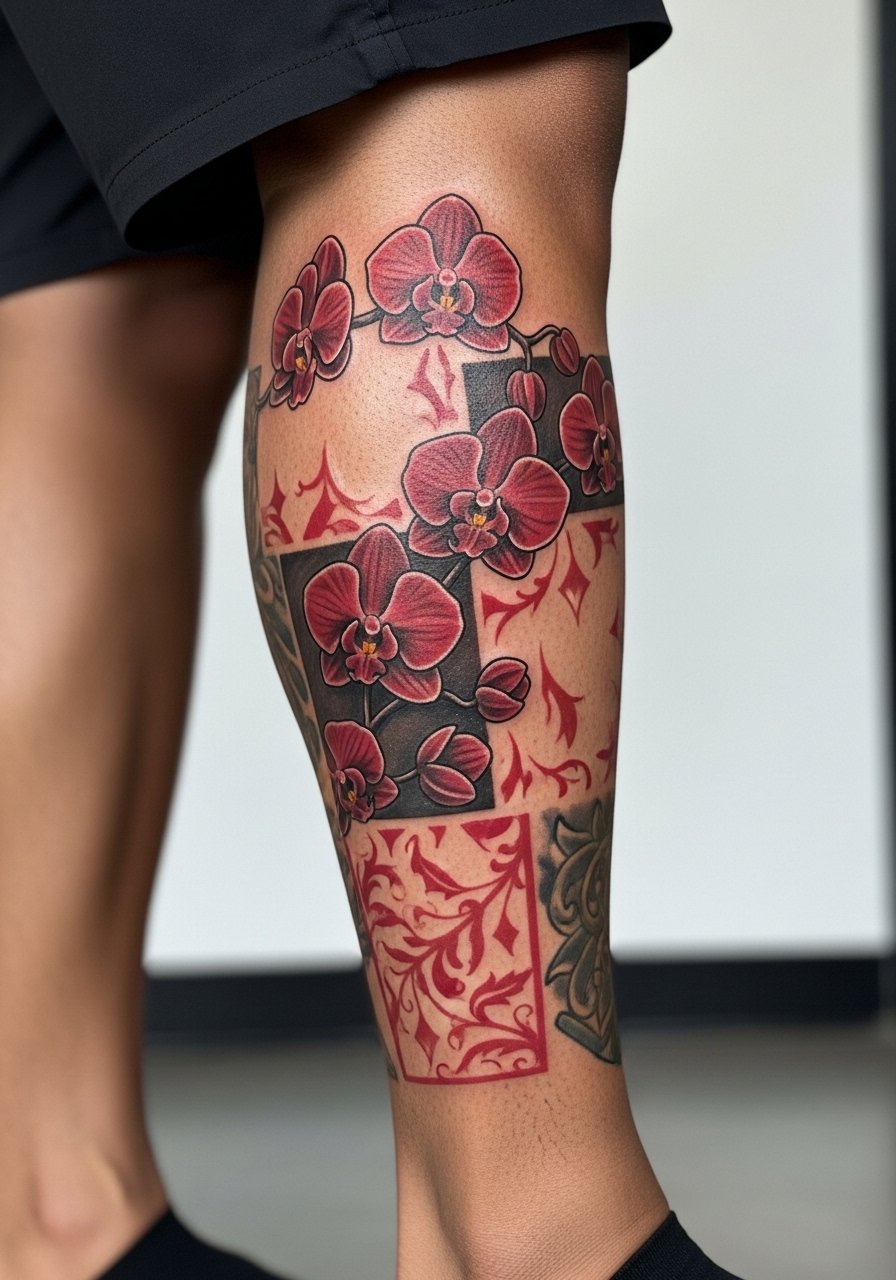
Using a red orchid motif as filler can unify older pieces and create flow between mismatched colors. When you consult, show all the existing work so the artist can plan negative space and transition elements. Lower leg sessions handle medium-length work and are less affected by weight gain than the thigh. People sometimes request exact replication of previous color and then are surprised by healed tone differences. Expect touch-ups to blend older pigments with new reds. For session wear loose drawstring pants that can be rolled without pressure.
14. Fine Line Red Rose with Thorny Stem on the Wrist
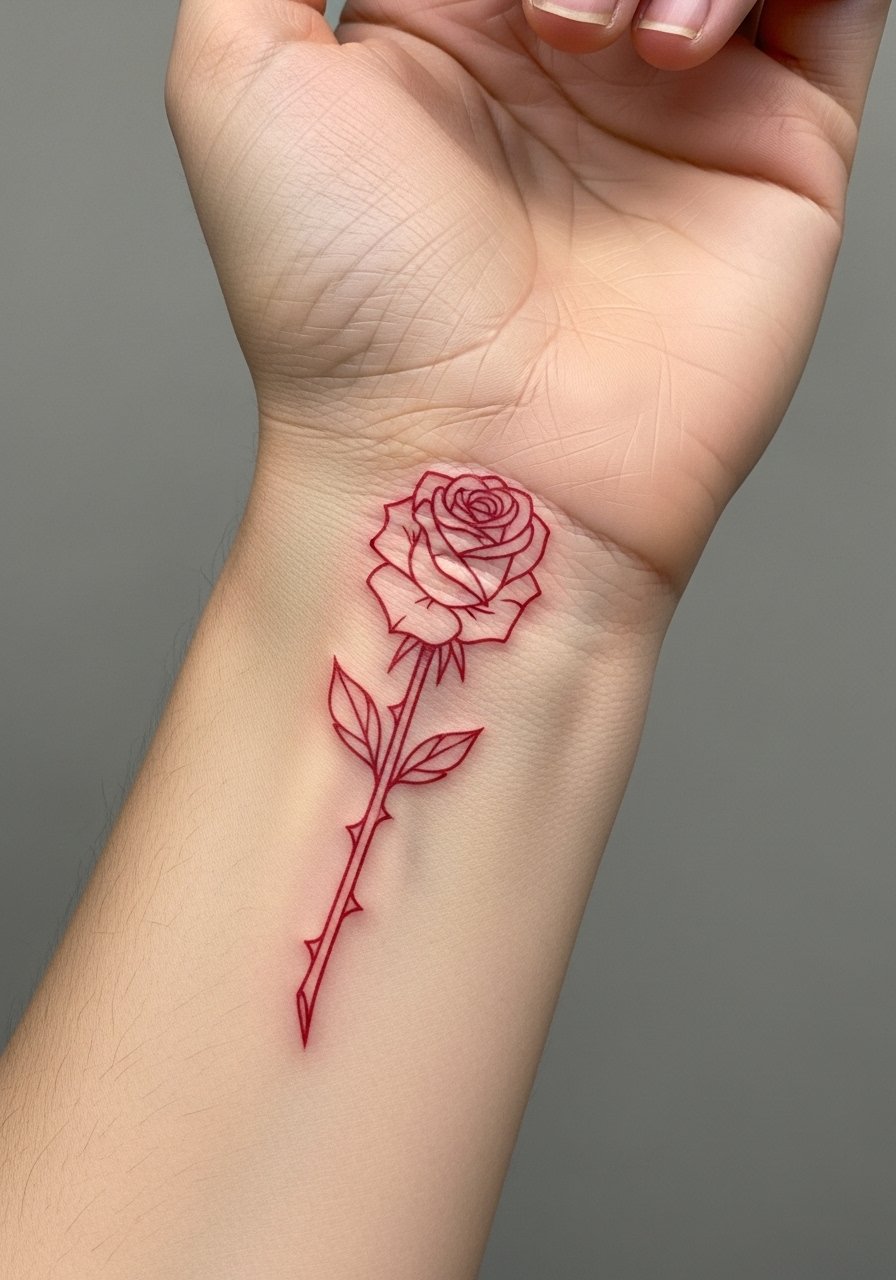
This is the classic romantic selection for those who want a compact piece with symbolic duality. I tell people to request slightly bolder primary lines on the stem so thorns keep definition as they soften. Wrist pieces face daily friction and sun exposure so schedule touch-ups sooner rather than later. One mistake is requesting an ultra-fine stem and ending up with an indistinct line after six months. For showing it off, layer with a dainty gold cuff bracelet on the opposite wrist so attention flows across both hands.
15. Small Red Poppy on the Ankle
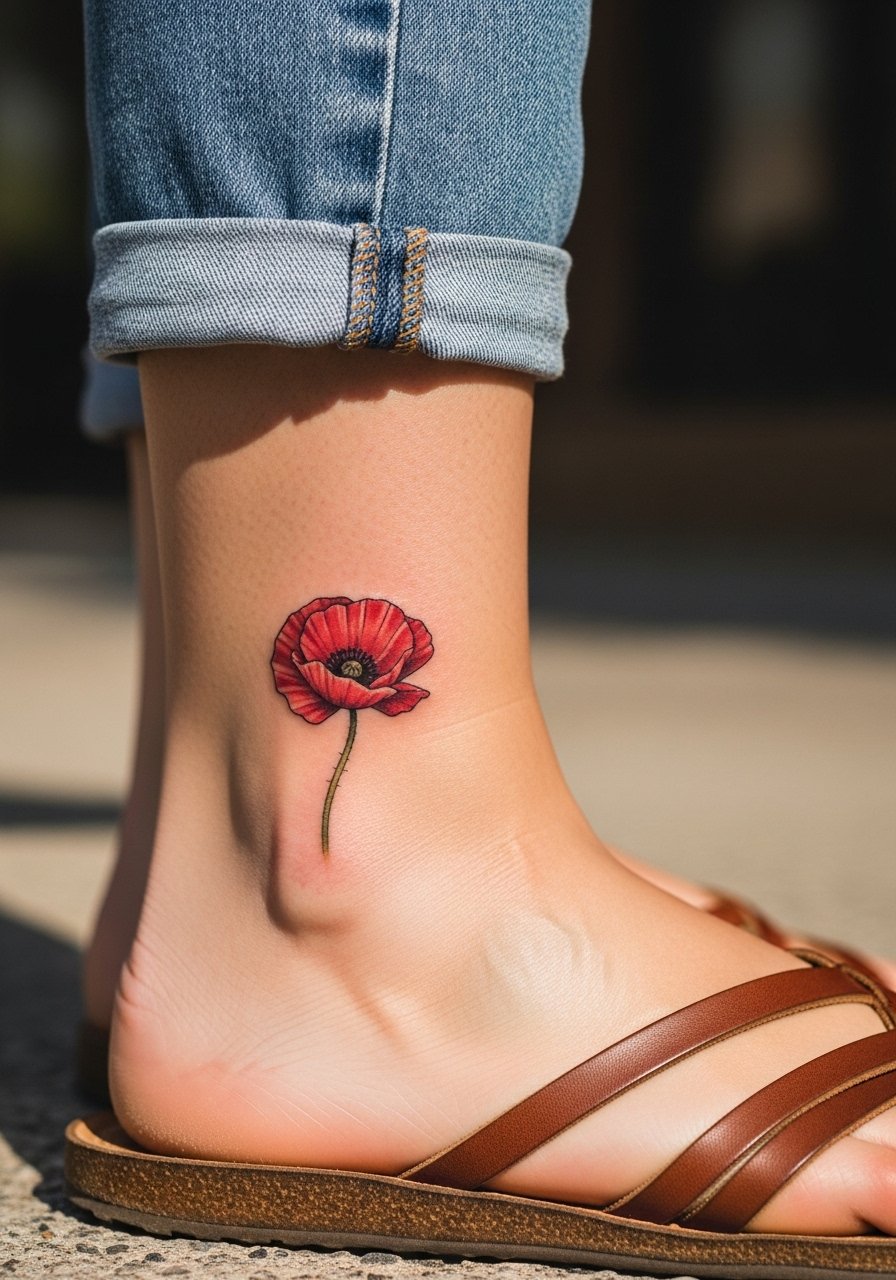
Ankle pieces are seasonal show-offs and heal with particular friction from footwear. Ask your artist for slightly reduced saturation near the edge so scab removal does not pull heavy pigment out. The ankle can sting more for some people but sessions are short for a 1.5-inch poppy. A common mistake is tight footwear immediately after the session. For visibility, strappy sandals and ankle chains highlight the work.
16. Watercolor Red Lotus on the Collarbone
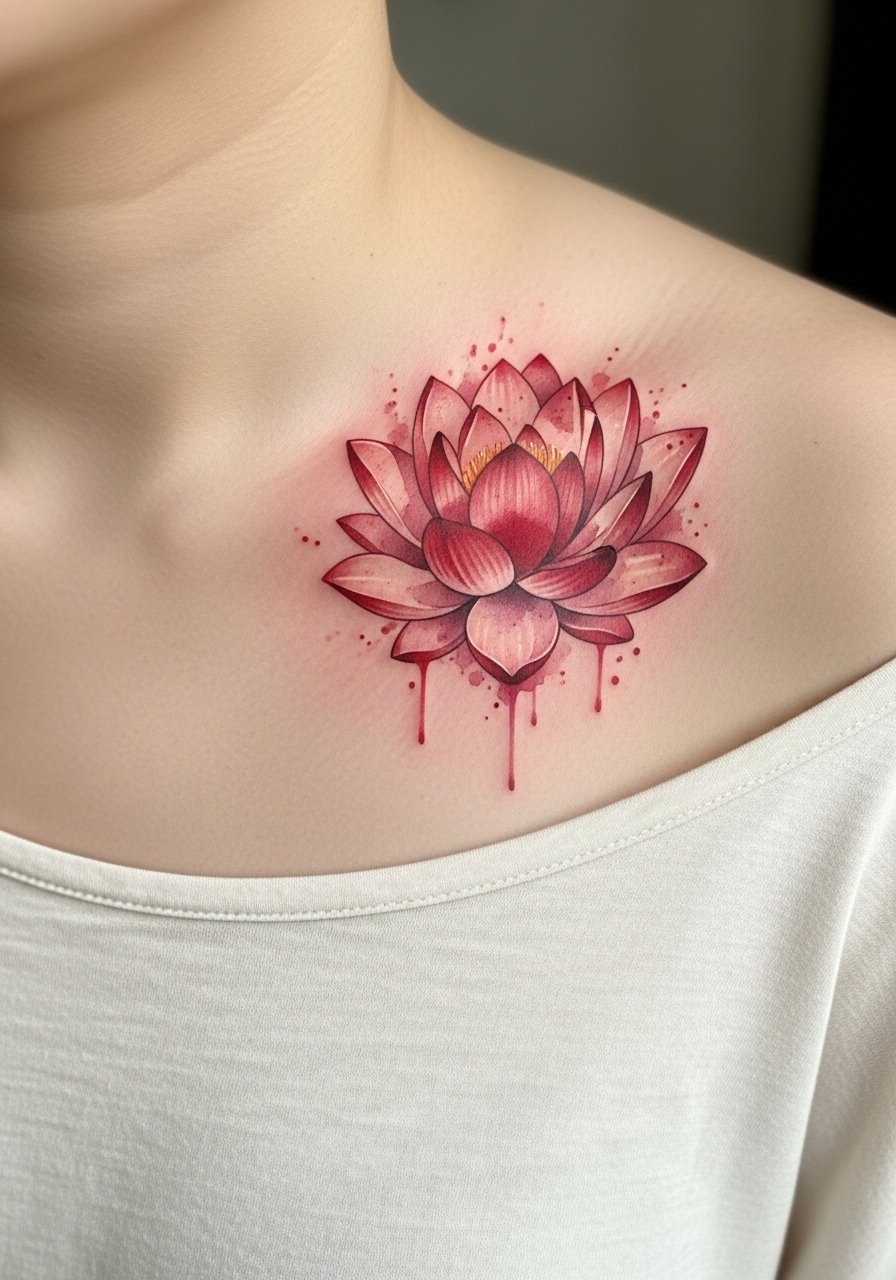
Collarbone watercolor looks painterly with soft gradients but that same softness is what fades first. Ask for slightly stronger pigment saturation at the core so the fading preserves shape. Collarbone sessions are low to moderate pain and require careful positioning to keep lines even. People sometimes choose too shallow a wash and then wish for more presence. Wear V-neck sundresses or layered delicate necklaces to frame the area. For session comfort wear a strapless bralette or a button-up you can open.
17. Micro-Realism Red Poppy Memorial Piece on the Calf
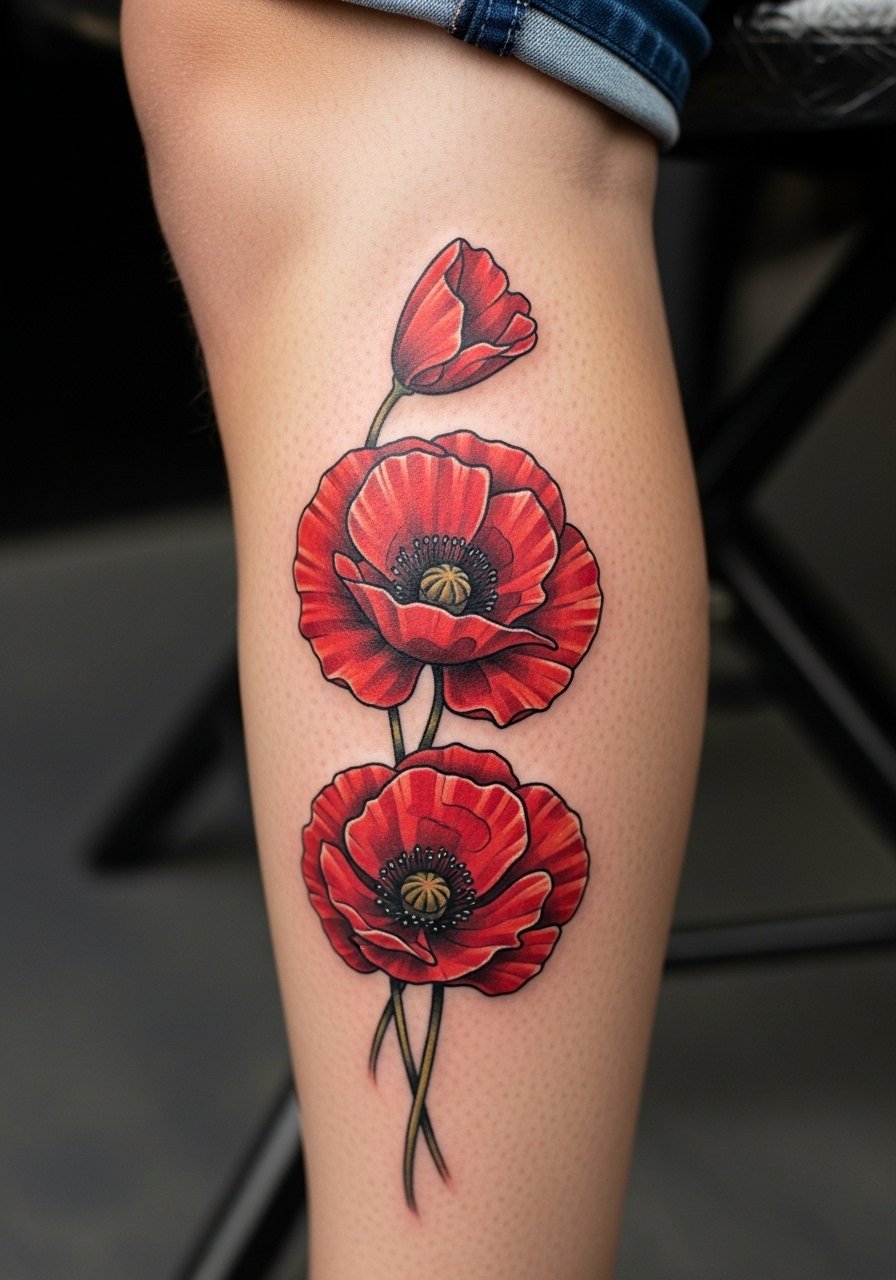
Micro-realism for memorials asks for tonal subtlety and photographic reference. Discuss the exact shade family you prefer and whether you want warmer or cooler reds. Calf placements allow scale that preserves detail longer than smaller areas. A common issue is shrinking portrait-sized detail into a small patch where it reads as blotch after healing. Expect multiple sessions if fine gradients are required. Consider how the piece sits with footwear and calf muscle movement when choosing final placement.
18. Geometric Red Lotus Frame on the Wrist Wrap
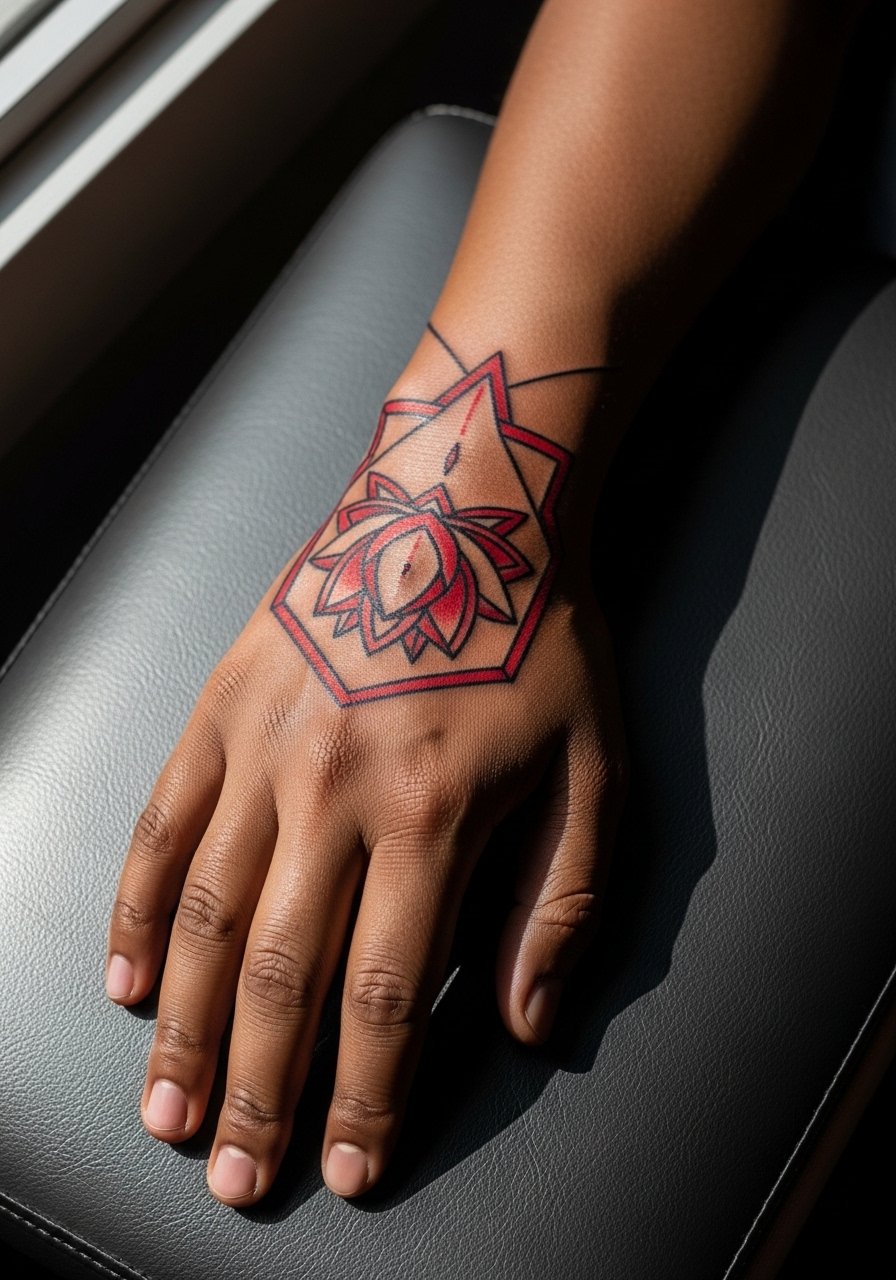
Geometric lotus frames require precise spacing so the symmetry does not blur. Tell the artist you want negative space between dense nodes to allow for natural skin shift. Wrists suffer from constant washing so expect lighter touch-ups over time. A frequent mistake is choosing a dense lattice pattern too small for the wrist. Pair with a minimalist watch or a thin chain pendant necklace on days the wrist is bare to balance the visual weight.
19. Red Anemone Accent with Black Outline on the Hand Edge
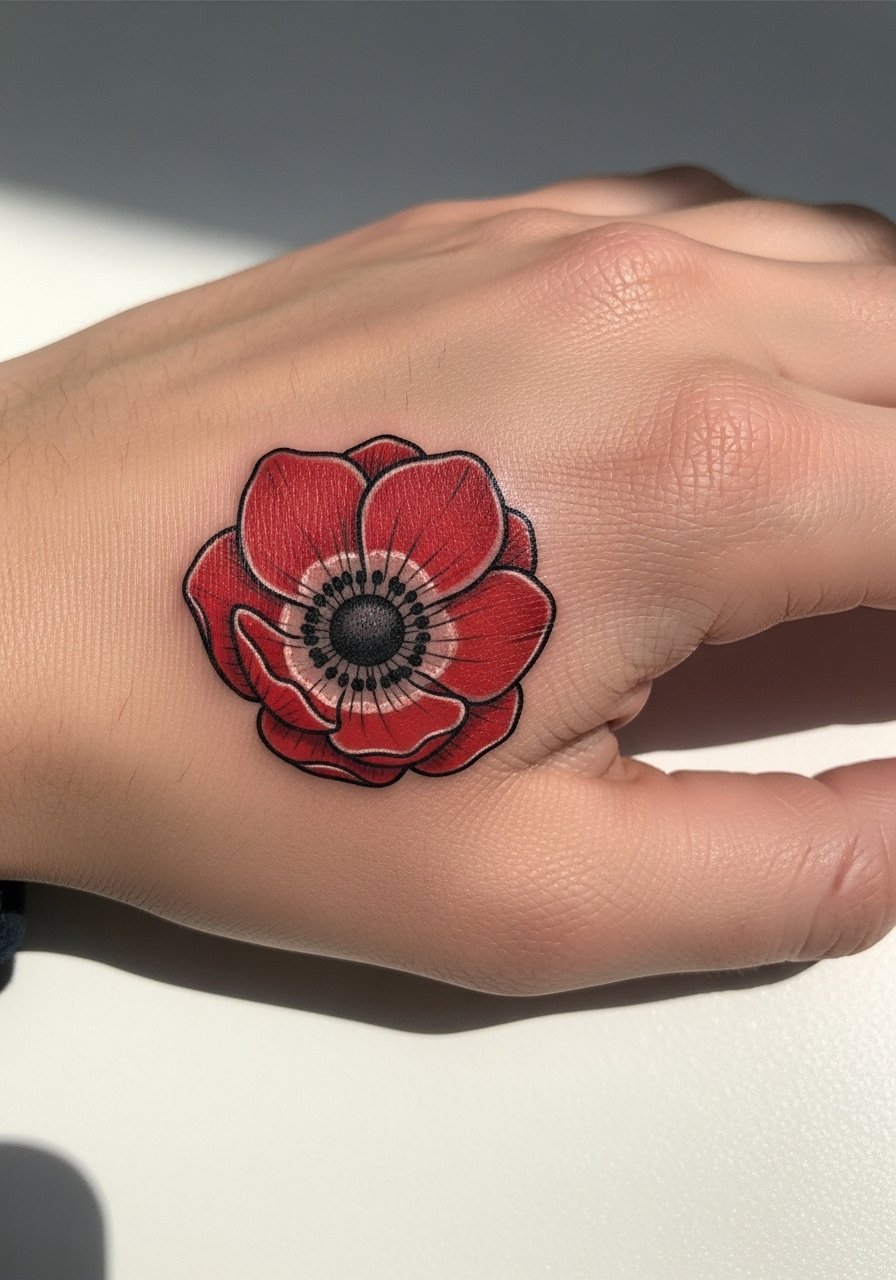
Hand-edge pieces are expressive but they face heavy wear. Ask about pigment choices that remain visible with frequent washing and sun. Hands are higher risk for faster color loss and touch-up timelines are shorter. One important consideration is employment visibility. If career flexibility is a factor put the piece on the hand edge rather than the full palm. For the session expect more discomfort and plan for shorter sittings.
20. Patchwork Red Orchid Sleeve Connector on Lower Leg
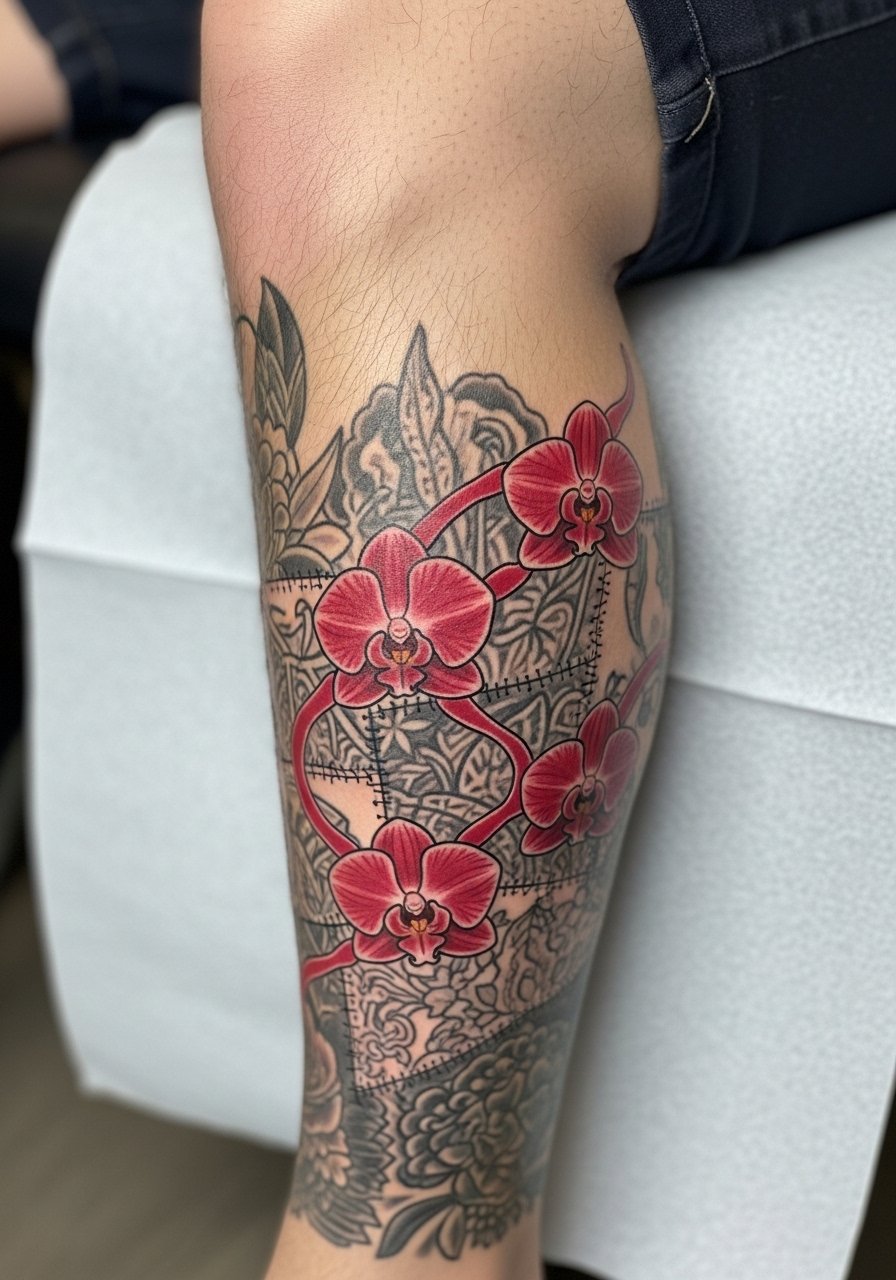
Connective patchwork is a practical way to make older pieces feel intentional together. When you consult, bring clear photos of existing work so the artist can plan negative spacing and color transitions. Lower leg filler handles multiple sessions and is less prone to dramatic stretch. People sometimes try to force a single style to match all previous work which results in tonal mismatch. For the appointment wear loose shorts and consider light compression after sessions as recommended by your artist.
21. UV-Reactive Red Accent for Blacklight Effects on Finger Joints
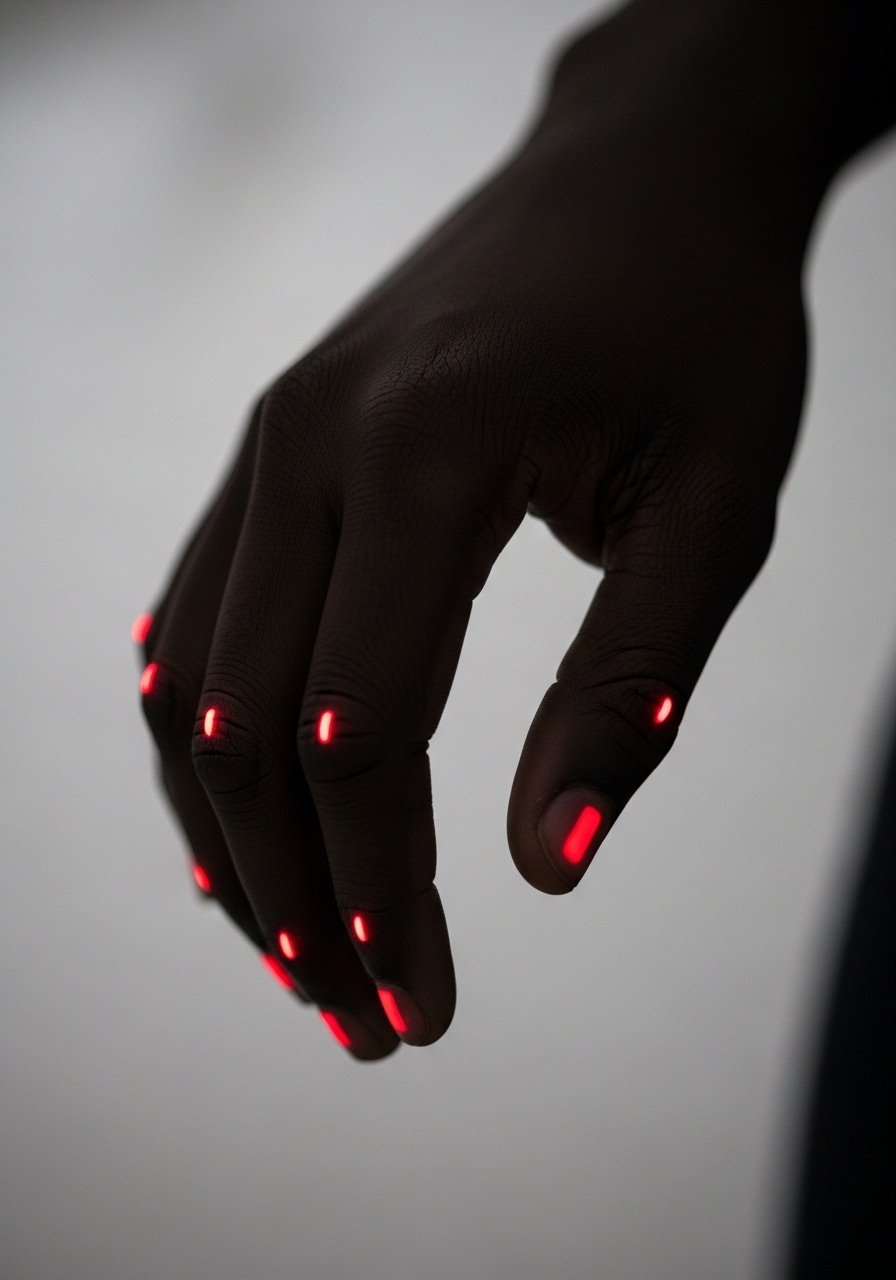
This experimental angle uses pigments that glow under blacklight and read subtle in daylight. Ask the studio about the specific pigments they use and any patch testing policies because reactive dyes are not standard. Fingers are prone to blowout and fast fade, so plan for frequent touch-ups if you want longevity. A unique use is to place tiny growth points on finger joints so motion gives the illusion of the blossom opening. For the session keep it small and expect short, precise passes.
Frequently Asked Questions
Q: Will a fine line red flower on my forearm fade faster than a traditional red rose on the bicep?
A: From what I have seen, fine line red work on high-exposure spots like forearms tends to soften quicker than a traditional piece with heavy outlines on the bicep. The fix is to ask for slightly heavier primary lines up front and expect a touch-up window around year two to three.
Q: How should I test for red ink sensitivity before booking a full session?
A: Patch testing the specific pigment at least a week before a larger session is smart because some people react to pigments differently. Ask the studio if they will do a small test dot and monitor it over seven to ten days to see how your skin behaves.
Q: For people with darker skin tones, which red flower approaches remain visible in photos?
A: High-contrast approaches with black outlines or blackwork fills around the red tend to read better in photos. Micro-realism can work too but ask the artist to include a strong dark anchor so the red does not wash out under camera filters.
Q: Should I use protective film or dry heal for a ribcage watercolor lotus?
A: Both camps make valid points. Protective film limits external friction and moisture, while dry healing encourages a natural scab barrier. Ask your artist which method they prefer for red pigments and follow their plan consistently for the best color retention.
Q: Where can I find artists who specialize in red floral work near me?
A: Search social platforms with tag combinations like #RedFlowerTattoo and #FineLine or use directory filters on booking apps that let you select "red ink" and "floral" plus your city. Reddit recommendation threads can also point you to guest spots and conventions if you plan to travel.
Q: How should I dress for a thigh or calf session to keep the area clean and accessible?
A: For lower body sessions wear loose shorts or a skirt you can hike up easily so the artist can access the area without fabric dragging across the fresh work. Bring a lightweight coverup to avoid sun after the session if you need to run errands.
