
Fine line wraps dominate saved boards and trend feeds right now, but they do not always age the way people expect. Some clients walk into shops focused on the freshest photo, and then face cost creep, faster fading on curved areas, and extra moisture needs while healing. There is a real debate in the community about fine line longevity: one camp says thin work blurs too fast, the other says careful depth and spacing keep lines crisp. Below are practical wrap designs and what to ask your artist first.
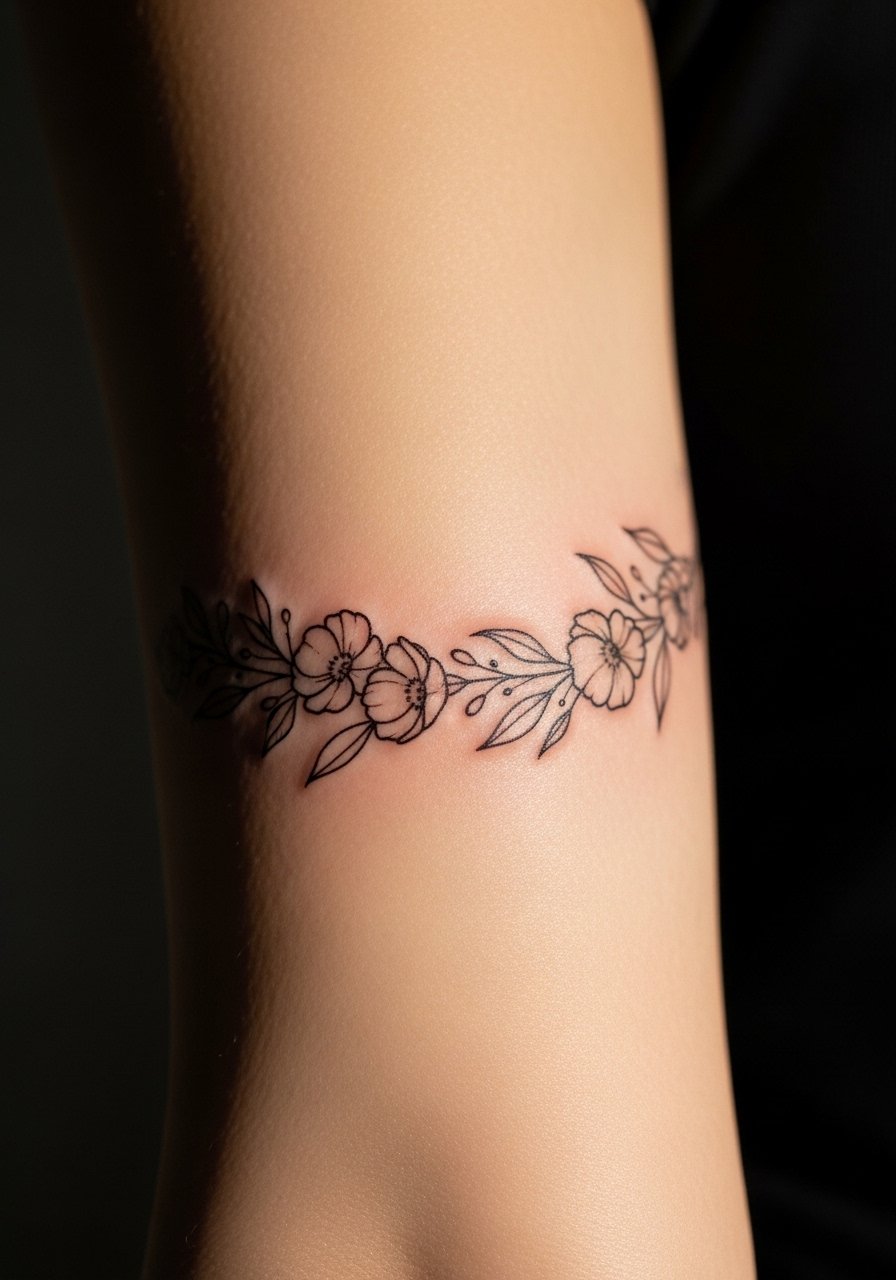
1. Floral Wreath Armband on Upper Forearm
I've seen this wreath sit well on the upper forearm for years when artists space the leaves for breathing room. Ask for slightly heavier linework on the outer edges and stipple shading inside leaves so the design keeps contrast as it heals. Common mistakes are packing too many tiny petals close together, which merge into gray at year two. It hurts like a 3 to 4 out of 10 on the forearm and usually takes one session. For showing it off, roll up a rolled sleeve blouse in white or pastel to frame the wreath without competing with the linework.
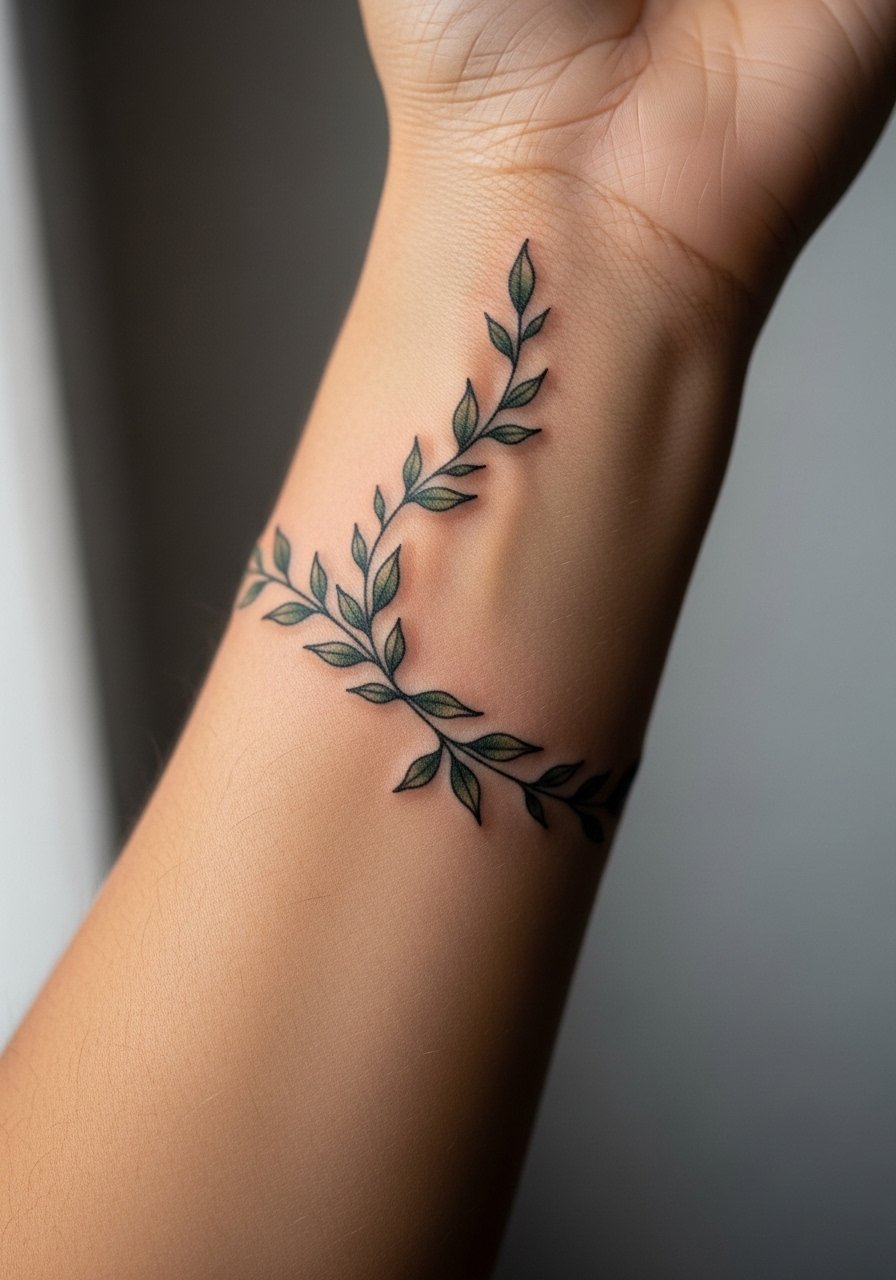
2. Leafy Vine Thin Band from Wrist to Mid-Forearm
Fair warning: thin botanical bands can blur where the arm bends unless spacing and needle depth are right. I recommend asking your artist for single-needle stems with tiny gaps between leaves so each element ages separately. The session is short and the pain is low, but wrist friction shortens crispness, so expect a touch-up window depending on lifestyle. Pair the thin vine with a dainty silver cuff bracelet and roll linen sleeves high to keep attention on the linework without crowding the wrist.
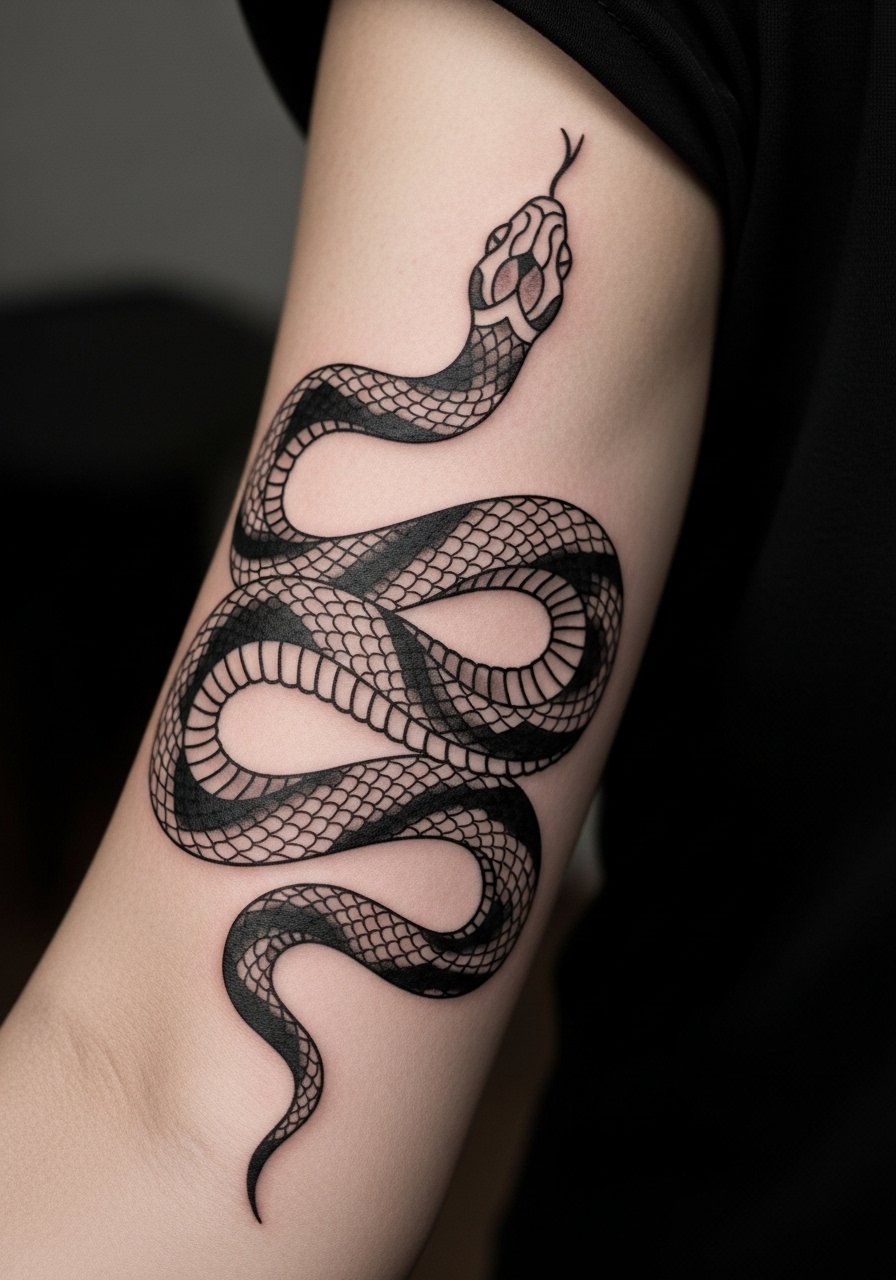
3. Snake Armband with Scales on Mid-Forearm
When you want movement, a coiling snake reads better than a straight motif because the body naturally wraps around curves. Tell your artist to vary scale size along the curve and to anchor the head or tail with a bolder outline so the shape reads from a distance. The common mistake is using tiny scales everywhere, which age into mush on curved skin. This is mid-forearm work so pain is moderate and two sessions are common for detailed blackwork. For showing it off, a fitted black tee or an olive button up shirt with cuffs rolled emphasizes scale texture and silhouette.
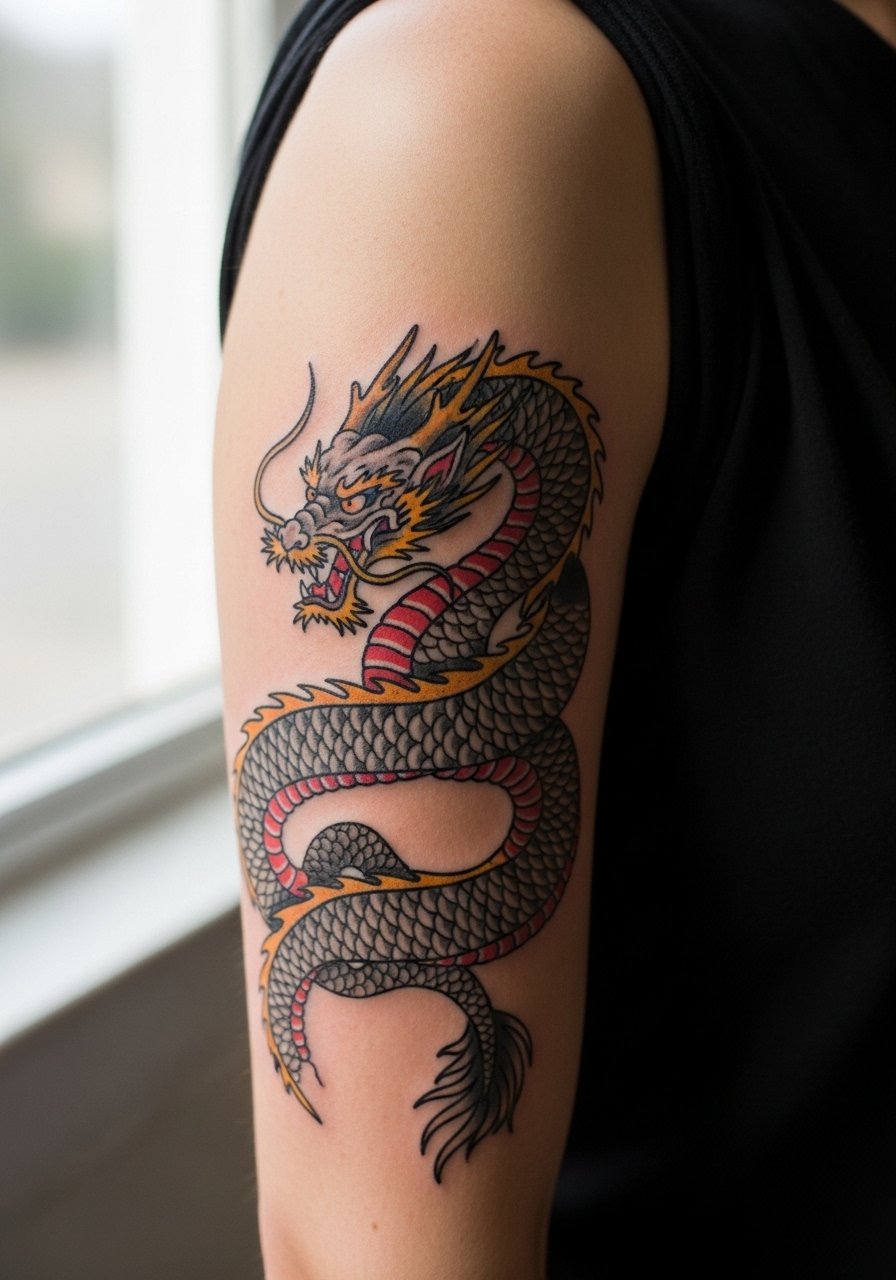
4. Dragon Coil Wrap Around the Bicep
There is something about an elongated creature wrapping the bicep that reads like a bracelet from across a room. For longevity, ask for stronger outer outlines and layered shading rather than extremely fine crosshatching. The bicep tolerates denser work and the session can be two to three sittings if you want color saturation. Mistakes include shrinking the dragon too small so details collapse after a year. Off-shoulder tops or strapless dresses frame this placement beautifully, and for session ease wear a loose button-down tank so the artist has full arm movement.
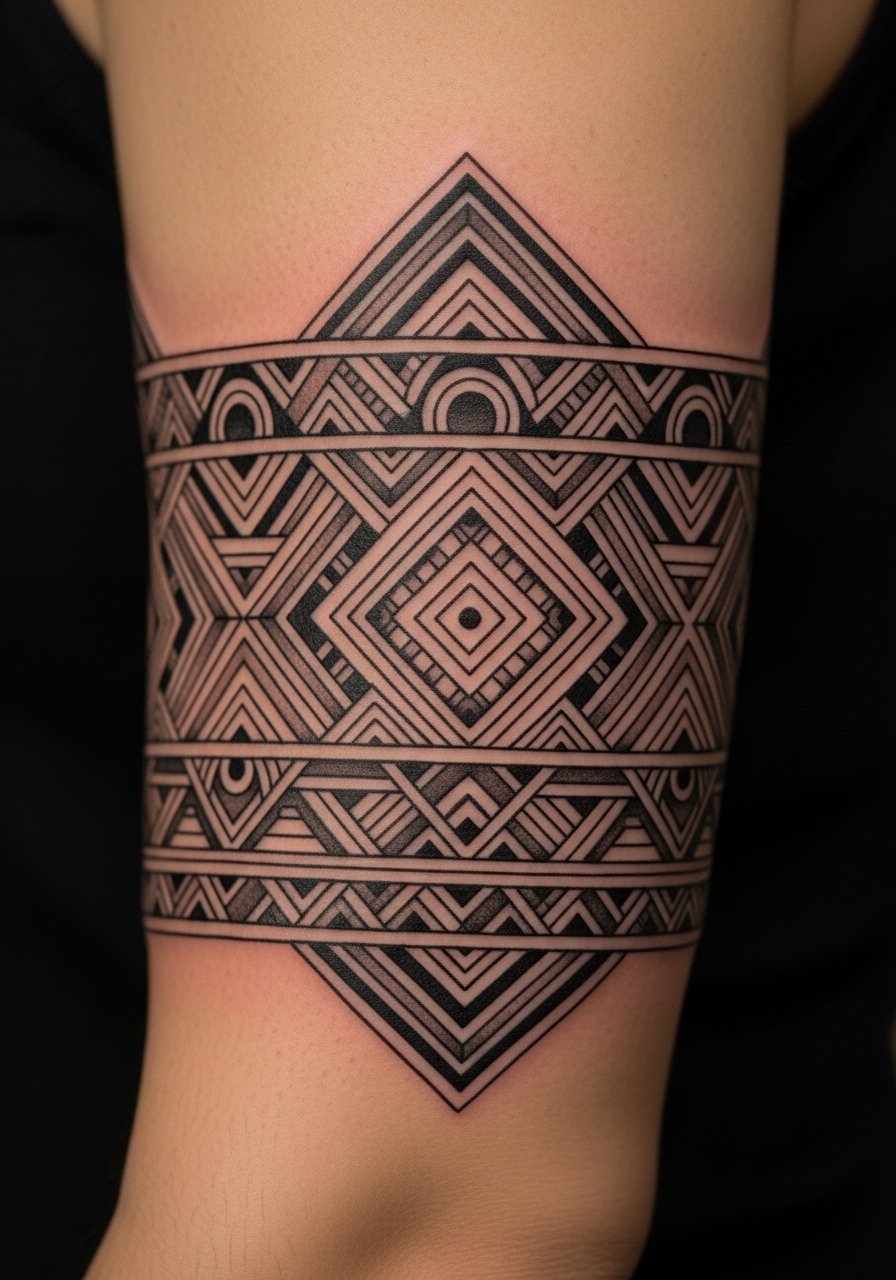
5. Ornamental Pattern Band on Upper Arm
I've seen ornamental bands function like permanent bracelets when the repeat motif has breathing room. Tell your artist you want repeating motifs with clear negative space so the pattern does not smudge into a single block over time. Pain is mild on the upper arm and most patterns finish in one session. A common aging issue is too-dense geometric fills that show as gray within two years. This style pairs well with neutral off-shoulder tops that keep the band visible, so think about an off shoulder top for show-off moments.
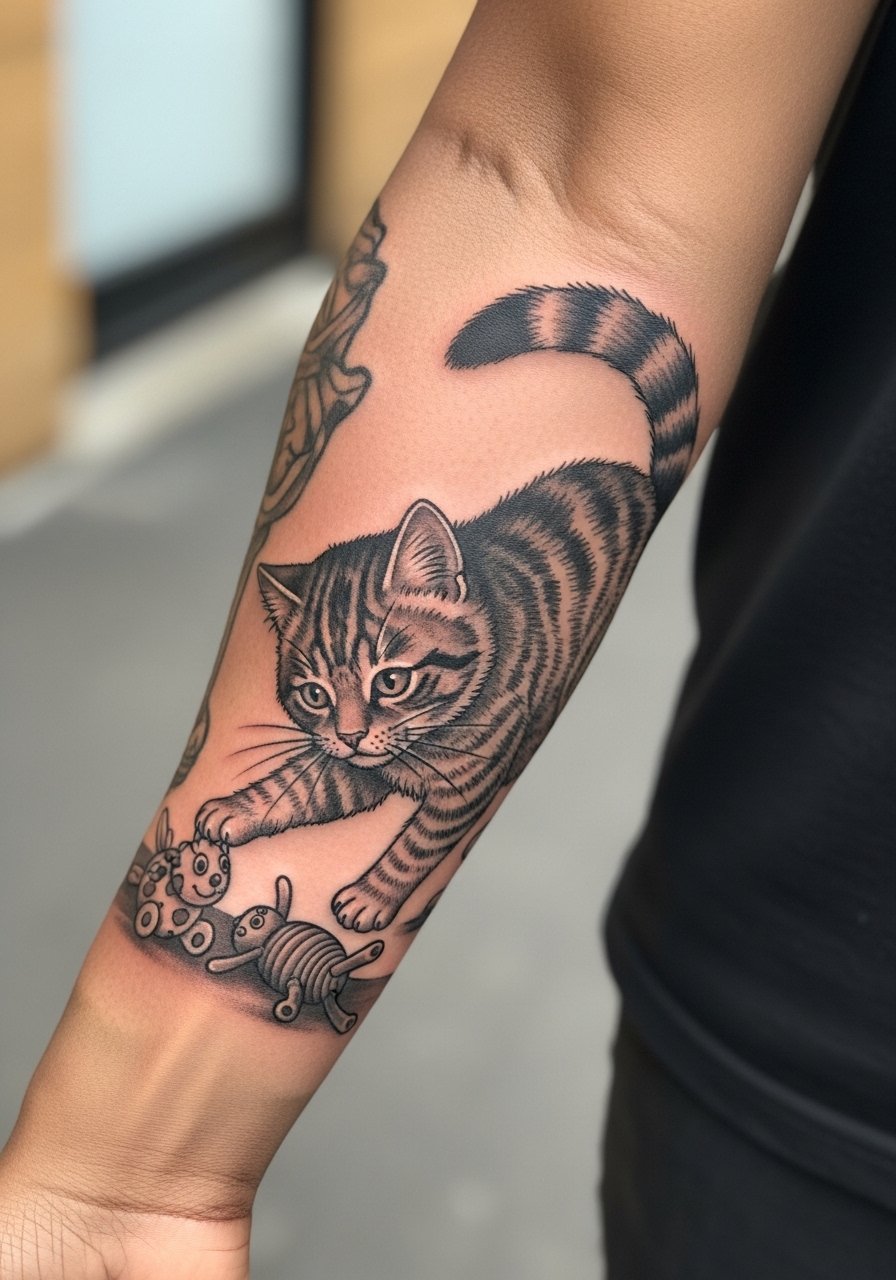
6. Cat Scene Armband with Toys on Lower Forearm
This playful wrap tells a story as it circles the arm, and it ages best when the main figures have solid outlines and the tiny props are given space. During consultation point out which toy is focal so the artist can scale it for longevity. Lower forearm sensitivity is low and a single session usually suffices for black and gray illustrative work. A common mistake is cramming narrative bits so small they lose recognition after healing. For casual visibility try a pastel cotton tank that leaves the forearm fully exposed.
Studio Day Picks
Those lower forearm and wrist pieces above need different prep than full bicep work, and a few specific items make the session and first week smoother.
-
Stencil transfer paper kit. Lets you preview the linework on skin and adjust placement, which matters for wrapped scenes like the cat band.
-
Topical numbing cream. Applied under guidance roughly 45 minutes before can ease wrist and inner-forearm sensitivity without altering the artist's linework when used correctly.
-
Thin protective film roll. Useful for wrist and finger wraps where daily washing causes extra friction in the first few days.
-
Fragrance-free gentle body wash. Cleans healing tattoos without stripping moisture from fine line work on the forearm.
-
Aquaphor healing ointment. A thin layer during the first two to three days helps retain moisture for thin botanical lines while the skin forms a protective layer.
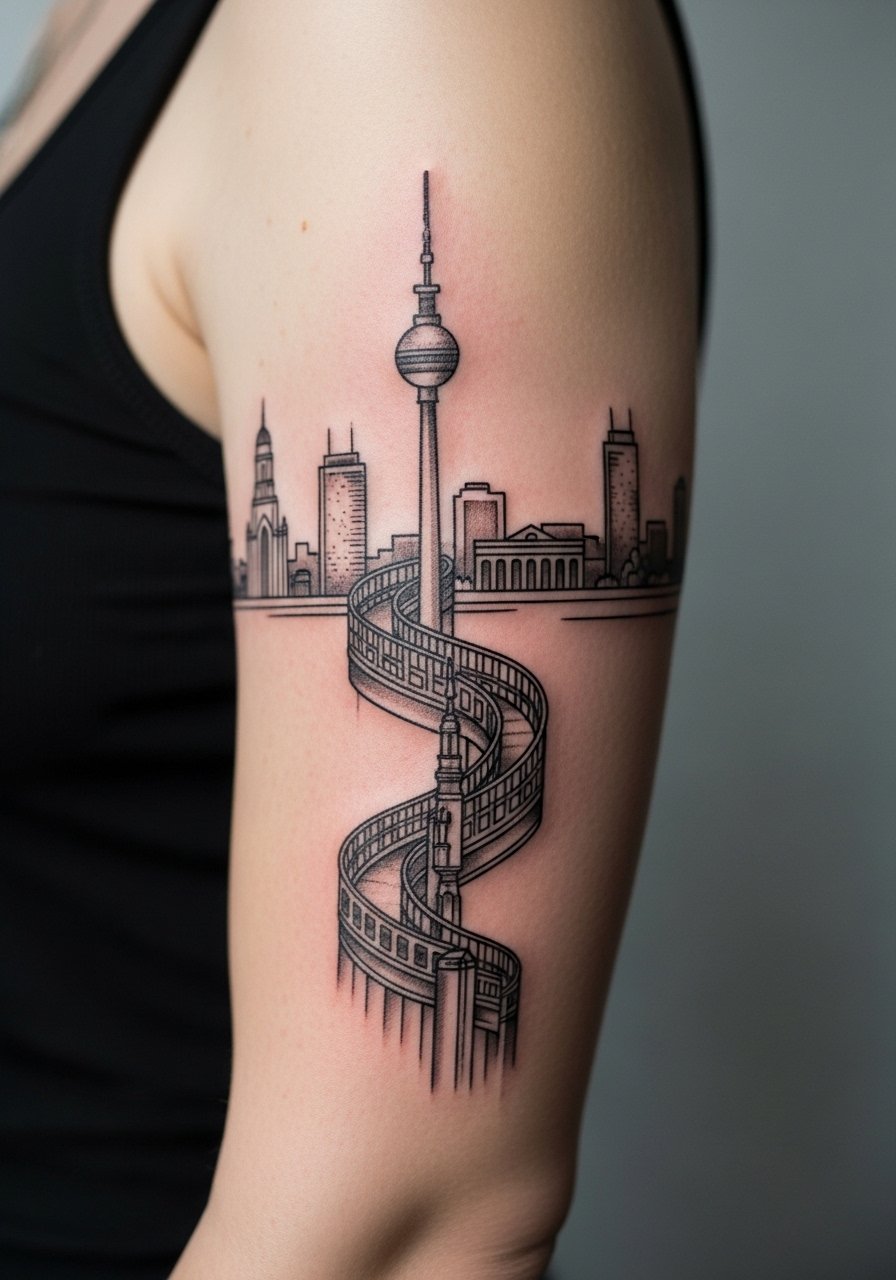
7. Berlin Cityscape Continuous Band on Upper Arm
There are few things more personal than a city wrapped around your arm, and micro-realism works best when the skyline elements have distinct negative space between buildings. Ask your artist for a reference photo crop so each landmark sits on its own plane. This style often needs multiple sessions for consistent linework and shading, and it reads well in black and gray. The common error is over-detailing tiny windows and losing contrast after healing. Style it with three-quarter sleeve sweaters that let the band peek out, especially in fall, and consider a three quarter sleeve sweater for seasonal outfits.
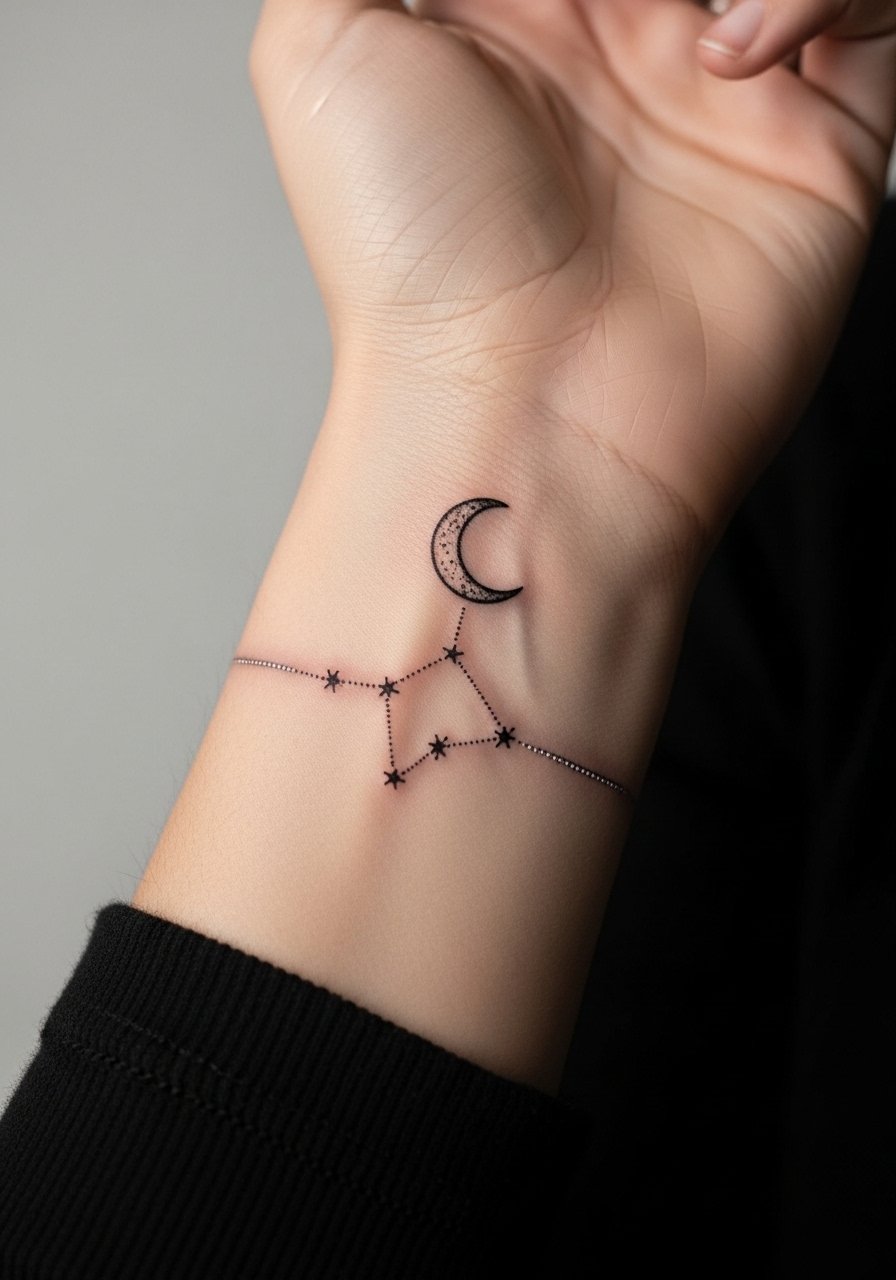
8. Crescent Moon Constellation Bracelet on Wrist
Most bracelet-style constellations age fine when the dots and connecting lines have slightly larger spacing than they appear to need. The biggest mistake is using minuscule dots that blur together from hand use. Expect a quick session and low pain, but plan a touch-up in a couple of years depending on hand washing. Pair this delicate wrap with rolled-up jeans and a dainty silver cuff bracelet or a linen rolled shirt to keep the wrist framed without competing pieces.
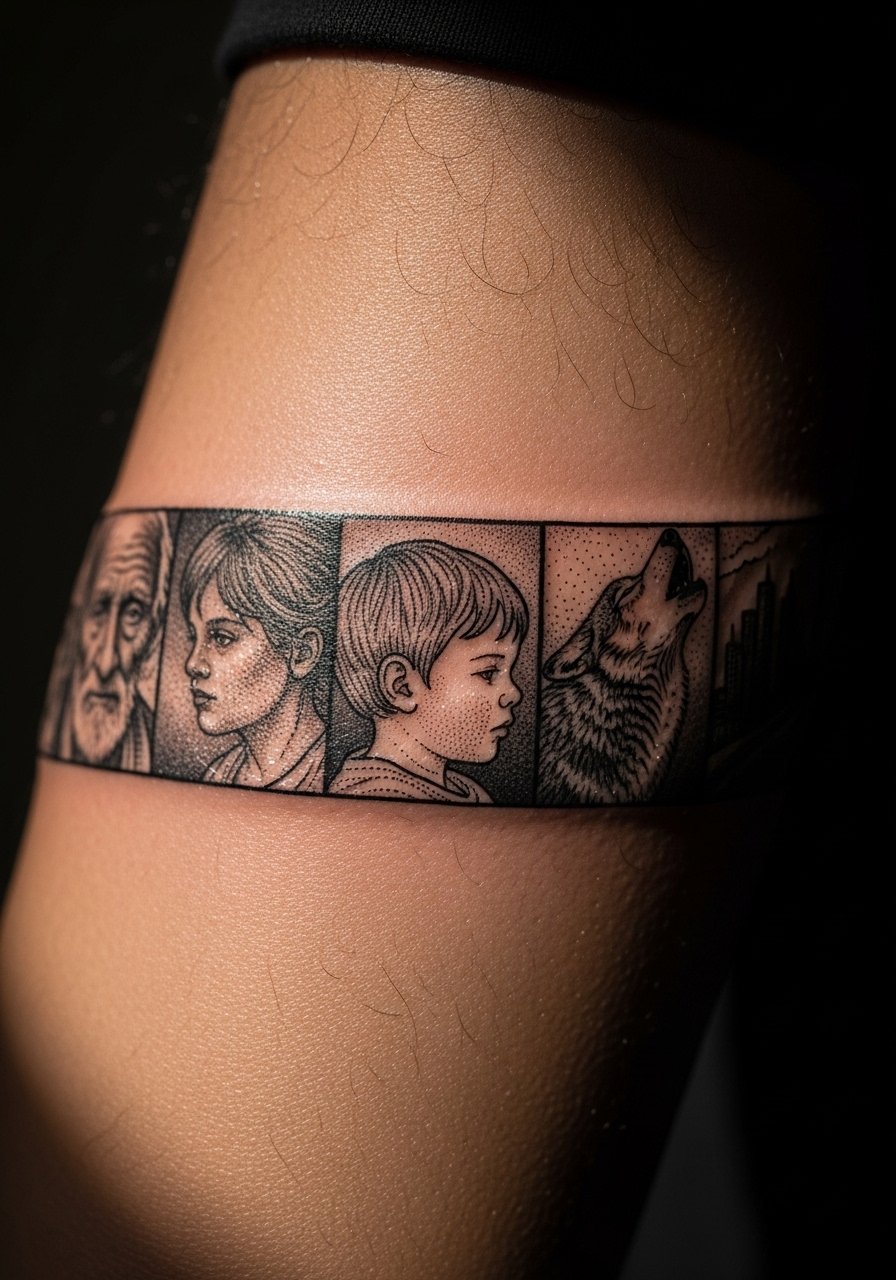
9. Micro-Realism Portrait Strip on Inner Forearm
Portrait strips that wrap partially around the inner forearm need deliberate spacing, and you should bring high-contrast reference images. I advise asking for larger pupils and simplified hairlines so facial features remain readable as the piece heals. Inner forearm sensitivity is moderate and high detail often means two sessions. A common error is insisting on micro details that are too small to survive movement and sun exposure. For appointment day choose a pastel cotton tank so the artist has full access to the inner arm.
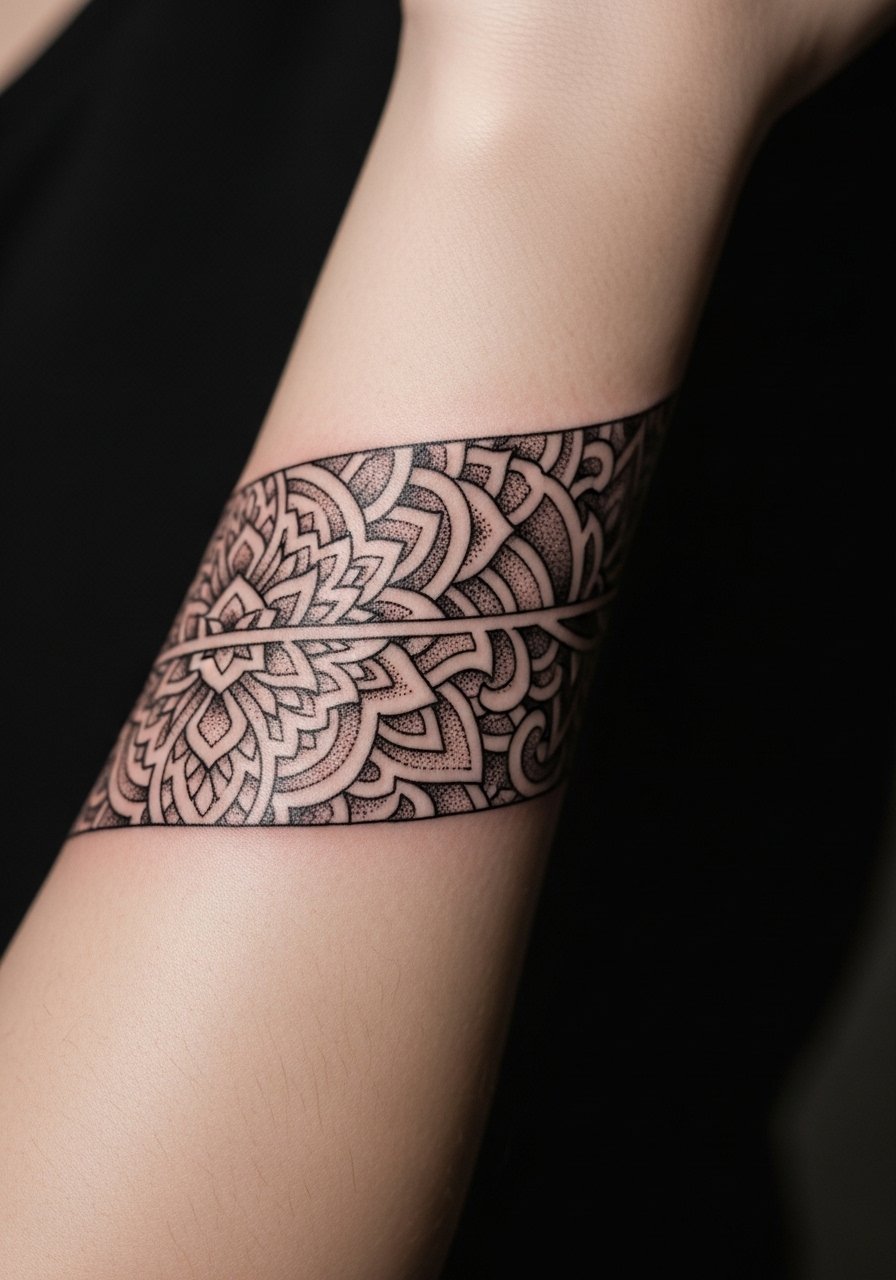
10. Geometric Mandala Band That Ages Well
Most people underestimate how compact geometry can blur on arms with frequent motion. One camp argues mandalas should be large and spaced to age, while another insists expert needle depth preserves small mandalas. Both sides have merit. My recommendation is to scale the mandala so the radial lines have breathing room and to use dot work instead of dense hatch shading. Expect mild pain on the forearm and a single long session for a mid-sized band. If you want this look, request sample spacing from your artist and avoid cramming intricate fills.
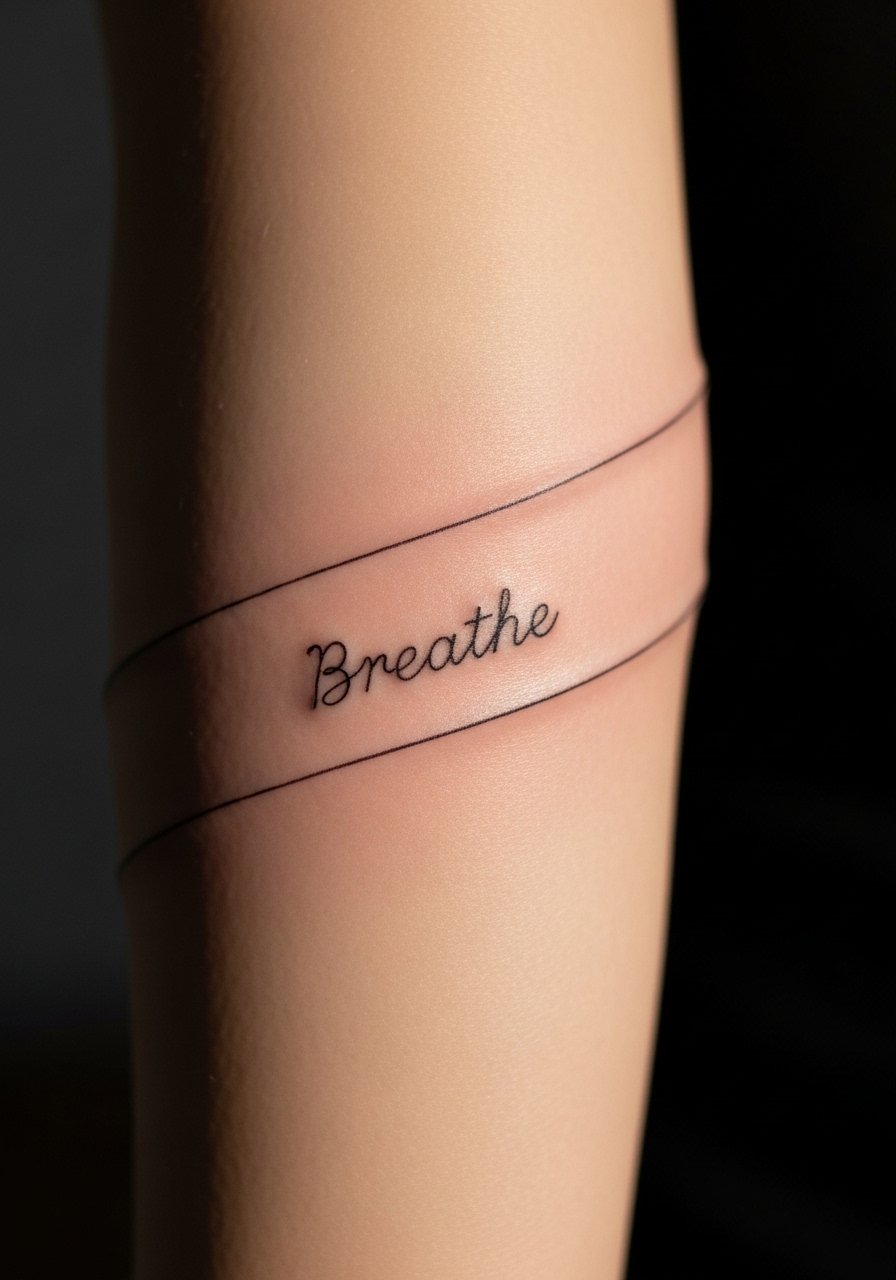
11. Minimalist Script Wrap Inside Forearm
Consultation matters a lot for script wraps since placement changes how letters read when the arm moves. Tell your artist the exact font weight and spacing you want and ask them to write the line on skin first to check legibility. The pain is low and a single session often suffices, but small lettering can fade into blur if placed across joints. For showing off, a rolled sleeve blouse or a simple rolled cuff tee keeps attention on the script without overshadowing it.
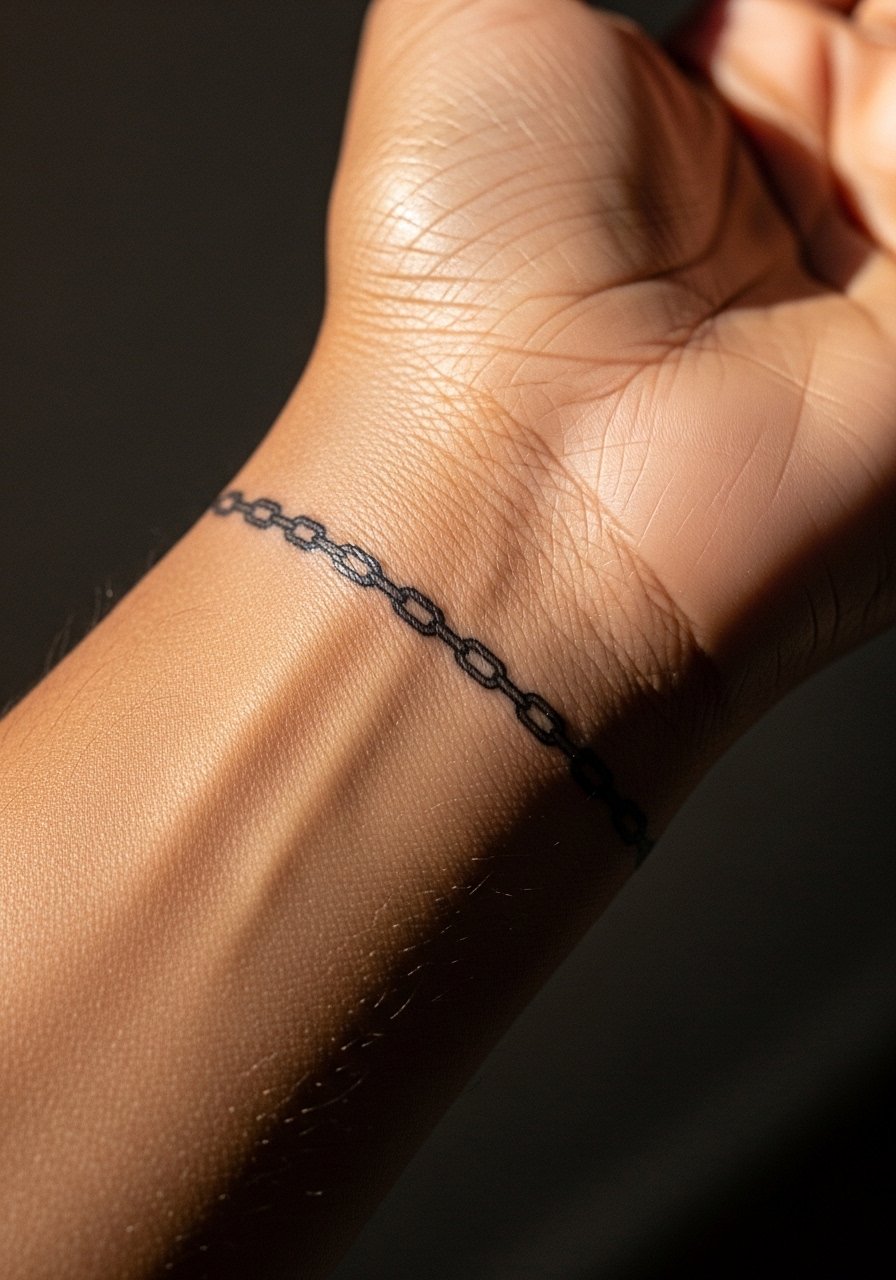
12. Chain-Link Bracelet Tattoo Around the Wrist
There's real merit to treating a chain-link band like jewelry instead of a dense tattoo. Ask for negative space between links and slightly heavier outer contours so each link stays distinct over time. Wrist work takes more friction from daily life, so expect touch-ups sooner than mid-forearm rings. For the session wear a fitted black tee that can be pushed up easily. Access and ease of movement in the chair reduce stress on the area while the artist works.
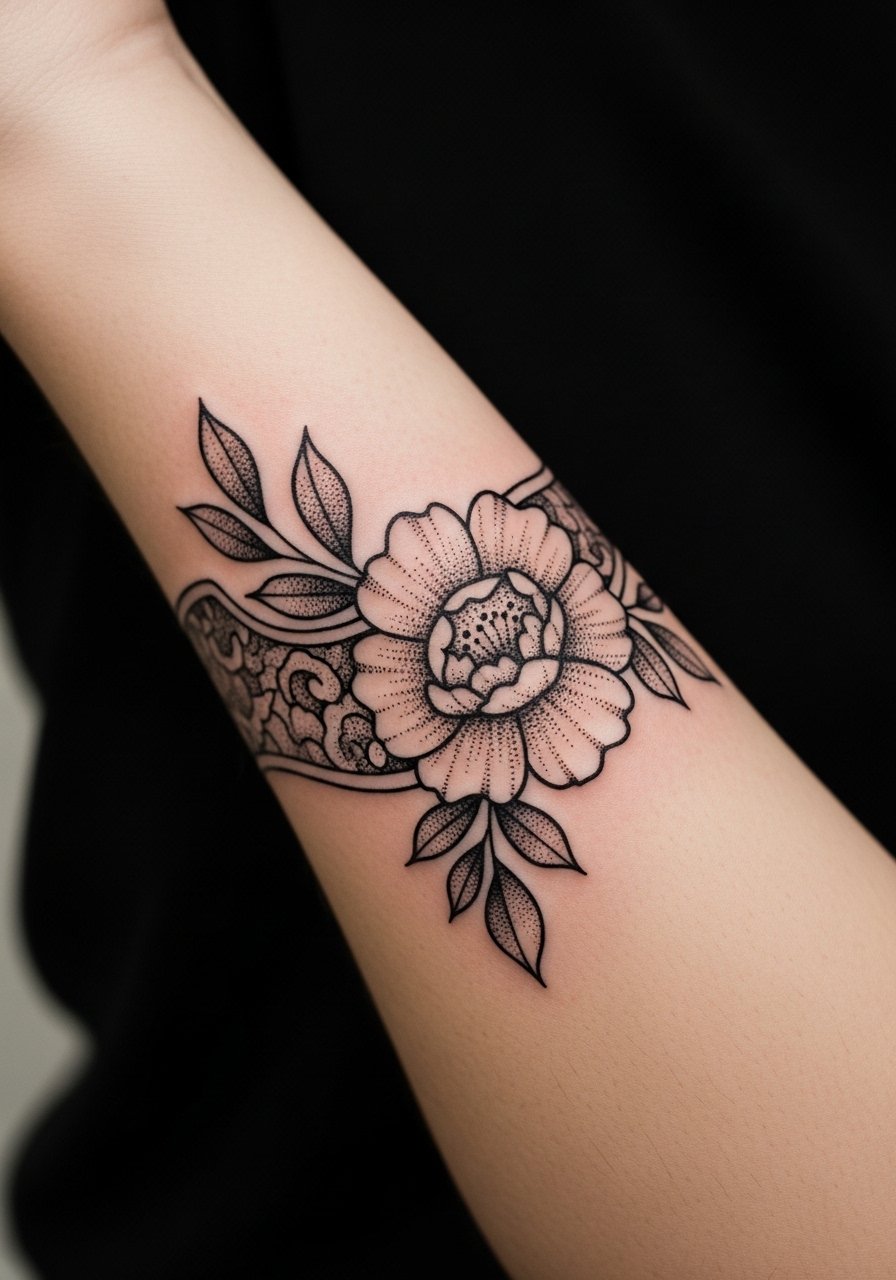
13. Stippled Dot-Work Floral Band on Forearm
Stipple shading keeps botanical wraps readable because dots hold contrast differently than continuous shading. For this band, instruct the artist to concentrate dots in shadow areas and leave leaf edges crisp. The forearm tolerates dot work well and the session can finish in one to two sittings depending on size. Common mistakes are uneven dot density that creates muddy areas after healing. If you want a casual pairing, a linen rolled shirt rolled to mid-forearm complements the muted texture without fighting the ink.
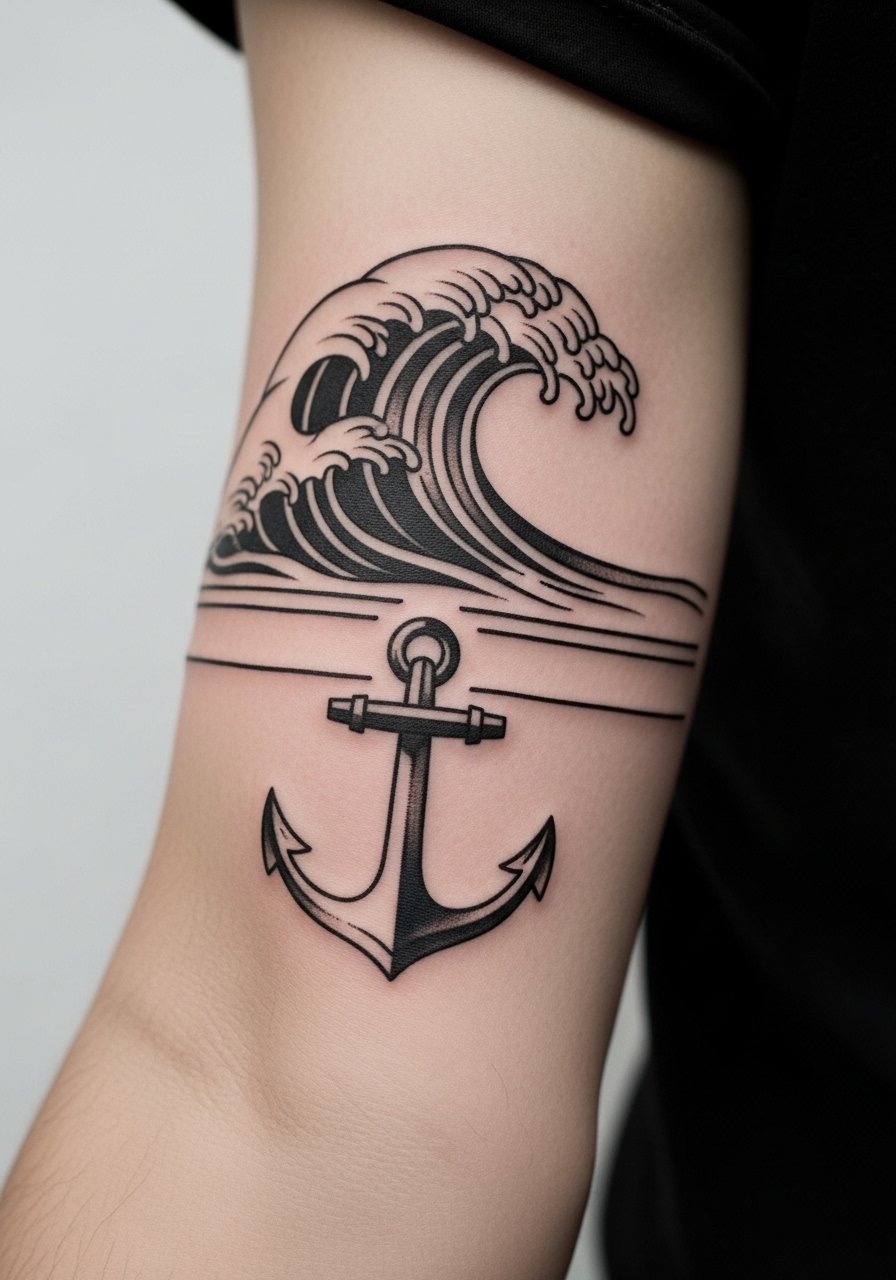
14. Wave and Anchor Nautical Band on Mid-Forearm
Purely illustrative wave bands read clean when the crest lines are left bold and the inner water texture uses negative space. This style suits people who want a wearable marine motif that wraps fluidly. The pain is low and one session often covers it. The mistake to avoid is overfilling the negative space with tiny details that become gray under sun exposure. Wear rolled sleeves or a tank when showing it off. For the session pick a loose short sleeve so the artist can rotate your arm freely.
15. Botanical Sleeve Connector That Wraps Around the Arm
If you want a partial sleeve built from armband motifs, plan the connector elements ahead of time. I advise mapping which bands will sit closest to the elbow and leaving wider spacing where the arm flexes most. Sessions usually span multiple visits and touch-ups are more likely at the joins. The most common error is trying to force disparate styles into one flow without revising line weight. For multi-session comfort bring a loose tee or tank that you can adjust so the artist has consistent access.

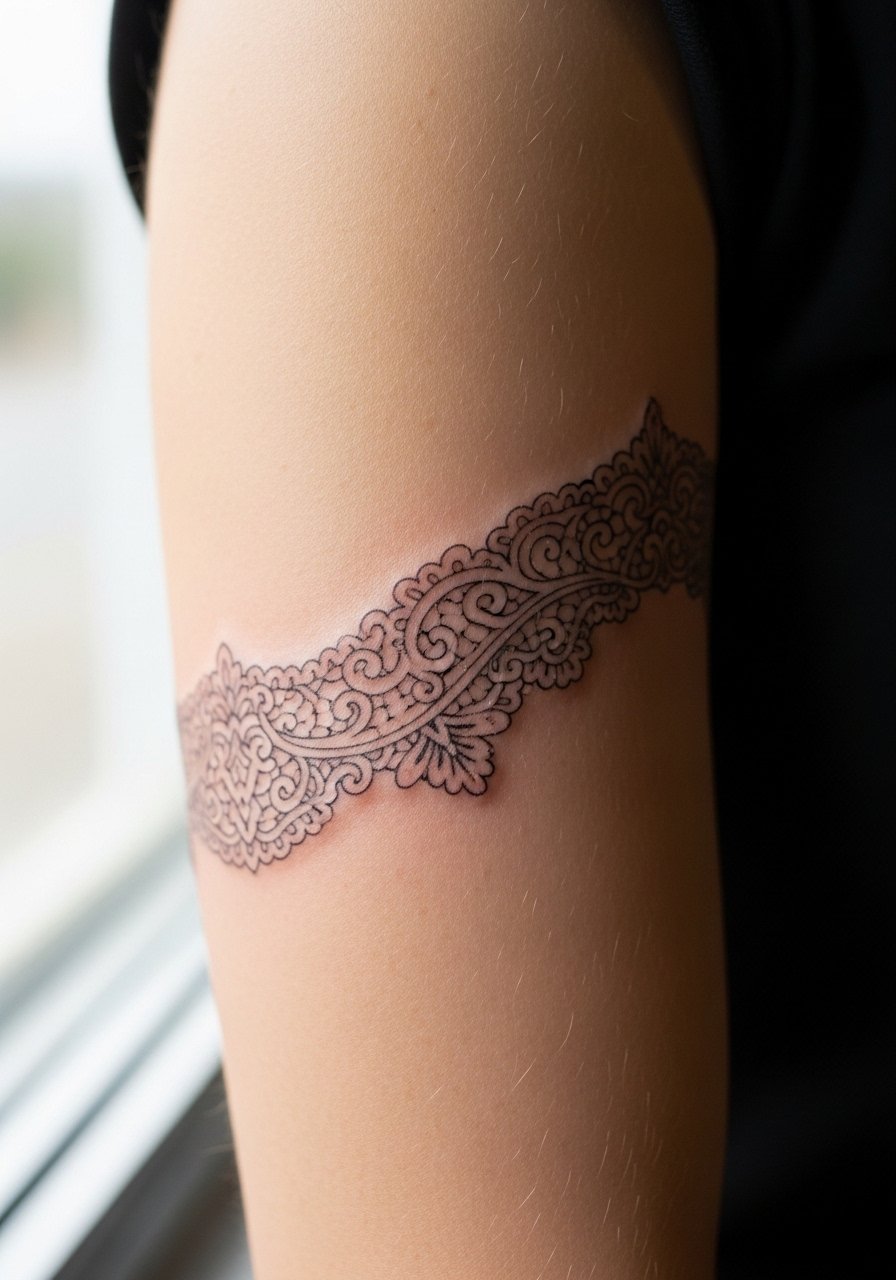
16. Lace-Inspired Filigree Band on Upper Arm
Lace bands work beautifully as a feminine wrap but require clear negative space between filigree elements to avoid merging. Consultation should include scaled mockups so edges sit clean against skin movement. The upper arm is forgiving for delicate filigree and most of these bands finish in a single session. A common mistake is excessive tiny loops that close up during healing. Pair this design with an off shoulder top or strapless summer dress to highlight the band when you want to show it.
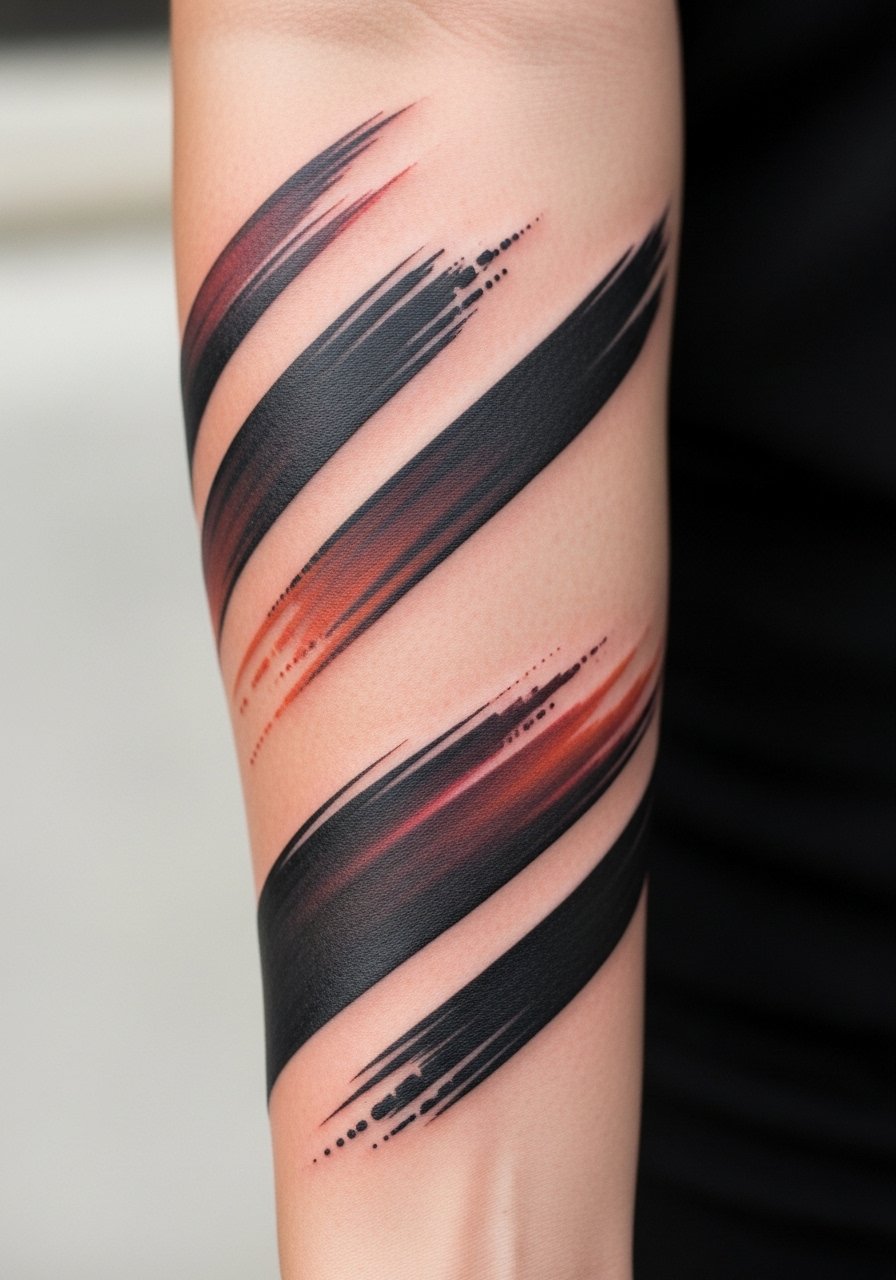
17. Abstract Brushstroke Wrap on Lower Forearm
Visual impact leads this piece. Bold brushstroke-style marks that circle the arm can age well if the ink is saturated and the strokes have deliberate gaps. Tell your artist you want visible breaks in the strokes so the wrap breathes rather than becoming a single block. Lower forearm pain is low and the session is usually short. A common mistake is relying on too many thin parallel strokes that soften into a gray wash. For easy access on session day wear a pastel cotton tank so the artist can rotate your arm freely.
Frequently Asked Questions
Q: Will fine line armband tattoos blur faster on curved arm areas like the forearm or bicep?
A: It depends on spacing and depth. One camp argues thin lines will merge on curved, high-motion areas within a few years. The other camp says careful needle depth and intentional spacing keep fine line readable. Ask your artist to show healed examples on similar placements and to scale elements so they have room to age.
Q: How do cityscape or portrait wrap tattoos compare to floral armbands when it comes to session time and touch-ups?
A: Micro-realism cityscapes and portraits typically need more sessions and a higher chance of touch-ups than simple floral bands because they rely on tiny contrasts and shading. Plan multiple sittings and expect a touch-up at one to three years depending on sun exposure and skin type.
Q: What should I wear to my appointment for a lower forearm or wrist wrap?
A: Comfortable, adjustable sleeves help. For wrists and forearms wear a loose tank or a rolled sleeve blouse that you can push up easily. The right clothing keeps the artist from tugging fabric and makes positioning quicker.
Q: Are there real differences in aftercare needs between full bicep wraps and tiny wrist bands?
A: Yes. Wrist bands face more friction and water exposure, so they benefit from protective film and careful drying during the first week. Bicep work usually sits under clothing and can stay cleaner, but both need gentle cleansing and moisture. Specific aftercare products are covered in the Studio Day Picks above.
Q: If I want my wrap to last without frequent touch-ups, what should I ask my artist during consultation?
A: Ask for sample spacing, show healed photos of similar placements, and request slightly stronger outer outlines on focal elements. Also ask how they plan to handle negative space. If they avoid showing healed work, that is a red flag. Trust your artist, but verify by reviewing healed pieces that match your skin tone and placement.
