
Fine line owls are all over saved boards, but the ones that still read crisp at year three usually had more thought put into placement and line weight than the iPad reference. I have seen fine line on wrists fade fast, guest spots cancelled at the last minute, and color flatten on darker skin. Read the next sections for designs that look elegant fresh and still work after a few years, and what to tell your artist up front.
1. Fine Line Owl Head on the Wrist
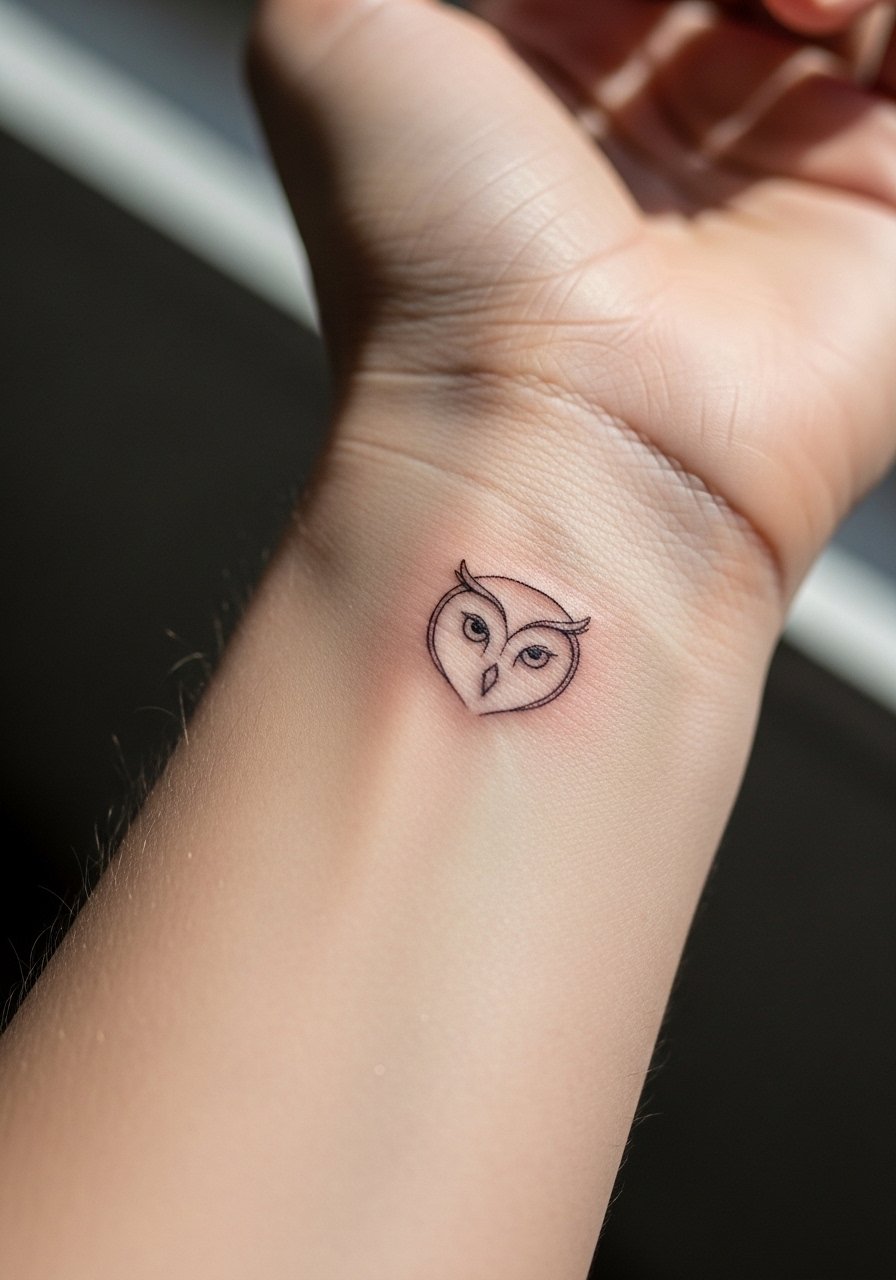
I've seen tiny owl heads on wrists that looked delicate the day they healed and then almost vanished within a year. For a fine line wrist piece aim for two line weights rather than a single hairline. Tell your artist you want a slightly stronger contour around the beak and eyes so those anchor points hold. Expect a 1-session appointment and a touch-up at six to twelve months for most people. Fair warning, wrists take friction and sun a lot, so plan darker linework if you want long-term clarity. For showing it off, stack a thin silver chain bracelet on the opposite wrist and roll linen blouse cuffs when you head out.
2. Micro-Realism Owl Eyes on the Inner Forearm
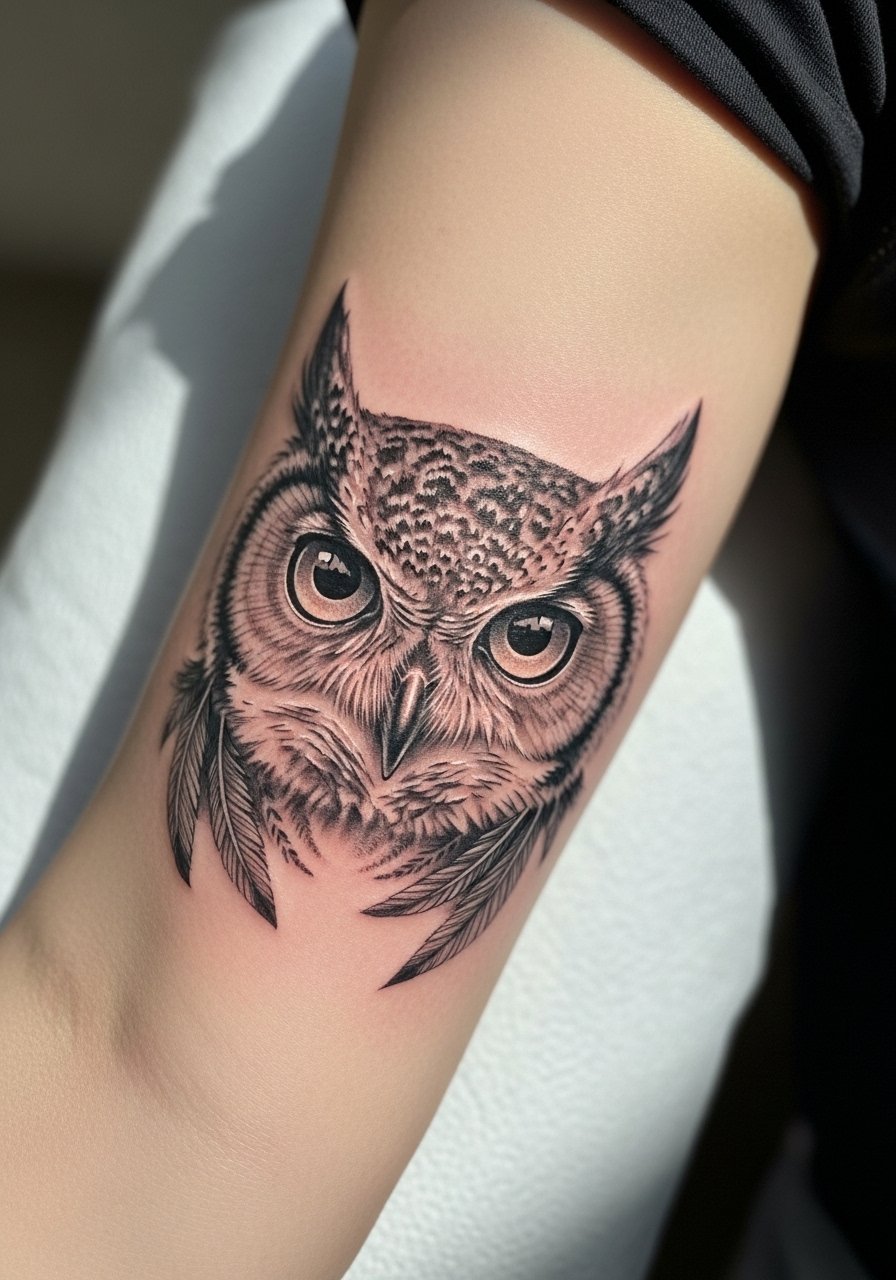
This micro-realism option reads like a pendant of attention when placed on the inner forearm. In my experience it needs two smaller sessions to build depth without blotching the tiny feathers. Tell the artist you want high contrast between the iris and surrounding feathers and ask to see healed reference photos on similar skin tones. Blowout risk is low on forearm but tiny dot work can soften by year two if saturation is shallow. For the session wear a loose button-up shirt you can roll up, and later show it off with a pushed-up fitted cream sweater or a minimalist leather cuff.
3. Geometric Owl Silhouette on the Shoulder Blade
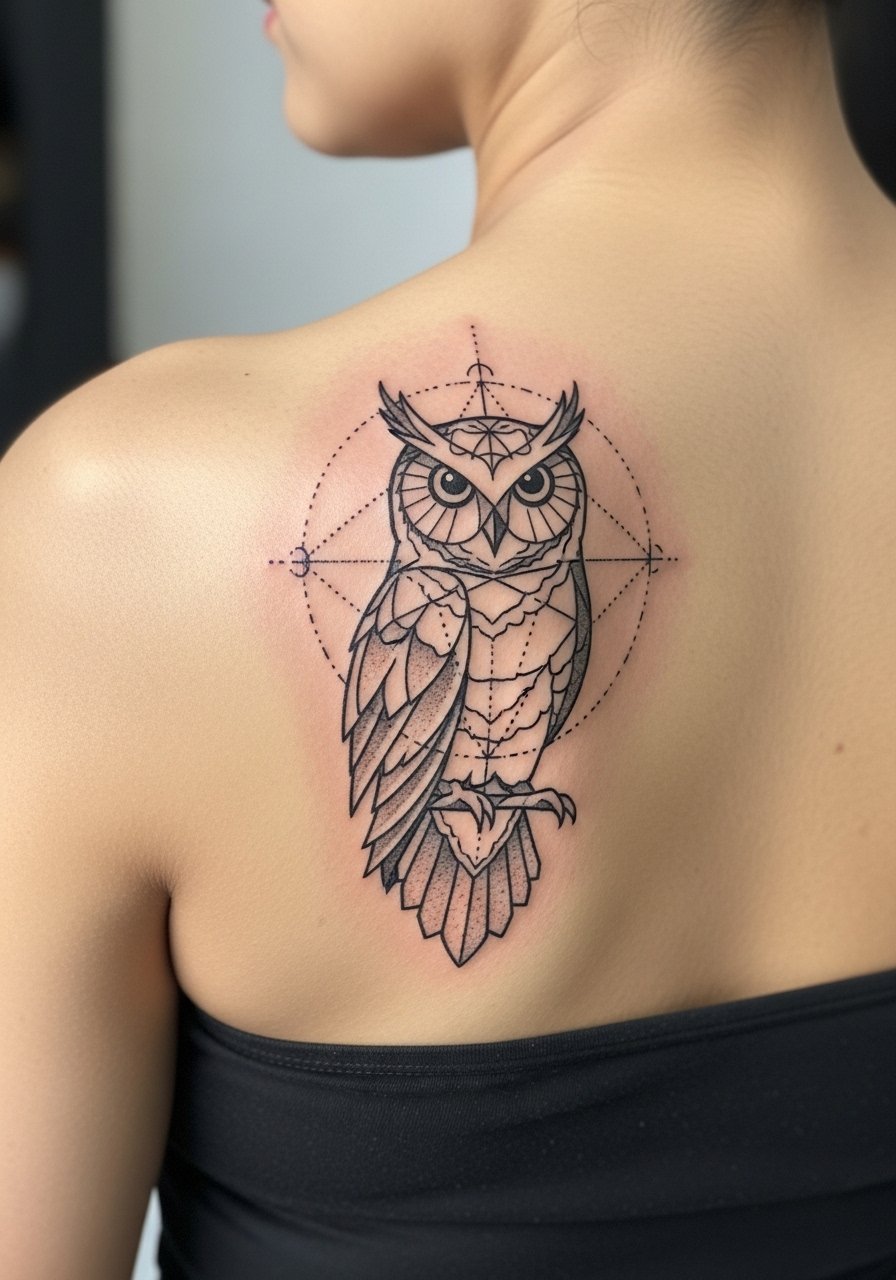
Shoulder blades are forgiving for geometry because the skin stretches less and the canvas is flat enough for straight lines. The biggest mistake is making the sacred geometry too dense. Ask for breathing room between primary lines so negative space stays readable after two years. Artists are split on fine line versus bold line for blackwork geometry. One camp says bolder lines age better on shoulders, the other says crisp fine lines are fine with the right spacing. Bring examples that show the exact spacing you want. For session wear, use a strapless tank or off-shoulder top so the artist has clear access without tugging.
4. Watercolor Owl in Flight on the Collarbone
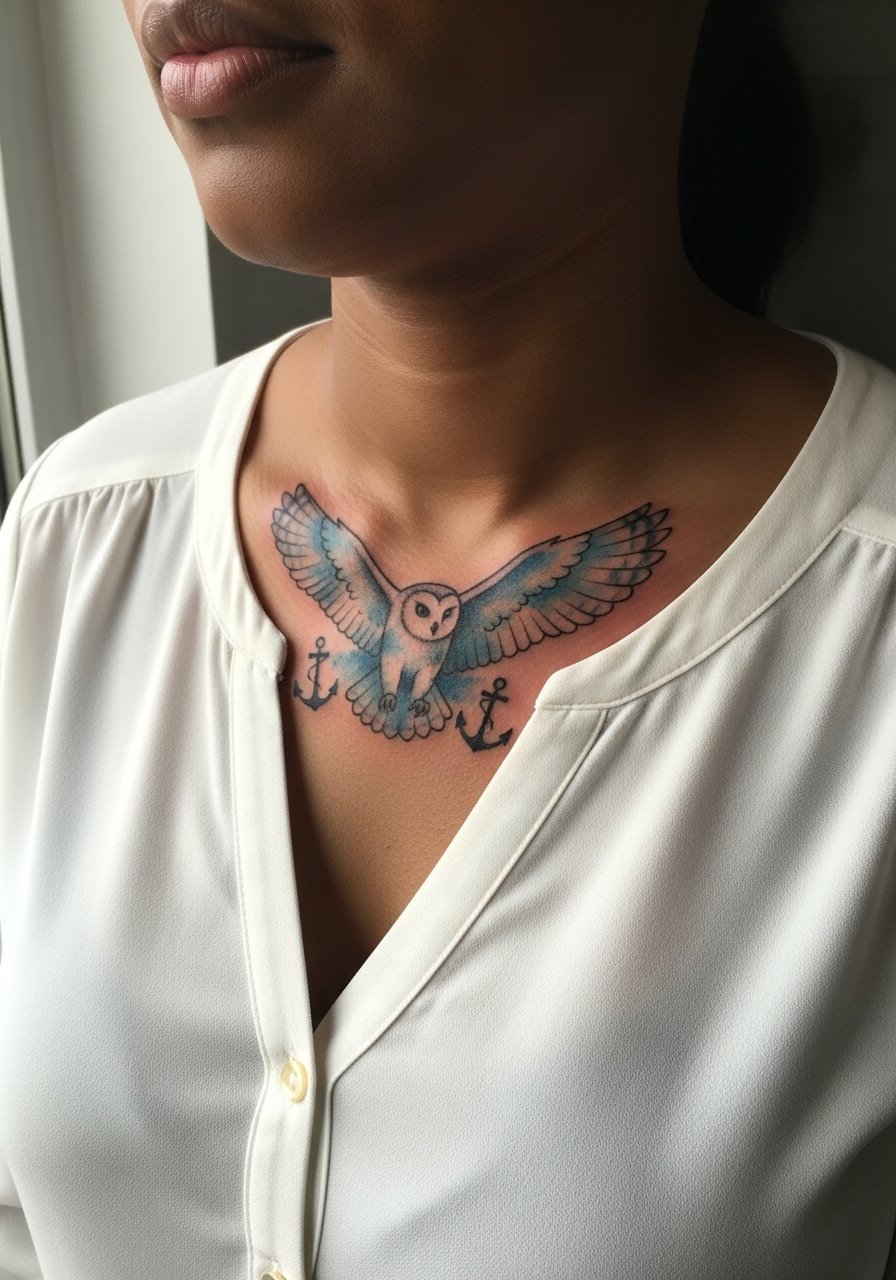
Watercolor on the collarbone gives an ethereal look that photographs beautifully, but color diffusion is real. Expect two sessions if you want saturated blues layered over subtle black anchors. A common version that ages poorly uses too little black contrast, which makes the color wash blend into skin over time. Ask for small black anchor points around the beak and wing joints to preserve silhouette. Pain on the collarbone can spike when needles pass close to bone, so plan short breaks. Pair this design with a v neck silk blouse for evenings, and wear a button-front shirt on session day so you can open it and protect the area.
5. Neo-Traditional Owl with Floral Crown on the Outer Thigh
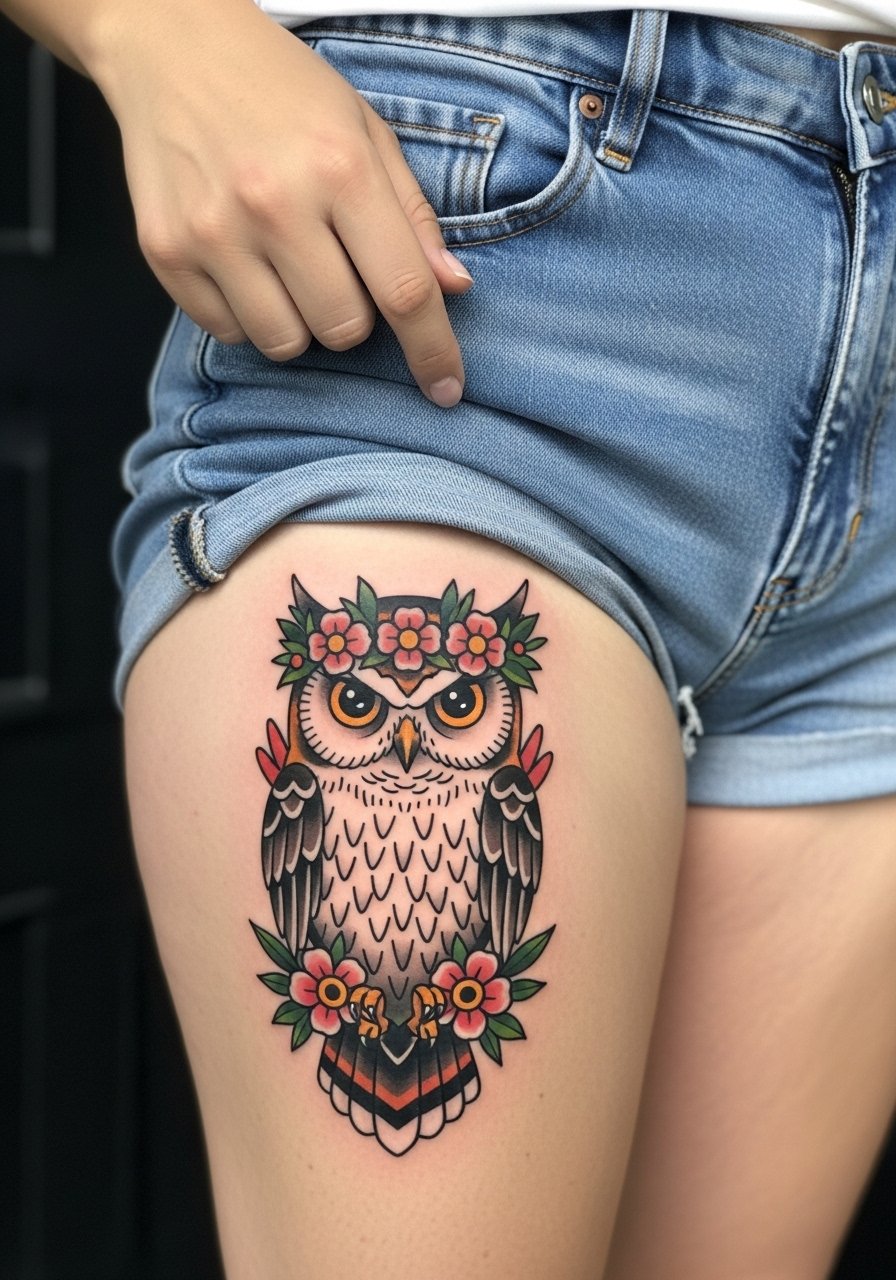
Outer thigh is a superstar for larger neo-traditional pieces because it heals well and tolerates saturation. This style benefits from bold outlines and layered color to keep the floral crown readable over time. A mistake I see is asking for tiny petals that blur once the piece sits. Tell the artist you want petal shapes scaled for viewing at arm's length. Expect two to three sessions for a five-inch composition and plan loose shorts or a skirt for the session by wearing high-waisted denim shorts so the artist can work without fabric rubbing the area afterwards.
6. Blackwork Owl Mandala on the Upper Arm
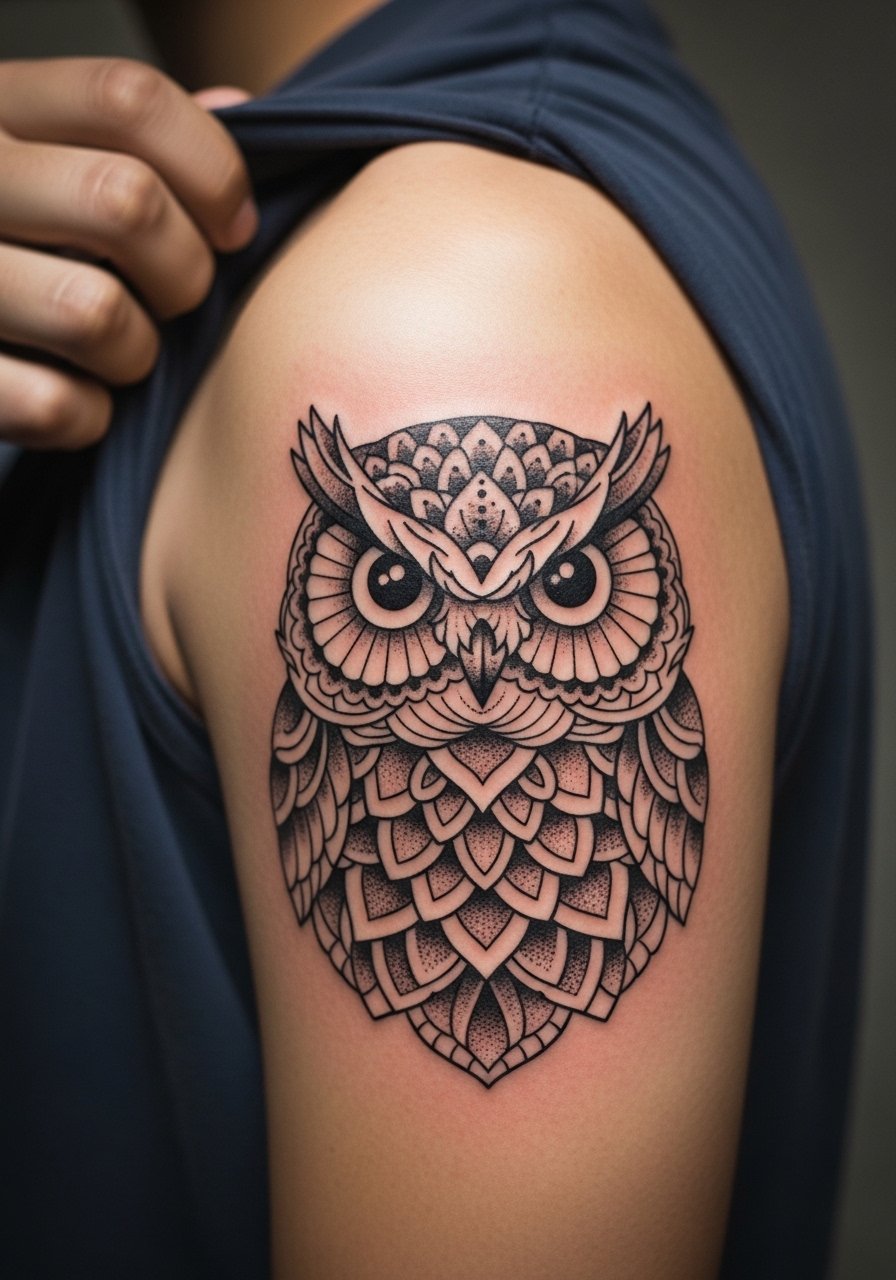
Blackwork mandalas on the outer upper arm age predictably when the dot work has spacing. One practical mistake is cramming too many concentric rows into a small diameter. Ask for a mandala that extends three to four inches so the dot work has room. Touch-ups are common at year two for dense stipple shading. The area is low on friction and heals clean, but discuss shading density with your artist. For show-and-tell wear an off-shoulder black cotton top that frames the mandala without competing with the patterns.
Studio Day Picks
The first six ideas range from wrist fine line to upper arm mandala and each asks for slightly different prep. These picks smooth the session day and the first week of healing for small wrist work and larger upper-arm or thigh pieces.
- Indie dotwork balm. A thinner balm that breathes better than heavier ointments, useful for dotwork mandalas and blackwork areas that need moisture without clogging.
- Breathable second-skin film. An alternative to standard barrier film for people who reacted to thicker films, handy for the inner forearm micro-realism piece.
- Rice-based moisturizer. Lightweight hydration that plays nicer with fine line wrist work and avoids the greasy residue that can soften tiny lines.
- Tea tree salve small batch. A calming salve for mild itching on geometric and floral work, best used sparingly and after consulting your artist.
- Aquaphor healing ointment. Thin layers help protect fresh fine line work in the first 48 hours when friction is highest on wrists and ankles.
7. Minimalist Single-Line Owl Behind the Ear
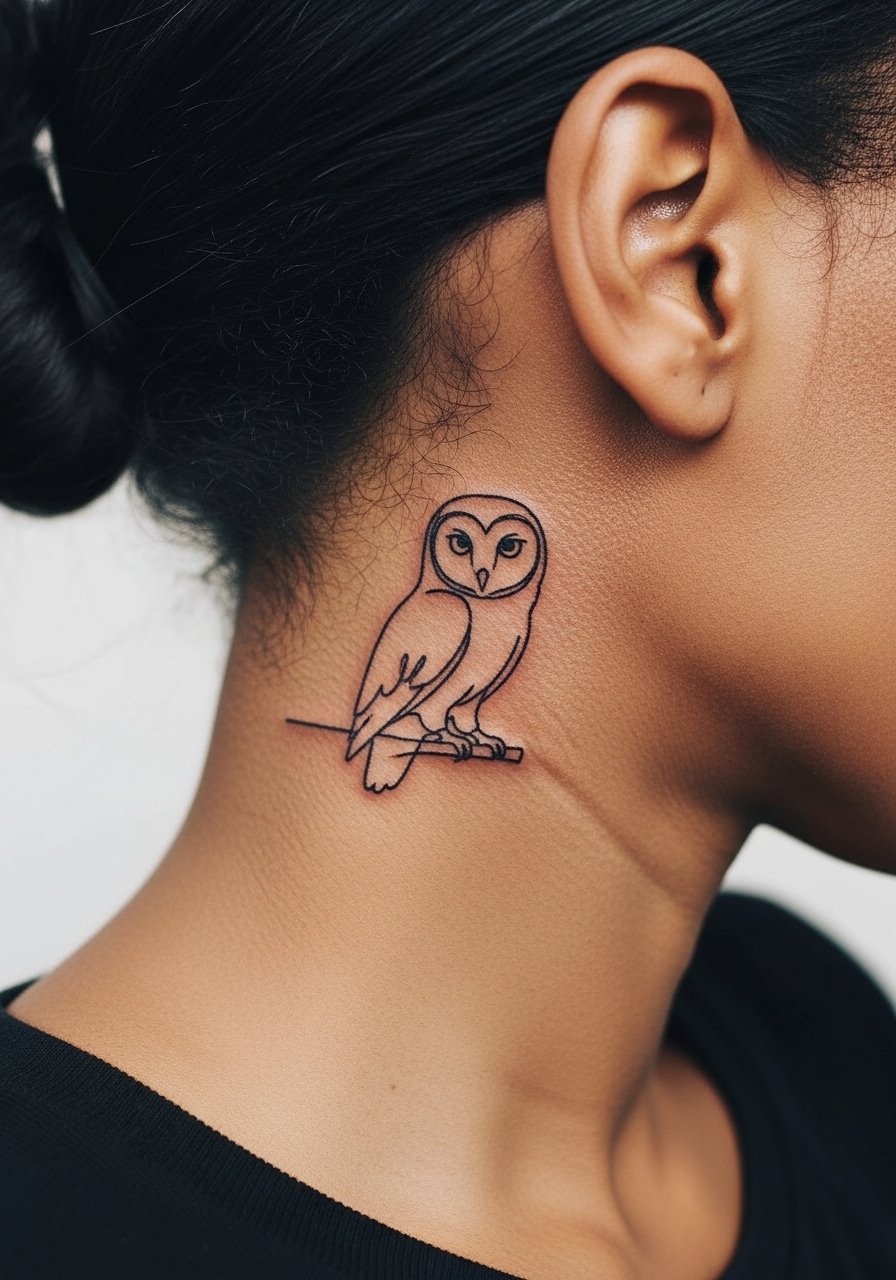
Behind-ear tattoos read like a secret charm, but they are tiny and prone to blurring if the line is too faint. The usual mistake is choosing a single hairline for an area that gets shampooed and rubbed daily. Ask the artist for a slightly bolder continuous stroke and test placement with a marker. The pain is mild and sessions are quick, usually a single short sit. Note that hair regrowth and glasses can obscure the area. For the session wear your hair up or a simple ponytail so the artist can access the spot easily.
8. Realistic Barn Owl Portrait on the Calf
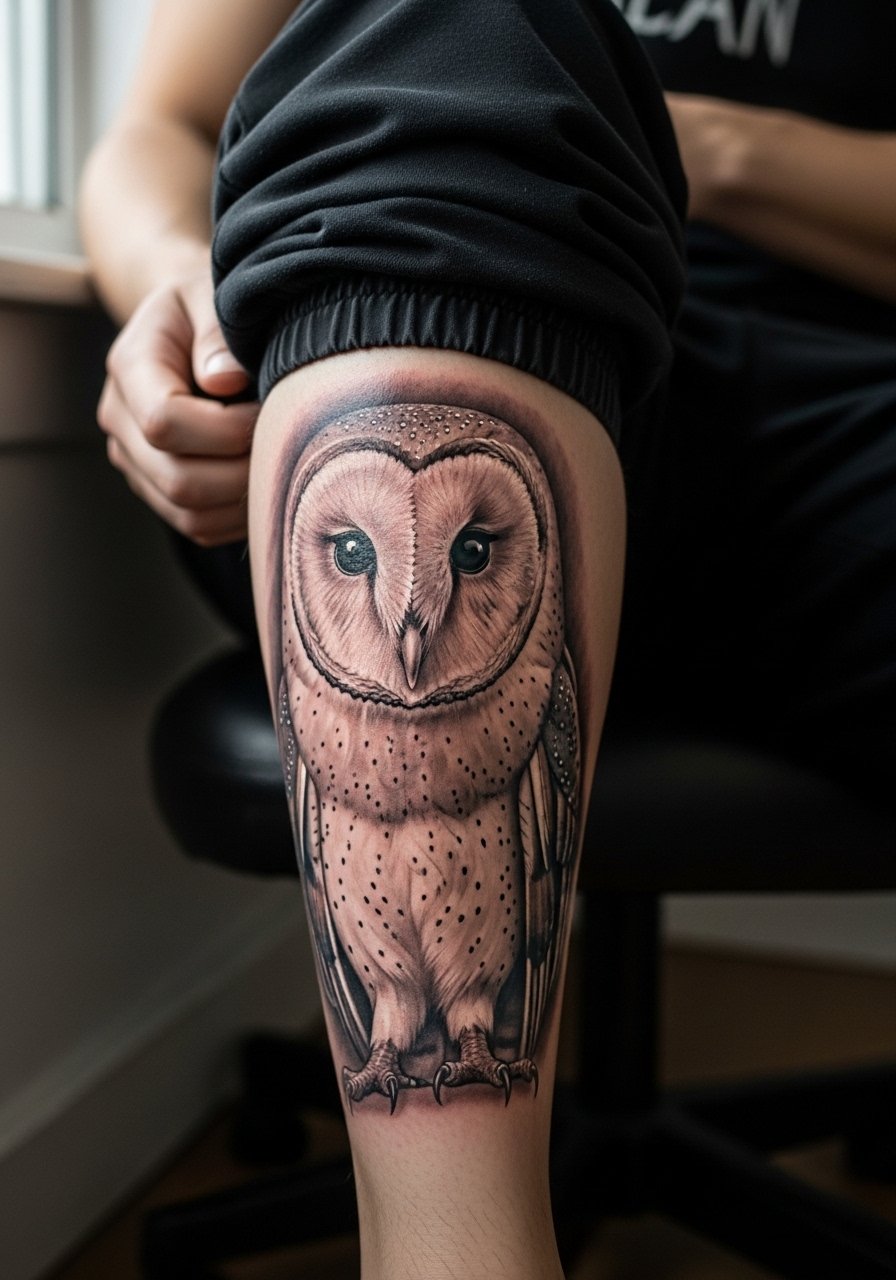
Calf portraits take time but reward you with a flat, visible canvas. Expect multiple sessions to layer feather texture and tonal depth without overworking the skin. A common error is asking for a smaller portrait than the detail requires, which forces the artist to compress feathers into indistinct patches. Tell your artist you want feather texture and to show healed photos of similar work on calves. The calf tolerates saturation well and photographs true to tone, but if you gain or lose significant weight, proportions may shift. For session comfort wear loose jogger pants you can slide down without pressure.
9. Ignorant Style Owl on the Ribcage
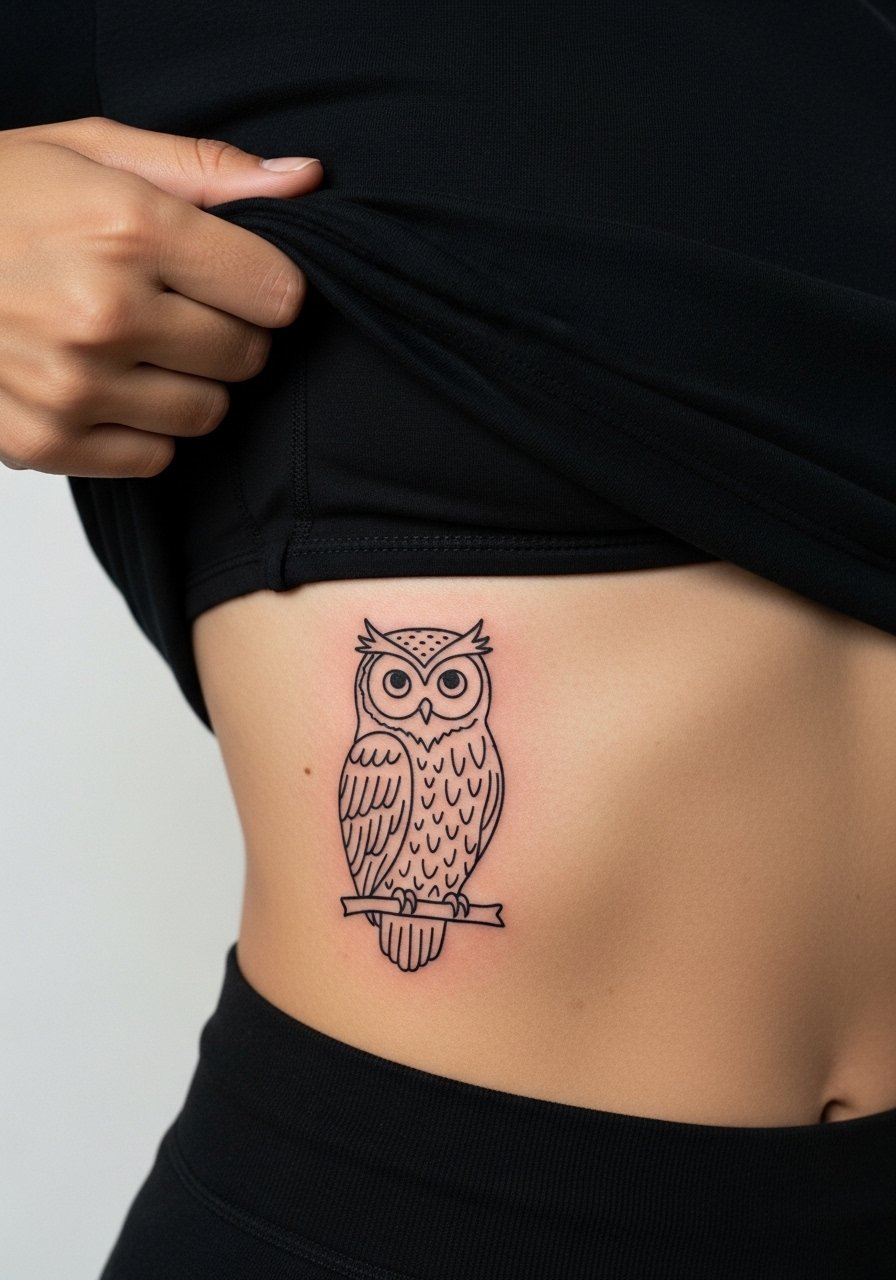
Ribcage tattoos hurt more than most and ignorant style with bold, naive lines can actually be a forgiving choice because larger strokes age predictably. The controversy about fine line on ribs matters here. Some artists say ribs stretch and blur lines in two years. Others say if you use deeper placement and bolder line weight it holds. Name both to your artist and ask which camp their technique follows. Plan for a single session if you keep it medium sized, and expect a touch-up at year two if you want lines crisp. Wear a front-open robe or loose tee on session day so you can lift just enough fabric.
10. Fine Line Owl with Branch on the Inner Bicep
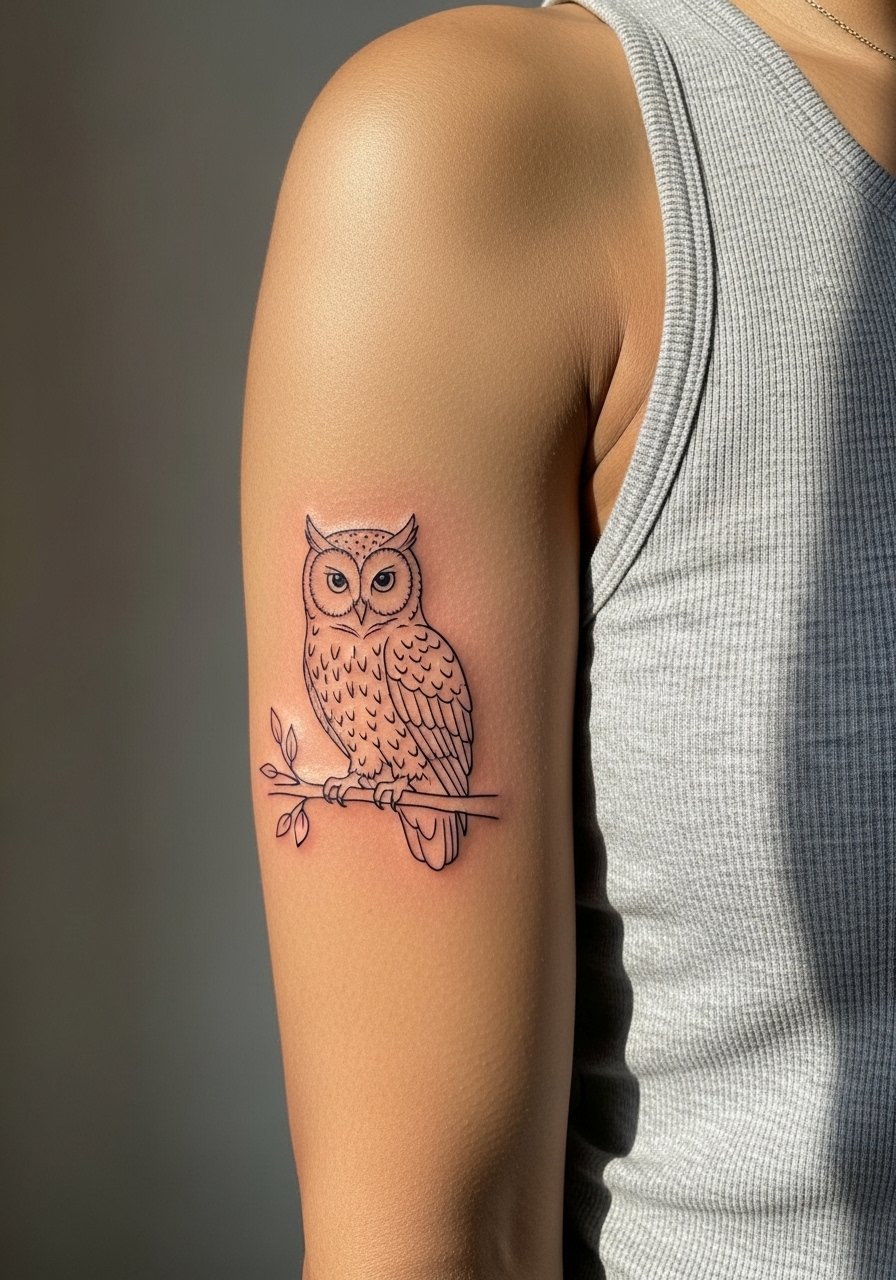
Inner bicep is protected from sun and friction, which helps fine line pieces age better. The mistake is requesting ultra-skinny contour lines without reserved anchor lines for the eyes and branch. Ask the artist to deepen the eye contours and add a subtle branch shadow to protect silhouette. Pain is moderate when needles cross muscle, so short breaks are reasonable. Expect one session for a 2.5 inch motif and a possible touch-up at year one. Pair it visually with a sleeveless linen tunic and a thin arm cuff for a balanced look.
11. Traditional American Owl on the Forearm
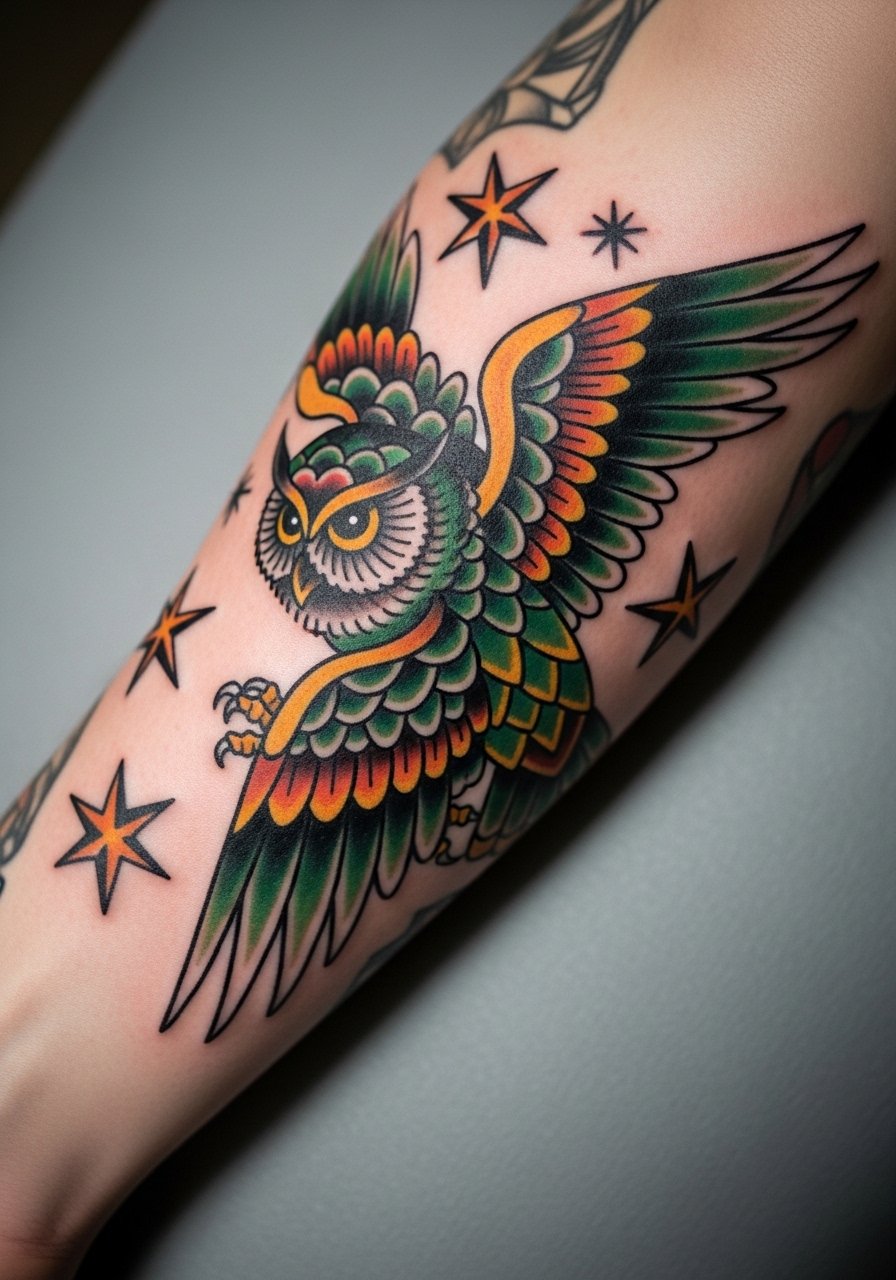
Traditional American lines are bold for a reason, they age into a readable silhouette even when pigments soften. That boldness also helps the owl read from across a room. The common misstep is crowding too many small stars and color fills into a five-inch composition. Ask for larger stars or fewer filler elements. Forearm placement sees frequent sun exposure, so plan for sun protection to keep saturation longer. Sessions usually span two sittings for five-inch pieces and the touch-up timeline is typically at year two. For show-off pairing roll up sleeves or wear a fitted button shirt so the forearm sits exposed.
12. Ornamental Owl Feathers Down the Spine
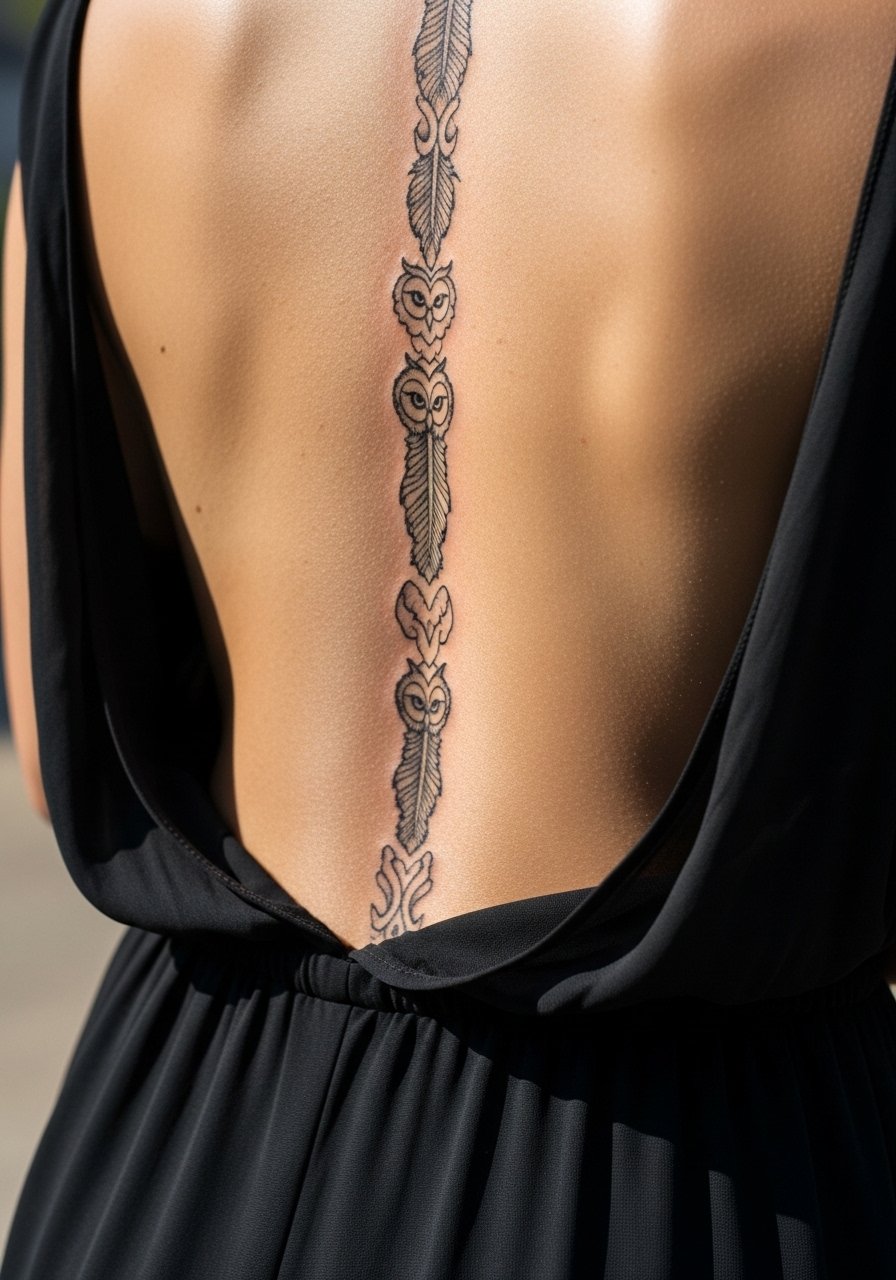
Spine placements create strong vertical statements and repeating feather patterns are elegant when scaled to body length. The key mistake is placing the pattern too narrowly which makes the repetition look cramped as the skin ages. Ask for slightly wider feather spacing and test how the pattern reads when you bend. Healing time may require two sessions for a four to six inch vertical run. Spine tattoos need careful aftercare to avoid scabbing along the curve. For events, a backless halter frames the repetition beautifully, and for the appointment wear a front-open robe so the artist can access the area cleanly.
13. Minimalist Owl on the Ankle
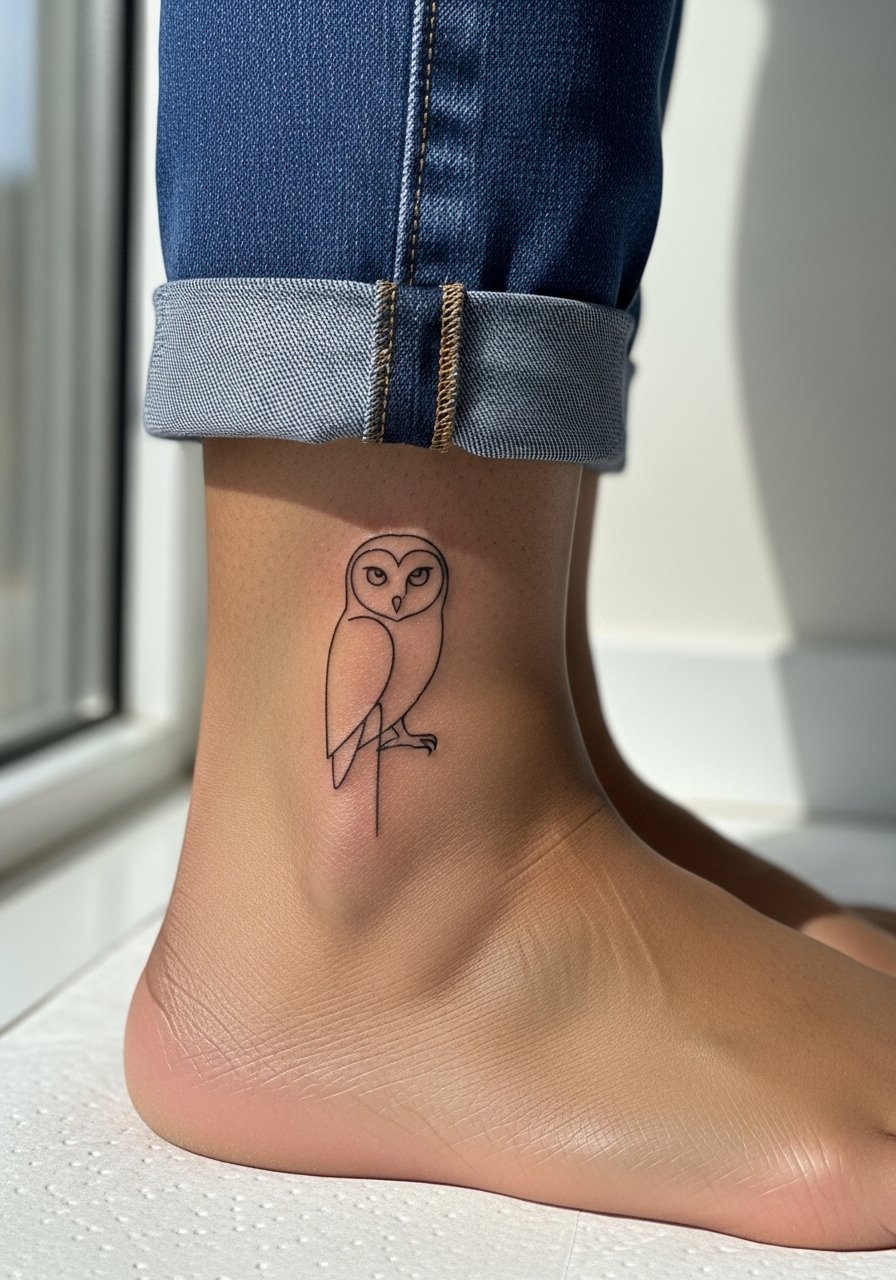
Ankle tattoos face constant friction from socks and shoes so single-line minimalists there risk early softening. One mistake is choosing a one-millimeter line and expecting it to stay razor-fine. Ask for a slightly stronger outline and plan thinner footwear for the first two weeks. The session is quick and pain sits around a four out of ten for most people. A thin protective film at night helps prevent rubbing against bedding. To show it off, wear sandals or roll your jeans and pair with a delicate anklet.
14. Micro-Realism Owl Eyes as a Finger Tattoo
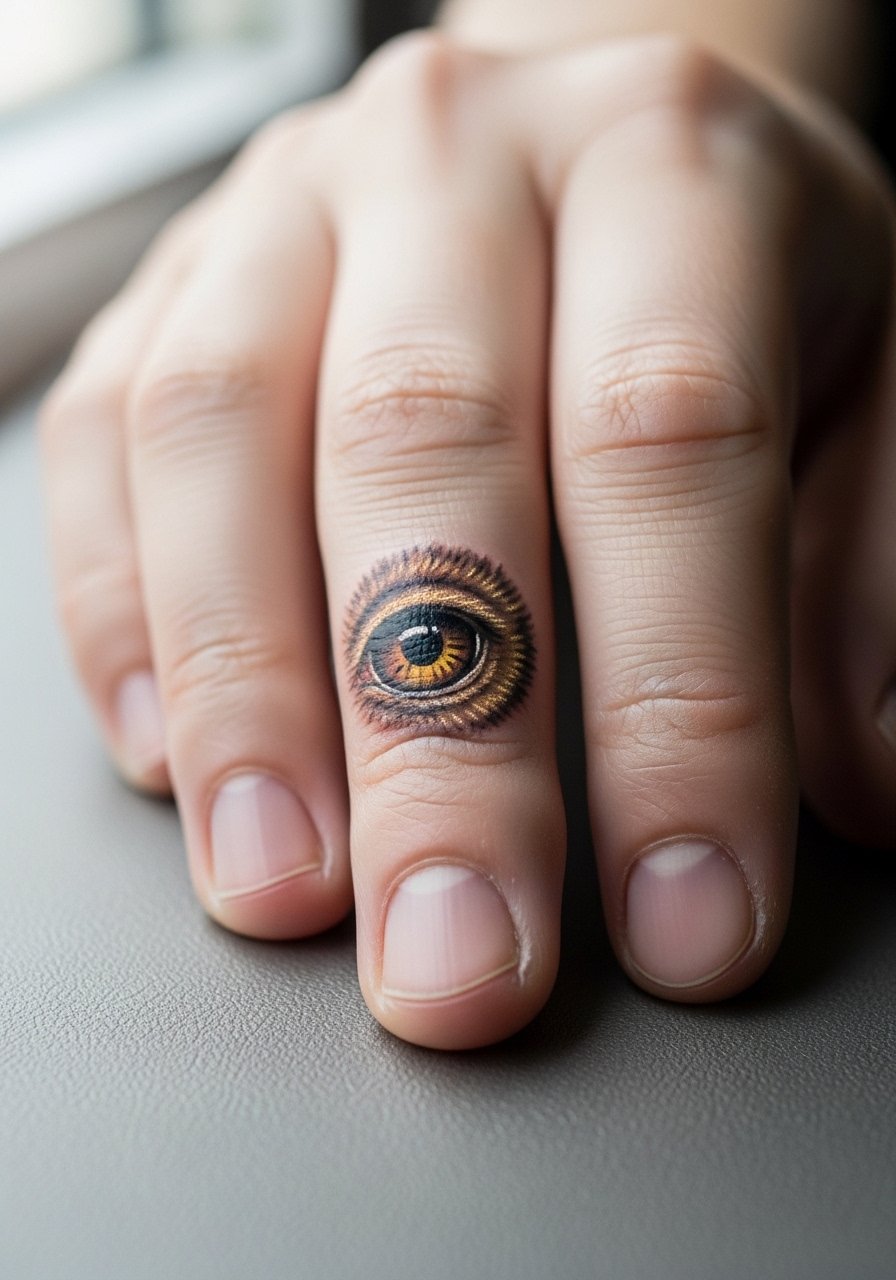
Finger tattoos are convenient to show, but they are the highest maintenance of tiny realism because the skin regenerates quickly. A typical mistake is insisting on hyper-detail at a size that cannot hold it for more than a year. If you want micro-realism on a finger, plan on simplified detail and a touch-up cycle of every 12 to 18 months. Discuss pigment saturation and edge softening with your artist during consultation. For the session keep nails clean and minimal so the artist works on bare skin and later pair the tattoo with stacked rings that sit away from the design.
15. Geometric Owl Chest Piece Near the Sternum
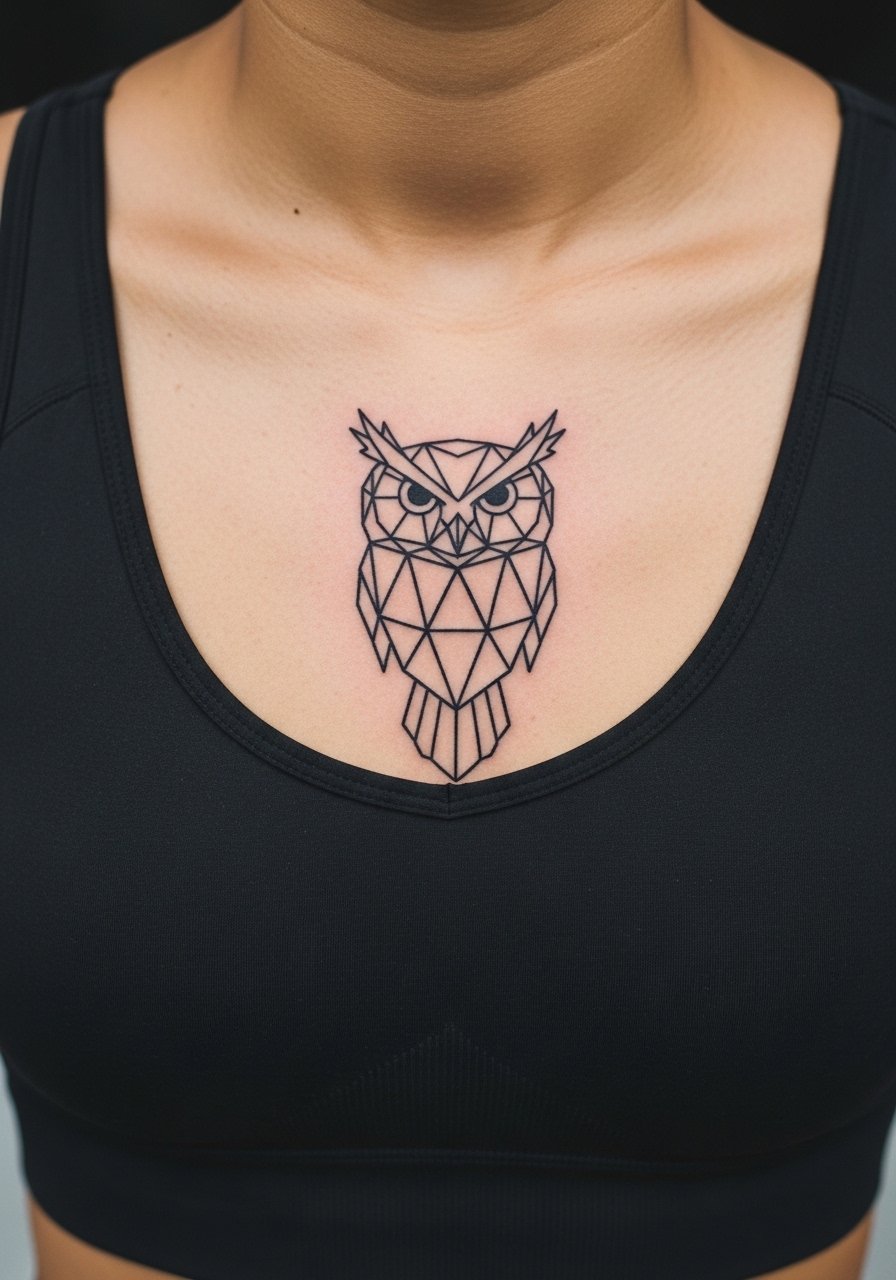
Sternum placements photograph well but sit near bone so pain spikes are common. Geometric work here needs spacing and contrast or the shapes will merge as swelling settles. Artists argue about fine line on chest. One group says the chest resists fine line aging, the other warns that movement and stretch make it riskier. State both and ask which approach your artist recommends. Sessions often split into two shorter sittings so the body recovers. Wear a fitted sports bra on the day so the artist can work just above the fabric edge without exposing a larger chest area.
16. Patchwork Owl Feathers for Sleeve Integration
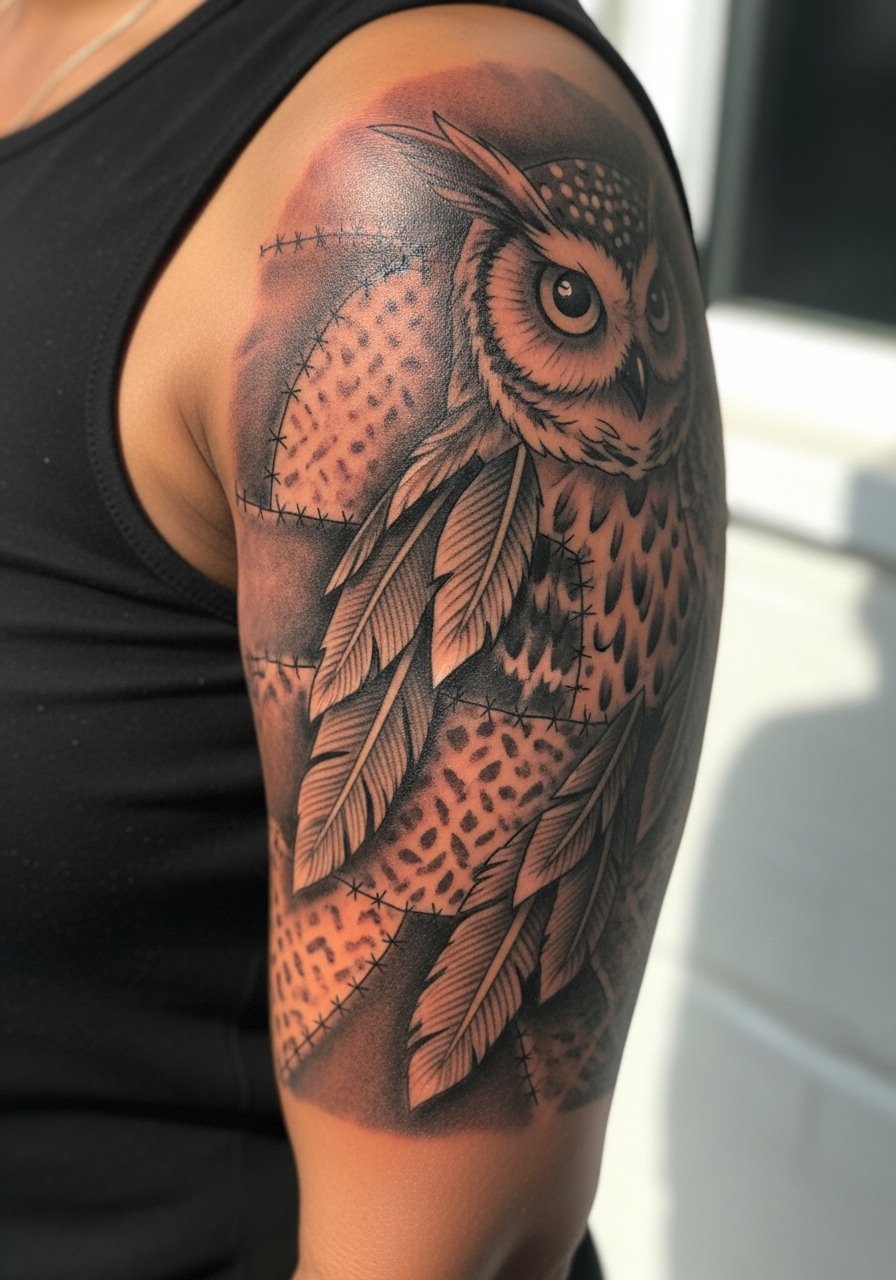
Patchwork solves the awkward gaps in sleeves by using feather motifs that match surrounding flow. The common mistake is matching line weight poorly which makes the new feathers stick out from the rest of the sleeve. Tell your artist you want the feather edges and stipple shading to match the existing sleeve tone, and bring healed photos of the surrounding pieces. Multi-session planning matters here so expect two to three shorter bookings. For the session wear a loose button-down you can pull aside so the artist only exposes the work area.
17. UV-Reactive Owl Accent for Nightlife
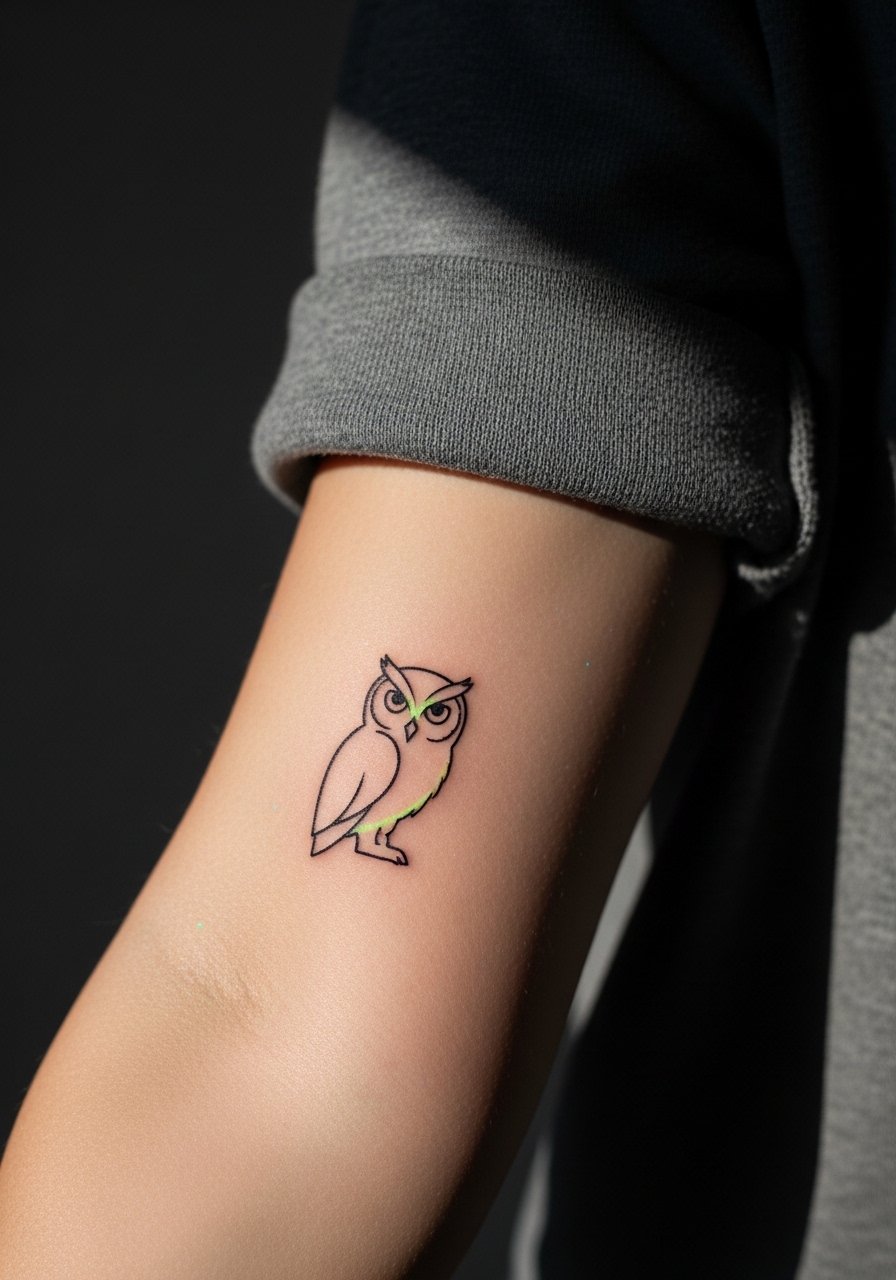
UV-reactive ink is rare in elegant contexts but can add a nightlife accent when used sparingly. The important caveat is that UV pigments behave differently on darker skin tones and sometimes read as a dusty sheen rather than bright glow. Test the placement with temporary UV markers and ask for a healed sample on similar skin tones if available. Session time is usually short for small accent bits and touch-ups are more frequent because the UV wears faster. For the appointment wear a rolled sleeve shirt and later pair the accent with a simple watch or cuff to keep attention on the glow points.
Frequently Asked Questions
Q: Will a fine line owl on my wrist need a touch-up more often than a bold traditional owl on my forearm?
A: Yes, fine line wrist pieces generally need touch-ups sooner because wrists see more sun and friction. Expect a touch-up at six to twelve months in many cases, while a bold forearm piece often holds longer between sessions. Ask your artist about planned touch-up timing during the consultation because their technique affects the timeline.
Q: How should I approach finding an artist for a micro-realism owl eye that photographs well on medium or dark skin?
A: Look for healed photos on similar skin tones and use discovery pathways like searching hashtags #micrealismoowl and local filters on tattoo apps. Book consultations via an app that confirms availability and have two alternate shops lined up in case guest spots cancel. Bringing healed images helps the artist plan contrast and white-ink highlights if needed.
Q: Do geometric mandalas hold up on the ribcage and sternum, or should I pick another placement?
A: Geometric work can hold up on ribcage and sternum if the artist spaces the lines and uses enough contrast. The trade-off is higher pain and a slightly higher chance of line merging if the design is too dense. If you want long-term clarity choose slightly larger scale and ask the artist to show healed examples of similar geometry on torso placements.
Q: What should I wear to a session for a collarbone watercolor versus a thigh neo-traditional piece?
A: For a collarbone watercolor wear a button-front blouse you can open to expose just the area without being topless. For an outer thigh neo-traditional piece pick loose drawstring shorts or a skirt so the artist can work without fabric pressing on fresh pigment. Comfortable, accessible clothing makes the session smoother.
Q: Are there healing differences between blackwork mandalas and watercolor owls I should plan for?
A: Yes. Blackwork mandalas rely on dense pigment and dot work that benefits from breathable moisture and minimal sun early on, while watercolor pieces often need layered color sessions and careful sun protection because colors can fade faster. Both benefit from light moisturization and avoiding heavy exfoliation through the first month.
Q: Is UV-reactive ink safe and will it photograph under normal light?
A: UV-reactive ink used in small accents is generally safe when sourced responsibly, but it does not photograph the same under normal light as it does under blacklight. It is often subtle by day and bright under UV. Discuss pigment origin and long-term plans with your artist because touch-ups are more frequent and results vary across skin tones.
