
Fine line pieces and watercolor washes look fragile at first glance, but the tattoos that actually last are the ones planned around how skin moves, how you dress, and where you sleep. Fans who pick a Frank Ocean motif and think only about the image often end up booking a touch-up at year two. These 21 ideas focus on designs that photograph well now and settle into something you still want to see on your body after a few seasons.
1. Minimalist "Blonde" Outline with Wave Accents on Inner Forearm
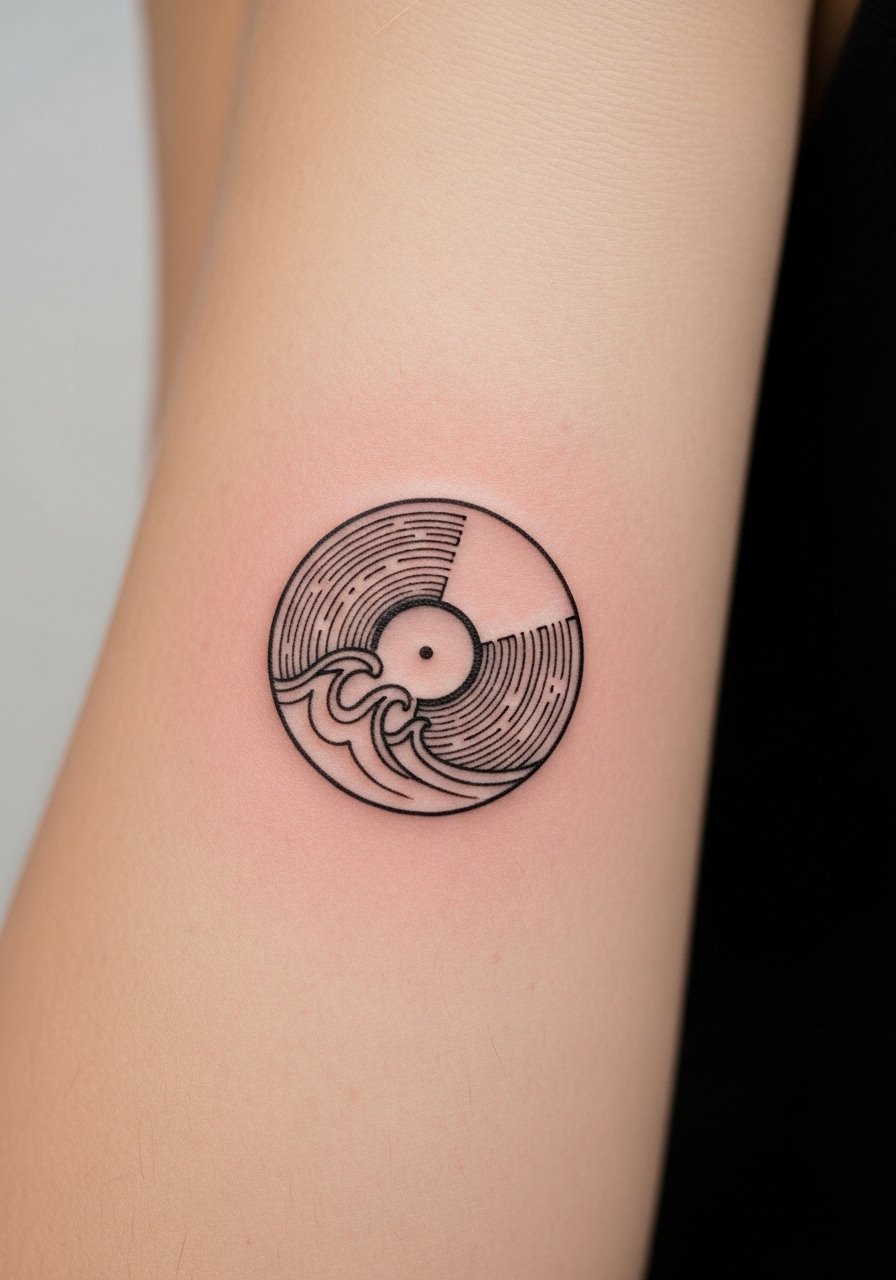
I’ve seen this tiny Blonde outline last best when the linework sits a touch bolder than the reference. Fair warning: ultra-thin single-needle lines on the inner forearm can fade faster if they are drawn too faint. Tell your artist you want clean linework with a slightly heavier single-pass for longevity, and plan for a possible touch-up around year three. For showing it off, roll a sleeve up and try a rolled cuff chambray shirt that frames the forearm without crowding the motif during warm months. The session feels straightforward and rates around a four out of ten for pain. Blowout risk is low here if the artist spaces lines slightly apart.
2. Watercolor Ocean Waves Quoting "Self Control" on the Shoulder
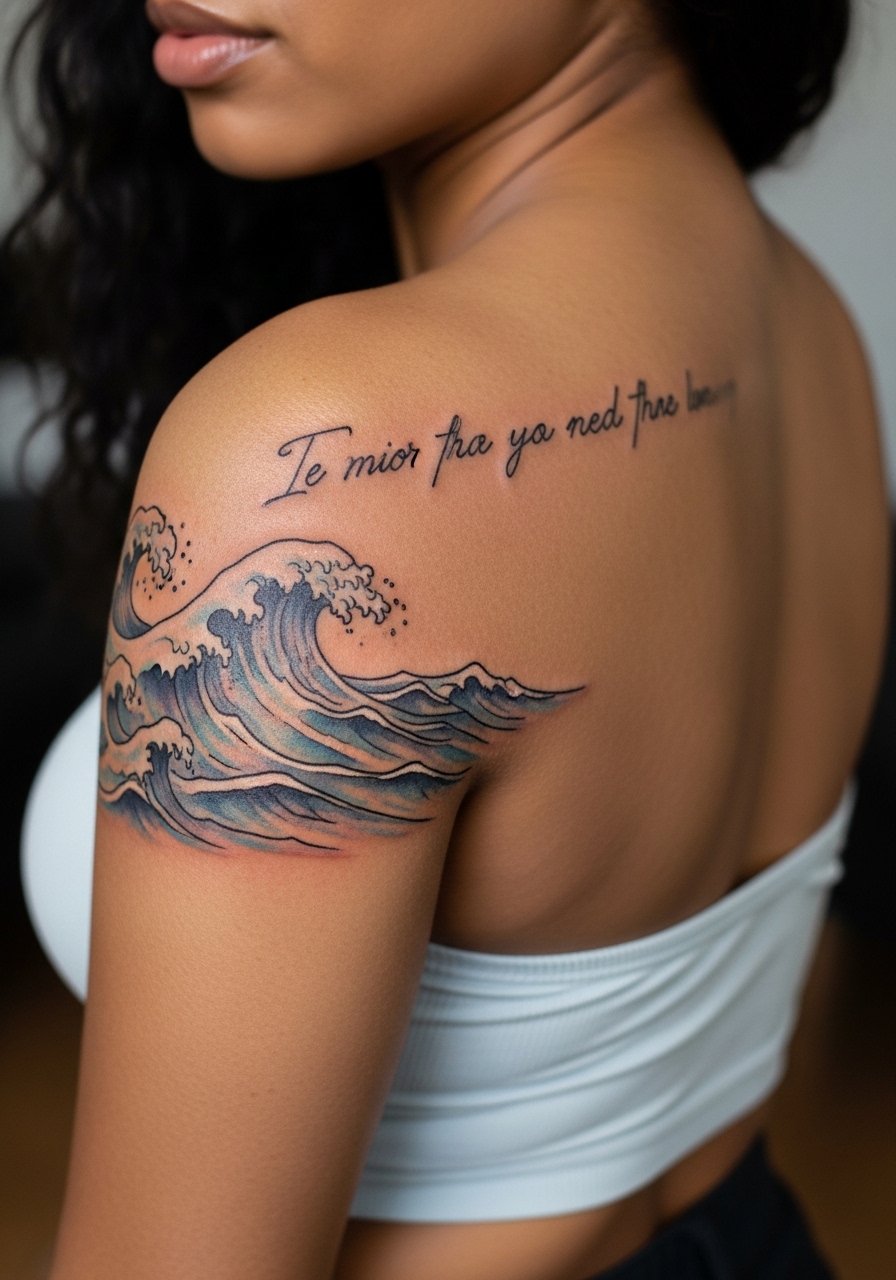
Artists split on whether watercolor holds up on curved shoulder planes. One camp says watercolor breathes with the skin and looks delicate for years. The other camp points out that pigments can disperse without dense outlines. For this shoulder piece, ask for soft watercolor fills anchored by thin black outlines so color can fade without blurring the composition. During the session wear a strapless bralette or an easy-to-remove top so the artist has full access. Expect two sessions for saturation and a three out of ten pain level. A common mistake is asking for pure wash without holding lines for structure, which often needs touch-up sooner.
3. Fine Line "Channel Orange" Fruit Slice on the Wrist
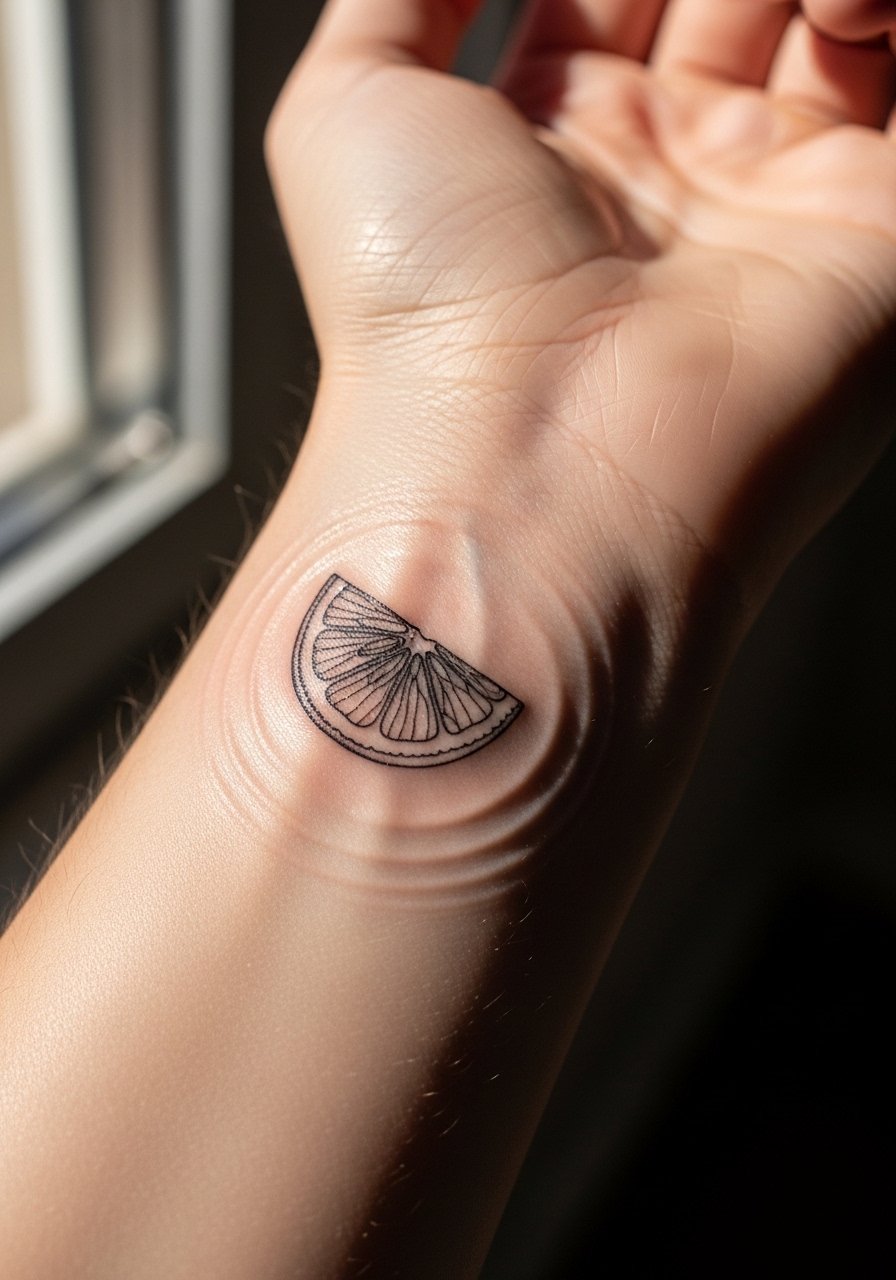
The wrist is a high-friction zone and small script or thin fruits can fade quickly there. If you want the Channel Orange nod on your wrist, request slightly thicker contour lines and ask the artist to avoid hair-fine internal detailing. That keeps the slice readable after regular hand washing. For showing the piece, pair it with a thin leather cuff bracelet on the opposite wrist so the tattoo remains the focal point. Session time is short, usually under an hour, and pain sits around five out of ten. The real mistake is asking for micro-detail inside a 1-inch space. Scale up or simplify the interior ripples to conserve clarity.
4. Neo-Traditional Endless Pyramid with Wave Integration on the Ribs
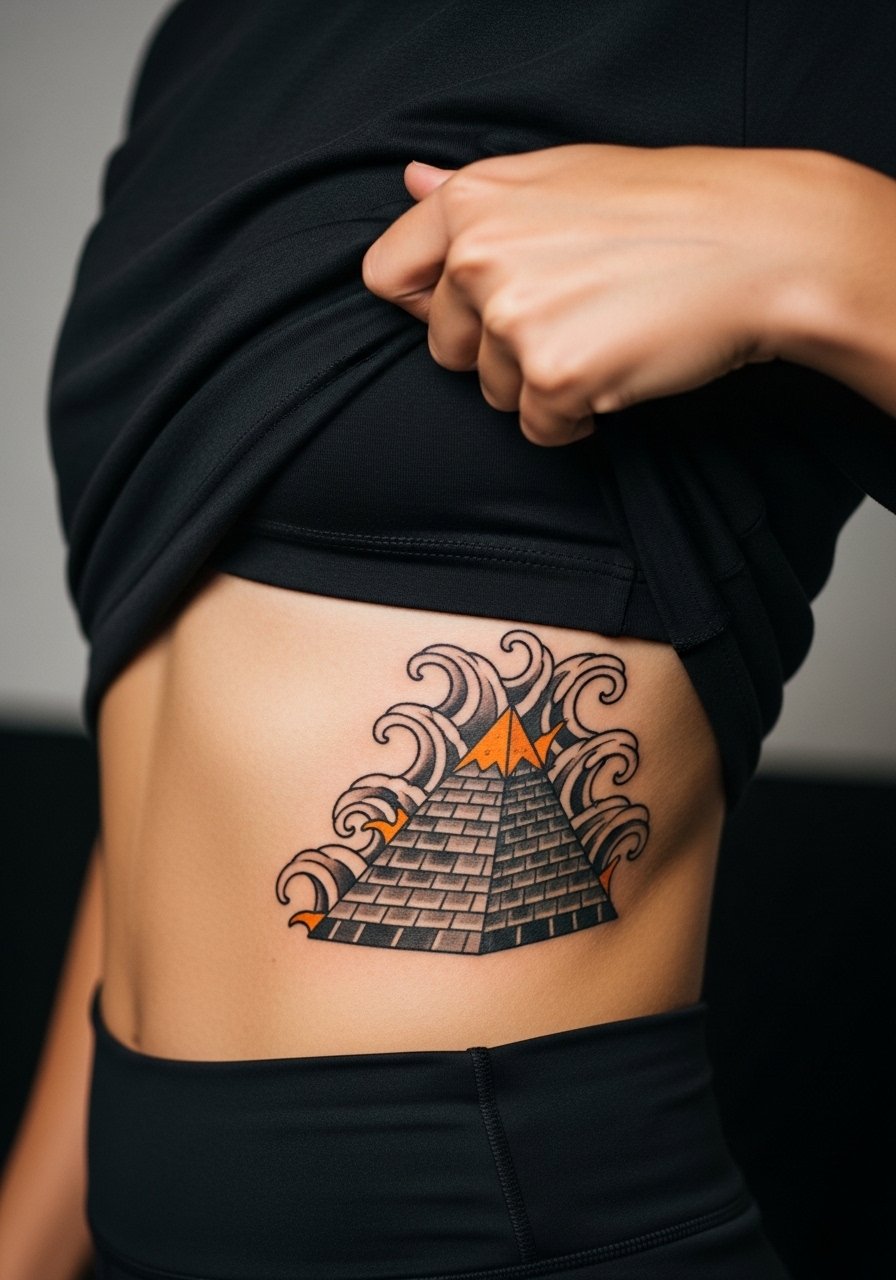
Fair warning: ribs are a higher pain zone and the skin stretches with breathing and weight changes. The debate about watercolor versus blackwork is relevant here. One camp says the ribs are fine for delicate washes because the skin is relatively flat in that strip. The other camp warns that washes on ribs often disperse and require more frequent touch-ups. For a neo-traditional pyramid, lean on saturated black and gray foundations with targeted orange accents to preserve contrast as color shifts. Wear a button front tank top to the session so you can expose only the side area. Expect two to three sessions and plan for a touch-up at year three depending on how your body changes.
5. Blackwork Abstract Heart Dissolving into Ocean Foam on Outer Forearm
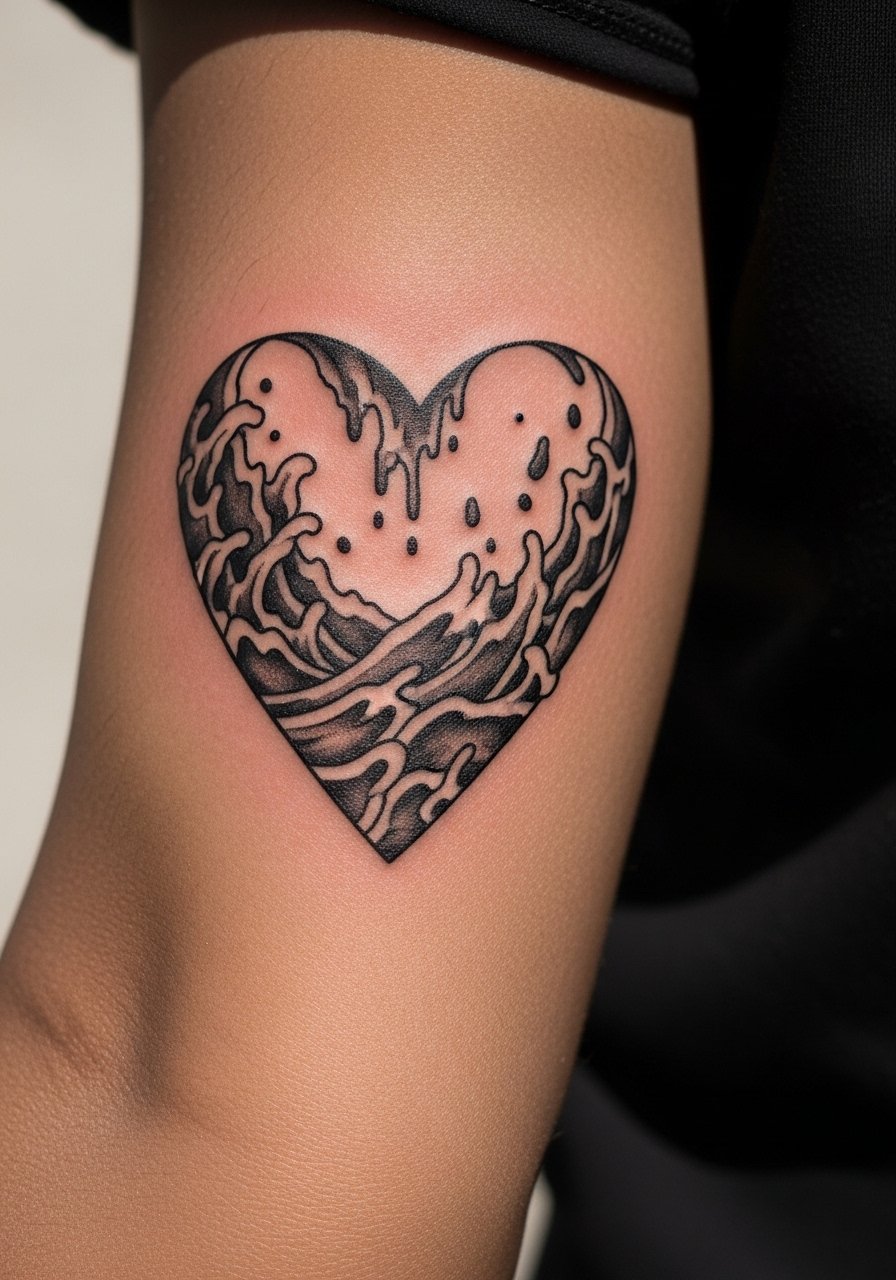
There is visual impact in heavy black saturation for a Channel Orange love motif. Bold blackwork on the outer forearm resists blurring and reads from across a room. A common mistake is shrinking a blackwork piece into a micro size. If you want this to stay crisp, keep it at least three inches across so saturation can settle without patchiness. During the session you may feel a medium pain level and expect one to two hours for a solid fill. For styling, cuff a sleeve or wear a fitted tee rolled to the elbow; a olive green fitted tee frames the motif well. Touch-ups are rare if saturation is done properly.
6. Patchwork Blonde Motifs: Peach, Bike Silhouette, Tiny Icons on Upper Arm
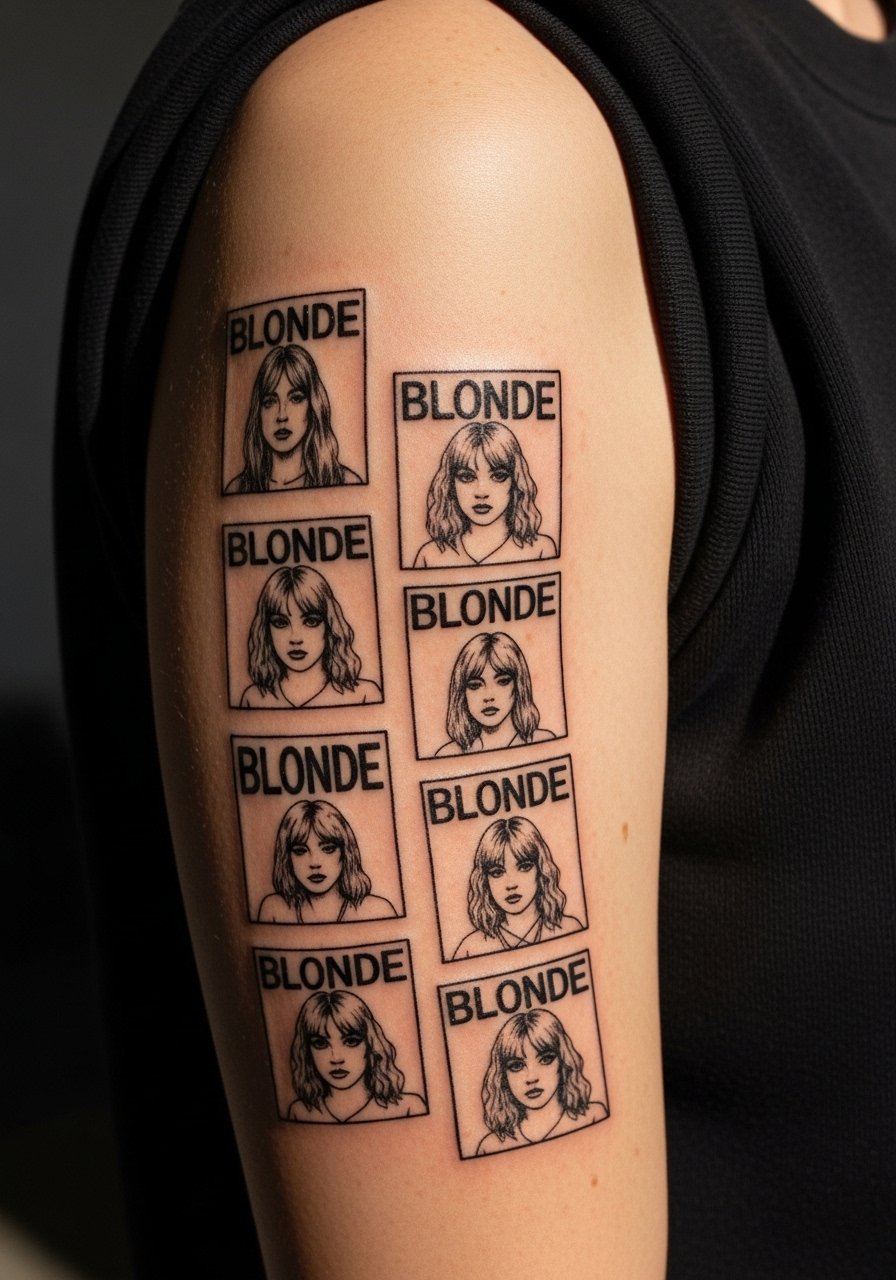
Patchwork is perfect if you want to collect moments from Blonde over time. The best approach is to plan negative space between pieces from the start so later additions do not crowd earlier work. Bring reference images for scale and tell your artist you see this as an evolving collector piece rather than a dense sleeve. Session wear is sleeveless so the artist can ink the upper arm, and a muscle tank top makes access easy. The typical mistake is adding pieces too small and too close together, which merges in healing. Expect two sessions spread out for multiple elements and a yearly check if you expand the set.
Studio Day Picks
These first six pieces range from wrist micro work to ribs and upper arm patchwork, so a few small items smooth the session and the first week of settling.
- Stencil transfer paper kit. Lets you preview placement on skin before the needle hits, especially useful for the tiny forearm and wrist layouts above.
- Topical numbing cream. Applied about 45 minutes before helps wrist and rib sessions feel more manageable without changing the artist’s linework.
- Thin protective film roll. Keeps wrist and finger tattoos clean during the first week when friction and washing are highest.
- Fragrance-free body wash. Gentle cleansing is key for the fine line and watercolor pieces above while they form scabs and settle.
- Aquaphor healing ointment. A thin layer in the first days supports fine line settling without suffocating the needle channels.
7. Script Lyric "I thought that I was dreaming" on the Collarbone
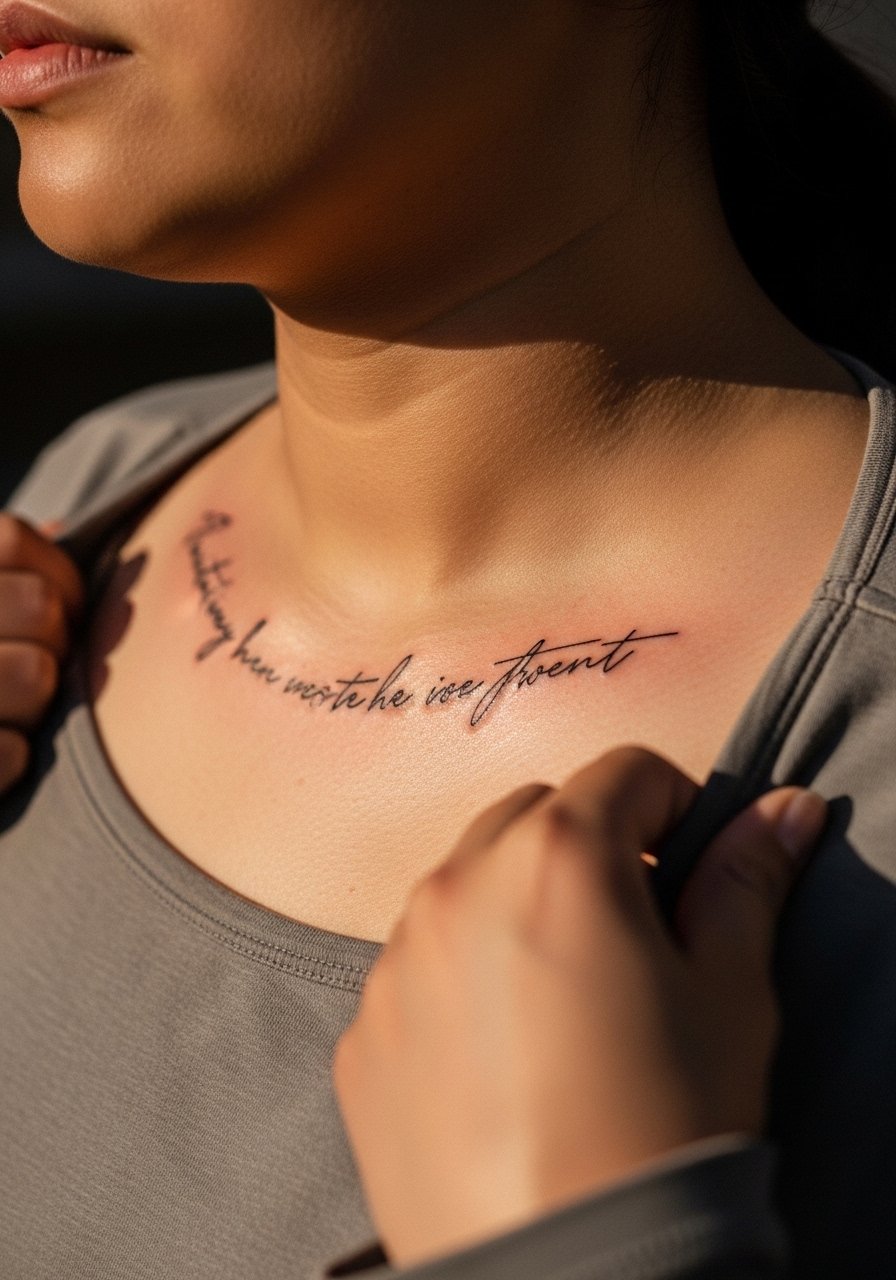
When you pick a lyric as a collarbone piece, consider how the letters curve with the collarbone. The biggest mistake is asking for very thin cursive across a high-motion area and then being surprised when it blurs. Ask your artist for slightly bolder stroke weight and consistent letter spacing. For the appointment wear a wide-neck shirt you can pull aside to expose the area without being topless. Pain sits around a five out of ten for most people. Expect a single session under an hour, and be prepared for a possible light touch-up after the first year if you swim or sunbathe frequently.
8. Micro-Realism Frank Ocean Silhouette against Sunset Waves on Inner Bicep
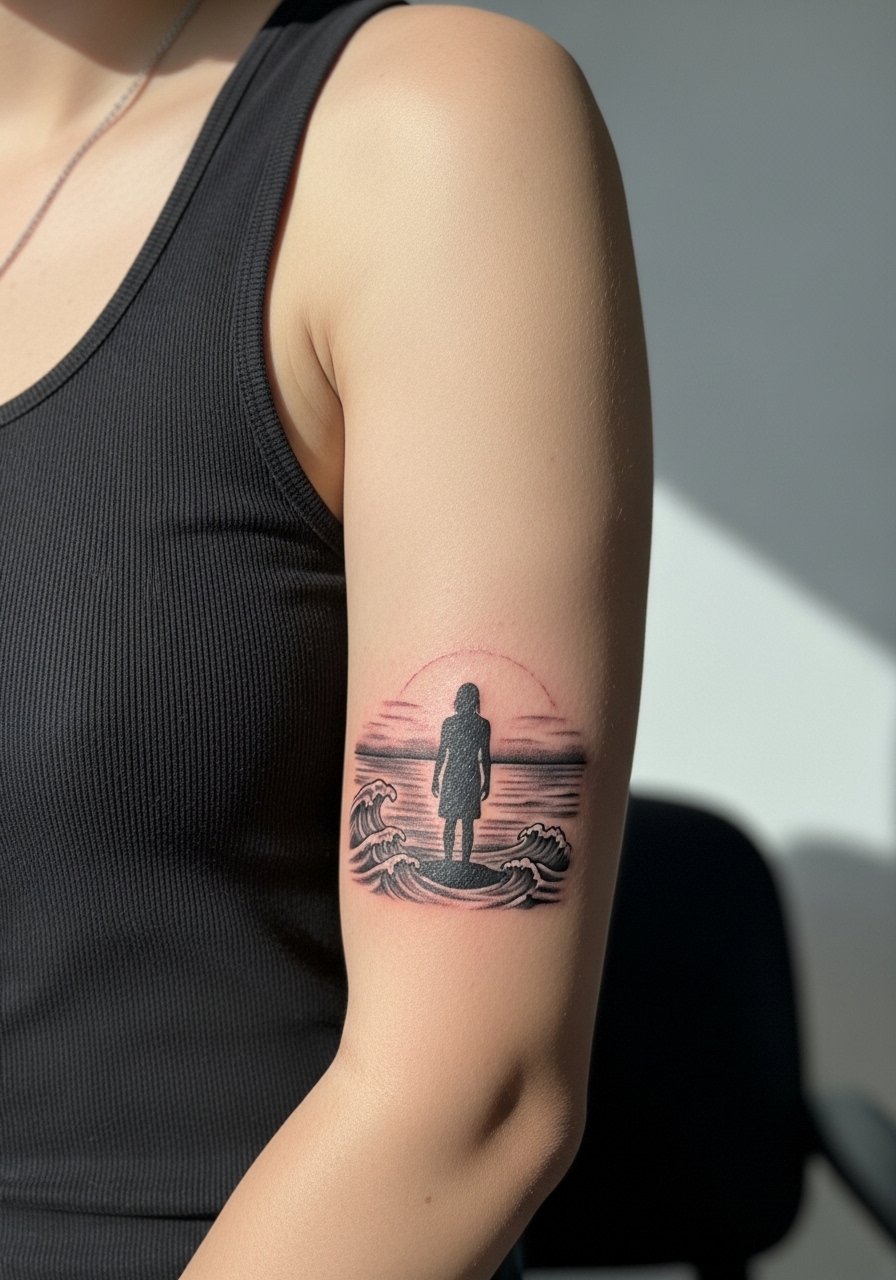
Micro-realism reads as a subtle celebrity nod without portrait-level commitment. The inner bicep gives some privacy but expect a sharper pain when the needle hits thin tissue near the armpit. The common error is asking for photographic detail in a 1.5-inch square. Scale the silhouette slightly larger or simplify gradients into crisp stippling so the image stays legible over time. Session time often runs an hour or a bit more. If you want to find a reference style, search #FrankOceanTattoo on Instagram for matching silhouettes and bring a clear example to the consult.
9. Ornamental Channel Orange Motif with Lyric Band on the Ankle
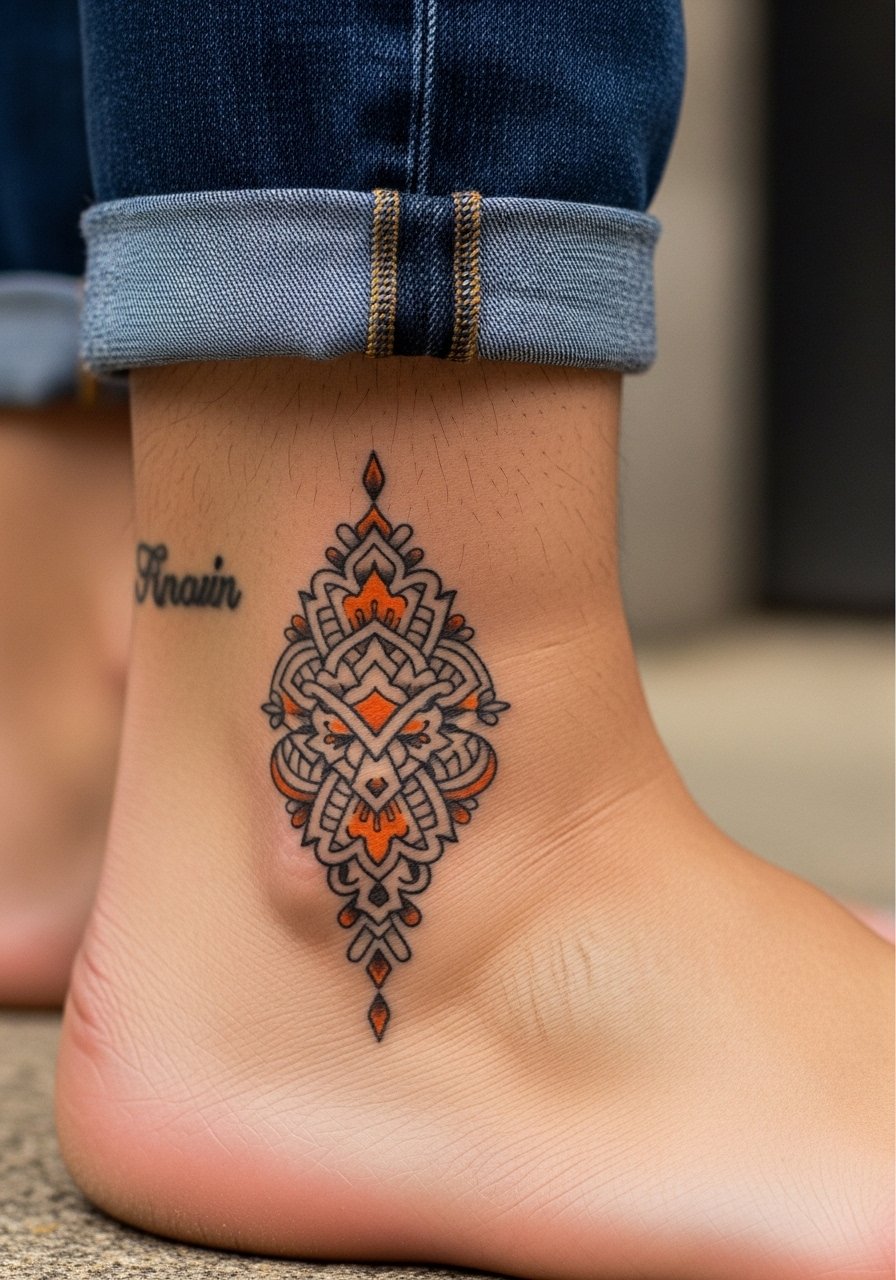
An ankle piece needs to be bold enough to resist rubbing from shoes and socks. The decorative frame and an integrated lyric band work well if the band letters are relatively thick and the orange fill has a black outline. For the session wear pants you can roll up, and afterwards avoid tight boots for the first two weeks. This placement rates a three to four on pain and heals slower because of constant movement. A common mistake is expecting watercolor saturation to remain vibrant with nightly friction. Ask for contrast first, then subtle color accents.
10. Ignorant-Style "Nikes" Text Melting into Waves on the Calf
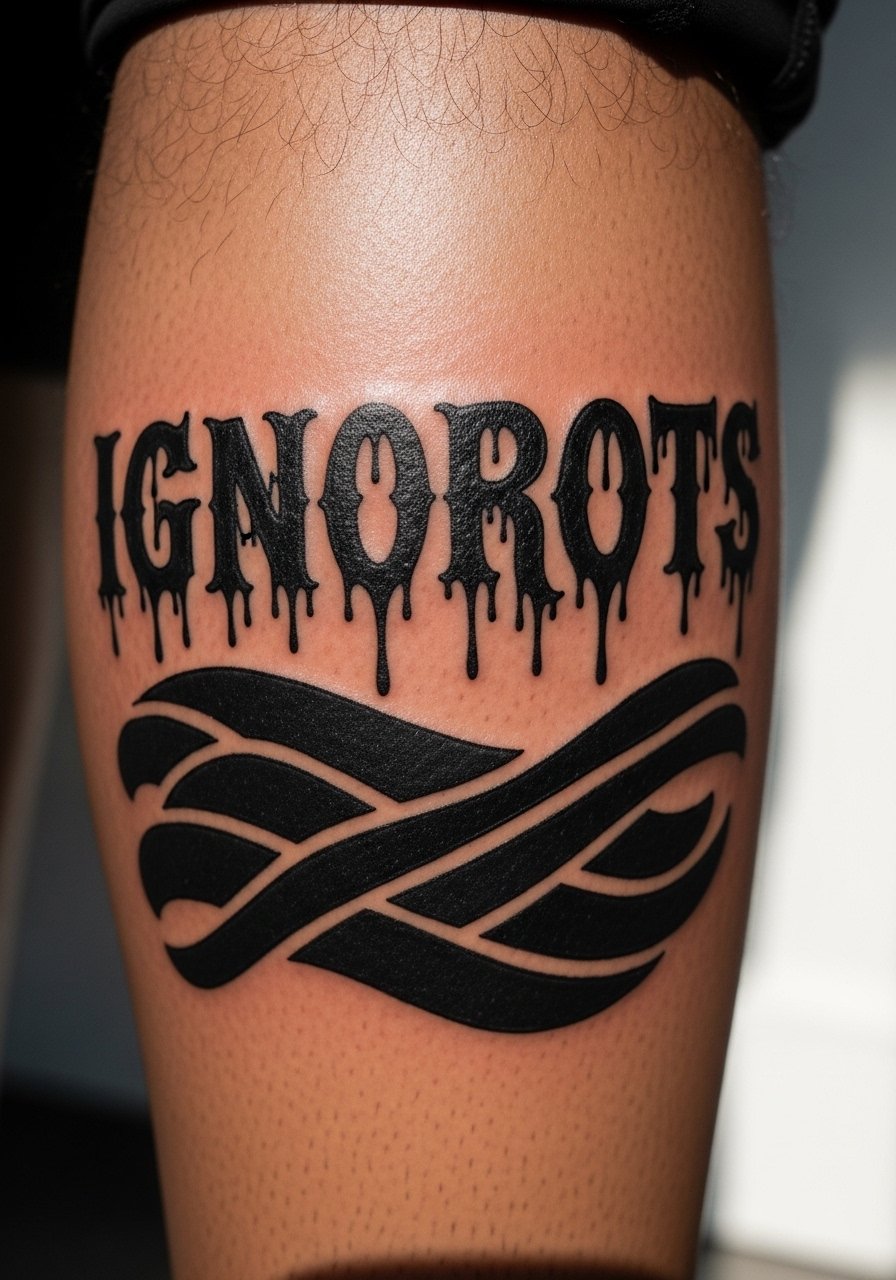
Bold, thick letters that blend into blackwave fills age well on the calf where skin movement is moderate. The visual impact is immediate and the piece can be seen from a distance. The biggest mistake is pushing too many micro details into the letters. For a melting effect, ask for heavy contour lines and simplified internal textures. Calf sessions are comfortable for most and usually take one to two hours depending on size. For summer showing wear shorts or a skirt with a slight slit to highlight the area. Touch-ups are uncommon when saturation is solid.
11. Tiny Blonde Peach Behind the Ear, Below Hairline
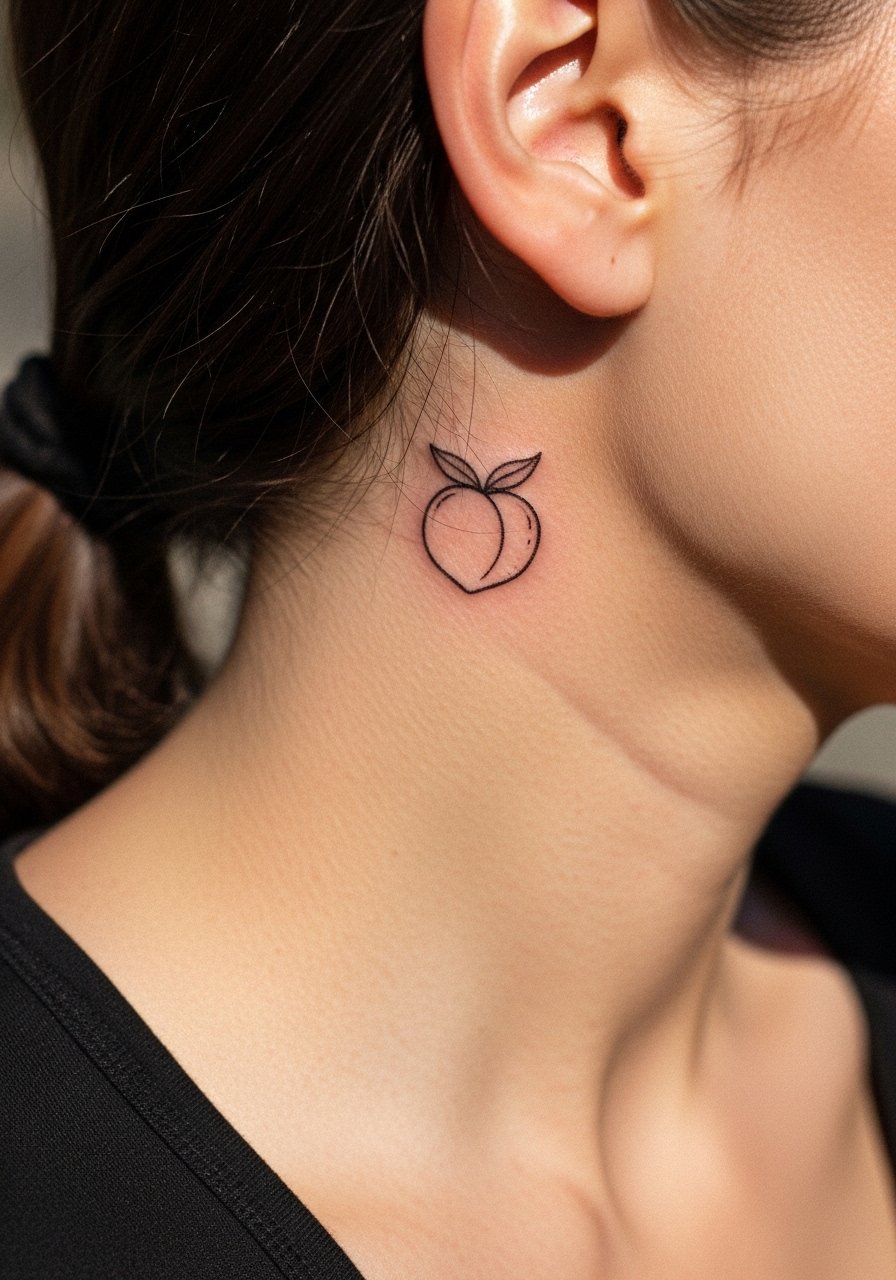
Behind-the-ear pieces are intimate and show up in glimpses. Keep the peach micro size but ask for a slightly heavier outline to avoid early feathering. Because of the location, access requires the artist to work around hair and a few minutes of repositioning may be needed for the stencil to sit right. This placement is low to moderate pain and heals quickly if you avoid hair products for the first week. A frequent mistake is expecting high detail in a 1-inch area. If you want a sequence of tiny icons, space them so they can breathe.
12. Thigh Lyric Strip Hidden Under Clothing
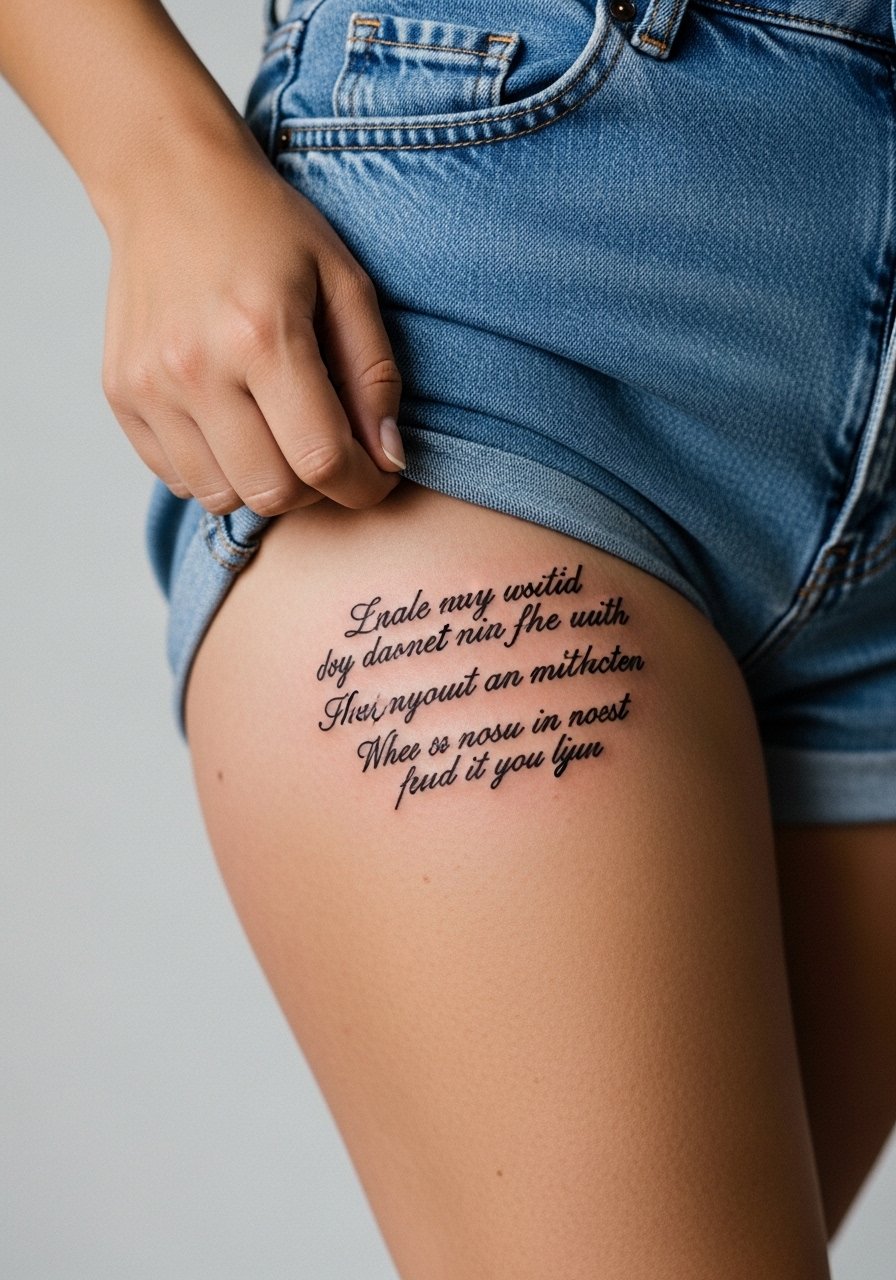
Thigh placements are perfect if you want a private lyric that only appears when you choose. From a practical perspective this site tolerates larger script better than wrists because friction is lower. Tell your artist you plan to keep it tucked under clothing so they can size letters for intimacy rather than gallery visibility. For the session wear loose shorts or high-waisted bottoms you can slide down slightly. Pain ranges from three to six depending on depth and body fat. A common mistake is getting script too small on a thigh where scale can actually be larger for clarity.
13. Scaled Micro Ocean Symbols Built into a Sleeve
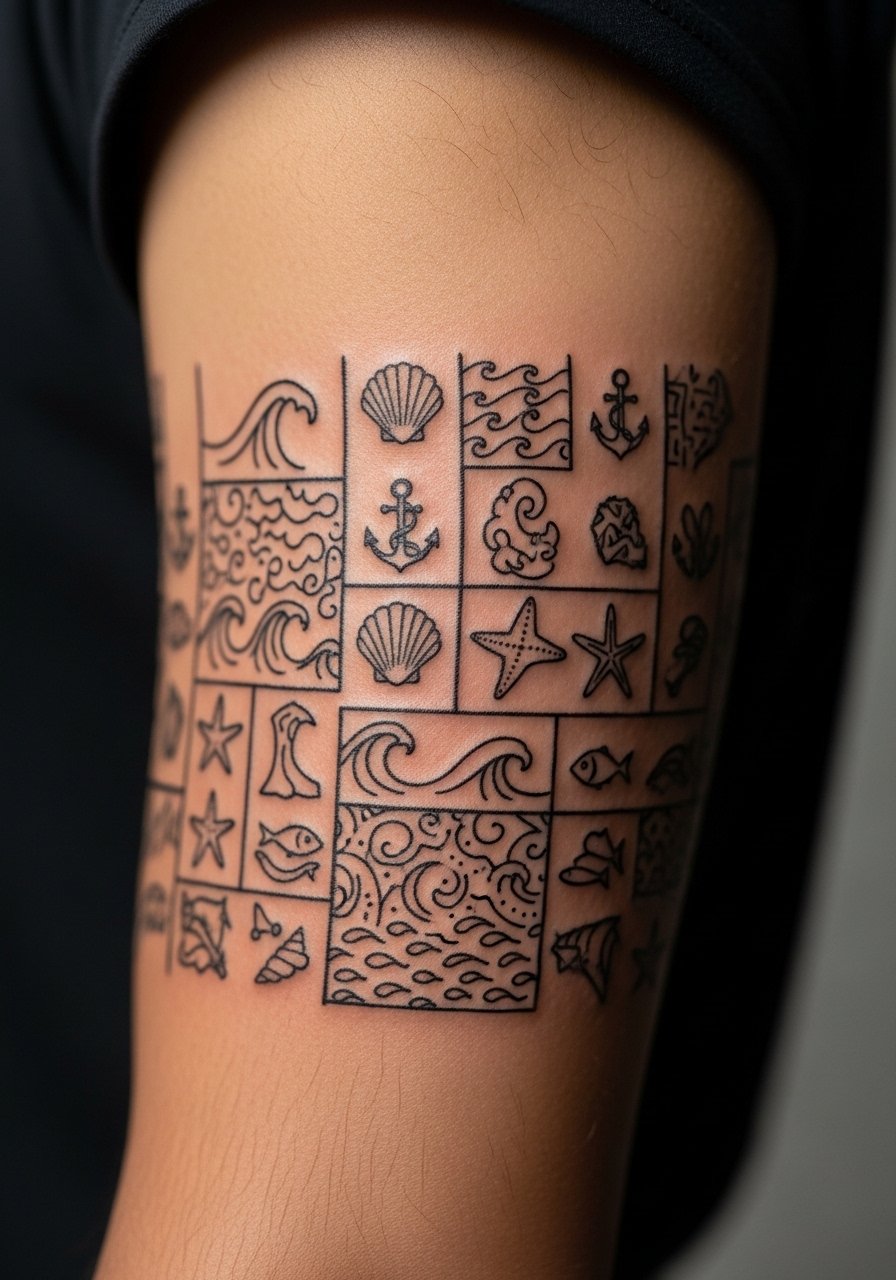
Someone I know turned a sleeve into a story by spacing micro symbols and leaving negative bands to connect later. Start with a plan for expansion so future pieces can flow into a sleeve without appearing glued on. Ask the artist to mark buffer zones between pieces during the first session. Sessions are modular and you can book one element at a time. Expect touch-ups when you begin connecting pieces as lines overlap. For showing it off, roll a sleeve to the elbow or wear a layered chain necklace that balances collarbone-level motifs if you extend work upward. The real mistake is treating each micro piece as a final product rather than part of a larger scaffold.
14. Ornamental Ankle Band with Channel Orange Accents
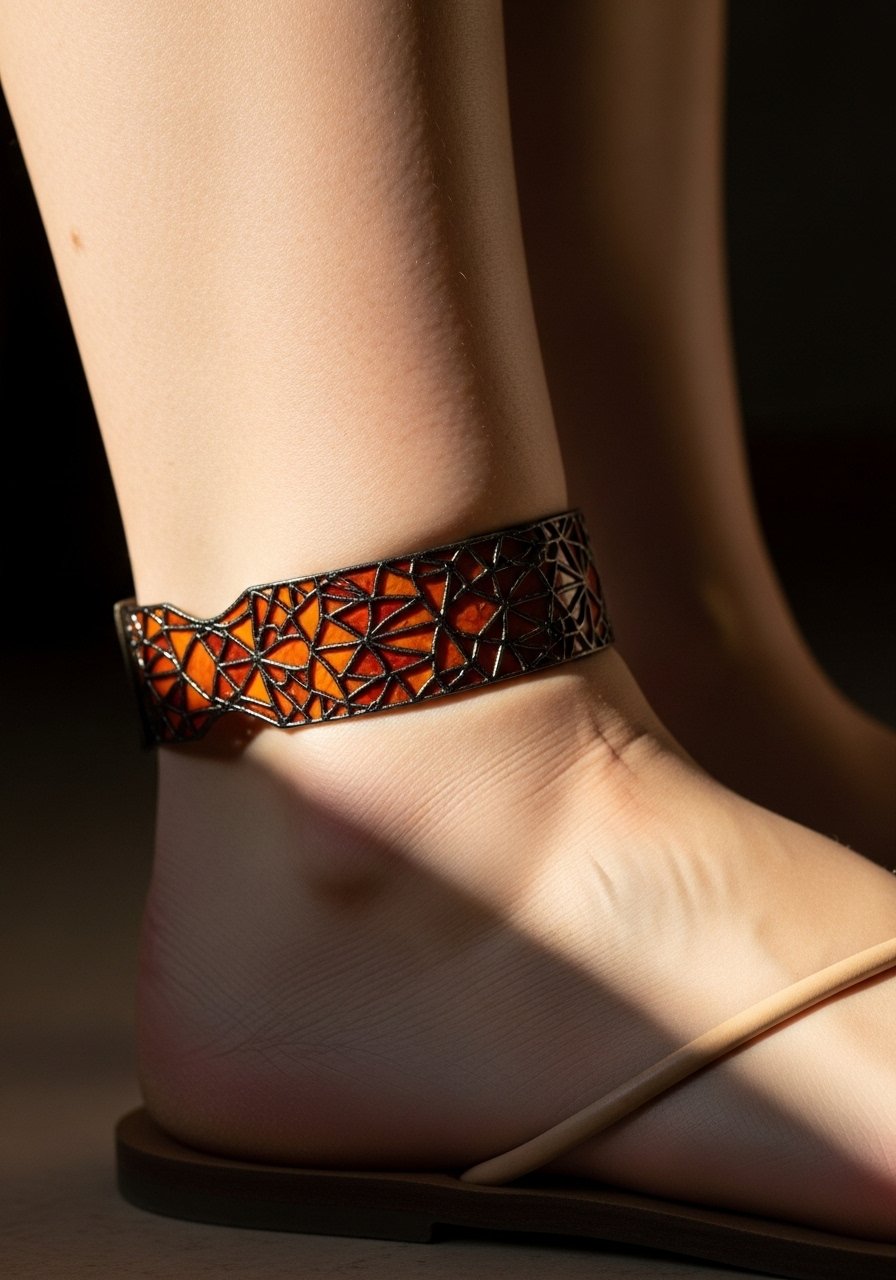
Ankle bands age differently because they sit near shoes and socks that rub daily. Keep fills compact and outlines bold so the ornament reads after repeated wear. A common error is requesting faint dot shading that vanishes with daily abrasion. Session time is quick, usually under an hour, and pain is moderate. After your appointment choose footwear that does not press directly on the fresh ink for two weeks. For showing off the motif, wear sandals or roll your jeans up slightly. Small design, big visual effect.
15. Micro-Realism Sunset with Tiny Silhouette on the Inner Wrist
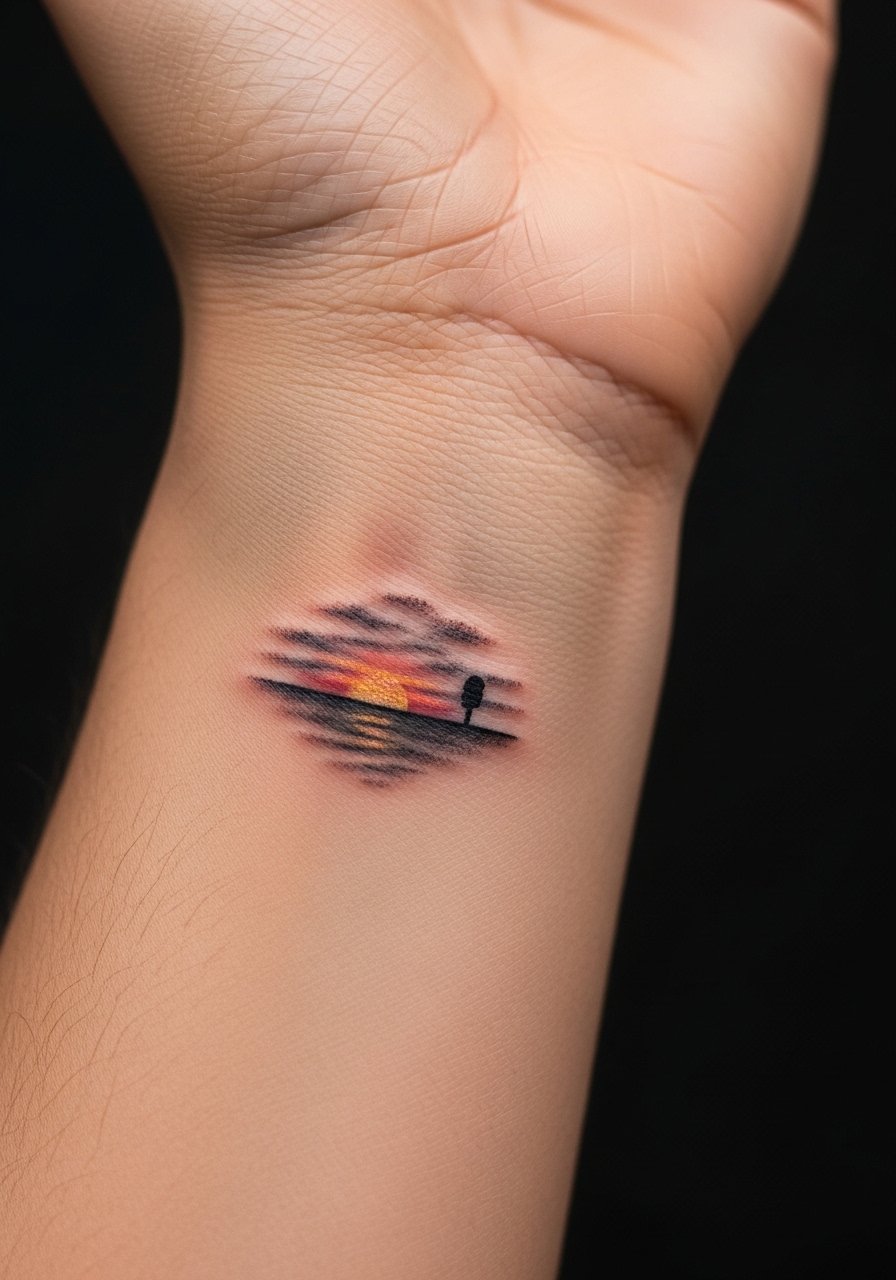
Inner wrist micro-realism can be stunning but it competes with constant hand movement and washing. Ask for simplified tonal transitions and a strong outline on the silhouette so the focal point survives light fading. Pain is about five out of ten and sessions are short. The mistake is expecting photographic fidelity in an area that often blurs. For the session wear a beige linen tank so the artist can access the wrist easily and you stay comfortable during the session.
16. Tiny Wave Line Following the Collar of a Shirt on the Back of the Neck
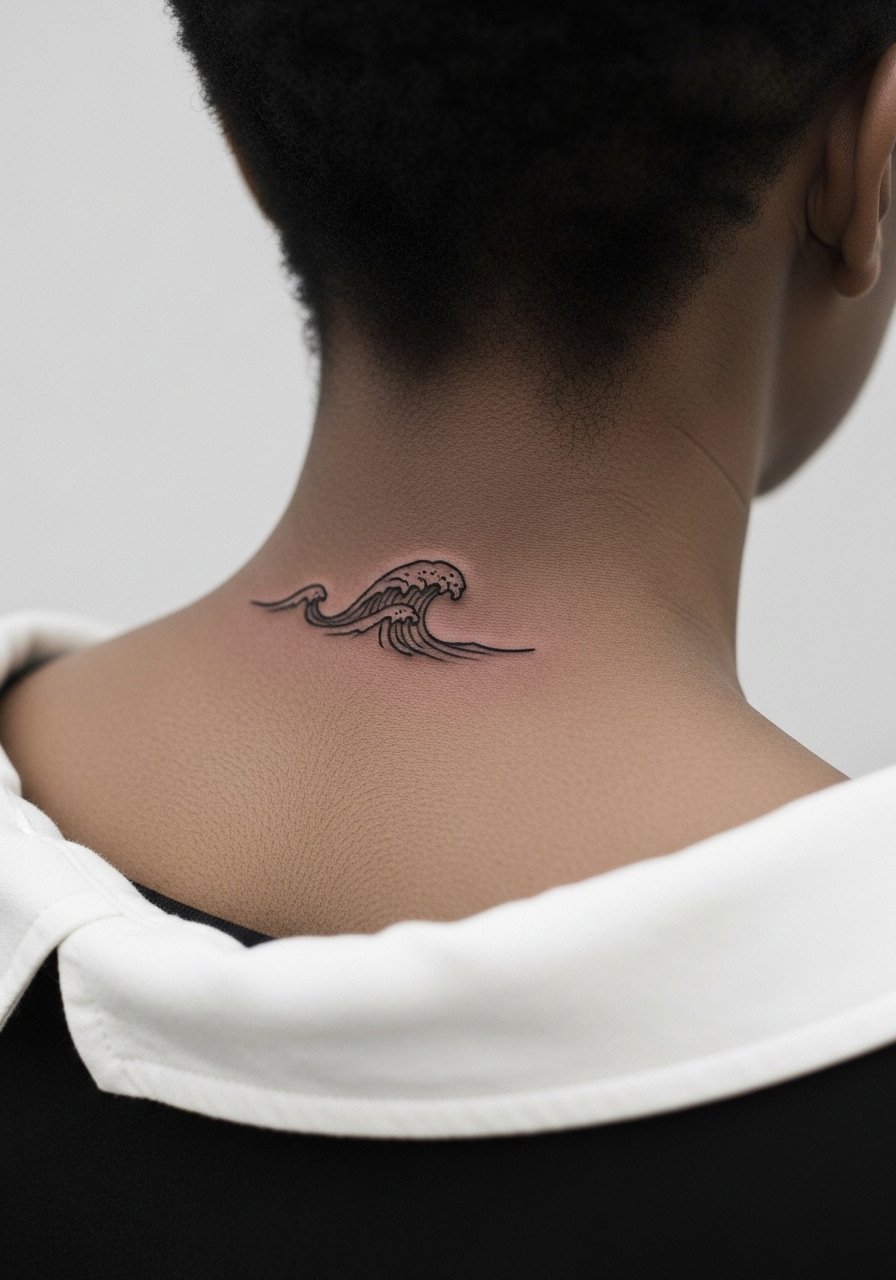
Back-of-neck pieces are discreet and peek out under certain collars. The line should be continuous and comfortably bold so it does not fragment. The session is quick and pain is moderate. One often-overlooked detail is career fit; neck tattoos are visible with certain haircuts and outfits. If you want to show it occasionally, plan hair and wardrobe around it. Keep the design tight and avoid intricate internal shading that can smear over time on this mobile zone.
17. Channel Orange Fruit Slice as a Tiny Sternum Accent
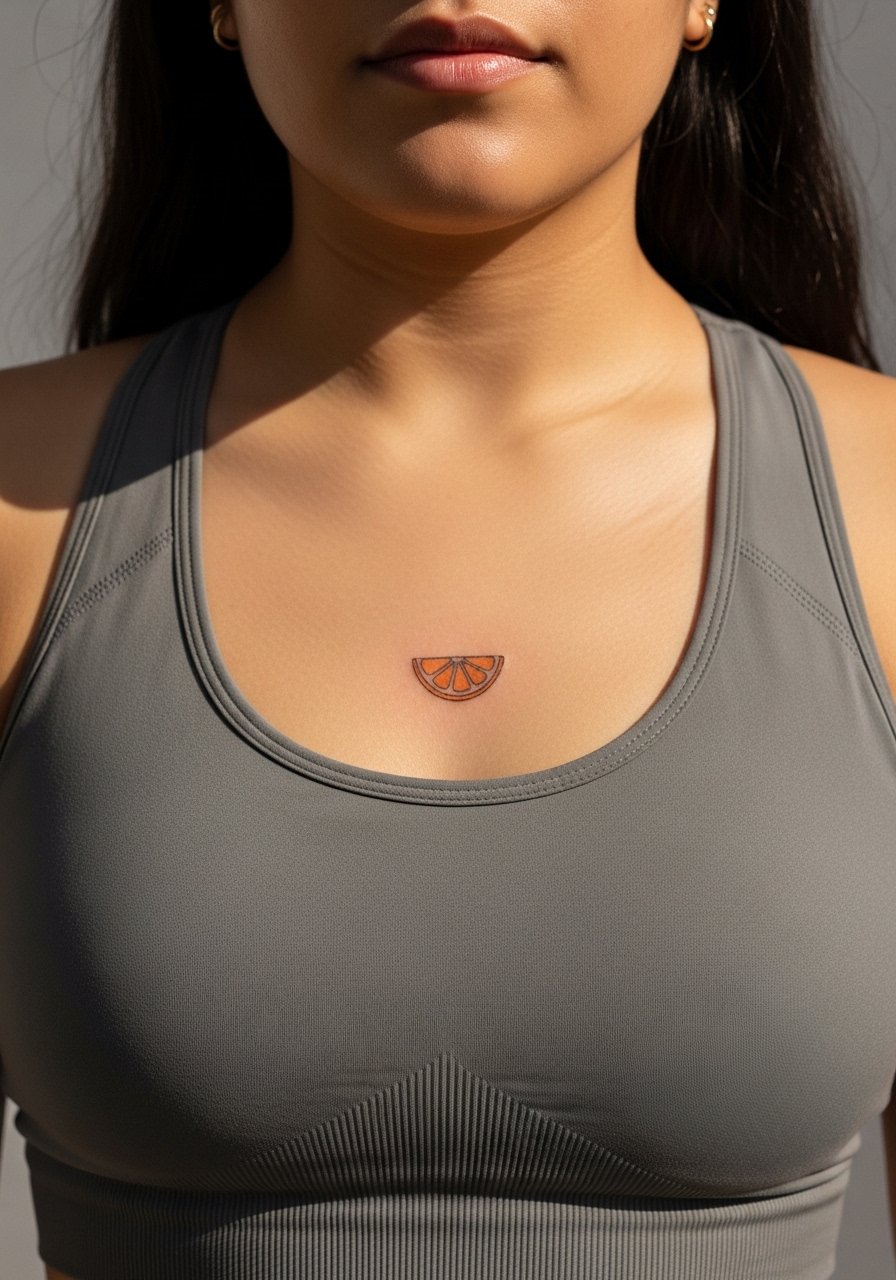
Sternum placements need a careful conversation about pain and healing. The skin here moves with breathing and can feel tender during sessions. One camp prefers bold outlines to retain clarity. The other camp likes softer edges for a more intimate look but accepts more frequent touch-ups. If you want a tiny fruit slice, plan for a single, confident line and minimal internal detail. Wear a fitted sports bra to the appointment for modest access. Expect a higher pain rating and a follow-up touch-up if you notice early color loss.
18. Palm or Side Finger Mini Wave Accent
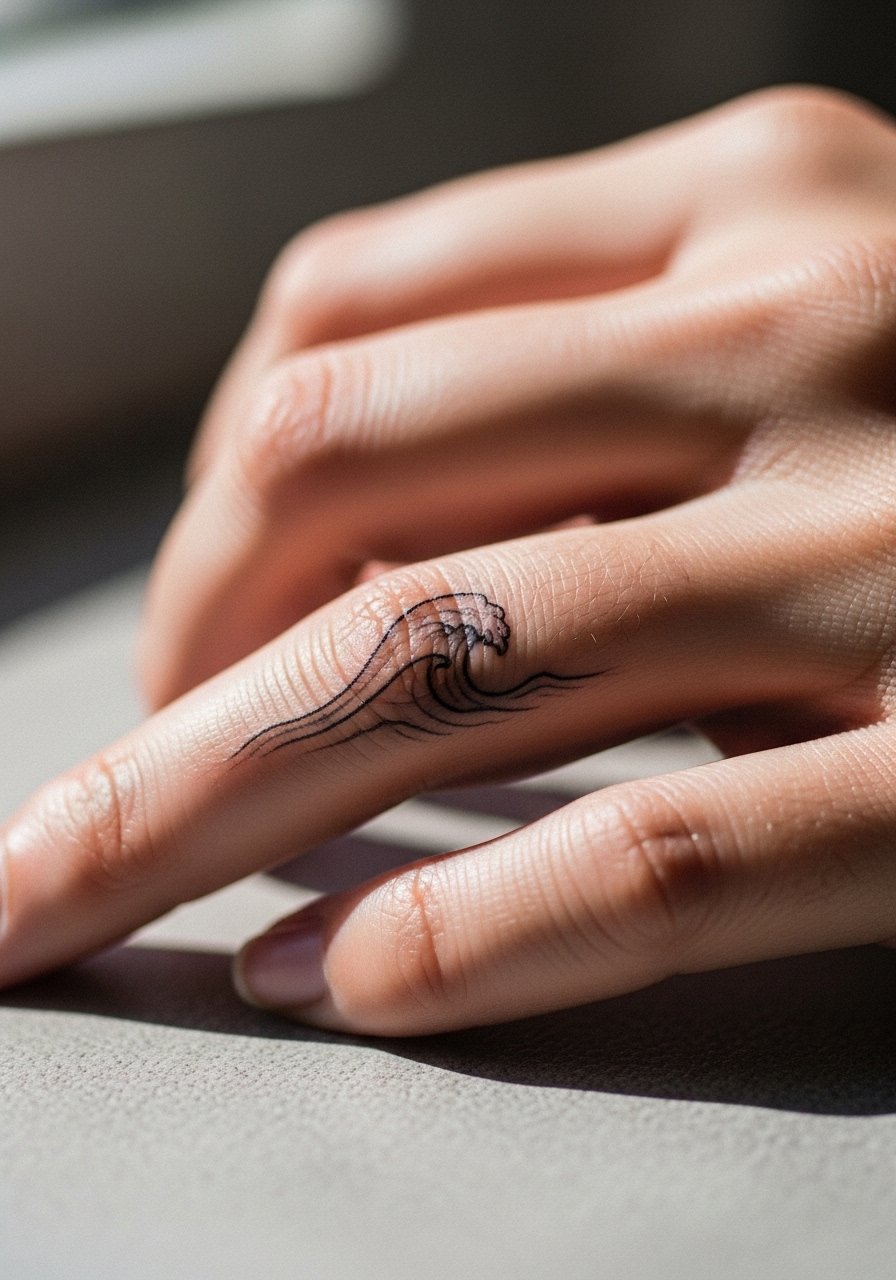
Finger and palm-adjacent tattoos fade faster because of skin regeneration and constant use. If you choose a mini wave for a finger side, request denser linework and simpler shapes so the motif does not blur into a streak. Expect yearly touch-ups and plan for a higher maintenance piece. The session is short but can be painful due to thin skin over bone. A key mistake is asking for ultra-fine detail on the finger. Keep it bold and minimal for longevity. Also consider workplace visibility before committing.
19. Patchwork Sleeve Starter with Blonde and Channel Orange Motifs
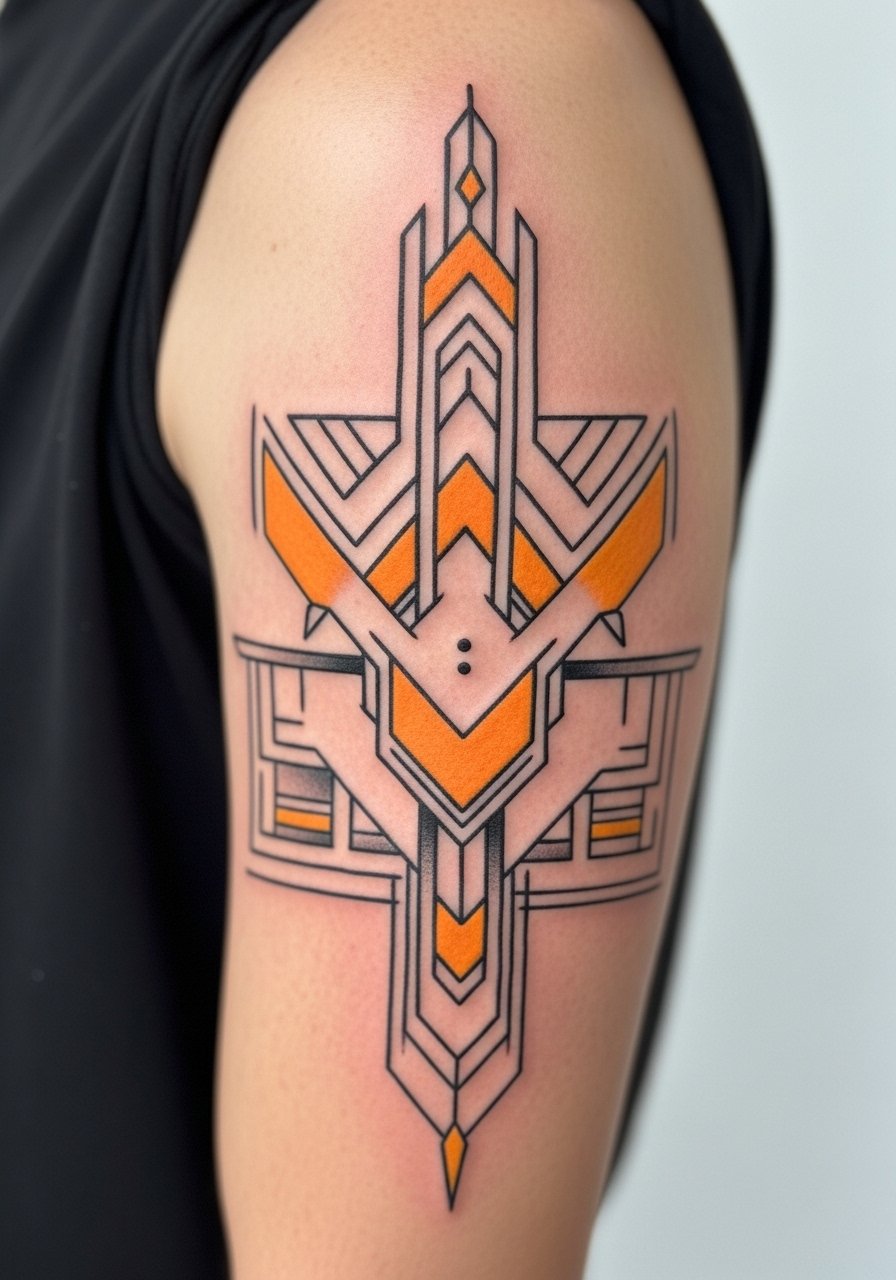
Visual impact lead: a patchwork starter builds momentum over years instead of in a single marathon session. The strategic choice is to map the sleeve in phases, leaving breathing room between pieces for future filler. A common mistake is cramming too many small elements at once which forces heavy touch-ups later. For session wear a fitted tee rolled to the elbow so the artist can work comfortably. Expect multiple appointments and a plan to connect pieces with background shading when you are ready.
20. Micro-Channel Orange Motif on Upper Arm with Patchwork Compatibility
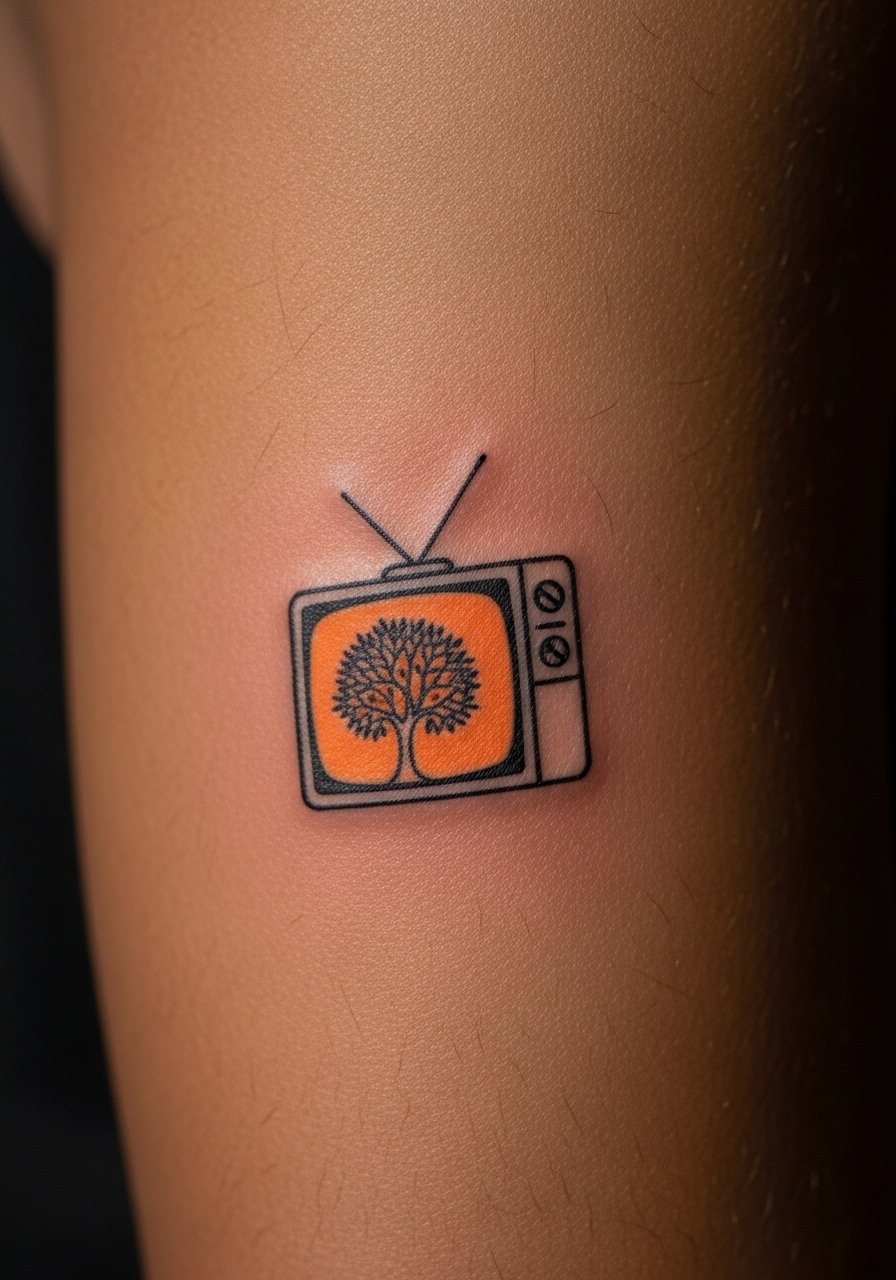
Visuals matter when you plan to expand into an arm narrative. This small upper arm design should be placed so its orientation works with potential future pieces. Ask your artist to mark alignment points and to leave negative bands for later flow. Session time is short and pain is low to moderate. The usual error is centering a tiny patch where a larger feature should go later. Plan ahead so your tiny piece becomes a building block, not an obstacle.
21. Endless Pyramid Micro Patch on the Ankle or Hip
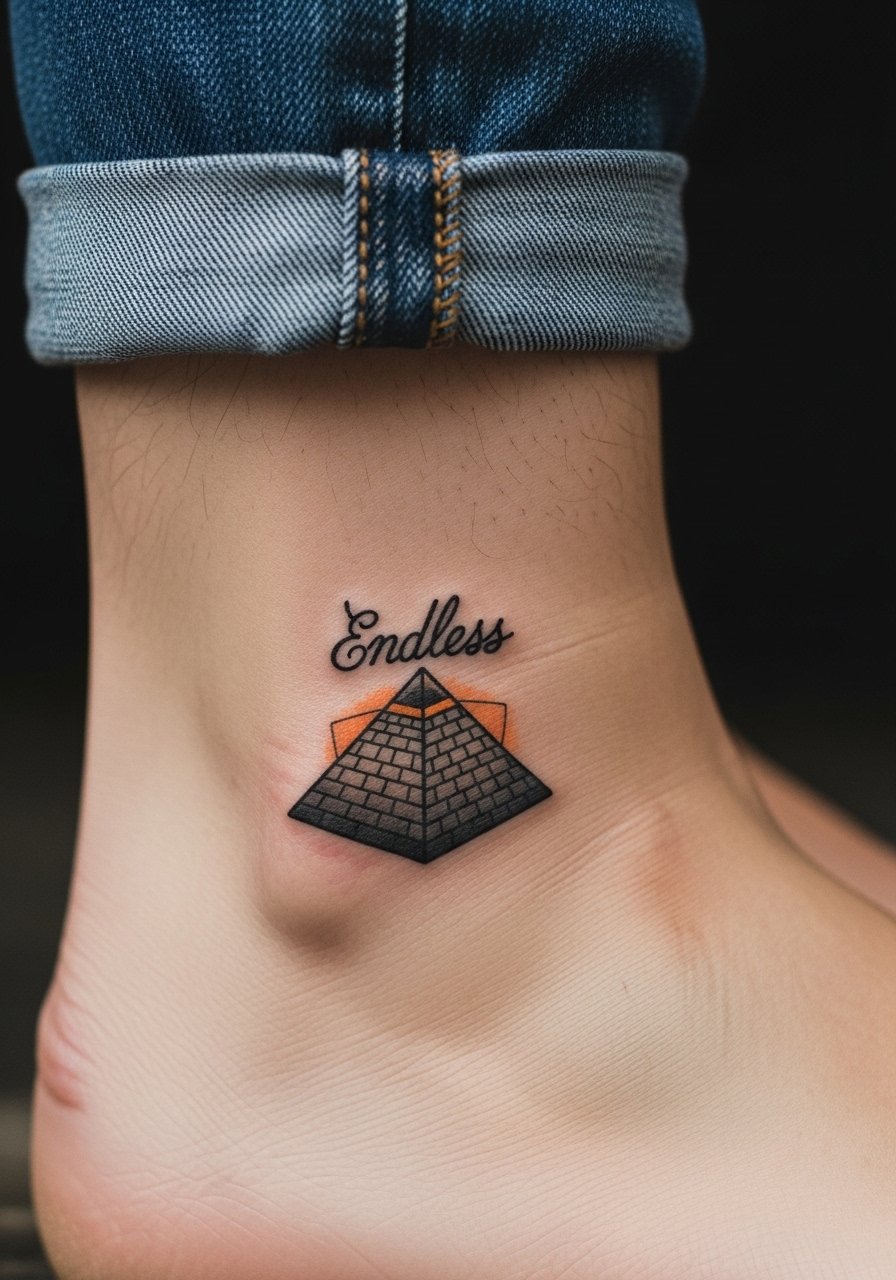
Decision pressure lead: choosing a rare nod to Endless means you want placement that suits how private you want the reference to be. Ankle gives visibility on warm days, hip keeps it intimate. For the ankle pick bold outlines and compact detail to survive abrasion. For the hip request slightly more shading because the area tolerates bigger fills. The common mistake is choosing tiny pyramids with too much internal detail for a small plane. If you plan to expand, place this symbol where its orientation can match a future patchwork.
Frequently Asked Questions
Q: Will fine line Frank Ocean tattoos blur faster than bold blackwork on forearms and ribs?
A: It depends on placement and line weight. Fine line tends to soften sooner on high-movement or high-friction areas like the wrist and ribs. Bold blackwork holds contrast longer on forearms. Ask your artist about slightly heavier strokes for fine line pieces in those spots and plan a touch-up at year two to three if you want the original sharpness preserved.
Q: Do watercolor-style waves need different care than blackwork pieces?
A: Watercolor pieces often need more attention to sun protection because pigments can fade unevenly. Blackwork tolerates sun exposure slightly better because of contrast. For watercolor on ribs or shoulders consider limiting early sun and using UPF clothing while the area fully heals.
Q: How should I dress to show a forearm Blonde outline without overshadowing it?
A: Neutral, rolled sleeves and simple necklaces complement forearm work. A rolled cuff chambray shirt frames the arm without competing for attention, while a thin chain on the opposite wrist balances the look.
Q: Are ribcage pieces worth the pain for a neo-traditional Endless pyramid?
A: Ribs are painful for most people but they yield dramatic results if you want a larger, intimate piece. Expect a multi-session plan and honest talk with your artist about how their technique handles skin stretch. If you prefer lower pain and fewer touch-ups pick a flank or upper arm instead.
Q: How often do small ankle and finger Frank Ocean motifs need touch-ups?
A: Finger and ankle placements typically need more frequent touch-ups because of daily friction and thin skin. Plan to check in around year one and again at year two. Choosing simplified shapes and bolder outlines reduces how often you will need work.
Q: Where can I look for style-matching examples without tagging specific artists?
A: Search hashtags like #FrankOceanTattoo and #BlondeTattoo on Instagram, check Tattoodo filters for local custom studios, and browse relevant TikTok tags to see short healing clips. Those pathways help you find an artist whose healed work matches the look you want.
