
Fine line clovers dominate saved boards right now, but what looks flawless on a phone screen does not always hold up on skin. Some styles maintain crisp edges for years, and others need touch-ups sooner than you expect. This list walks through 27 feminine four leaf clover tattoo directions, from micro-realism for upper arms to abstract blackwork, with what to ask your artist and how they age.
1. Realistic Micro-Leaf on Upper Arm
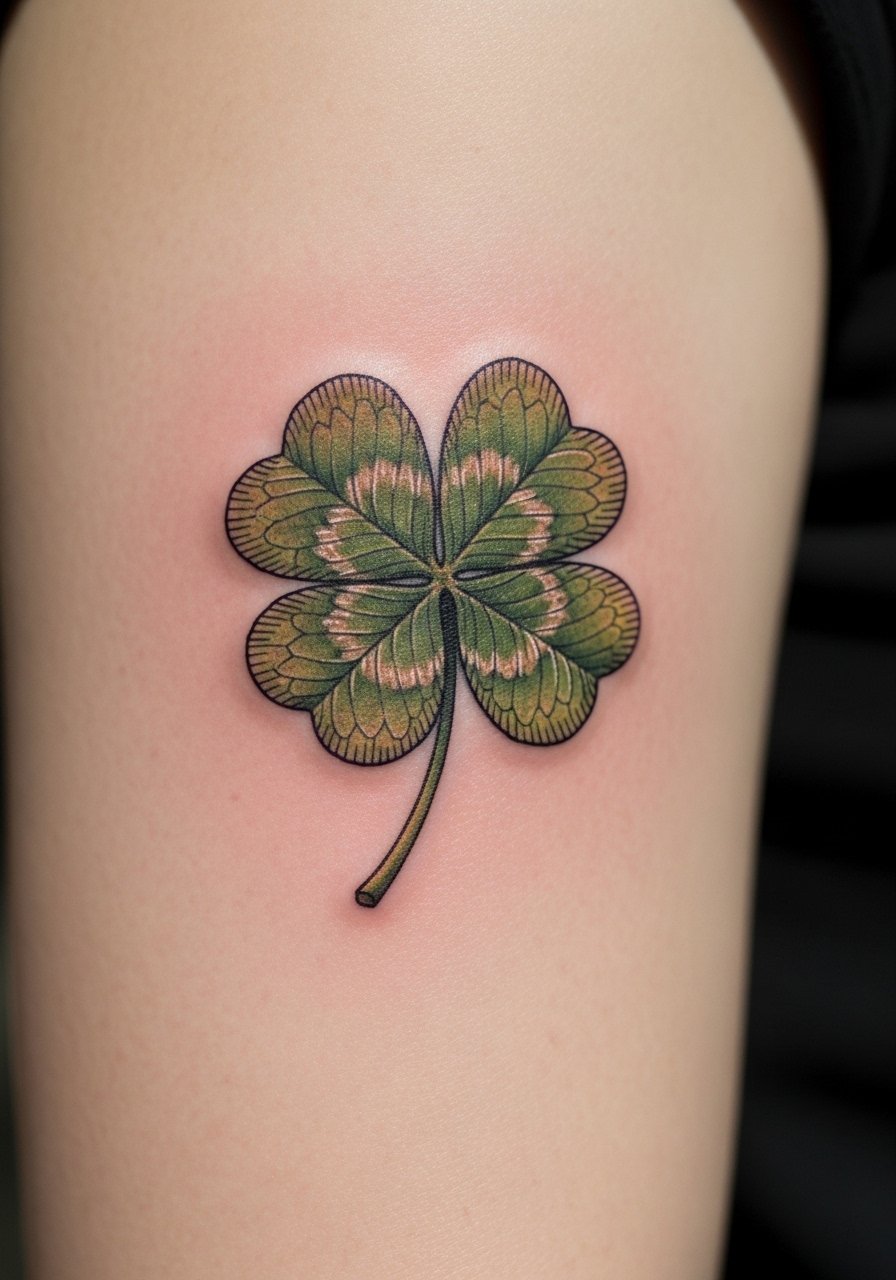
I often recommend micro-realism for upper arms when someone wants the clover to read like something they could pick off the grass. Tell your artist you want soft vein details and slightly varied greens rather than flat color. Expect a single session for a 2–3 inch piece and mild soreness while the arm rests against clothing. The upper arm moves less than the inner bicep so saturation holds better over time. A common mistake is asking for ultra-fine veins that blur at year two. For show-off styling, pair with a sleeveless tank in neutral tones to keep the shading visible.
2. Bold Tribal Outline for Forearm
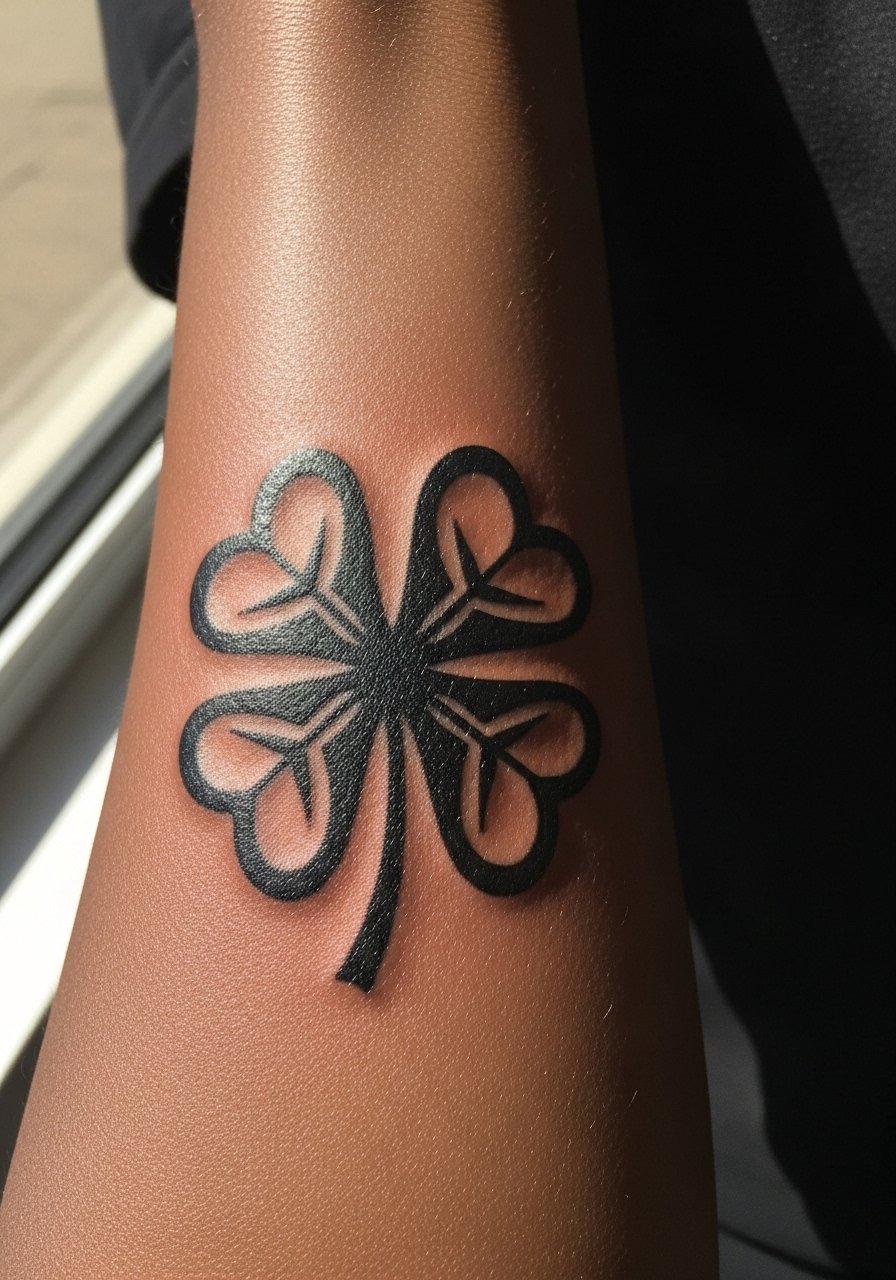
Fair warning: the forearm is one of the busiest places you can pick for bold work, but that is exactly why tribal blackwork performs well there. Thick outlines resist blowout and fading from sun exposure. During consultation, ask for slightly wider line weight than your reference so the leaf silhouette stays crisp through years of outdoor wear. Session time is usually under two hours with moderate discomfort when the needle crosses bone near the wrist. To show this off, roll cuffs or wear a linen rolled cuff shirt so the piece sits framed without distraction.
3. Celtic Knotted Clover Near the Collarbone
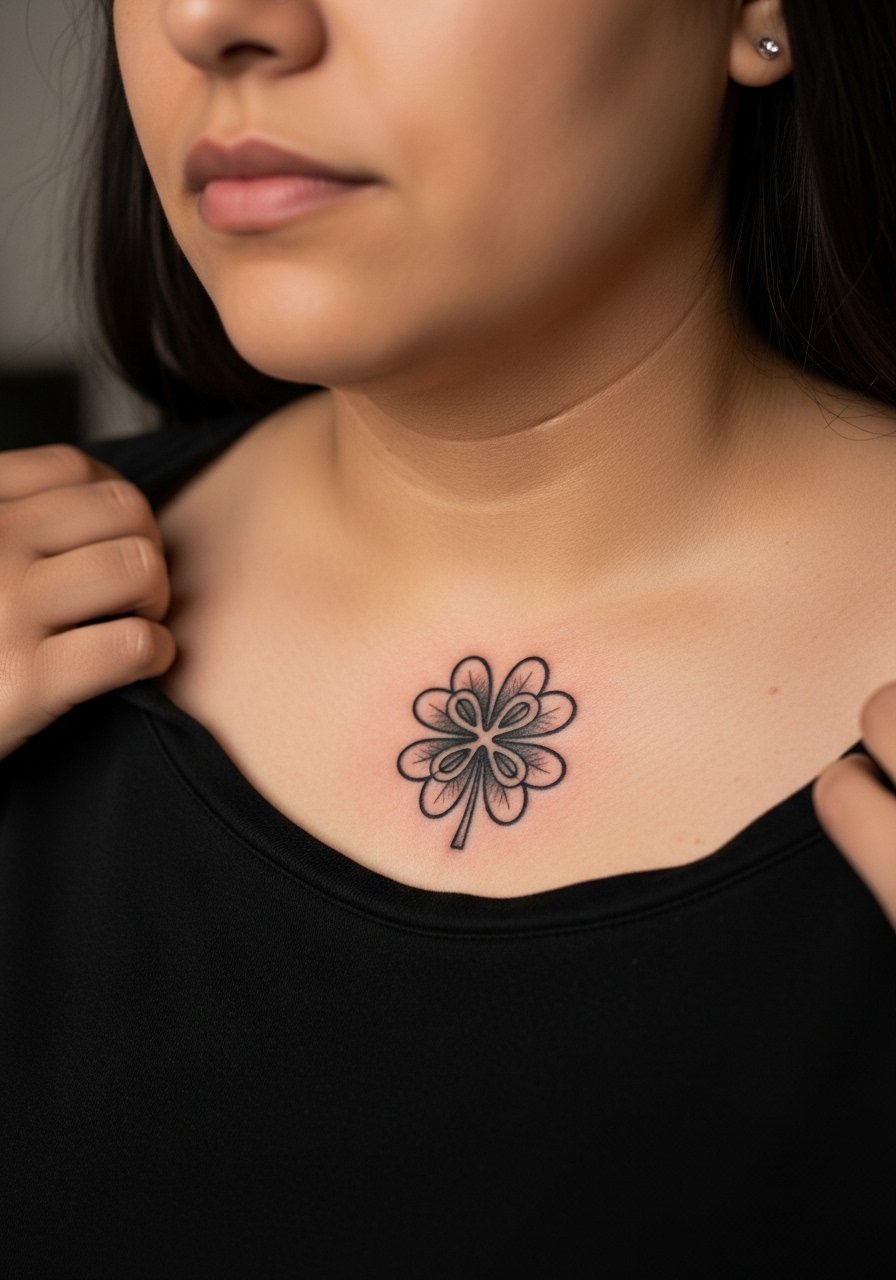
When heritage matters, knotted fills inside each leaf turn the clover into a decorative crest rather than a mere motif. Expect two shorter sessions for 2.5-inch work because knot detail needs space to breathe. The collarbone can be a 6 to 7 on pain scales, so plan for short breaks. Artists split on whether tiny knotwork holds forever. One camp says tight knots blur with skin movement. The other camp uses more spacing and reports longer longevity. Ask the artist which approach they prefer. Off-shoulder tops highlight this placement and a simple off shoulder top keeps the knotwork visible.
4. Minimalist Fine Line on the Wrist
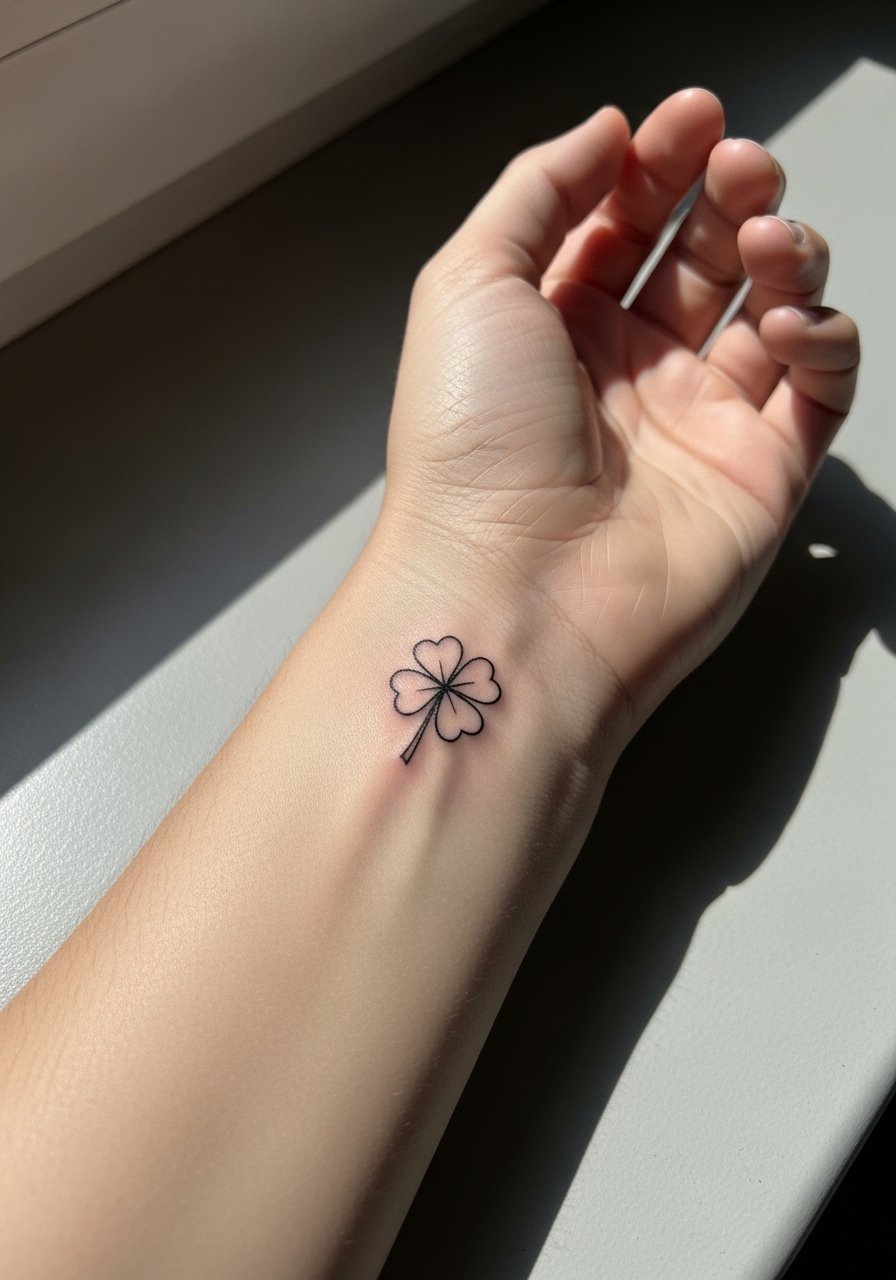
Most people choose a wrist clover as a first tattoo because it reads delicate and discreet. Expect a quick single-session appointment and a sting that rivals a strong pinch. The real issue is long-term wear. Wrist pieces rub against watches and sleeves and can thin faster than upper arm work. Ask for slightly thicker single lines and light stipple shading so touch-ups at year two are less obvious. For showing off, stack a thin stackable bangle set on the opposite wrist to balance dainty linework.
5. Name-Integrated Clover at the Ankle
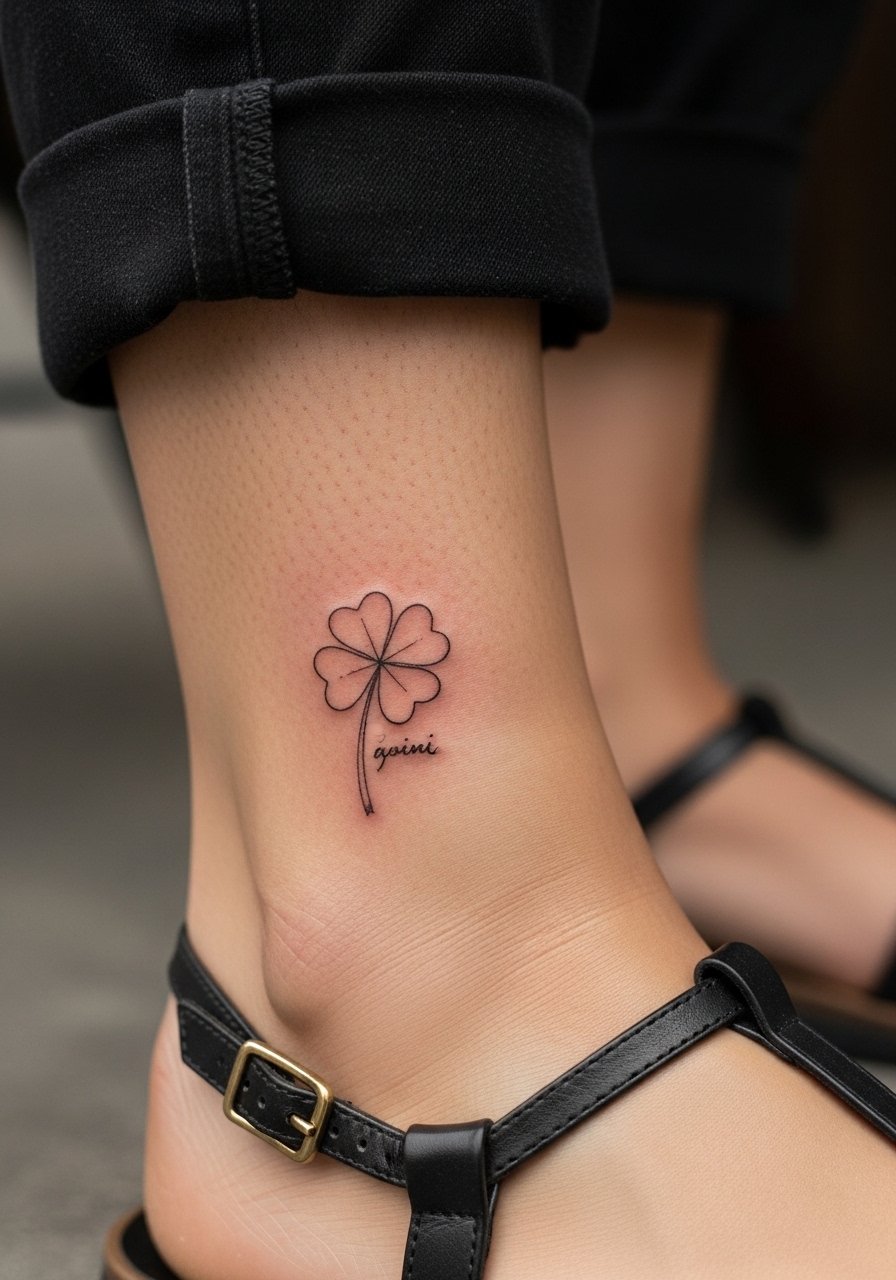
Combining a name with a clover keeps the design personal without turning the piece into a heavy memorial. The ankle is a high-friction spot, so ask your artist to place script along the natural curve of the foot to avoid distortion. Expect higher sensitivity when the needle is near bone and a session that can feel sharp. The most common mistake is cramming long names into a tiny ankle space. If you want visibility, choose a short name or initials and keep lineweight steady. In summer, strappy sandals frame ankle tattoos neatly so consider a pair like strappy sandal flat for show-off days.
6. Lush Watercolor Clover Cluster on the Thigh
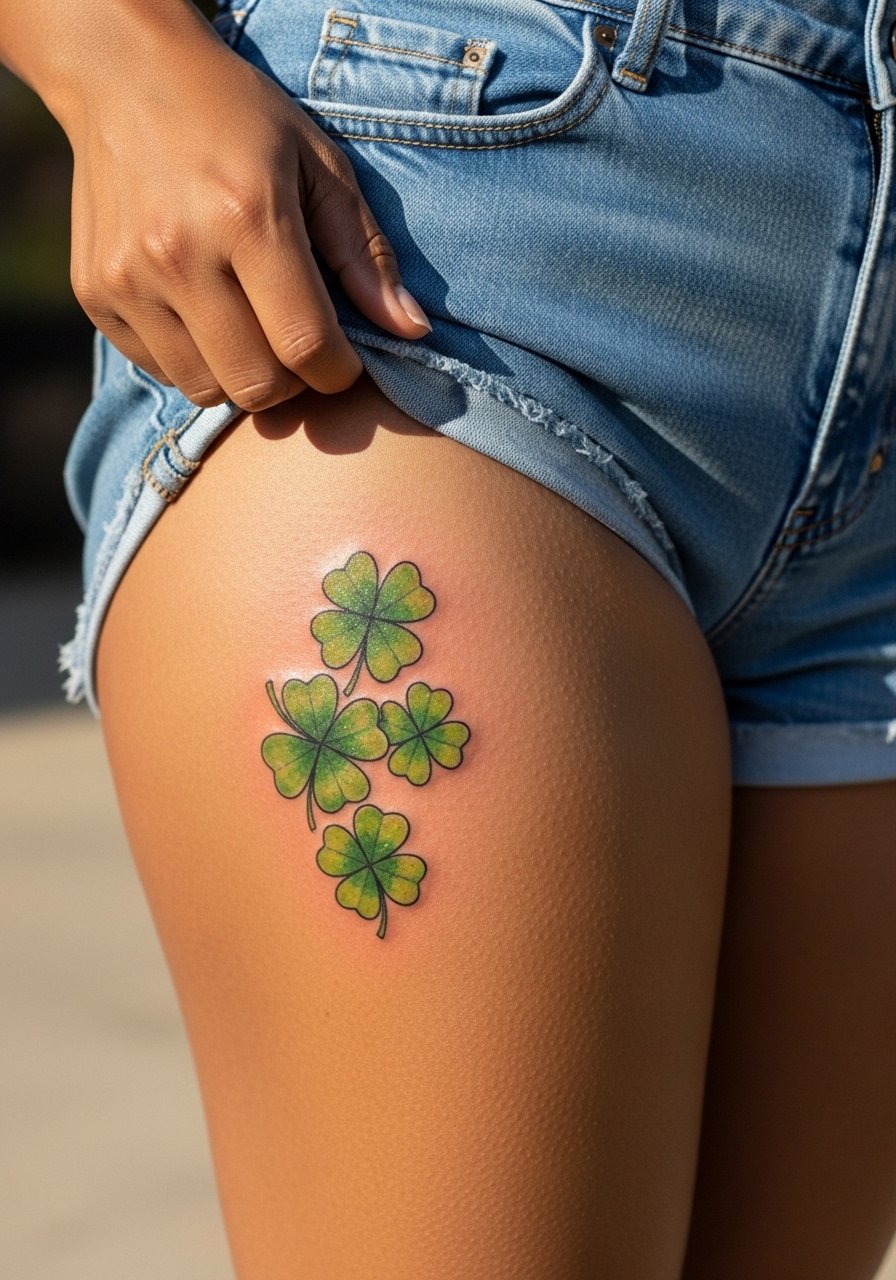
Thigh pieces let you go big with soft edges and washes of green without worrying about constant sun exposure. Pain is moderate and sessions can run longer because watercolor layering needs time. During consultation, mention you want saturation with soft white highlights and ask about blending that keeps leaves readable at six months and at year three. The common misstep is over-blending tiny areas so the clover shapes disappear. For session comfort, wear loose shorts you can shift as needed. High-waisted shorts like high waist shorts women work well.
Studio Day Picks
The ankle, wrist, collarbone, forearm, and thigh pieces above each have different prep and first-week needs, so a compact kit keeps the session smooth and the start of healing cleaner.
-
Stencil transfer paper kit. Lets you preview placement on skin and adjust scale before the needle goes down, especially helpful for the name-integrated ankle and the knotwork collarbone pieces.
-
Topical numbing cream. Applied per instructions before a sensitive ankle or collarbone session to manage sharp pain without altering linework.
-
Thin protective film roll. Useful after wrist and ankle tattoos that face daily friction from clothing and shoes.
-
Fragrance free gentle body wash. Cleans the healing area during showers without stripping delicate fine lines from the first week.
-
Aquaphor healing ointment. A thin layer right after washing helps protect delicate linework for small clovers while skin starts to repair.
7. Stippled Dotwork Clover on the Inner Wrist
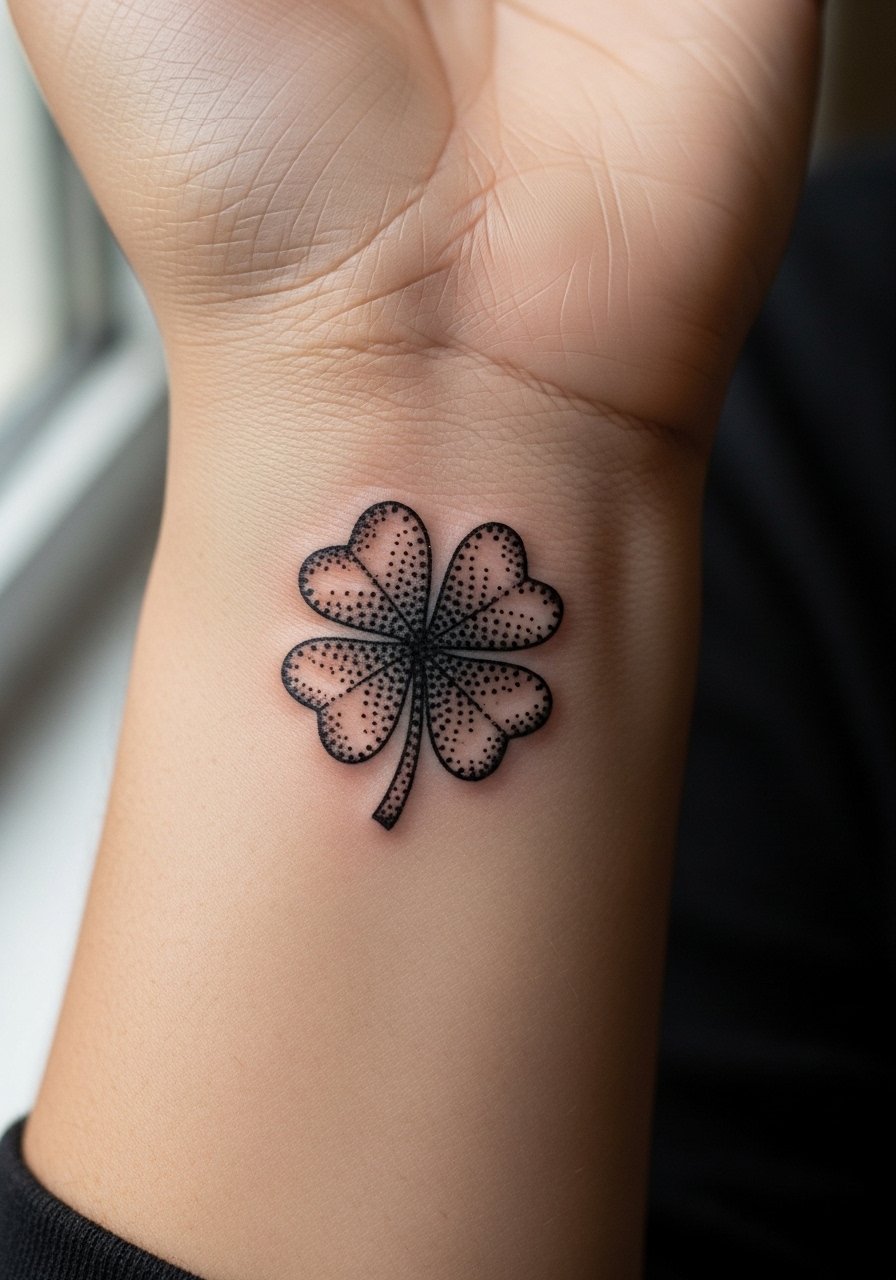
I've seen stipple shading keep a wrist clover looking textured rather than flat, and that texture survives minor fading better than a thin outline. The inner wrist can be tender but sessions are short. A common error is asking for too many dots in a tiny space, which can merge into a gray patch after a couple of years. Tell your artist you want airy dot spacing and shallow needle depth. For showing off, push blouse cuffs up and add a flowy blouse so the stippling catches light.
8. Tiny Four Leaf Clover Behind the Ear
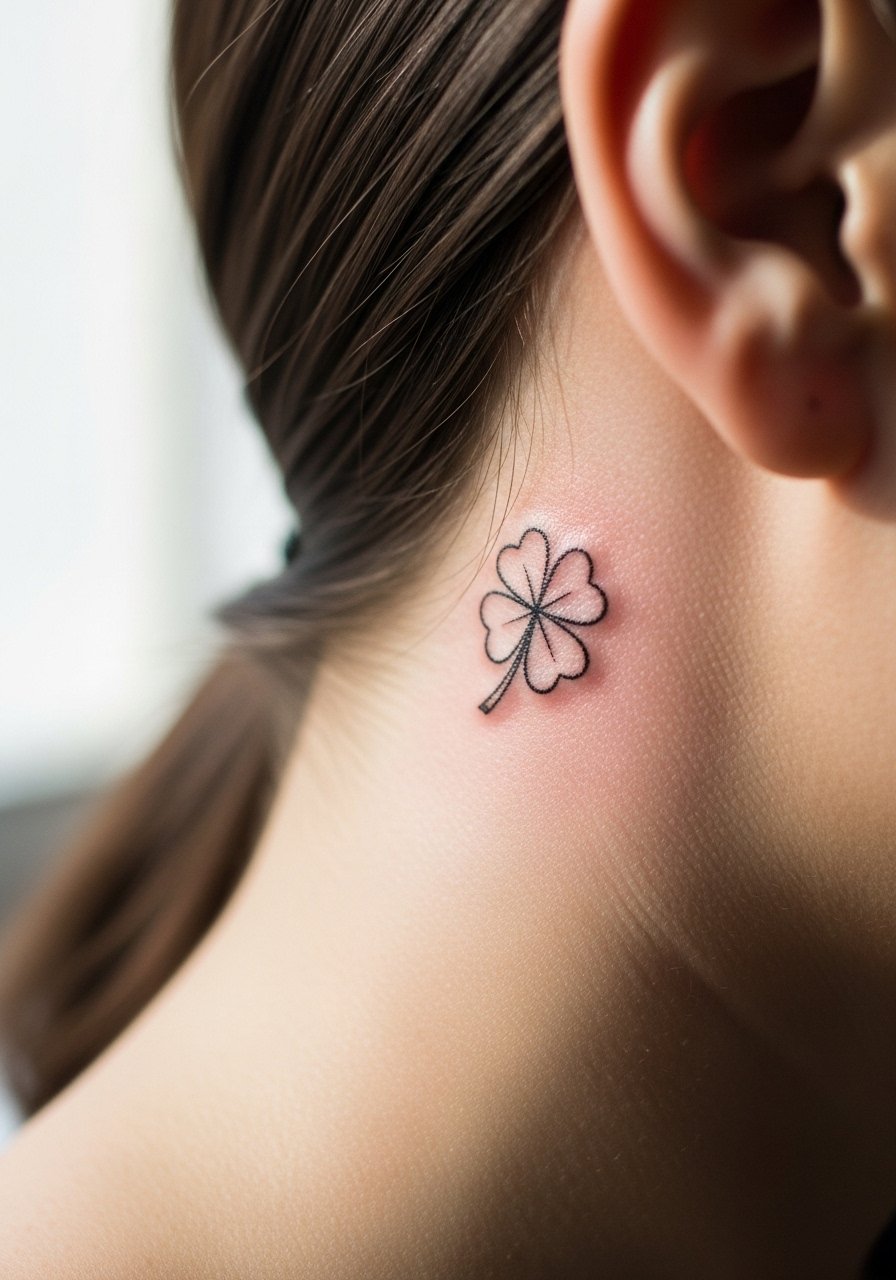
Behind-the-ear placements excel at being discrete. The trick is to ask for simple leaf shapes at a slightly larger scale than the reference so detail remains visible after normal hair movement. Expect low session time and low to moderate pain. Note that aftercare there requires keeping hair oils away for the first week. The mistake is requesting micro-detail that gets lost under hair. If you have a day job where subtlety helps, this is a smart pick. Also consider a haircut or style that keeps the area visible if you want to show it occasionally.
9. Geometric Clover Linework on the Shoulder
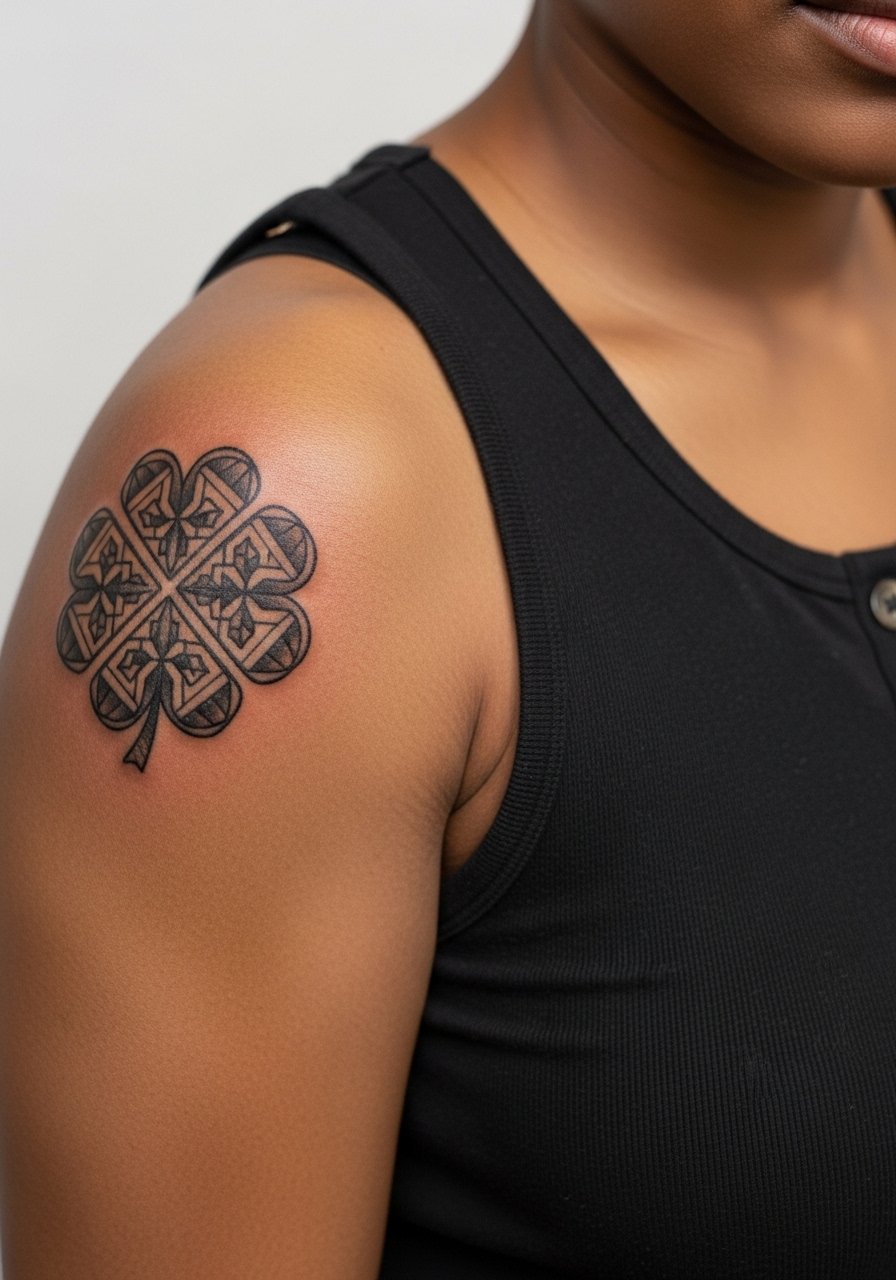
There is something about bold geometry on the shoulder that reads strong from a distance. The shoulder tolerates dense blackwork well and lines age into a graphic silhouette. For longevity, ask for slightly increased spacing between intersecting lines so you avoid merging at year three. Sessions are comfortable and often done in one sitting. A common mistake is making shapes too small for the shoulder's movement. For outings, pair with a button front tank that frames the design.
10. Small Clover on the Side Ribcage with Script
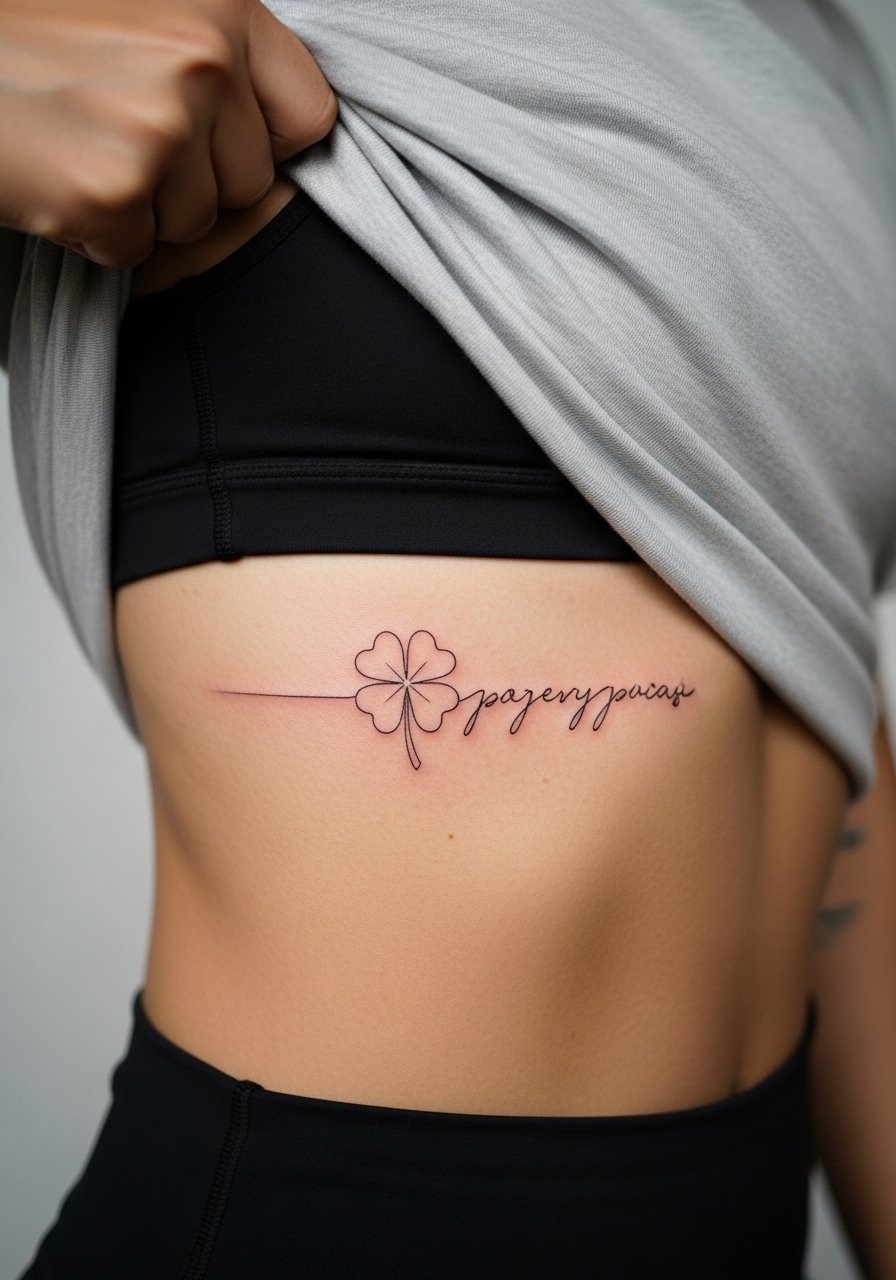
Pain warning: the ribcage is one of the more painful spots, often an eight out of ten. People pick the ribs for intimate pieces that stay mostly private. Artists disagree on fine line there. One camp says the skin movement blurs lines quickly. The other camp says proper spacing and needle depth keep fine work legible for years. Ask your artist which camp their portfolio supports. Name or date additions require careful sizing so the letters do not stretch. Wear a strapless bra or a cropped top you can lift easily for the session.
11. Neo-Traditional Clover on the Upper Back
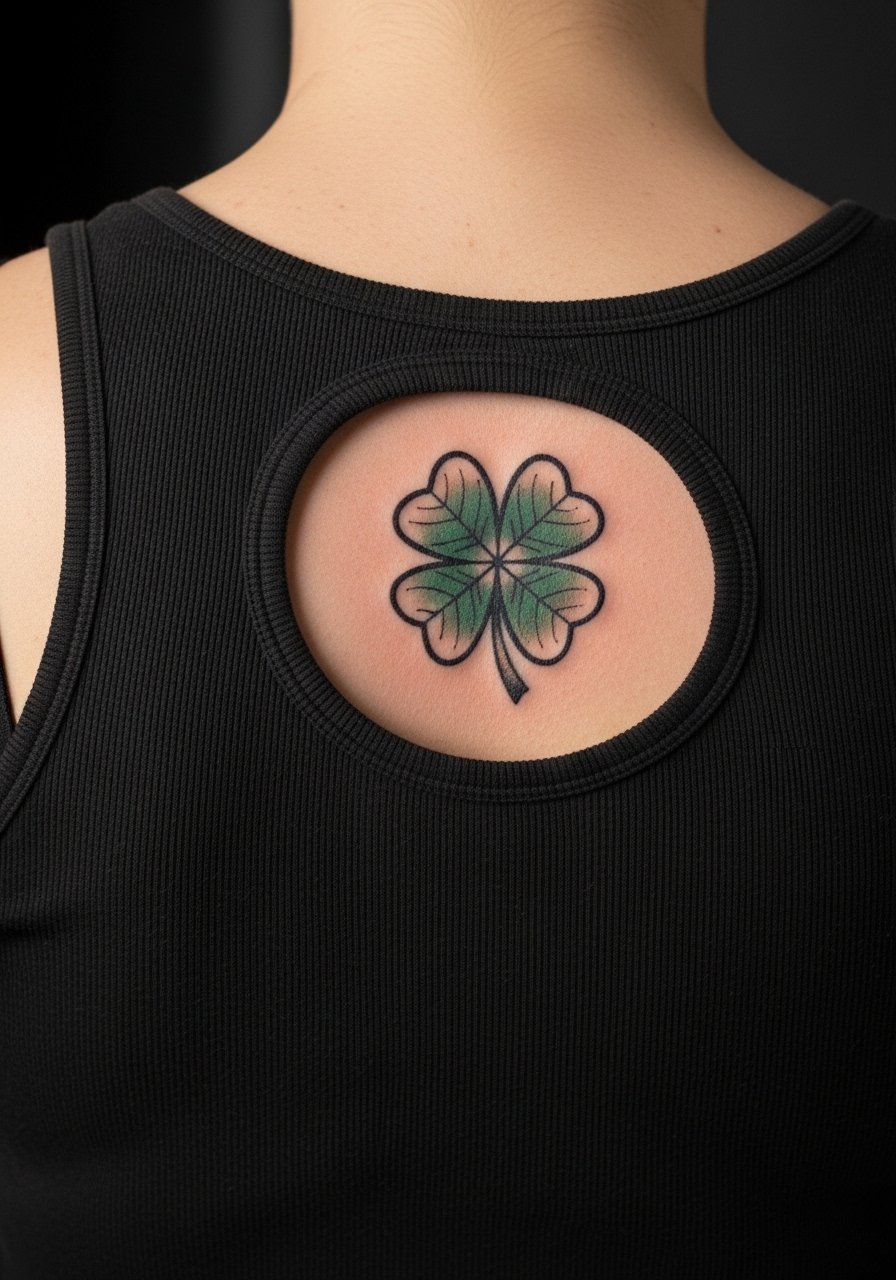
Upper back pieces let you scale the clover into an ornamental badge that plays well with other back work later. Expect moderate pain and a session length that depends on color fills. The common mistake is tight composition that makes later additions awkward. Tell your artist you might want a complementary motif added in future so they will frame the clover with negative space. For the session wear, a button-up or tank you can pull to the side gives easy access.
12. Abstract Surreal Clover on the Shoulder Blade
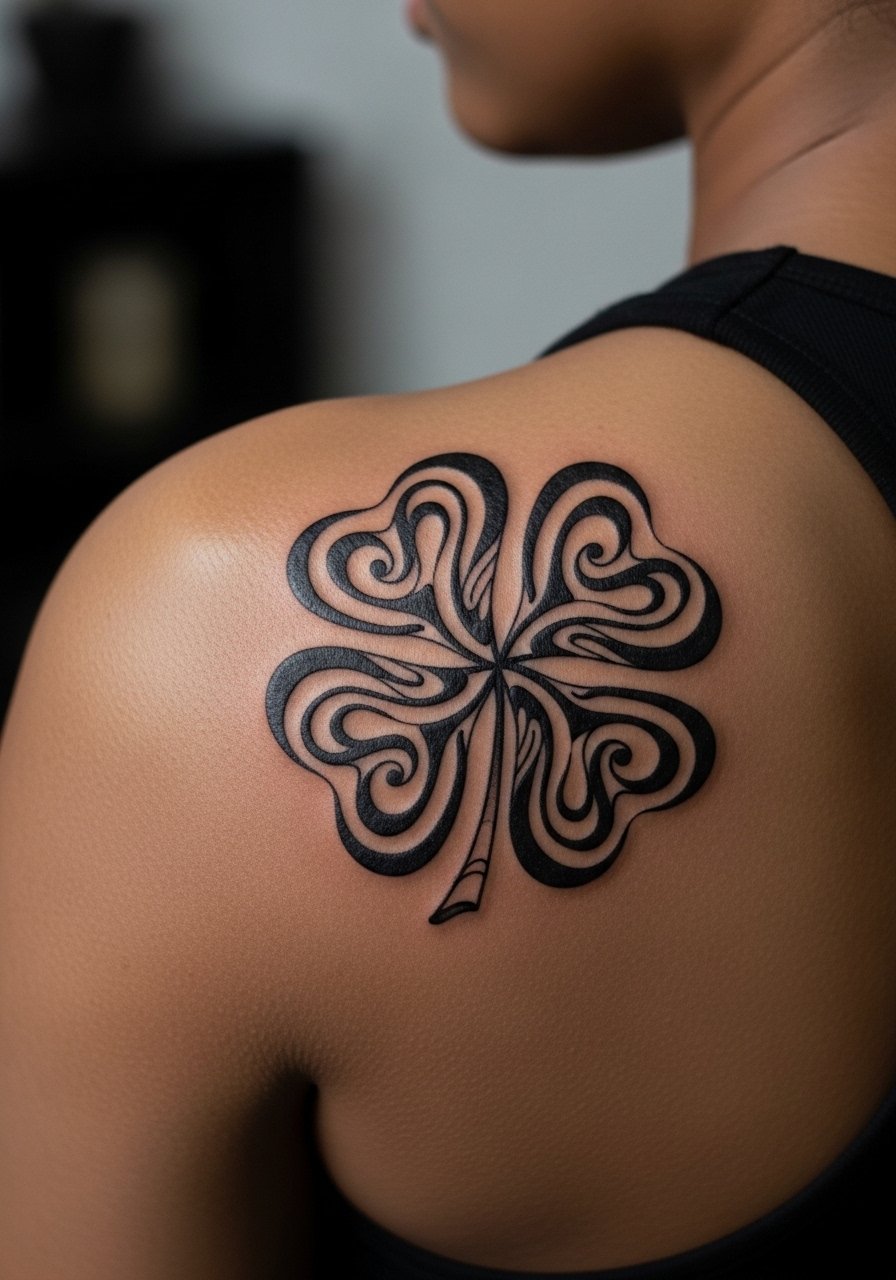
Abstract clovers appeal to people who want a hint of the motif without literal leaves. This blackwork approach reads well on the shoulder blade because the silhouette plays with the shoulder's angle. Sessions can be two parts if the plan is layered black fills. A common mistake is asking for too much micro-detail in an abstract composition. If you prefer wardrobe that flatters the shape, halter tops in neutral tones keep attention on the lines. For session comfort, wear a halter top neutral you can slip aside.
13. Tiny Clover on a Finger Edge
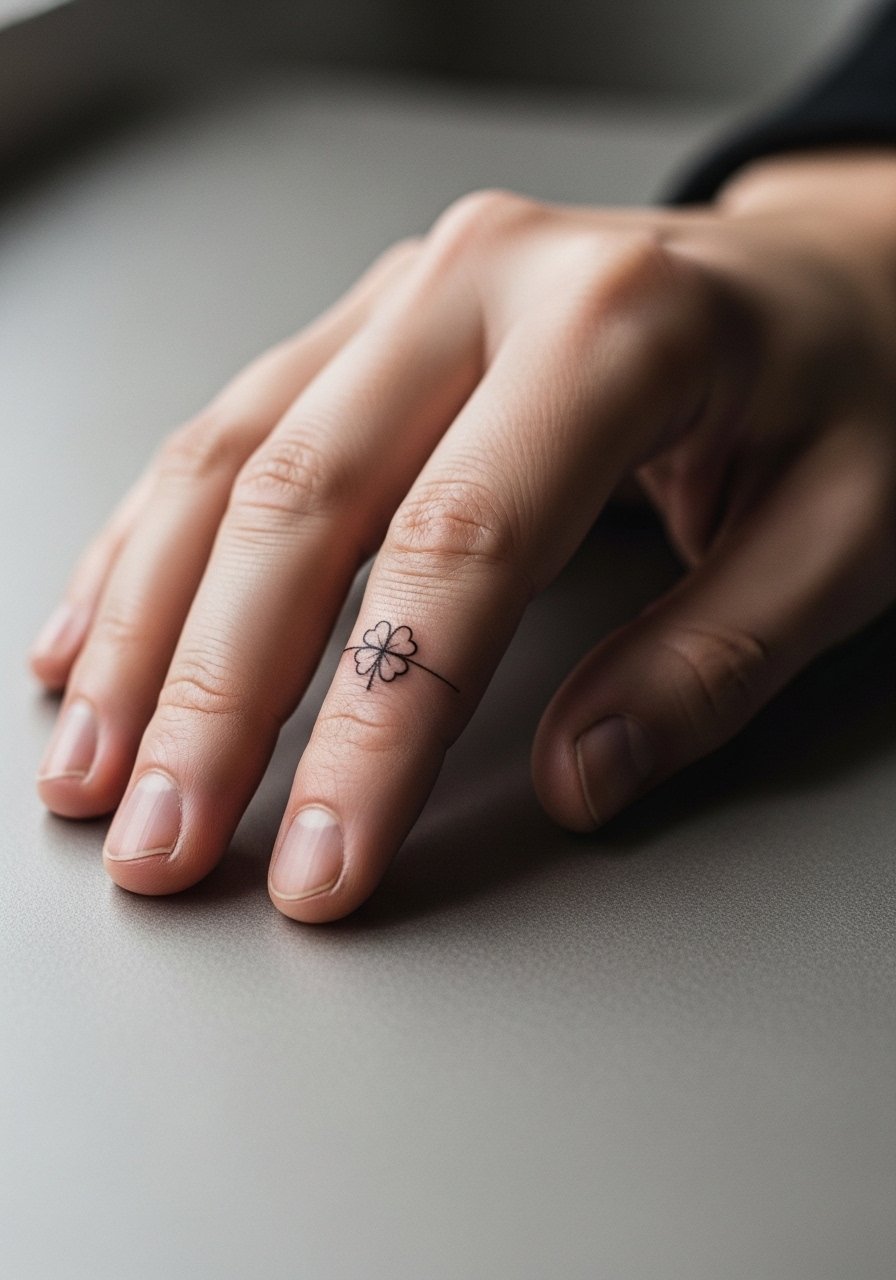
Finger tattoos are quick, intensely visible, and notorious for fading. Plan for annual touch-ups if you choose a finger edge location. The usual error is asking for too much interior detail. Opt for a bold simplified leaf outline to reduce blowout risk and to keep lines legible as the skin renews. Session time is short but the discomfort can be sharp. For showing off, keep nails neat and minimal to avoid competing visuals.
14. Healed Black Clover at the Nape of the Neck
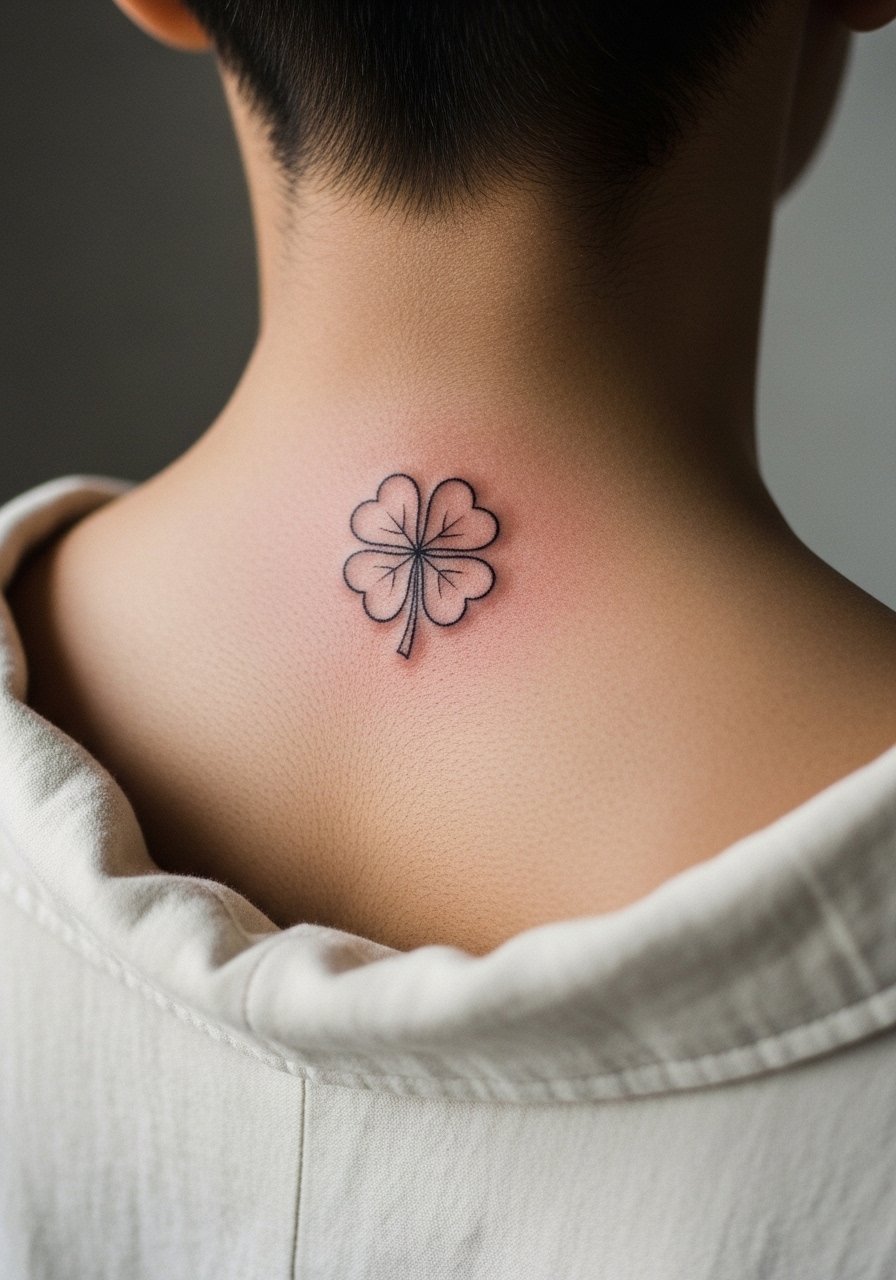
The nape is a versatile spot that can be covered by hair or revealed with a ponytail. Expect low to moderate pain and a quick session. The mistake is asking for tiny script beneath the clover where movement distorts letters over time. If you want it visible, style with a high bun or wear a wide-neck shirt that frames the area. Also confirm with your artist about line spacing so the clover keeps its identity after a few years.
15. Watercolor Single Clover on the Calf
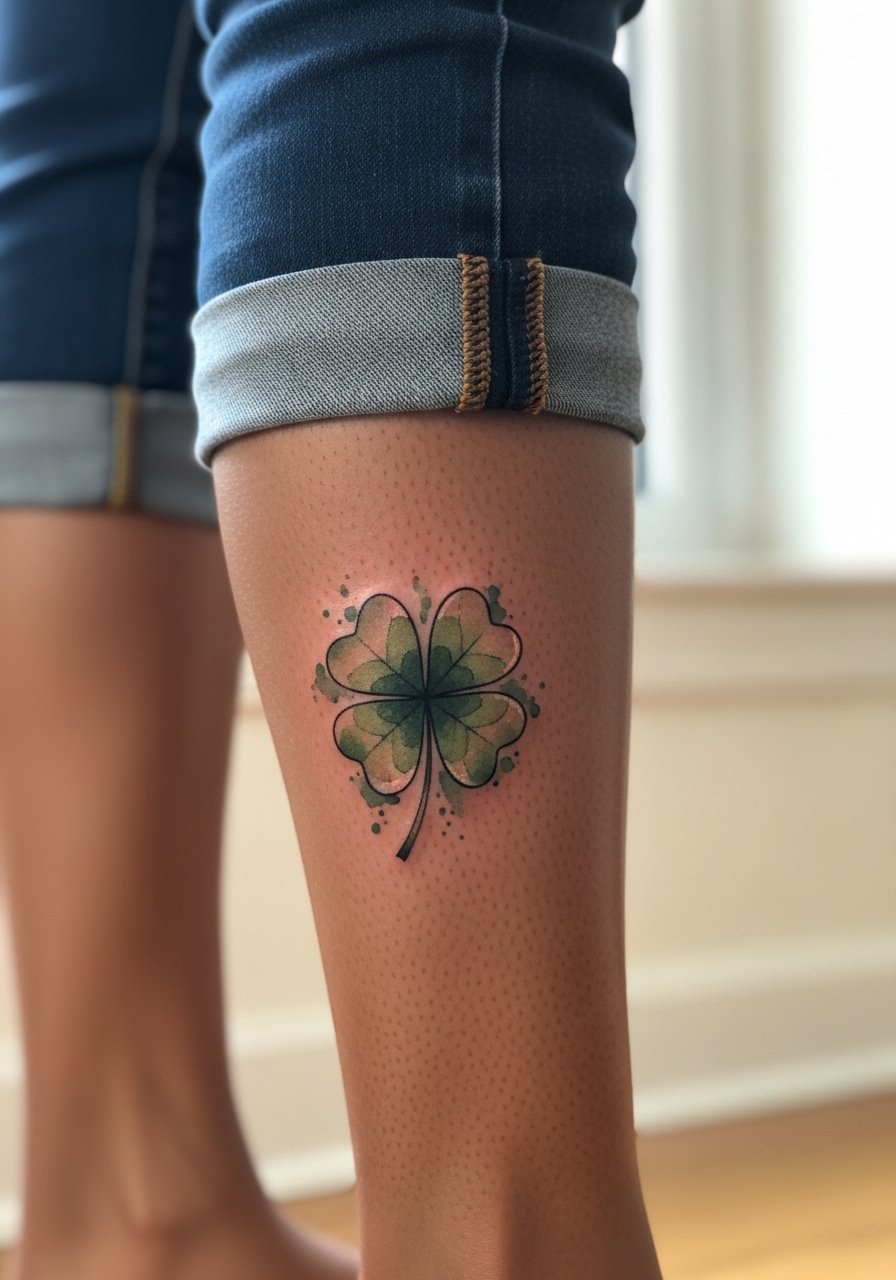
Calf placements are forgiving for color blends because they get less sun than shins and are easy to cover. Expect a longer single session for watercolor saturation and tender soreness when sitting for extended time. The most common mistake is pushing color too close to thin outlines, which can make edges look muddy after healing. For showing off, choose cropped pants or skirts. A pair of cropped ankle pants like cropped ankle pants keeps the calf visible and complementary.
16. Delicate Clover at the Collarbone Curve
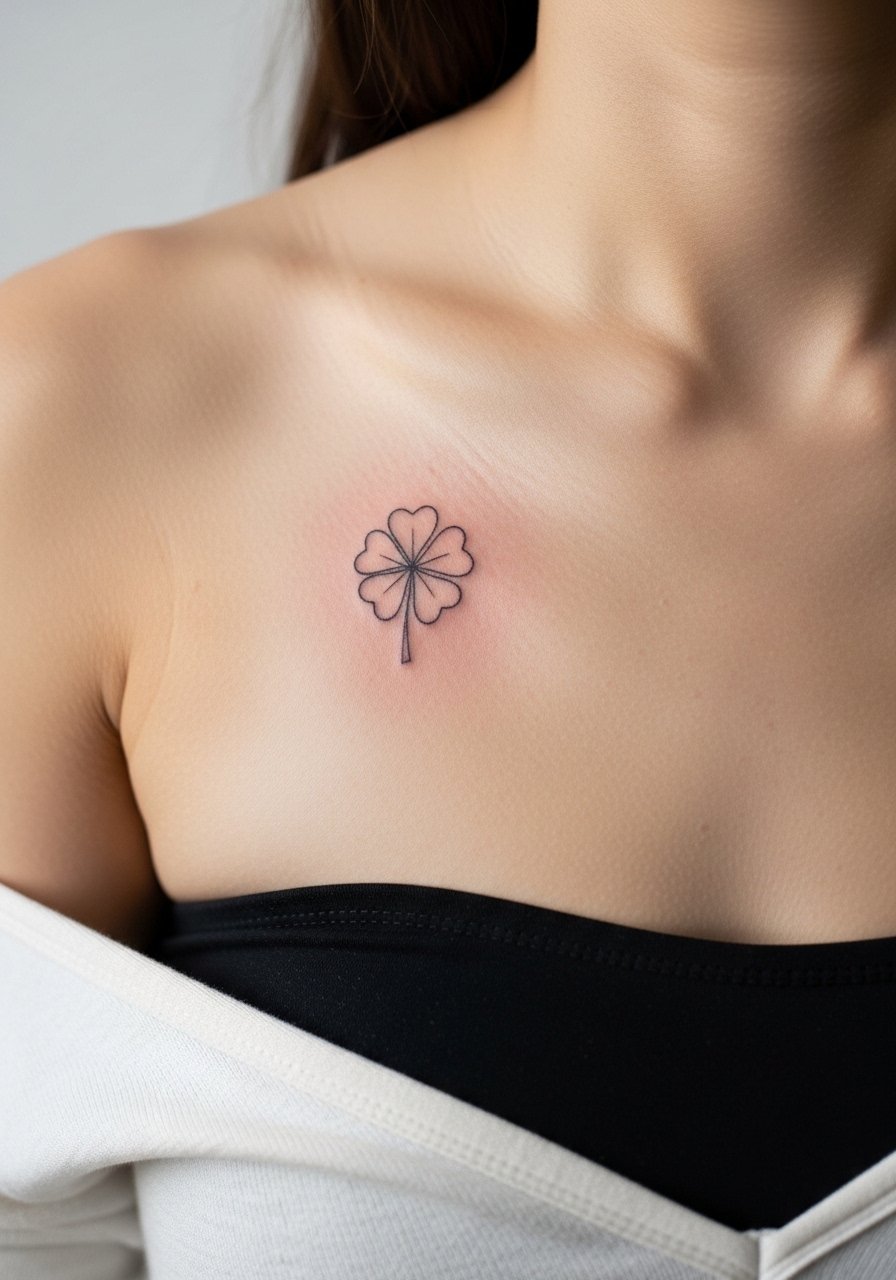
The collarbone area shows detail nicely but moves with shoulder and chest motion. Expect moderate pain and a session you can break into short sittings. Artists often caution against overly tight linework here because repeated movement can soften very thin lines. A smart consult request is slight spacing between veins and a touch of stipple instead of thin continuous lines. For evenings out, an off shoulder top keeps the piece visible and elegant.
17. Tiny Clover Over the Heart
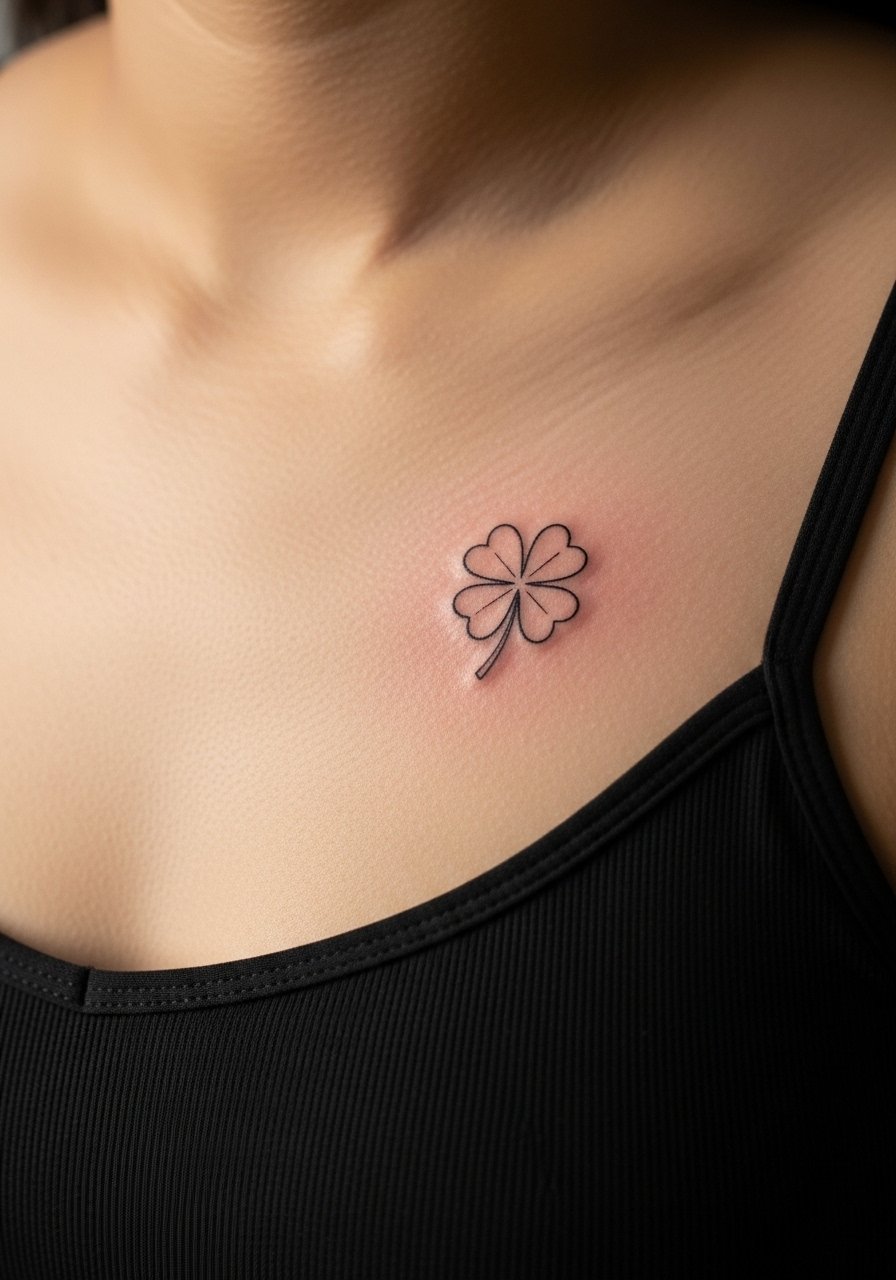
Chest pieces carry emotional weight for many people, but the skin there heals predictably when protected. Sternum-adjacent work requires special session planning and sometimes an extra layer of care. Ask for slightly thicker strokes so the tiny clover does not blur with normal chest movement. Expect a 5 to 7 on most pain scales for sternum-adjacent spots and schedule accordingly. Minimal stud earrings and low necklines show off a heart-side clover without distraction.
18. Clustered Mini-Clovers Behind the Knee
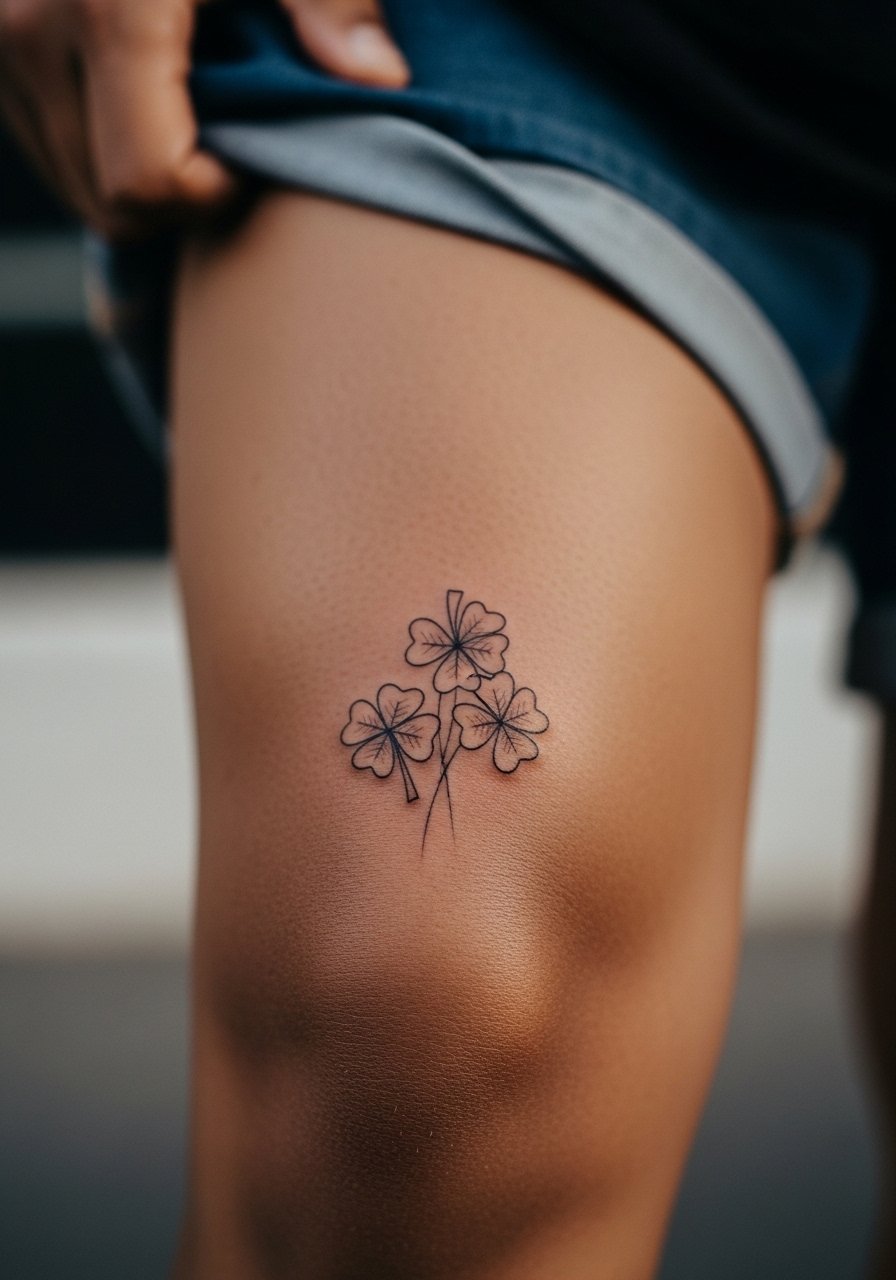
Back-of-knee tattoos are intimate and tricky because of constant bending. Most artists recommend small, simple shapes and slightly thicker lines to reduce stretching. The session can be uncomfortable because the skin is thin there. A frequent mistake is trying to stack too many small elements in a confined fold. For session wear, choose loose shorts you can shift without fabric dragging across fresh ink.
19. Celtic Swirl-Framed Clover on the Upper Arm
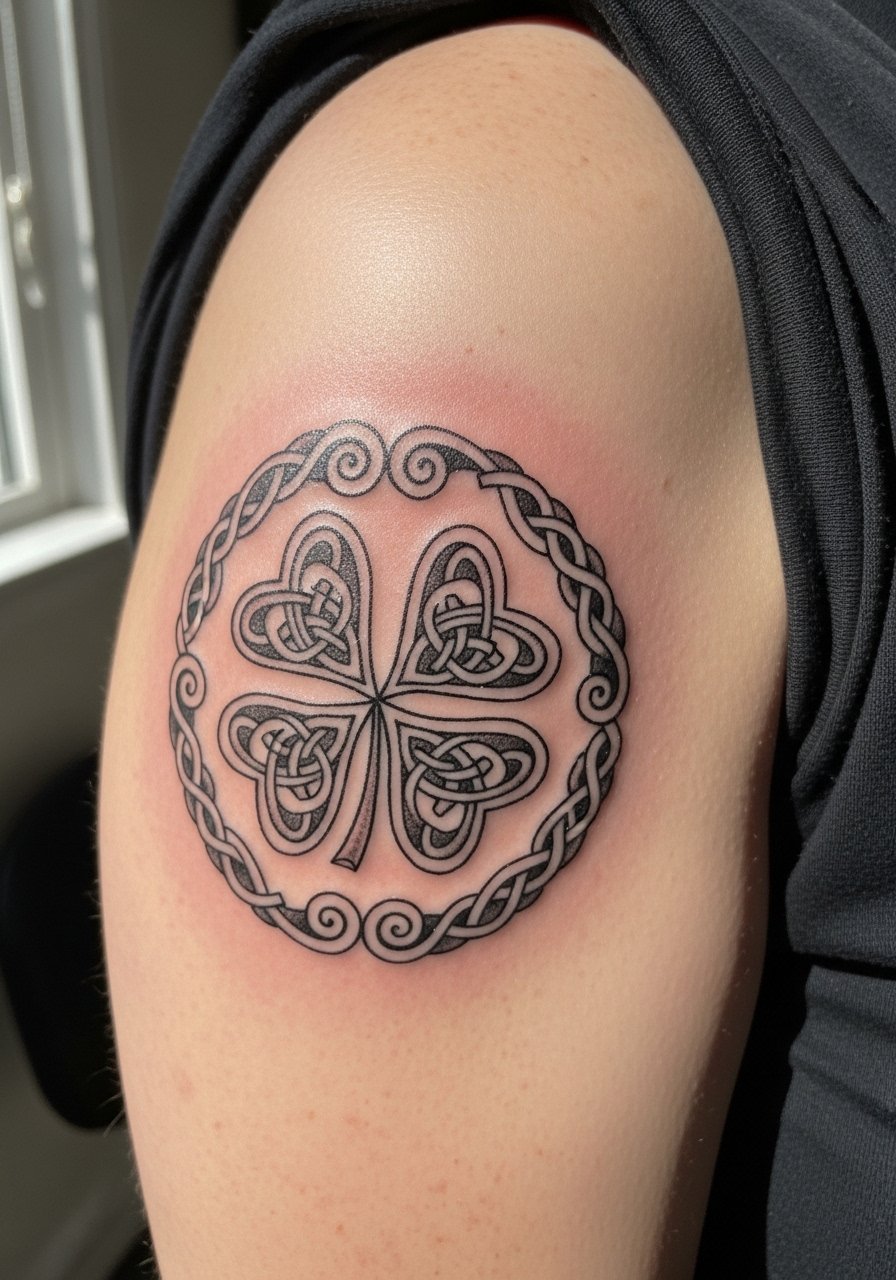
Upper arm canvas works well for ornate frames because the area resists frequent friction. Expect 1 to 2 sessions depending on detail and color fills. In consultation, ask for slightly open knot spacing so the curls do not merge with time. A common error is packing too many knots into a small frame. For easy showing, a sleeveless tank will keep both the frame and the clover visible without competing textures.
20. Bold Shaded Tribal Leaves on the Outer Forearm
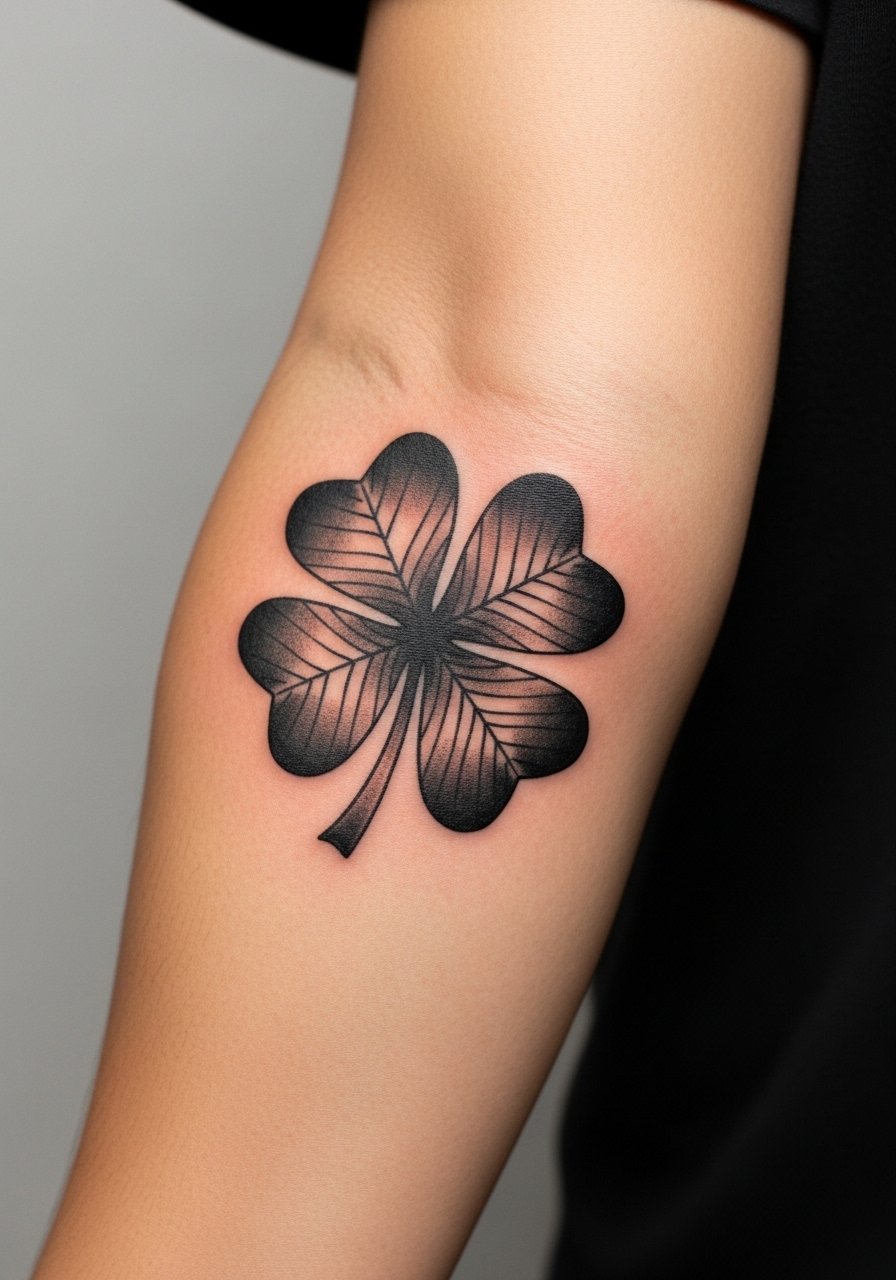
Outer forearm work benefits from bold shaded leaves that read from across a room. The thick fills hold up against sun and washing better than micro lines. Sessions are moderate and pain is manageable. The usual mistake is asking for whisper-thin gaps within black fills that later show patchiness. When talking to your artist, confirm how they blend dense black to avoid uneven fading. Roll-up sleeves or linen rolled cuff shirts frame these bolder pieces well.
21. Fine Line Clover with Hidden Date on the Rib Side
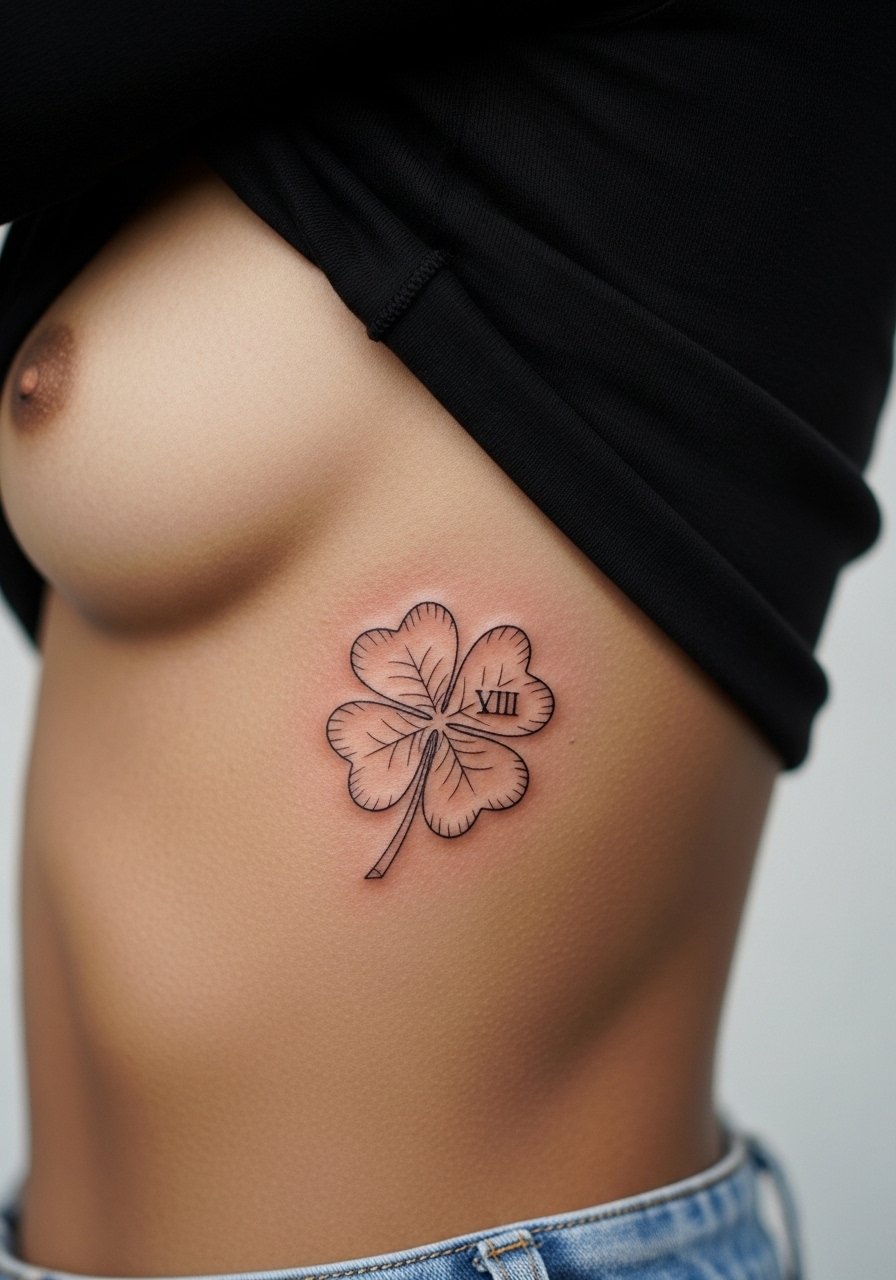
Rib-side placements are private and meaningful, which is why hidden dates inside leaves appeal to many. Again, the rib is sensitive so schedule breaks. Artists debate fine line on ribs. One group warns tight details blur with breathing and skin stretch. The opposing group says proper spacing and depth prevent that. Make sure you and the artist agree on sizing. Limit the numeral to two or three characters so it remains legible over time. A fitted sports bra during sessions helps access while keeping you comfortable.
22. Watercolor Clover Wrist Band
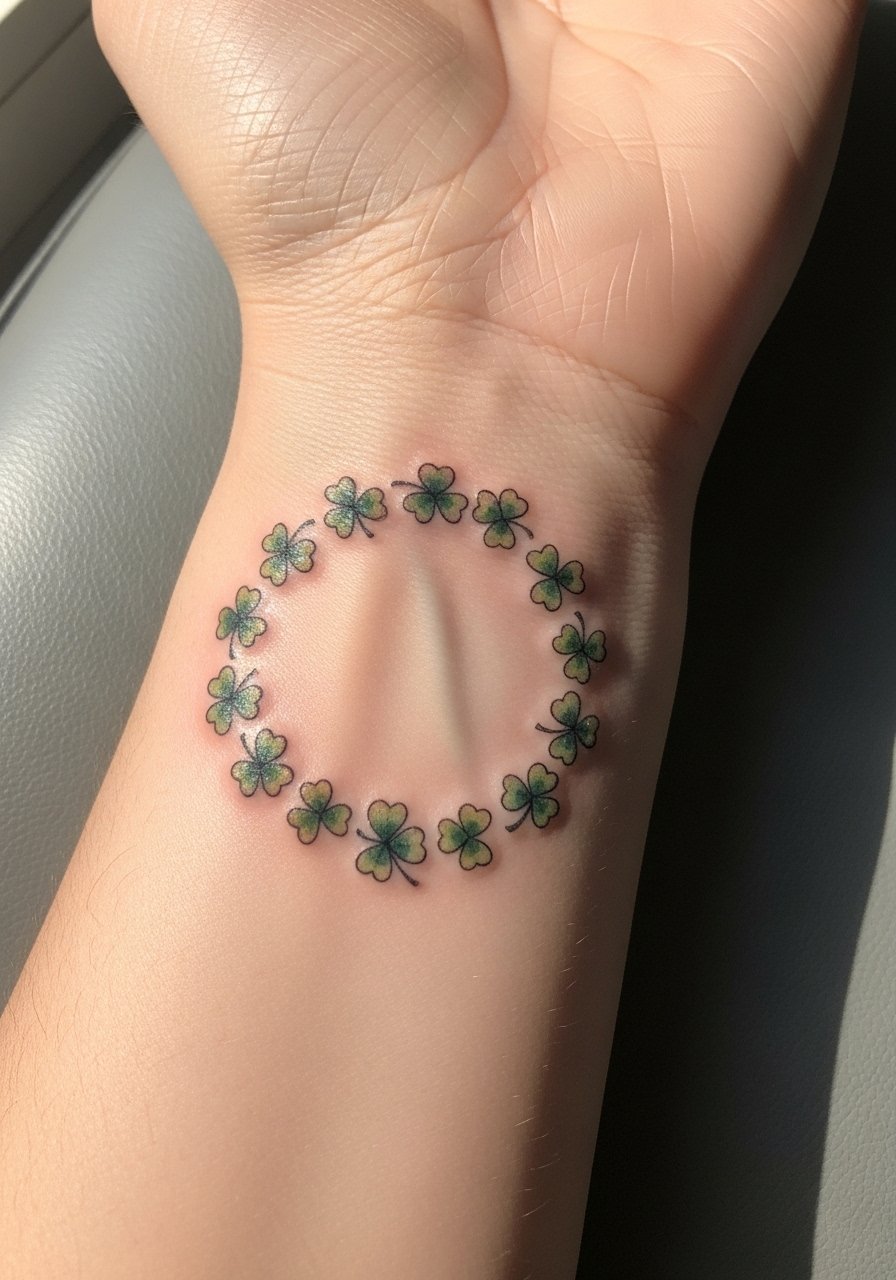
A wrist band made of loose watercolor clovers reads playful and feminine, but the wrist is a high-contact area. Expect annual softening of color and a likely touch-up at two to three years. The frequent mistake is asking for saturated watercolor without a protective plan. Ask your artist about color layering and plan for gentle sun protection afterward. For showing off, roll blouse cuffs and wear a thin chain pendant necklace higher on the neck so the wrist remains the focal point.
23. Minimal Clover on the Side Ankle
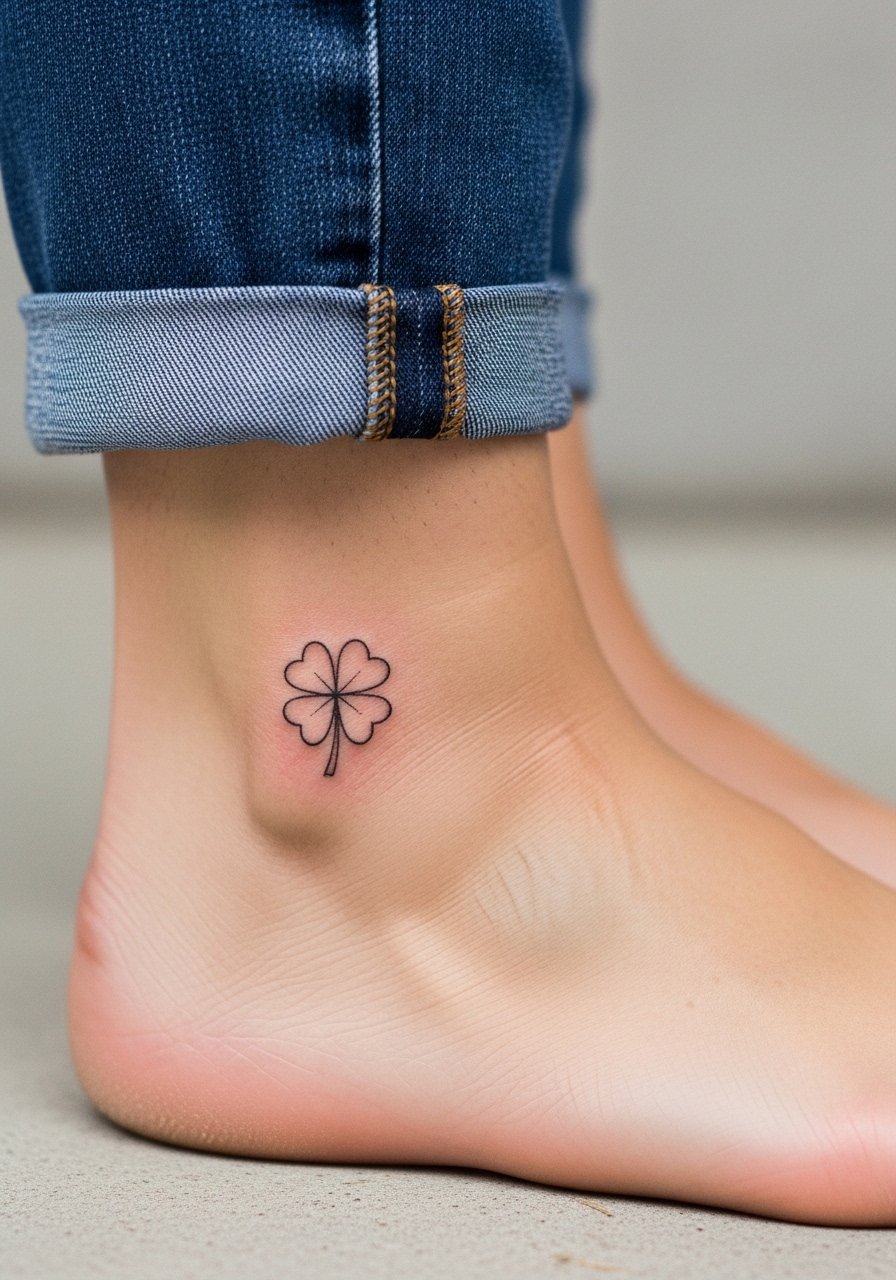
Side ankle tattoos face shoe and sock friction, so durability is the main concern. I tell people to pick slightly bolder outlines for this placement or accept touch-ups later. The session is quick but can be sensitive over bone. The mistake is forcing complex interior details into such a tiny area. For footwear that frames this spot, consider sandals or cropped trousers like cropped ankle pants to keep the clover visible.
24. Clover with Celtic Knot Fill on the Thigh Inner Edge
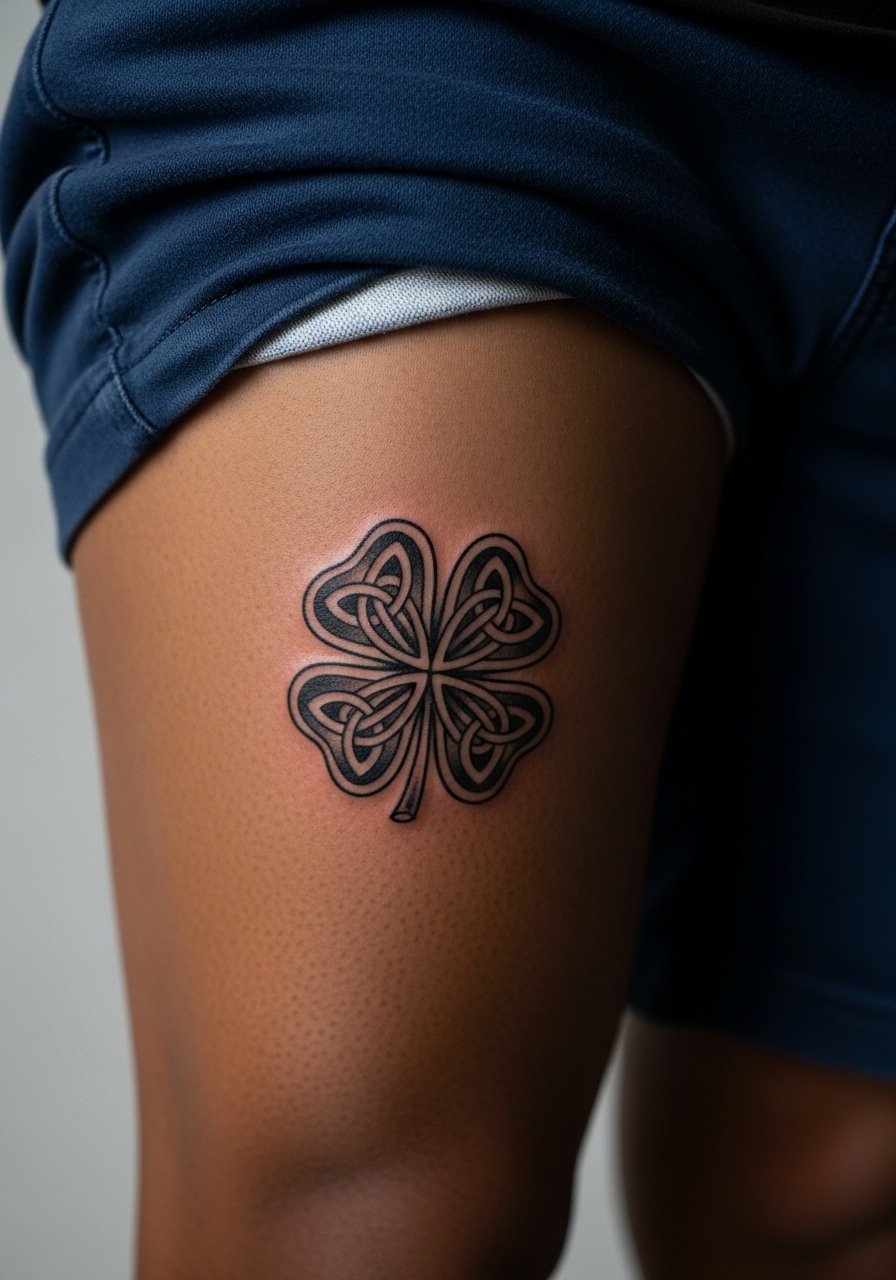
Inner thigh placements require special session planning and comfort considerations. The skin there can take saturated color well but is more prone to friction from clothing. A common misstep is asking for ultra-fine knots in a tight spot that later merge. Discuss spacing and future wardrobe choices with your artist. For session wear, loose shorts help the artist access the area without stretching the skin.
25. Single-Line Continuous Clover Along the Spine
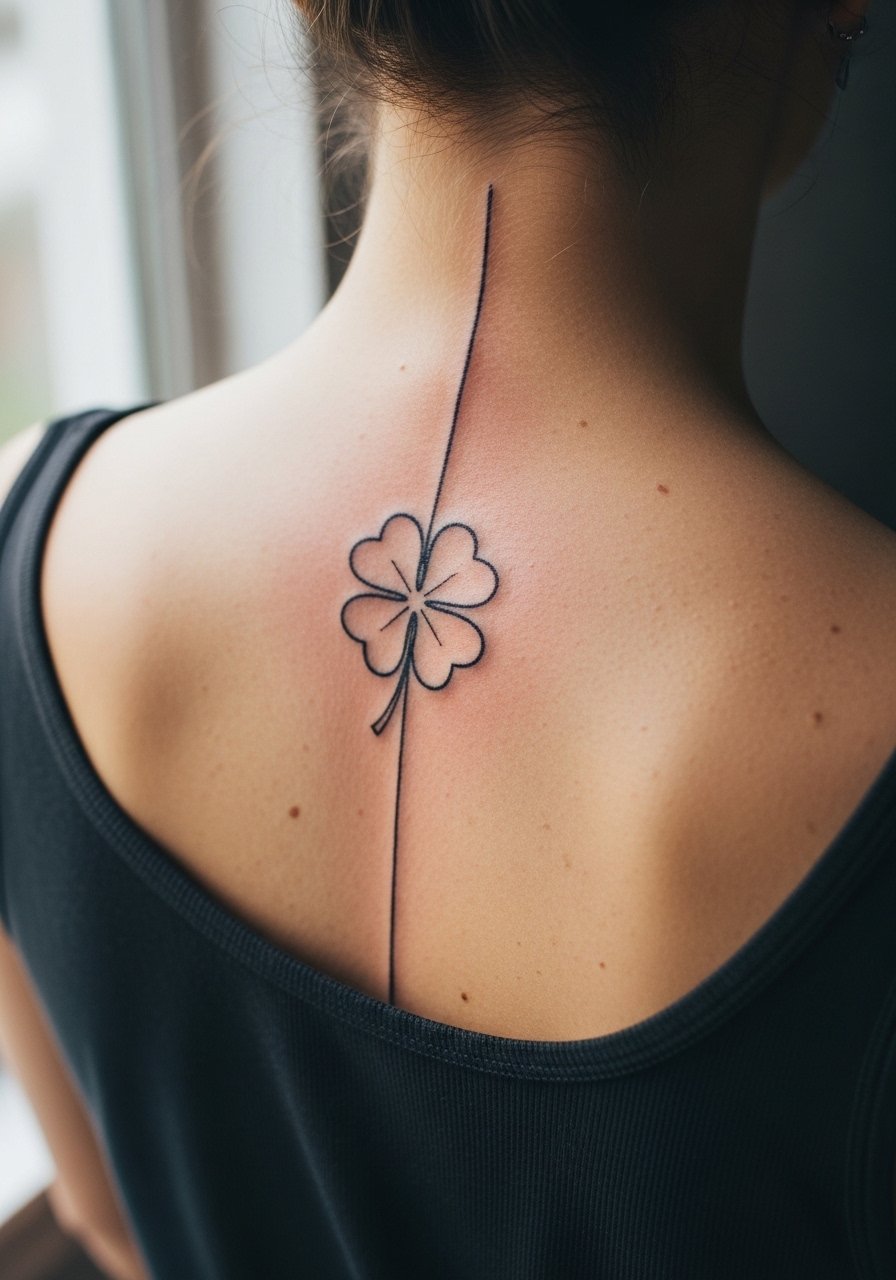
A continuous single-line clover down the spine reads modern and understated. Spine work can be sensitive when the needle crosses bony areas. The most frequent mistake is making the line too thin for that motion, which leads to softening over time. Expect a steady hand and possible touch-ups at three to five years. Choose clothing that can reveal the upper back when you want, such as a button front tank you can pull aside.
26. Negative Space Clover on the Lower Back
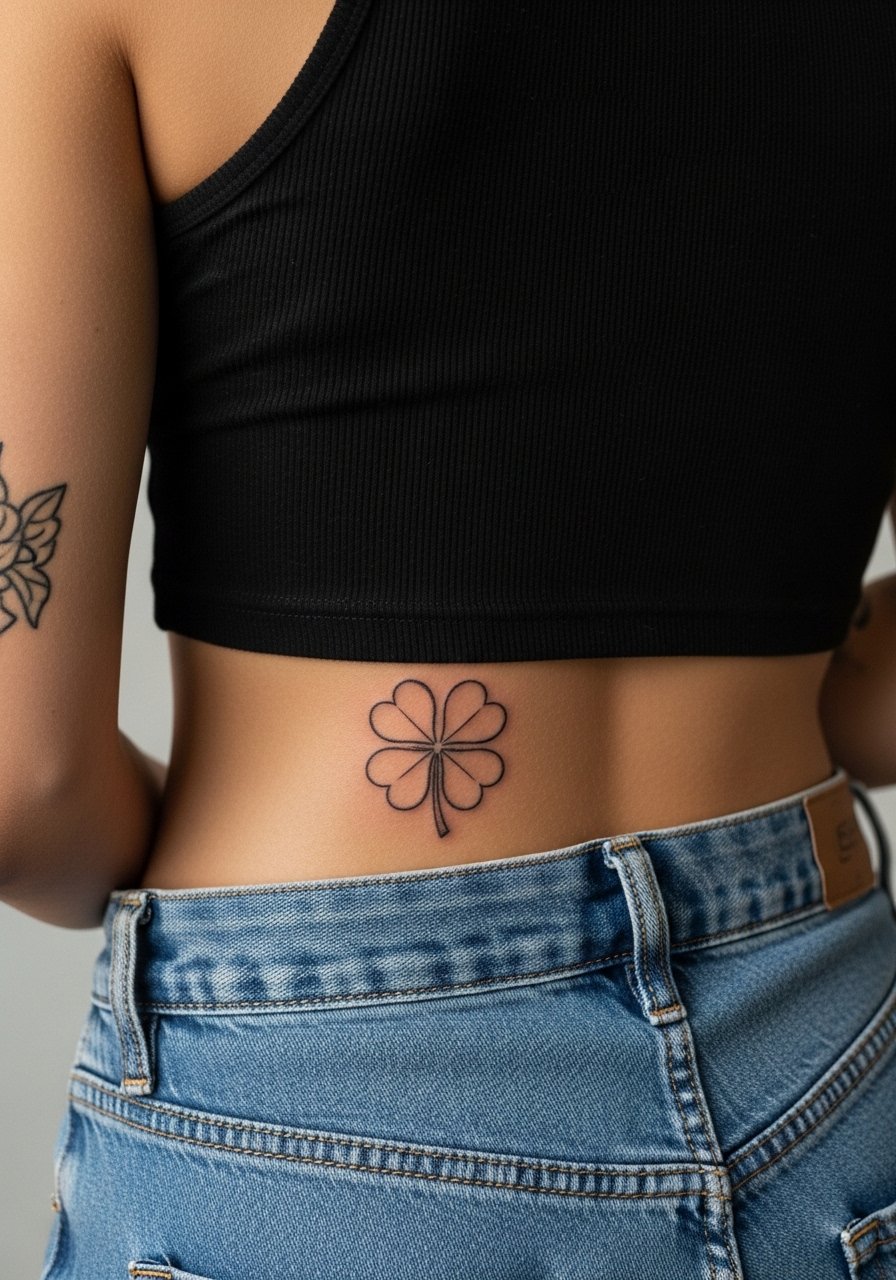
Negative space work creates a clover by surrounding it with ink, which can be dramatic on the lower back. This placement is easy to conceal and heals predictably if you avoid low-rise belts that rub. A common error is underestimating how tattoo aging interacts with clothing lines. For session access, a tank top that you can shift keeps the lower back exposed without full topless exposure.
27. Surreal Floating Clover with Line Breaks on the Shoulder
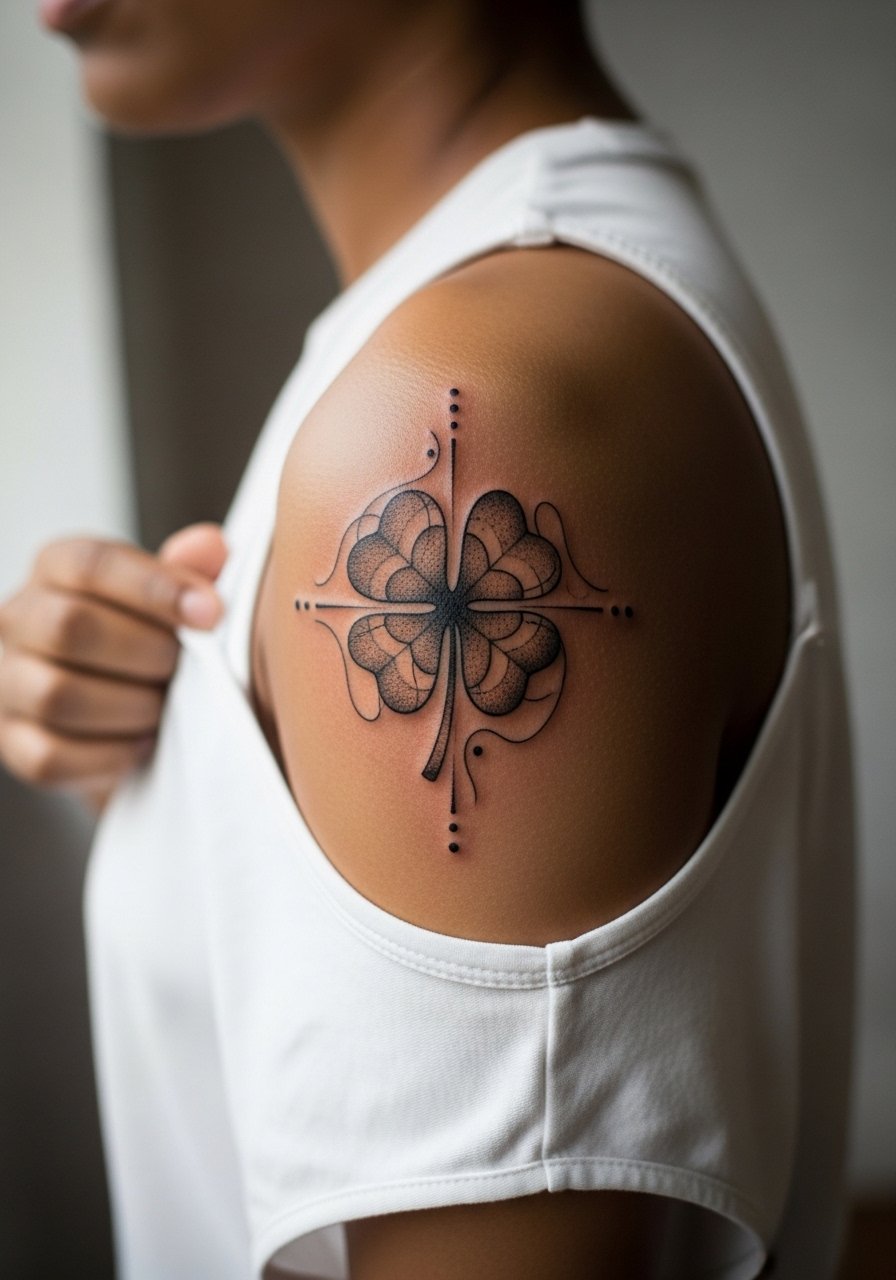
Surreal versions let you treat the clover as an idea instead of a literal leaf. On the shoulder the broken-line approach plays with negative space and movement. Expect two sessions if you want layered blackwork and fine negative breaks. The mistake is overcomplicating the breaks so they read like noise on the skin. For show-off outfits, a sleeveless top with clean lines keeps attention on the abstract shapes.
Frequently Asked Questions
Q: How long will a fine line four leaf clover on the wrist stay crisp before needing a touch-up?
A: It depends on sun exposure, daily friction, and how bold the original linework was. From what I've seen, thin wrist lines often need touch-ups around year two to three. Ask for slightly heavier single lines at your consultation to extend visual clarity.
Q: Are Celtic knot fills better on the collarbone or the upper arm?
A: Both locations can work, but the upper arm gives more room and less movement, which helps complex knots age better. The collarbone offers visibility but requires more spacing to prevent blur from skin motion. Talk to your artist about knot spacing based on the exact size you want.
Q: Should I expect more pain for a thigh watercolor clover than for an upper arm realistic one?
A: Generally no. The thigh tends to be less painful than the upper arm in many people, especially for outer thigh placements. Watercolor layering might lengthen the session, which affects comfort more than placement alone.
Q: If I want a tiny name inside a clover, which placement minimizes distortion over time?
A: The ankle and ribs are more prone to distortion because of movement and friction. The inner forearm or upper arm gives more stable skin for small lettering. If you love ankle placement for personal reasons, keep the text extremely short and bold enough to survive touch-ups.
Q: Artists disagree about fine line on the ribs. What should I ask during my consultation?
A: Ask which approach the artist favors. One camp prefers wider spacing and slightly deeper needle placement to prevent blur. The other favors traditional delicate depth. Request to see healed ribs in their portfolio so you can judge real results.
Q: How should I dress on session day for a collarbone or sternum clover?
A: Wear a wide-neck shirt or a fitted sports bra you can lift slightly to expose just the area. That lets the artist work cleanly and keeps you modest and comfortable during the session.
