
Fine line Junji Ito pieces look fragile on screen but live very differently on skin. The styles that get the most saves often need touch-ups or placement tweaks to avoid early blur. Expect to trade a little immediate delicacy for lines that stay crisp for years. Read this list to spot which Ito motifs suit your body, what to ask the artist, and how to dress for the session so the result actually holds up.
1. Fine Line Uzumaki Spiral on Inner Forearm
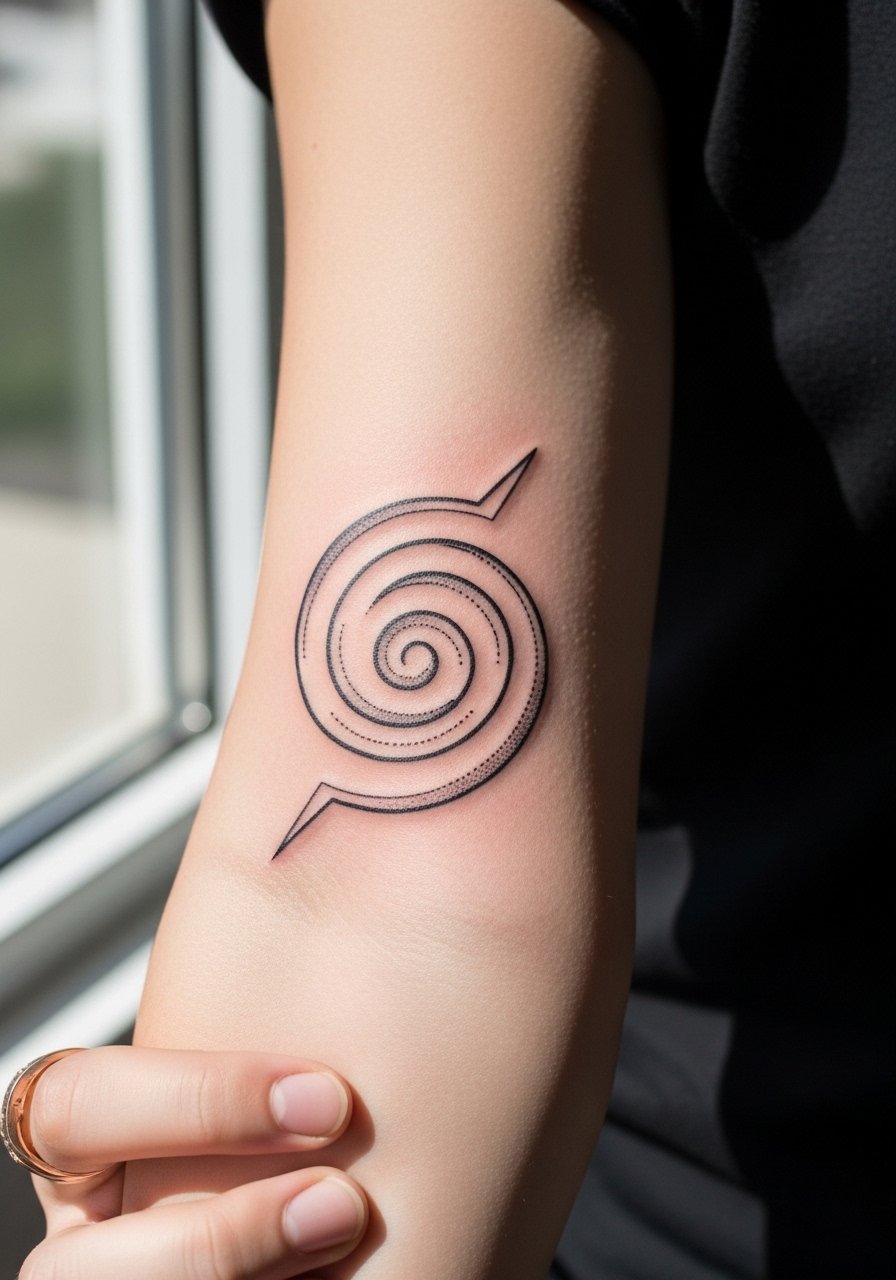
I recommend this when you want Ito symbolism in a discreet, always-visible spot. Bring references that show exact line weight and ask the artist to scale the negative space larger than your first instinct. Fine single-needle spirals look gorgeous fresh but often blur faster on high-motion spots like wrists and hands. On the inner forearm the movement is moderate and touch-ups every couple years are common. Tell the artist you want a slightly heavier outer line and tighter dot work to keep the optical effect readable at two and five years healed. For the session, wear a roll sleeve henley so the artist can roll the sleeve without stretching the area.
2. Micro-Realism Tomie Portrait on Outer Upper Arm
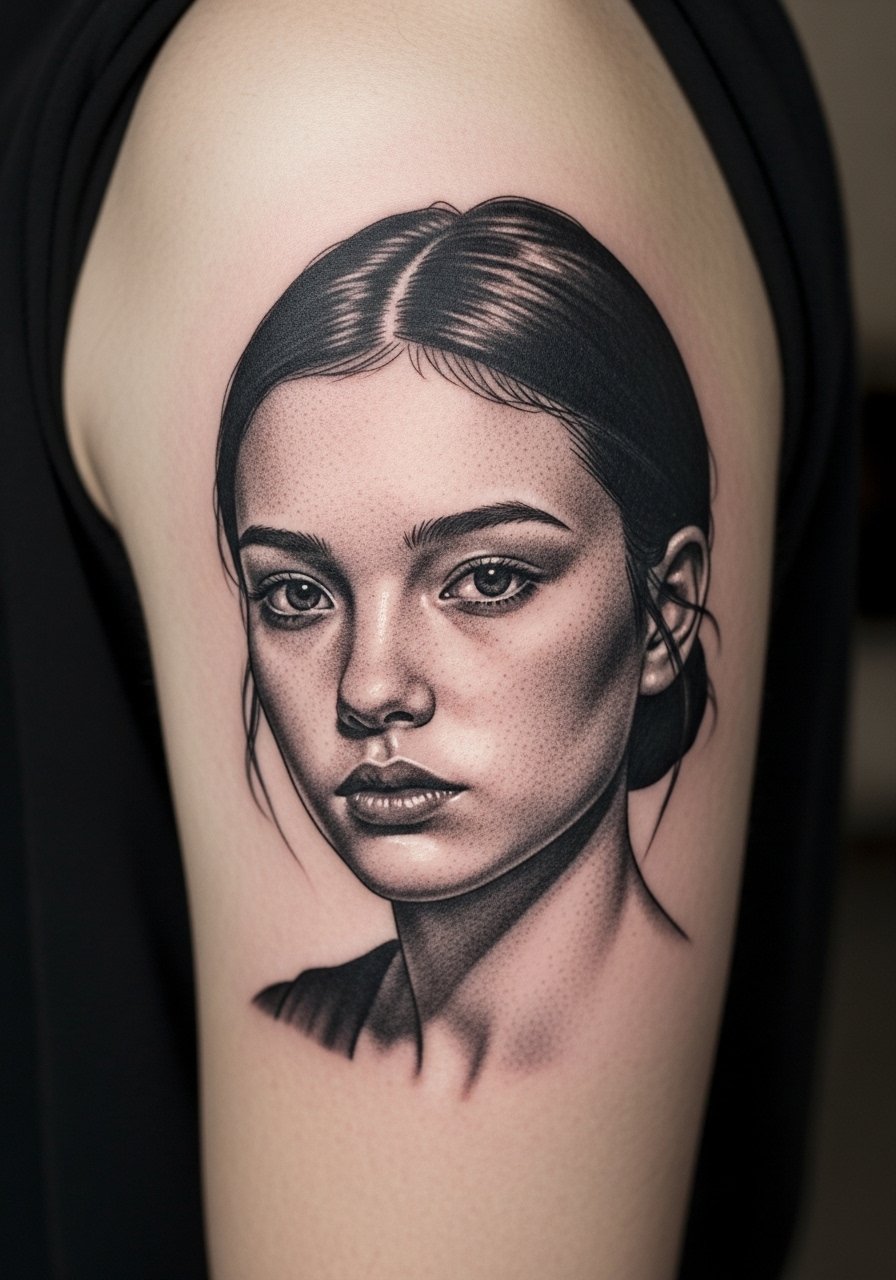
This one suits people who want eerie portrait detail without the commitment of chest placement. Outer upper arm tolerates longer sessions with lower pain, so the artist can layer micro shading across two sessions for depth. Ask for reference panels from the manga that match the facial expression you want and specify the size you want the eyes to read at arm distance. A common mistake is requesting portrait-level detail too small; the face needs three to four inches minimum to keep nostrils and lashes from merging. Expect a two-session build and a touch-up at year two if you live in sunny climates. If you want a peek during summer, style it with a loose tank and stacked bracelets for low-contrast framing.
3. Blackwork Horror Snail on Ankle
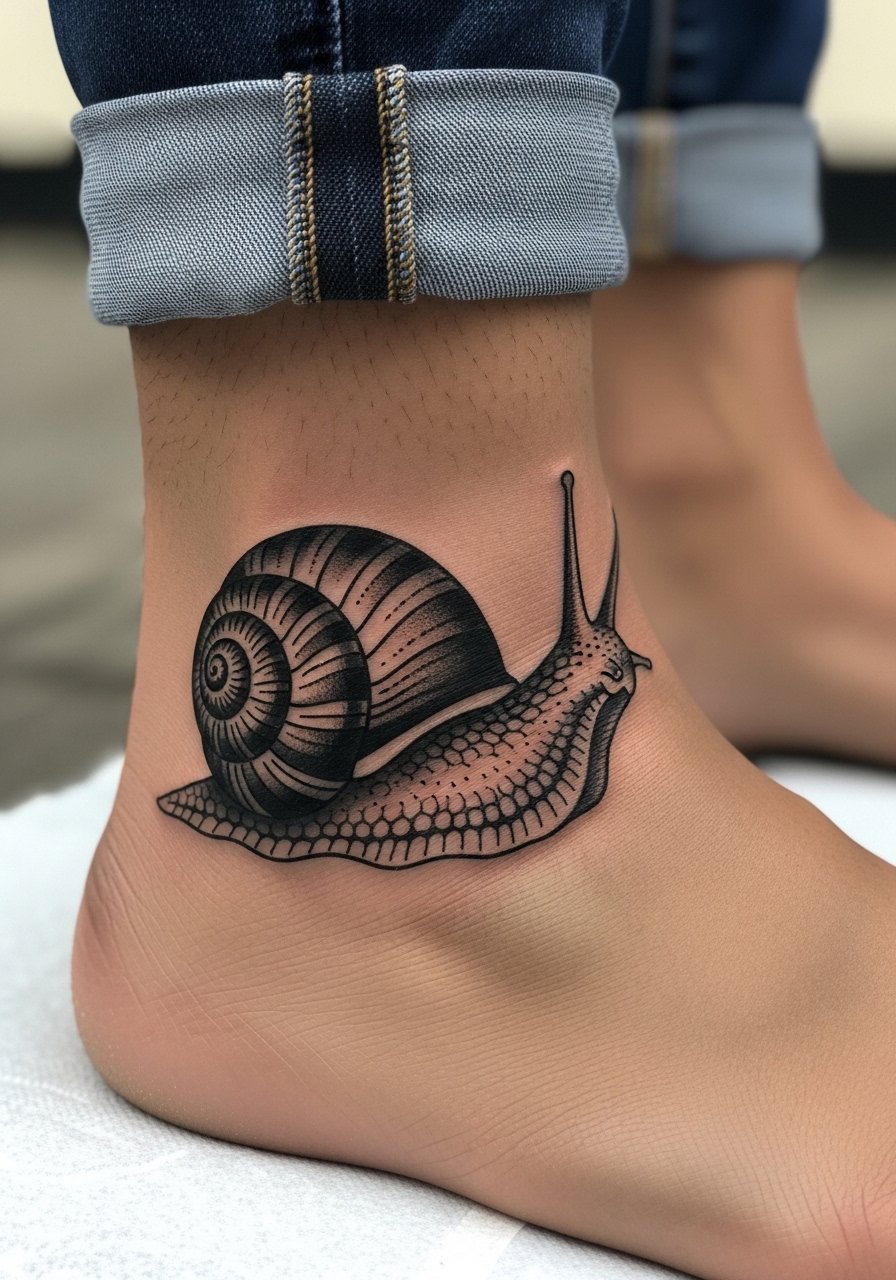
Ankle pieces read small and strange in a way Ito fans love, but the area endures friction from shoes and socks. For longevity ask your artist for slightly bolder fills and clean negative-space separation so blackwork does not pill into gray blobs. The usual mistake is crowding tiny texture into a two-inch shell, which flattens with wear. A single session usually suffices, but expect a touch-up if you wear boots often. For showing it off in warm months, pair the piece with strappy flat sandals and cuffed chinos. For the appointment, wear loose joggers you can pull up without pressing the area.
4. Minimalist Souichi Outline on the Wrist
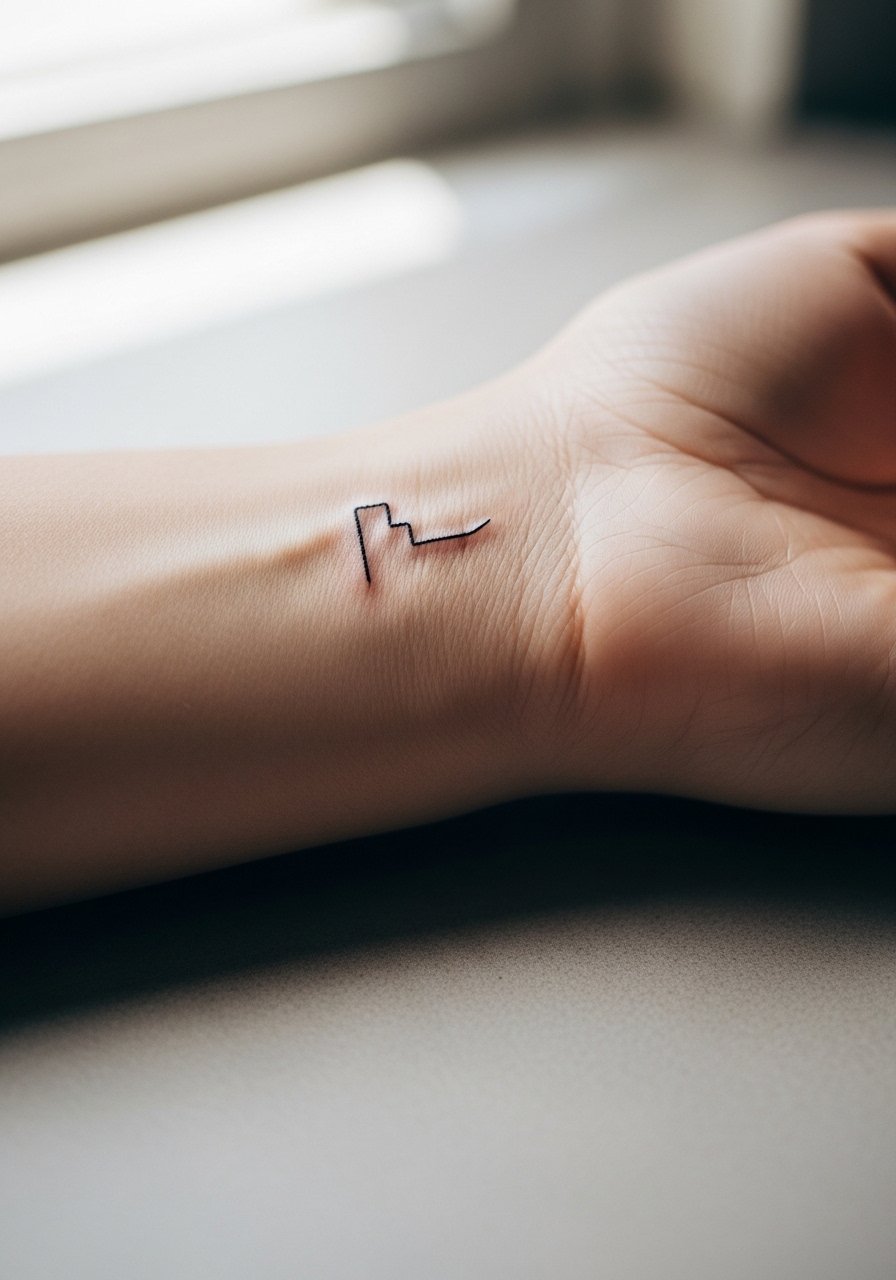
Wrist minis are immediately personal but also high-motion and prone to early fade. I tell people to request a single-needle outline but with a slightly thicker anchor line where the design meets the wrist edge. Artists split on how thin is too thin for that spot. One camp insists single-needle is fine if you accept touch-ups. The other camp prefers a bolder line from the start. If you want subtleness that lasts, choose the subtle anchor and plan to revisit at year one. For session day wear a sleeveless tank so the artist has clear access and remove jewelry on both hands to keep the area sterile.
5. Neo-Traditional Ito Cat with Distorted Features on Calf
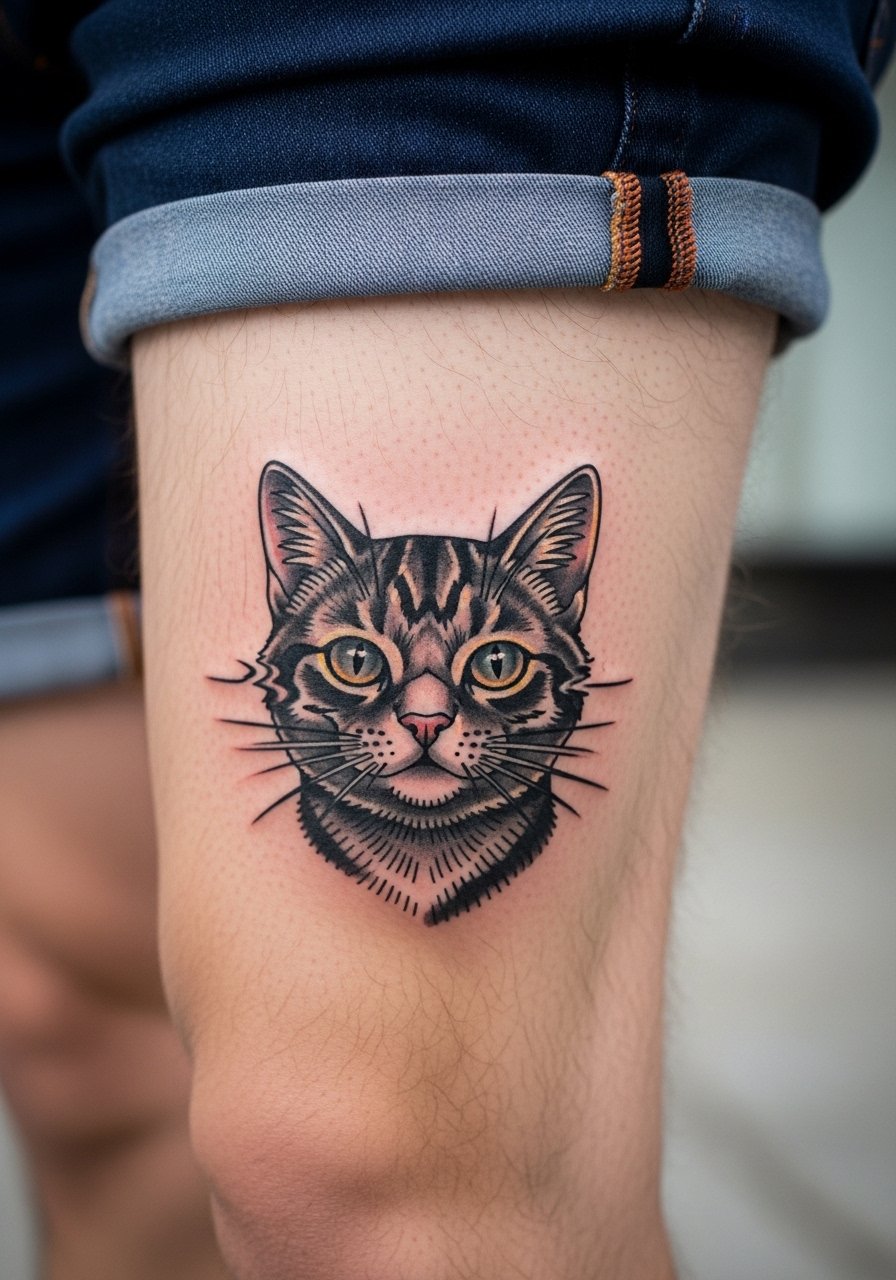
Calf pieces move with muscle and look great in motion on active legs. This neo-traditional take blends cute and grotesque without crowding detail into a small canvas. The most common mistake is over-detailing the whiskers and facial texture at a size that will blur with calf flexing. Ask for selective accents only and heavier outlines around the silhouette so the cat remains readable. Sessions are comfortable for most, usually two sittings if you add gray washes. Calf placement ages well if you avoid excessive sun on the area. For showing it off with shorts, pick asymmetric skirts or high shorts that let the curve read in motion.
6. Ornamental Manga Panel Frame on Collarbone
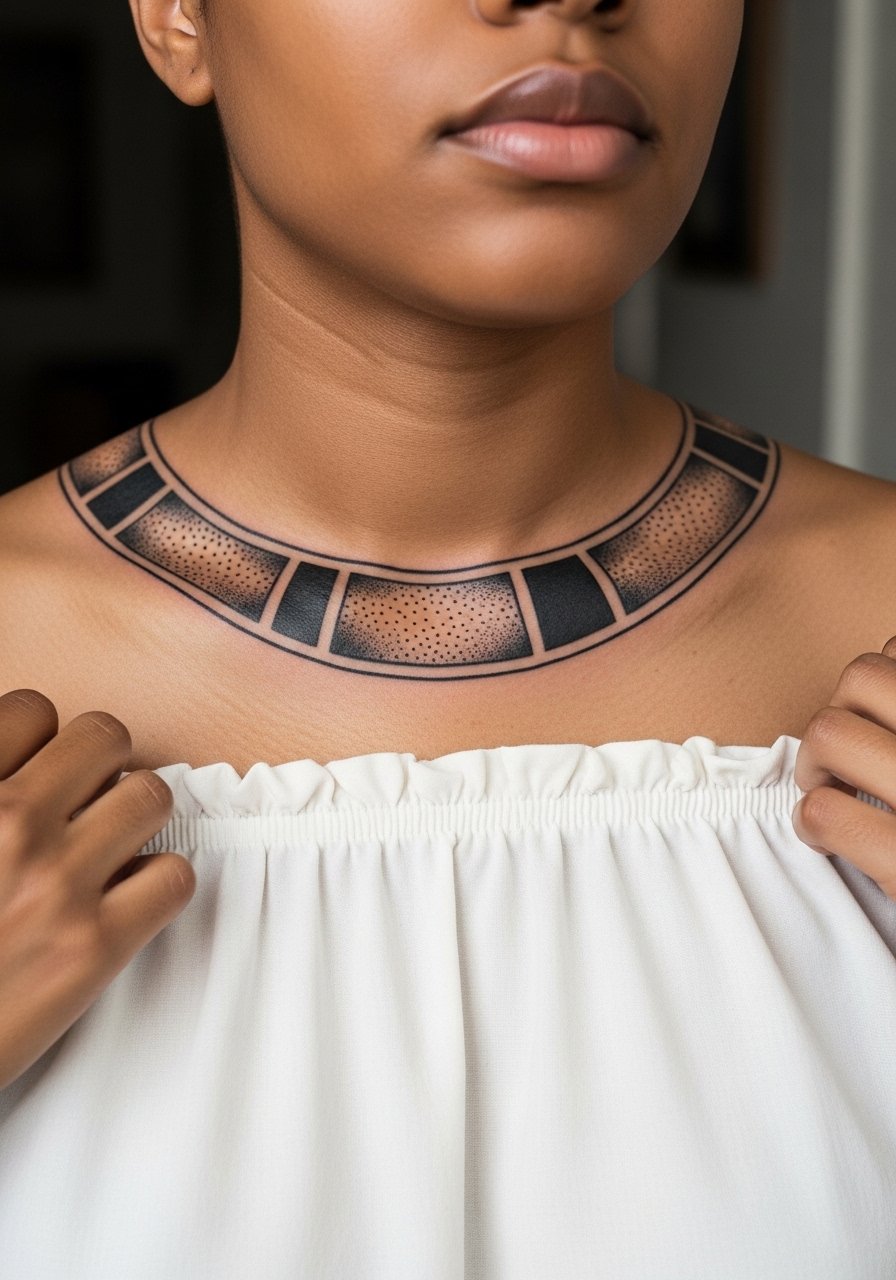
Collarbone panels read elegant and elongated but they live near clothing edges and jewelry, which can rub freshly inked skin. Tell your artist you want horizontal panels with breathing room between linework and the clavicle curve so the frame does not compress during movement. A typical mistake is packing too many panels into a narrow span. Expect one to two sessions and a careful first-week wardrobe. For show-off outfits try an off shoulder blouse or a wide-neck tank so the frames sit clearly without necklace interference.
Studio Day Picks
The forearm spiral, wrist mini, ankle snail, calf piece, and collarbone panel above all benefit from a little prep and different aftercare needs in week one.
-
Soothing tattoo salve. An indie AU salve many people recommend for fine line wrists because it is non-greasy and keeps tiny needles visible during the first few days.
-
Japanese rice bran aftercare oil. Absorbs quickly and helps with subtle gray washes on medium to dark skin tones without leaving a shiny film.
-
Herbal ink-lock spray. Useful for spiral pieces where you want minimal scabbing and consistent dot work retention in week one.
-
Mushroom extract balm. Gentle anti-inflammatory properties can reduce swelling after longer upper-arm portrait sessions.
-
H2Ocean healing spray. A thin spray option that helps prevent clogged fine lines, especially handy for inner-forearm spirals and wrist minis.
7. Fine Line Flower Horror Hybrid on Inner Thigh
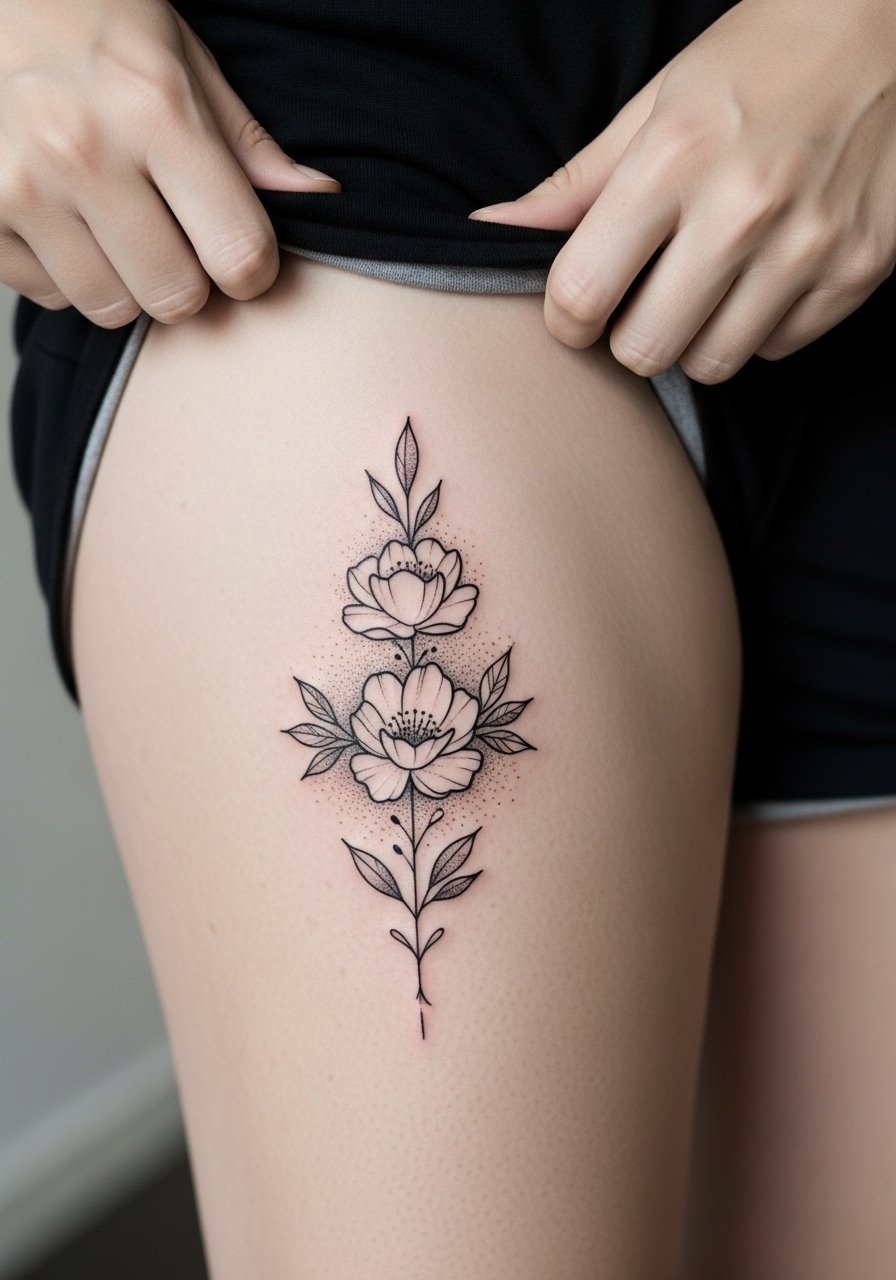
Thigh canvases let you go larger and keep intimate designs private while healing. This hybrid mixes delicate petals with unnerving elements like exaggerated stems. The inner thigh moves with clothing and weight changes, so ask your artist to avoid ultra-fine crosshatching near stretch zones. A common mistake is placing too much density in a tight circle, which can scar or blur if picked during healing. Expect two sessions for depth and a touch-up after weight fluctuations. For appointments wear loose athletic shorts so you can shift fabric without pressure. For summer shows, pair peeks with high waist denim shorts so the ink reveals cleanly.
8. Black and Gray Spiral Vortex Sleeve Starter on Shoulder Blade
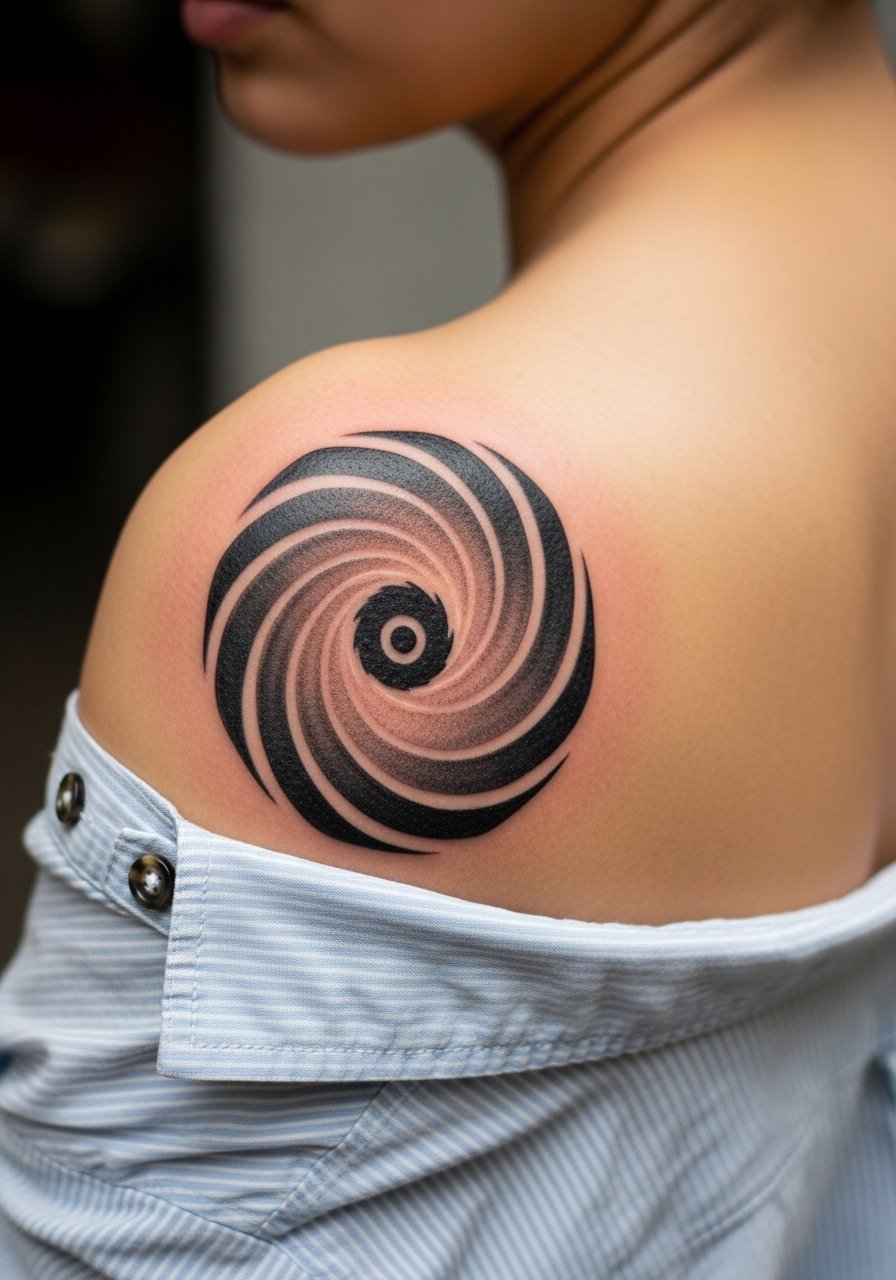
This is a collector-friendly starter for someone building an Ito-themed arm. Shoulder blade tissue tolerates gradient work well, but heavy gradients packed too tightly can look muddy on darker tones. When consulting, say you want a strong focal spiral with airy transitions around it. The mistake is trying to cram a full sleeve effect into a single session. Plan three sessions so shading layers settle. For the chair wear a loose button-down you can pull aside without stretching. For casual showing, a sleeveless muscle tank frames the upper arm and shoulder curve.
9. Micro Line Horror Face Distortion on Ribcage
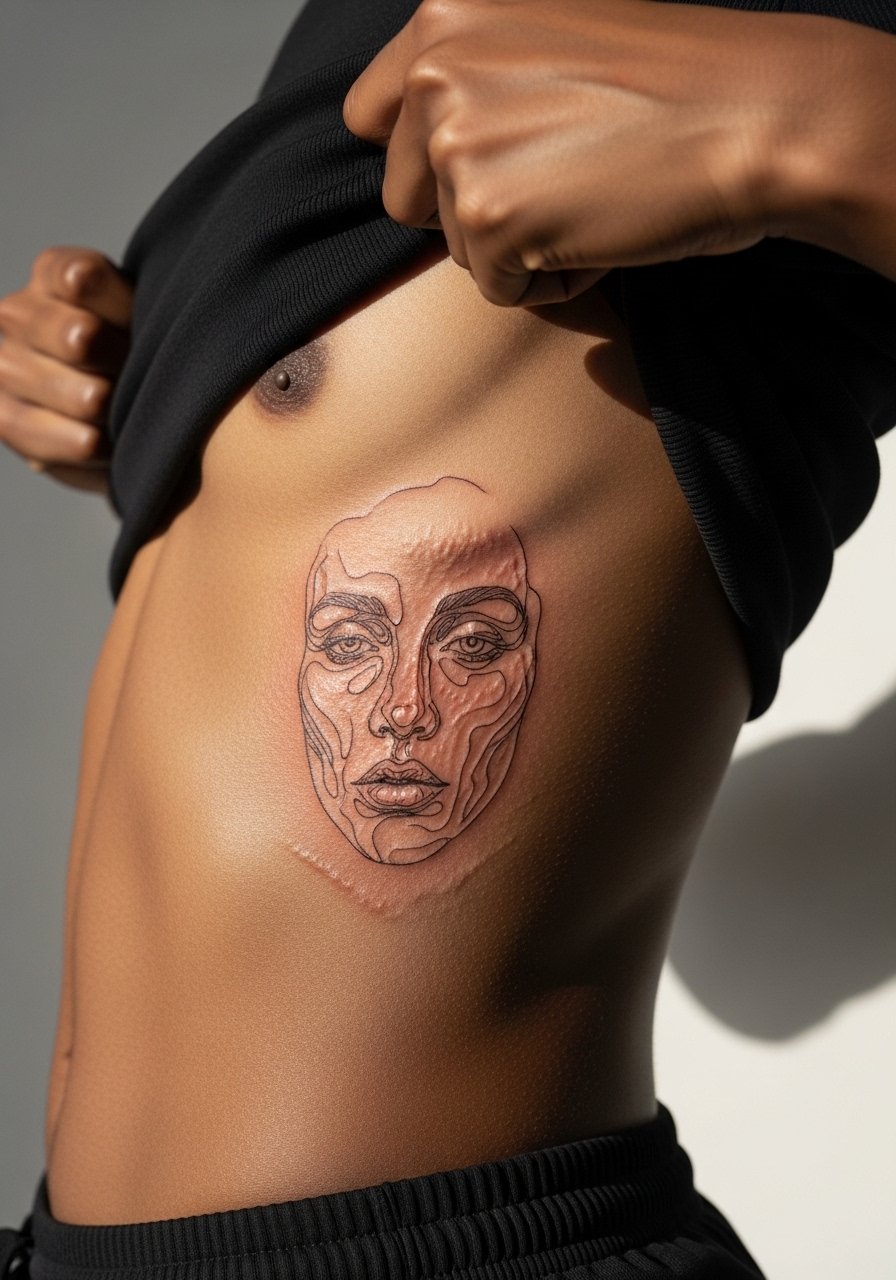
Ribcage tattoos look intimate and breathe with your movement, which enhances the unsettling effect. Fair warning: ribs are a high-pain area and the skin shifts with breath. Artists disagree on fine line here. One camp says the stretch and thin tissue blur single-needle work within two years. The other camp says careful spacing and proper needle depth can make micro line hold. I recommend spacing lines slightly wider than your reference and expect a touch-up window at year two. For the session wear a loose side slit tank so you can lift fabric without constricting your breathing. Consider asking about topical numbing if long sessions worry you, knowing some traditionalists push back on heavy numbing.
10. Ignorant Style Ito Ghost on Upper Back
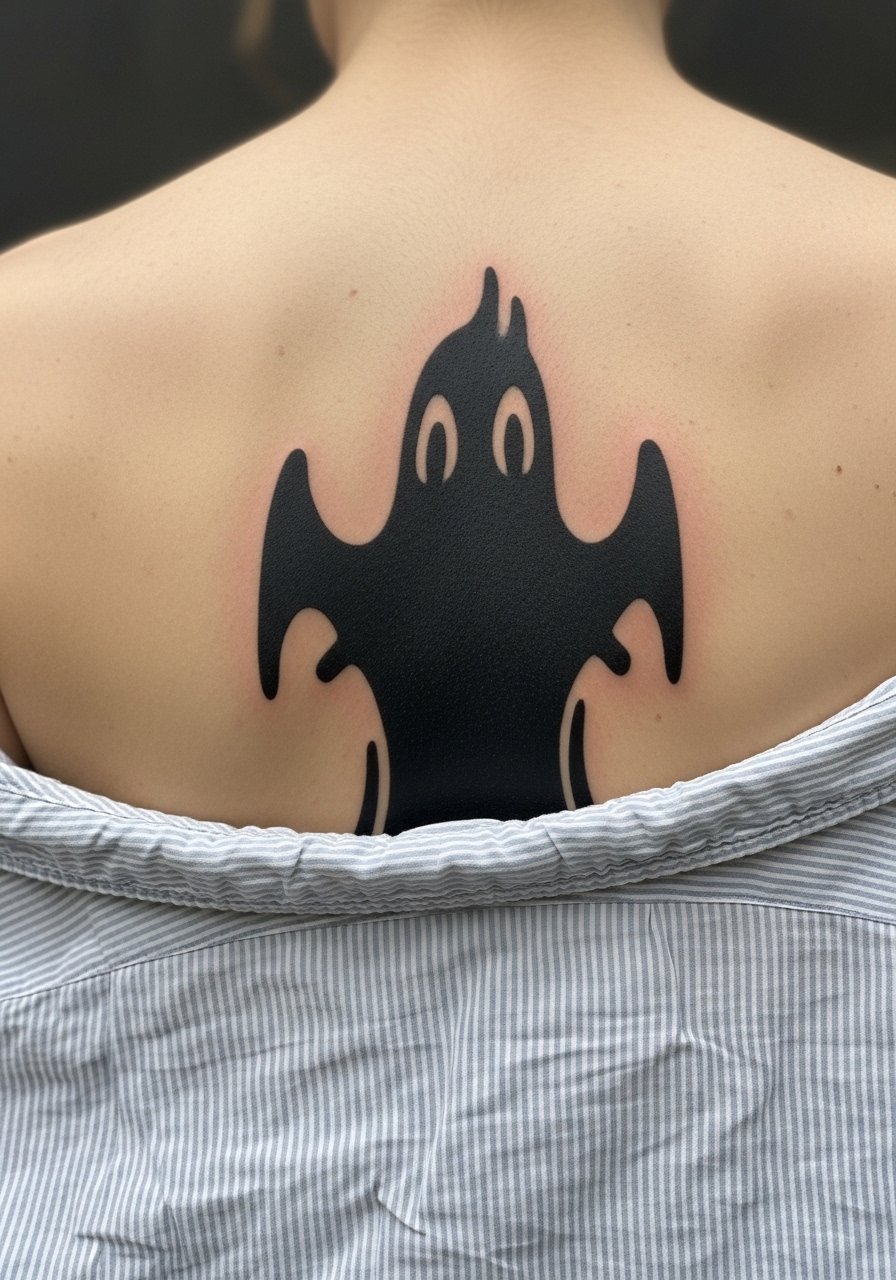
Bold, naive lines in an ignorant style translate Ito unease into a simpler vocabulary that ages into a graphic presence. Upper back placement gives room for scale and limits everyday friction. The common error is over-detailing a naive design and losing the raw charm that makes the style read as intentionally primitive. Expect two to three sessions and less frequent touch-ups than delicate single-needle pieces. For the appointment, a button-down you can pull aside works best so the artist can reach the upper back without you lying awkwardly. This style photographs well on social platforms without needing tight contrast tweaks.
11. Watercolor Manga Horror Splash on Outer Forearm
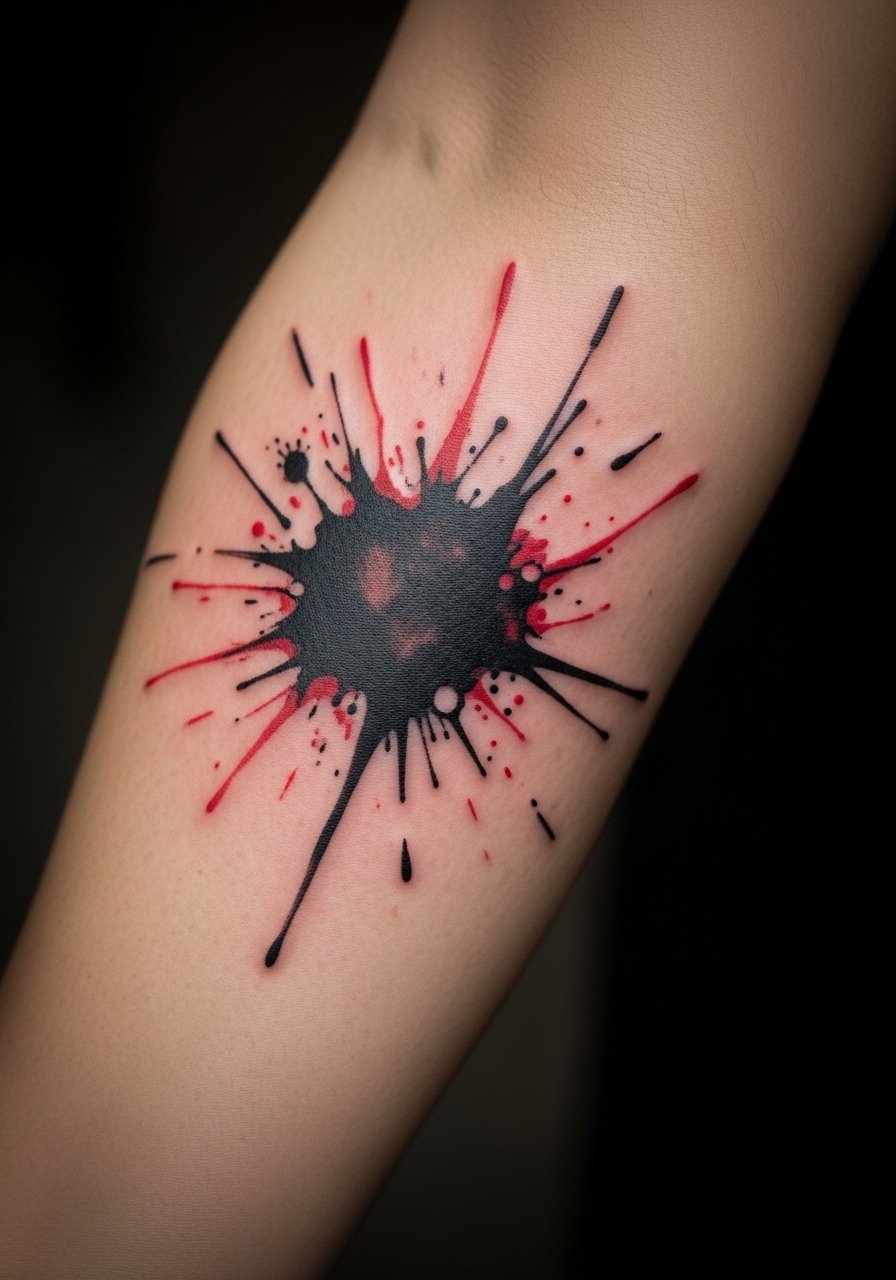
Watercolor washes give a soft, smeared page-like look that feels cinematic but they fade faster than saturated black and gray. If longevity matters, ask the artist to combine diluted washes with darker contour strokes so the image keeps an outline as the color settles. A frequent mistake is relying on pale reds alone for blood-like accents. Those can oxidize and disappear. Plan for yearly color refreshes if you want those tones vivid. For showing it off, wear rolled sleeves and a slim silver ring set that draws the eye without competing with the wash.
12. Minimalist Spiral Eye on Side Neck
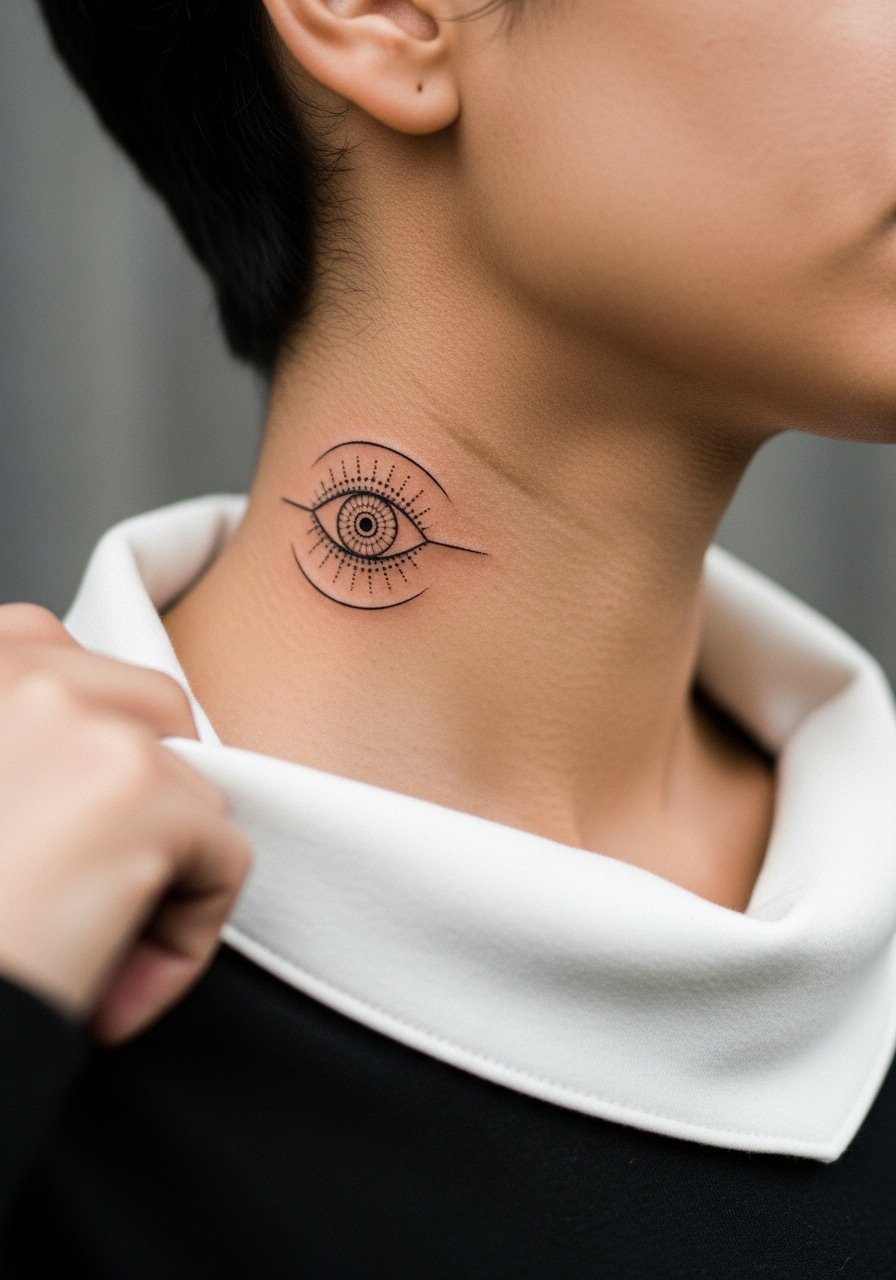
Neck pieces carry a constant visibility trade-off. They read as always-present and that can be the very appeal or a daily regret. The neck also endures frequent sun and motion, so ask for concentrated dot work with small spacing to keep the pupil readable over time. Common mistakes include making the eye too small to read at arm's length or placing it where collars rub. Pain is moderate but visible spots like this often need touch-ups earlier than upper-arm pieces. For session wear a v neck cotton tee so the artist can access the side-neck without pulling clothing over your head.
13. Negative Space Ito Eyes Using Skin as "Whites" on Hip
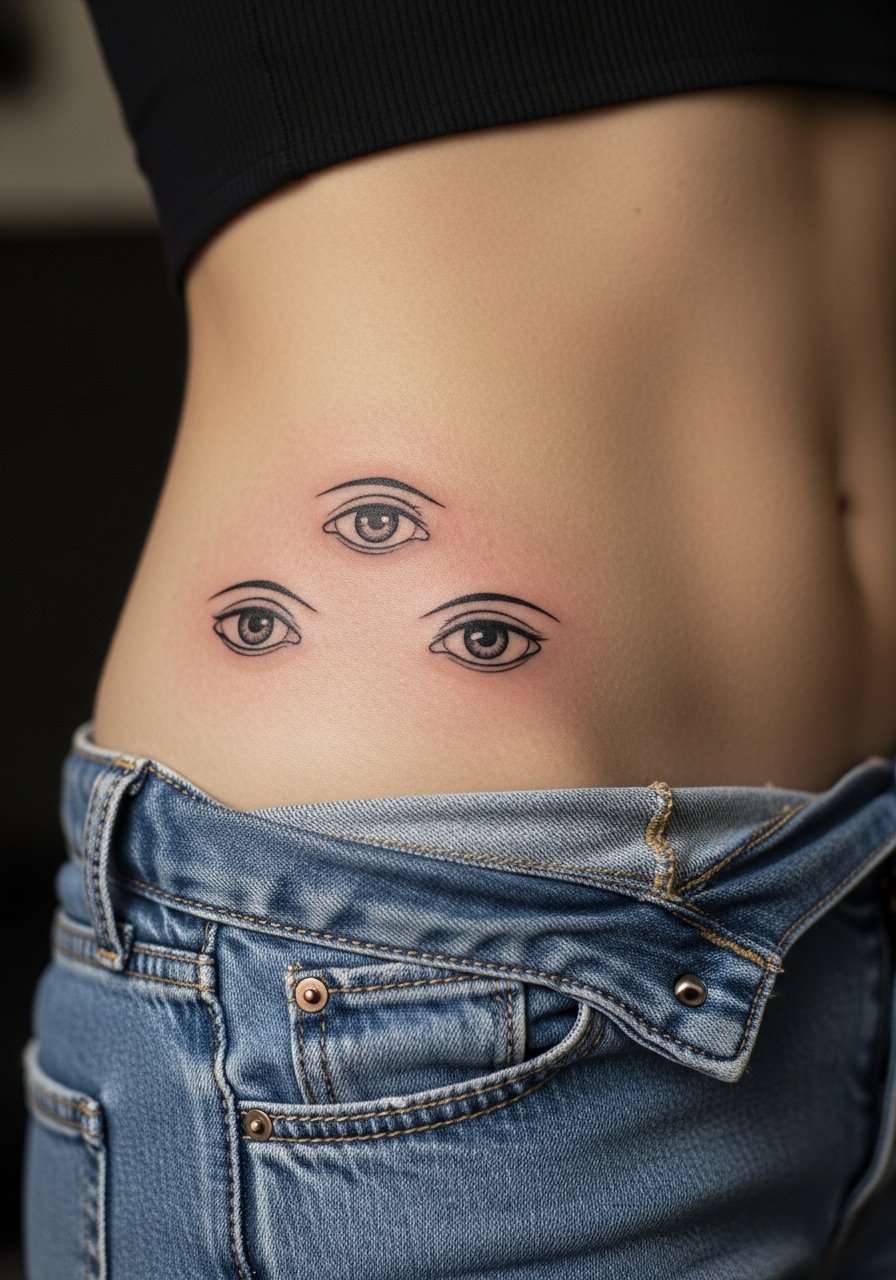
Negative space eyes rely on your skin as an active part of the composition, which makes them elegant on lighter tones and striking on darker tones when contrast is adjusted. Request stronger outer lines and avoid tiny internal hatching that disappears with healing. The usual mistake is expecting thin interior strokes to survive heavy clothing friction at the hip. Plan for the first week to keep waistbands loose. For appointments wear high waist denim shorts so the artist has clear, adjustable access and you can test how garments sit over the area before committing.
14. Horror Snail on Fingers for Constant Subtle Creep
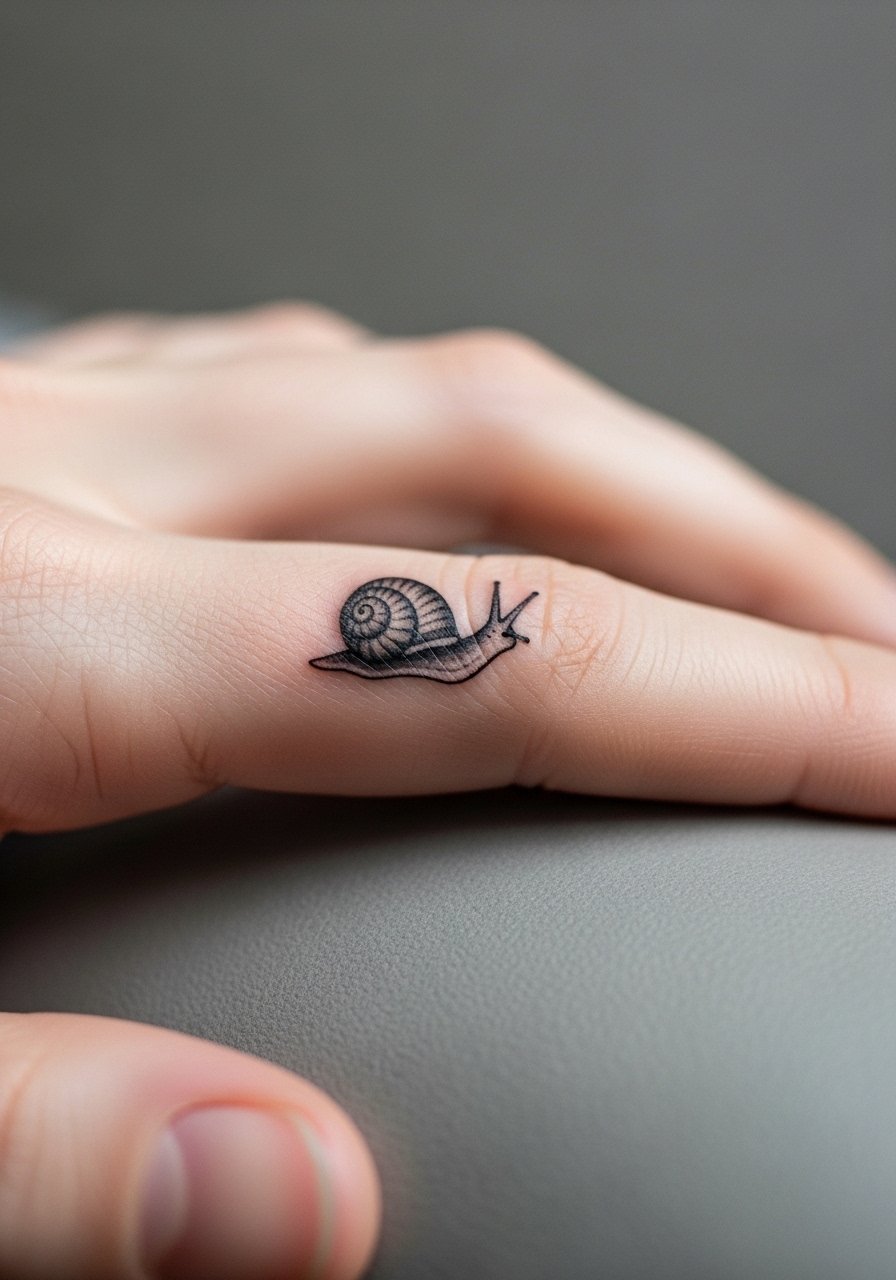
Finger tattoos deliver constant visibility but are notorious for fading and early touch-ups because skin there regenerates faster and sees constant washing. If you want an Ito snail on a finger, simplify shapes and accept that a bold anchor outline will last longer than intricate inner textures. The common mistake is choosing too many tiny lines and expecting them to remain crisp. Expect yearly touch-ups and avoid friction-heavy rings on the same finger during healing. For session day go bare-handed and avoid lotion residue to help stencil adhesion.
15. Tomie Micro-Realism on Outer Thigh Peek
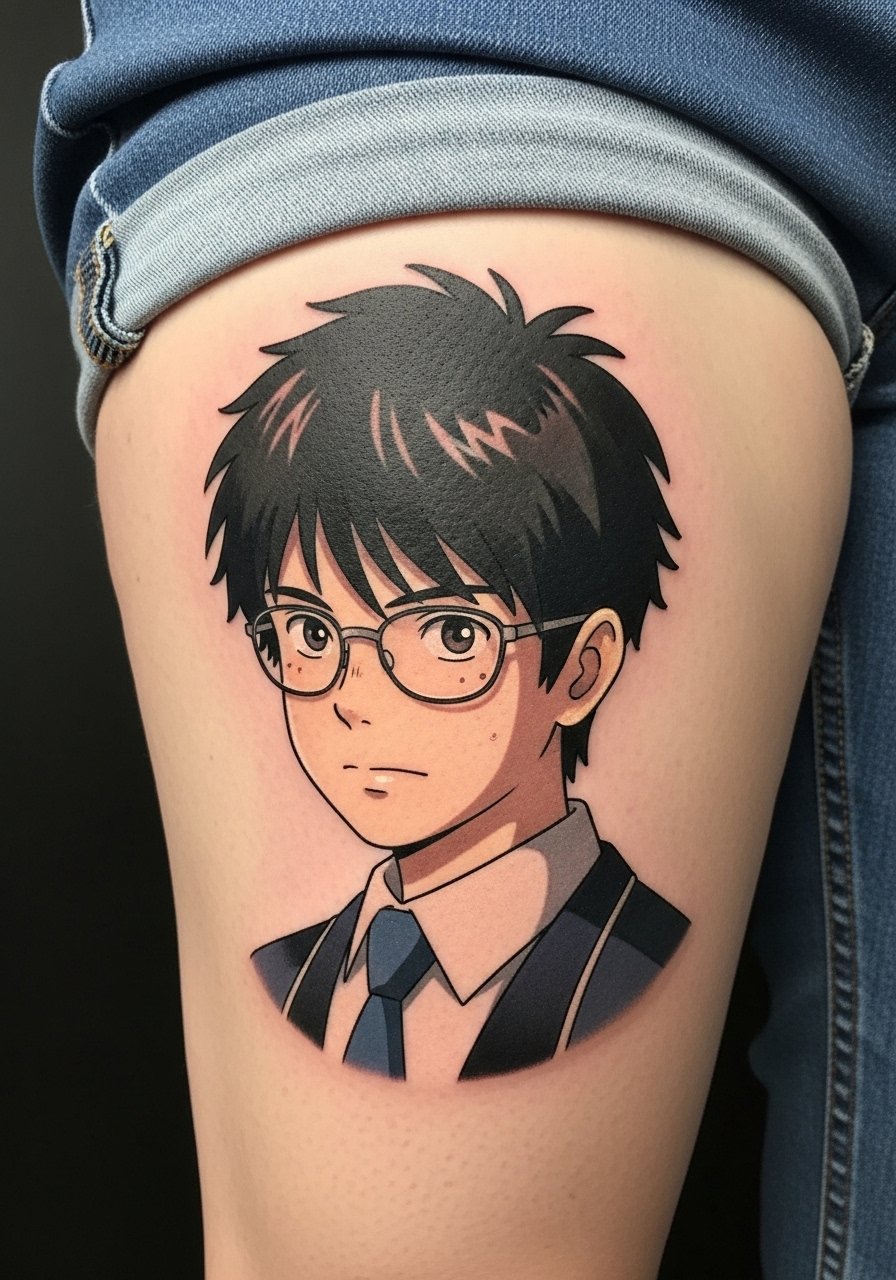
Outer thigh is forgiving for detail and hides well under clothing, which is why many choose full-manga panels here. Tomie portraits benefit from larger canvases for subtle facial shading. A frequent error is asking for hyper-real detail at a size meant for calf or wrist. The skin is more stable on the thigh, so stipple shading and multiple short sessions produce smoother gray gradients. Plan two sessions and a possible touch-up after significant weight change. For the appointment wear loose shorts you can pull down slightly without discomfort.
16. Spine-Aligned Uzumaki Vortex Running Down the Back
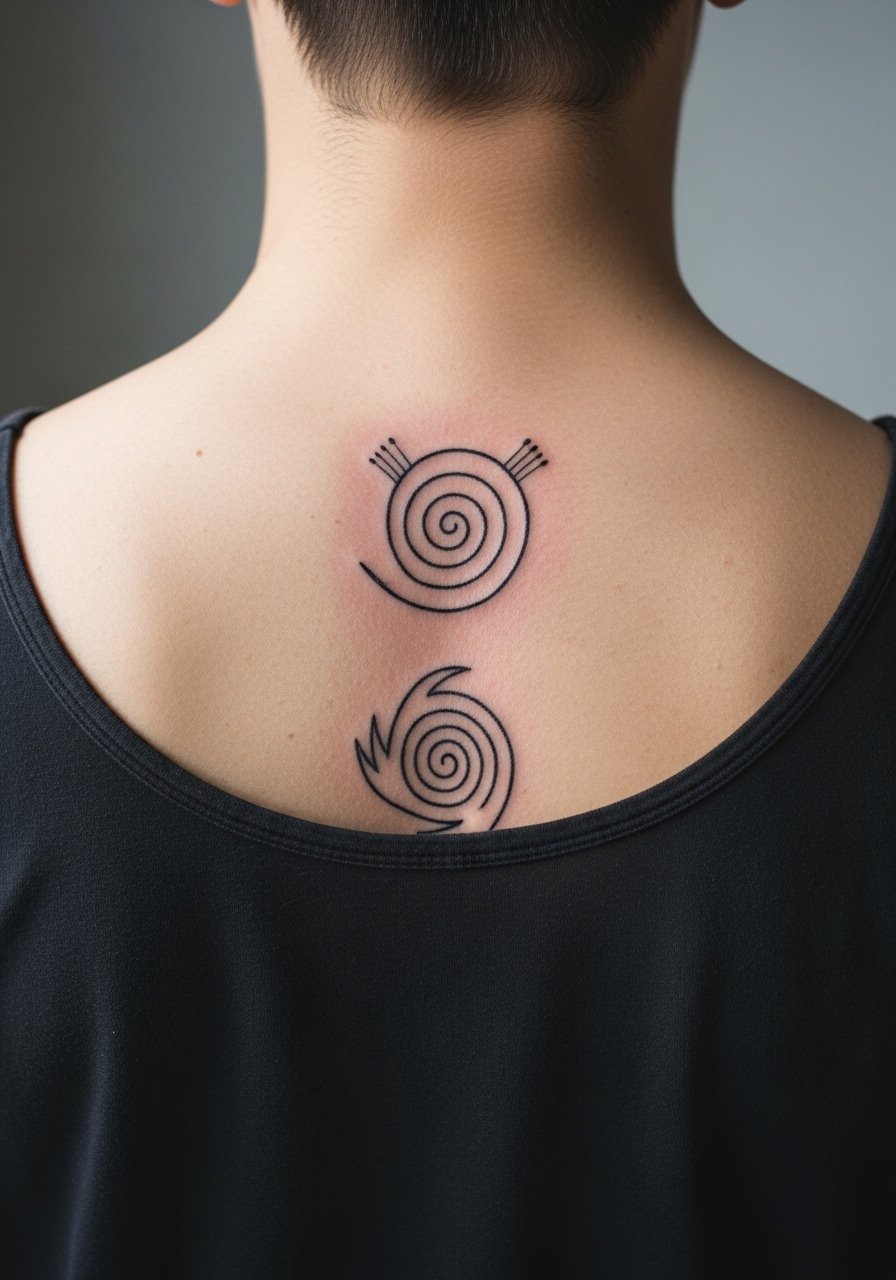
A vertical spiral down the spine reads dramatically and uses body curvature to enhance the optical effect. Spine work can be painful and demands an artist experienced with straight-line work over vertebrae. The normal mistake is centering the spiral too tightly so it looks off when you move. Ask to preview the stencil while standing and bending so you can see how it shifts. Expect two sessions for crisp line continuity and a first-year touch-up if you sleep on your back often. For the session choose a tank top you can slip off without pulling over your head.
17. Inner Bicep Micro-Realism Souichi Face
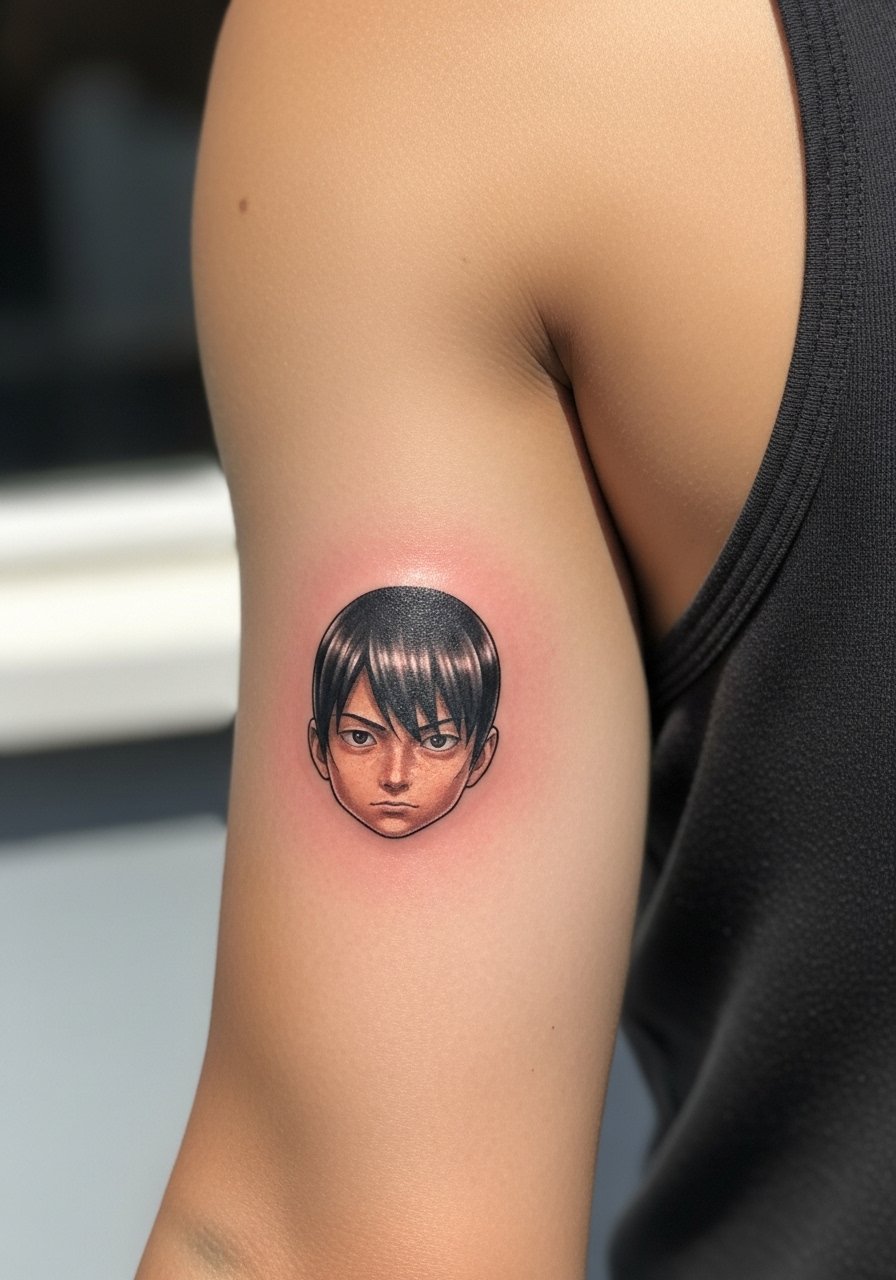
Inner bicep offers privacy and a soft canvas for small portraiture, but the skin there can stretch and shift with muscle. I usually tell clients to allow extra negative space and to avoid dense dot blocks toward the crease. A common error is cramming too much tonal density close to the armpit, which can blur. Sessions are moderate in discomfort because the area is tender when pressed. Wear a tank top so the artist can have clear access and you can raise the arm without stretching the design during stitching.
18. Ornate Panel Turned into a Sleeve Connector on Outer Arm
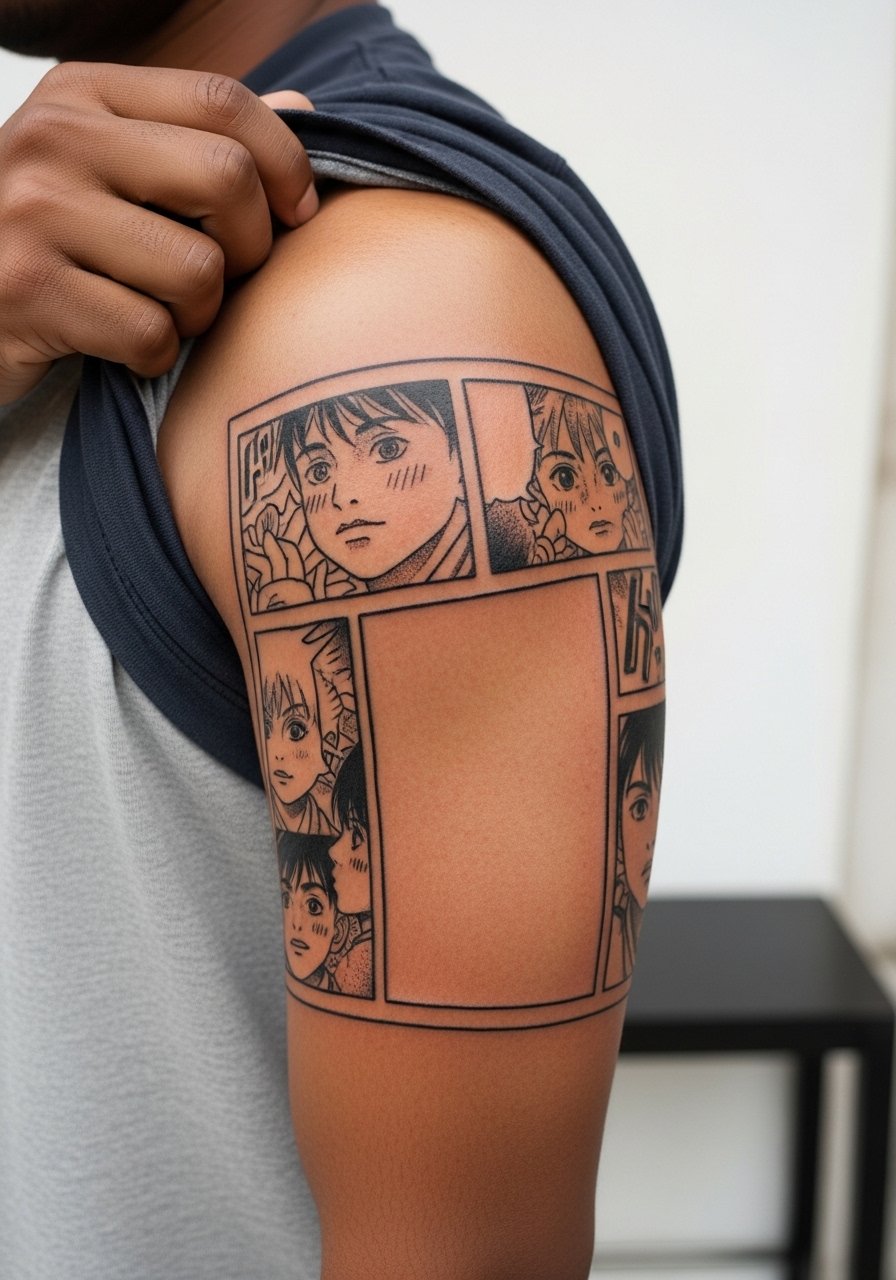
Using panel borders as connectors is a smart way to blend a collarbone or ribcage piece into a larger sleeve. The trick is to keep panel gutters clear and avoid fighting with existing work. A common mistake is matching panel density to older tattoos without accounting for healed saturation differences. Ask the artist to mock the panel in place and test movement so the connector reads both sitting and raising the arm. Expect multiple sessions and a planning chat about color balance. For the day, wear a loose short-sleeve shirt you can shift aside easily.
19. Negative Space Eye Cluster on Calf Side
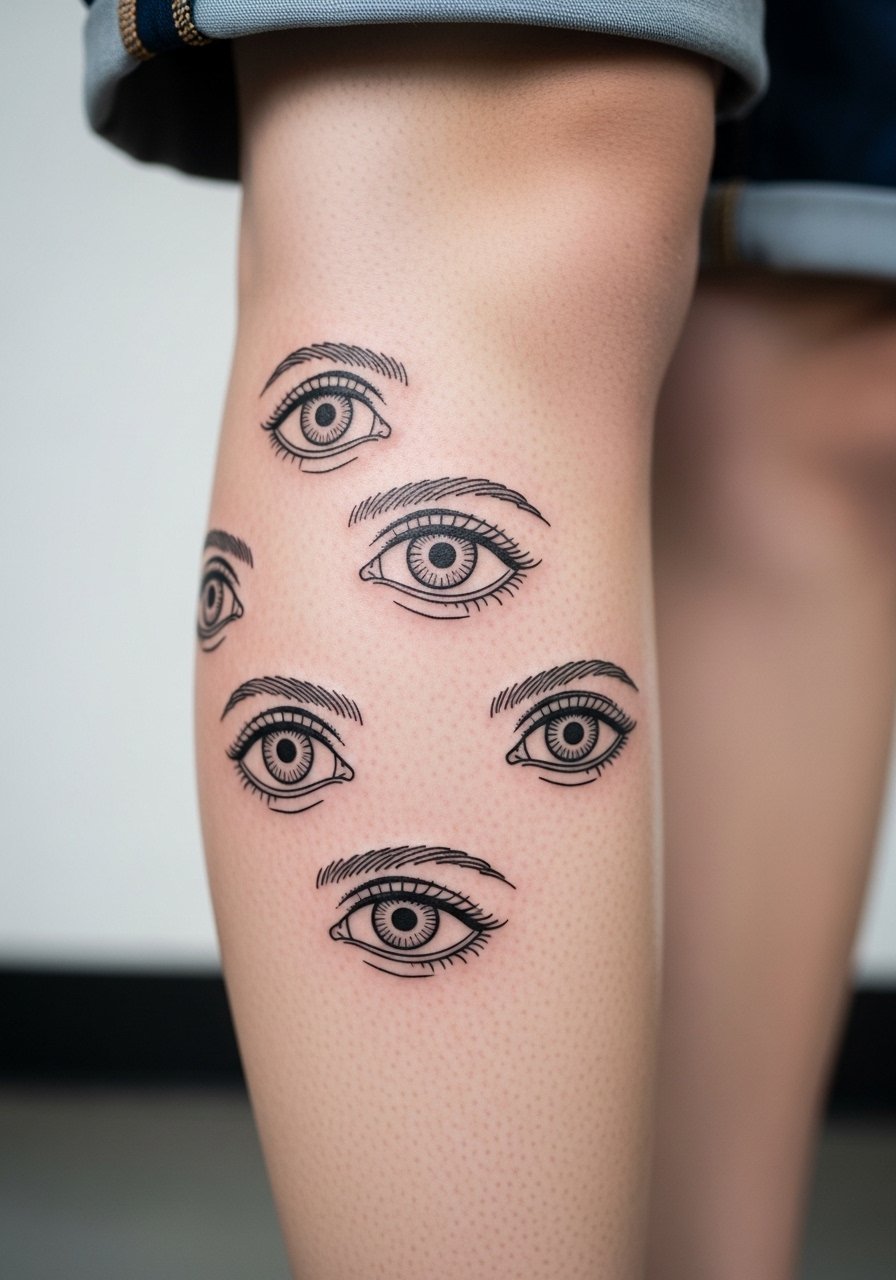
Clusters of eyes create that uncanny Ito rhythm without overloading detail. On the calf, they age well because of lower friction and moderate sun exposure. The common mistake is crowding eyes too close together at a small size. Space them so each pupil keeps separation after a year. Single heavy outlines with trimmed interior detail maintain the creepy read. Sessions are comfortable and usually completed in one sitting for a medium cluster. For showing off, asymmetric skirts and high shorts work well so the calf reads in motion.
20. Watercolor Bloody Panel Along the Outer Forearm
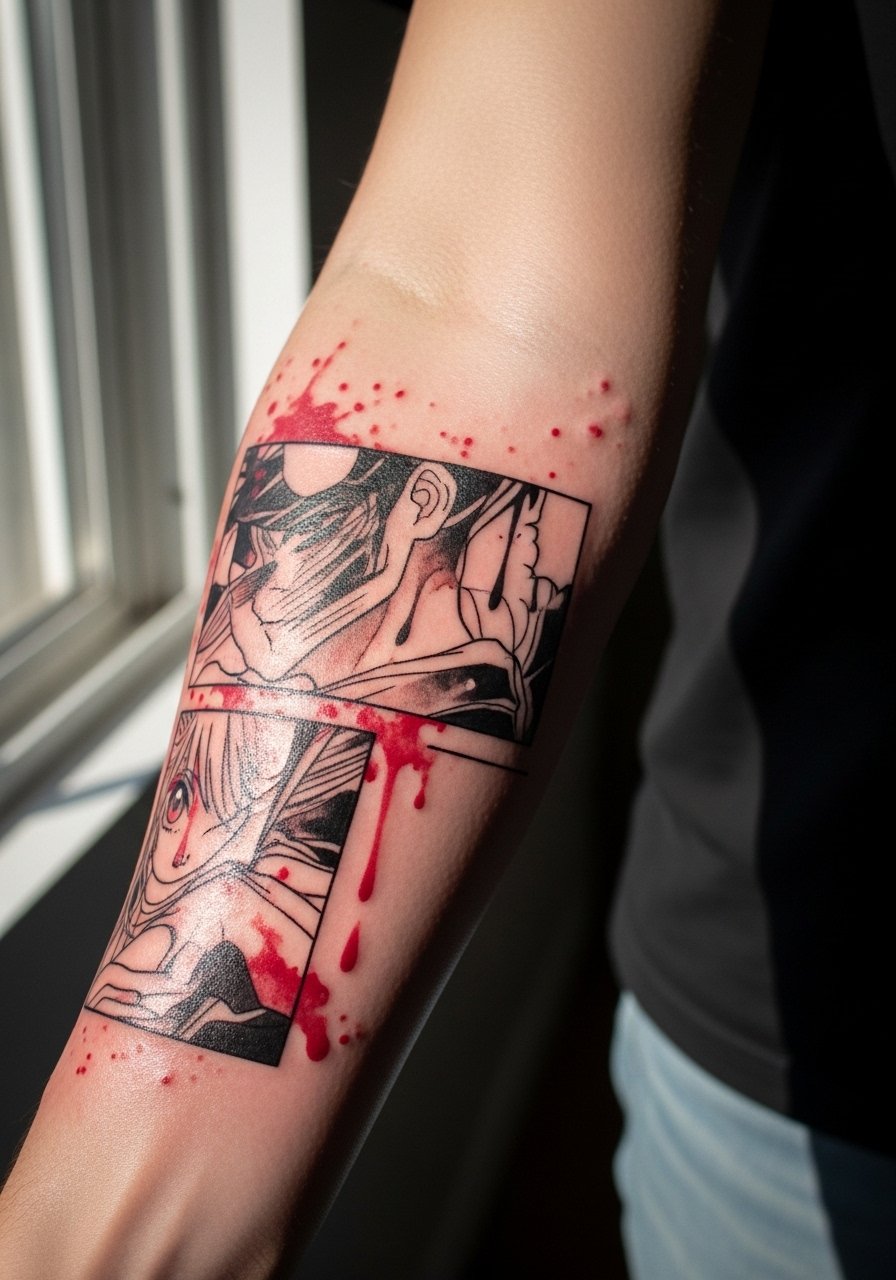
A panel that mimics a bloody manga page is atmospheric but relies on careful wash placement to avoid early muddiness. Ask the artist to keep key lines intact with darker anchors and use the wash as background drama. The usual error is letting washes cross over tiny line details, which softens the horror punch when colors fade. Plan to get a refresh for reds at year one if you want them vivid. For the session, roll sleeves or choose short sleeves so the artist can work without fabric interference.
21. Tiny Minimalist Ito Eye on the Behind-the-Ear Area
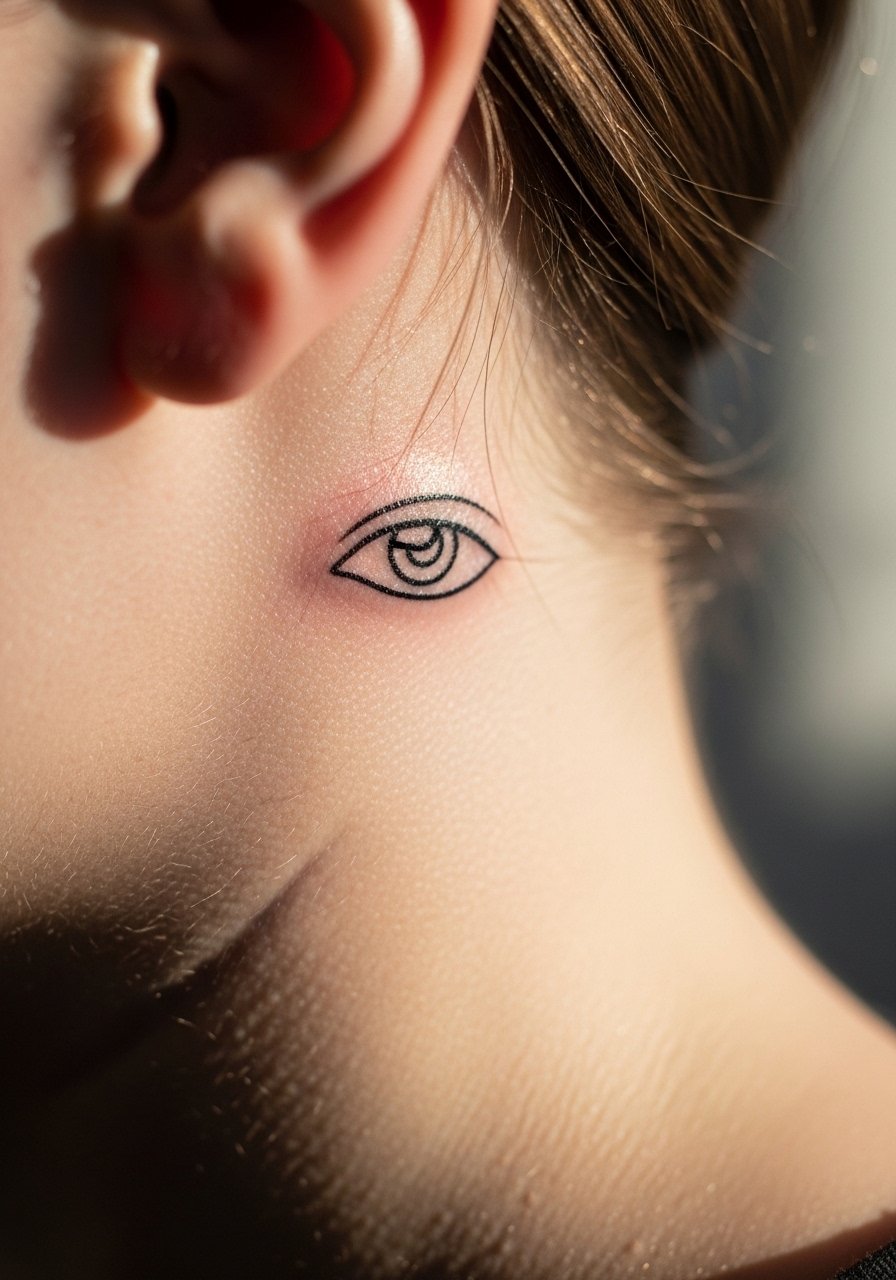
Behind-the-ear placements are subtle and feel private, but they require a careful stencil because curving surfaces can distort small details. The biggest mistake is making the eye too tiny; scale it so the pupil reads when your hair is up. Pain is low but visibility is minimal, so think about daily grooming and career considerations before booking. Ask the artist for a standing preview so you can see how hair and collars affect the composition. For the session keep hair tied and use gel or clips to expose the neck cleanly.
Frequently Asked Questions
Q: Will fine line Uzumaki spirals on the forearm blur faster than blackwork versions?
A: From what I have seen, pure single-needle spirals do soften faster than a version with slightly bolder anchor lines. If longevity matters, ask for a heavier outer contour and tighter dot spacing inside the spiral, which keeps the optical effect readable longer.
Q: How should I prepare clothing-wise for a collarbone manga panel session?
A: Wear a wide-neck or off-shoulder top you can pull slightly aside without stretching the skin. Something like an off shoulder blouse works well and lets the artist access the area comfortably while you stay modest.
Q: Do ribcage micro-line faces need different aftercare than forearm tattoos?
A: The early routine is similar, but ribs often peel differently because of movement and breathing. Expect slightly longer scabbing and follow whatever aftercare your artist prefers. If you plan to use protective film versus dry healing, ask the artist where they stand since opinions split on that.
Q: Are finger horror snails worth it for someone who types a lot?
A: Fingers demand frequent touch-ups, especially if you wash hands often or type. Simplify the silhouette and accept maintenance as part of the plan, or choose an ankle version for similar creep with less upkeep.
Q: How do I find local artists who can do delicate Junji Ito interpretations without making them cartoonish?
A: Search social platforms with combined tags like #JunjiItoTattoo and your city name, filter for recent healed photos, and check tattoo event guest lists. Tattoodo and local convention calendars are useful for finding guest spots where specialists drop in.
Q: Is it ok to use topical numbing for longer rib or thigh sessions?
A: Many clients use numbing for long sessions and it can help you sit through detailed work. Some traditionalists worry it affects how the ink settles, so have an explicit conversation with the artist about what they prefer and whether they will accept numbed sessions.
