Geometric trends on boards look slick, but knees are a weird surface. The skin stretches, the bone sits under a thin pad, and designs that read great flat can blur the first time you bend. If you want a small knee piece that still looks intentional after a year, think about how the shape flexes, ask for room in the composition, and pick an approach that favors clear linework over tiny detail. Below are 17 micro knee ideas that respect joint movement and the realities of healing.
1. Geometric Mandala on the Kneecap
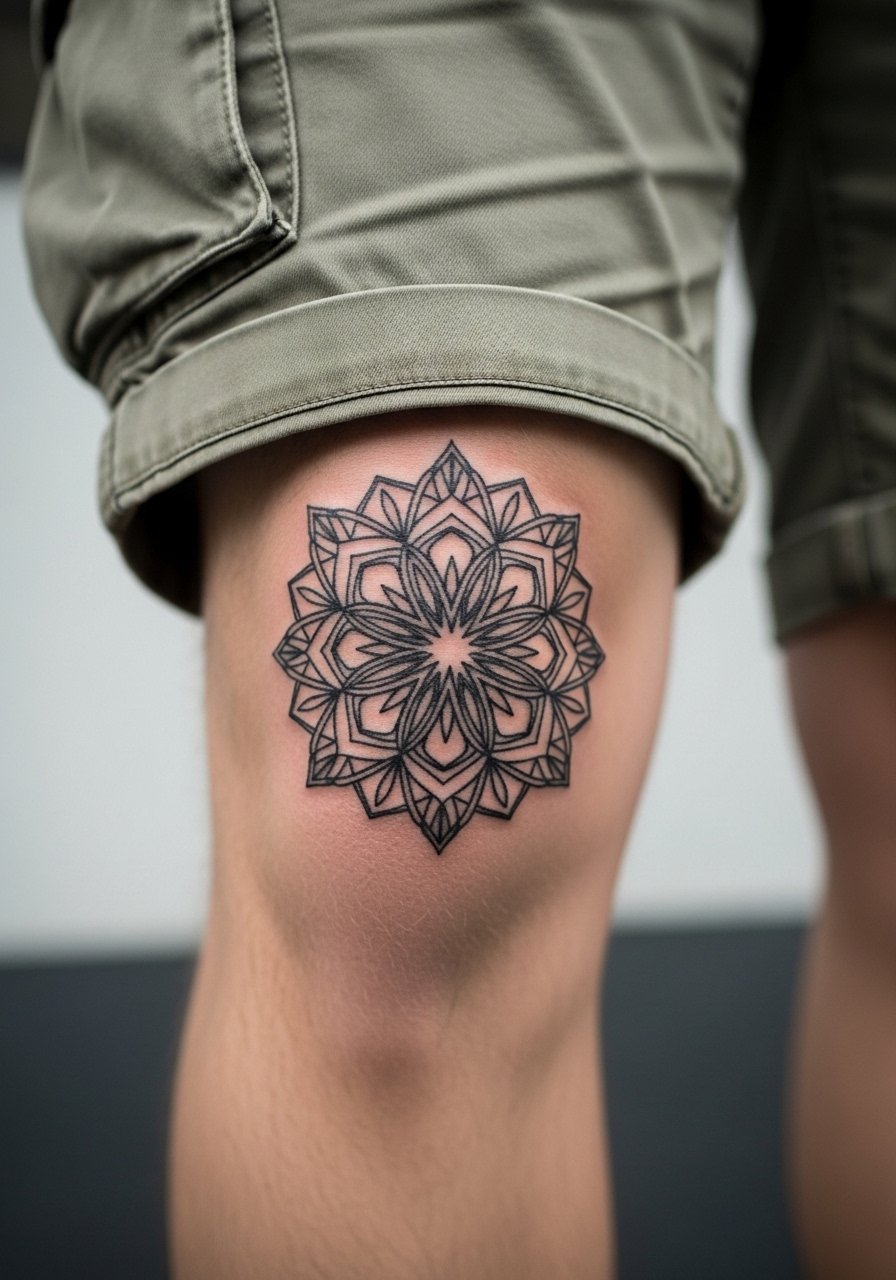
A mandala that follows the round of the kneecap uses symmetry to work with movement. Expect a fairly sharp session for a micro version, about 45 to 90 minutes depending on spacing. Tell your artist to draw the stencil with the knee slightly bent so the pattern opens correctly when you stand. A common mistake is packing too many concentric rings into a 3 cm piece. That causes the center to merge as the joint flexes. For longevity, keep contrast high with medium-thick linework and allow negative space between elements. For showing it off, pair the piece with cargo shorts in olive tones so the knee sits framed against solid fabric.
2. Tribal Band Around the Knee
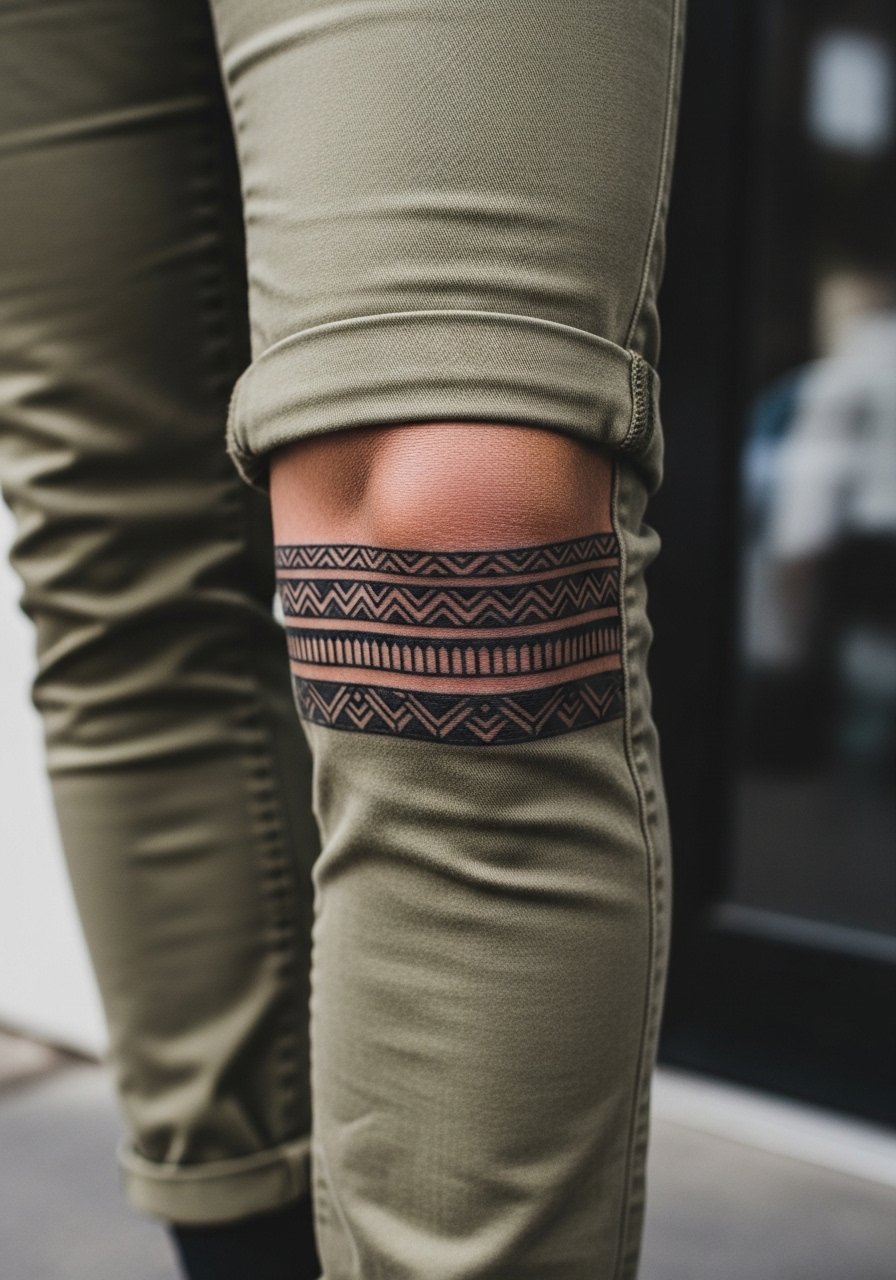
A full wrap has masculine energy while also serving as a great starter for a sleeve. Pain is moderate to high depending on how much of the bone the band crosses, and sessions can take 60 to 120 minutes for a clean wrap. Ask the artist to map the gap underneath the kneecap so the band never pinches across the joint crease. The usual error is trying to squeeze thin ornament inside a narrow band, which ages into a gray smudge. This style holds best with solid black fills and consistent lineweight. For a dressed-up look, cuff your slim chinos above the knee and add leather boots to frame the wrap.
3. Skull Head Centered on the Knee
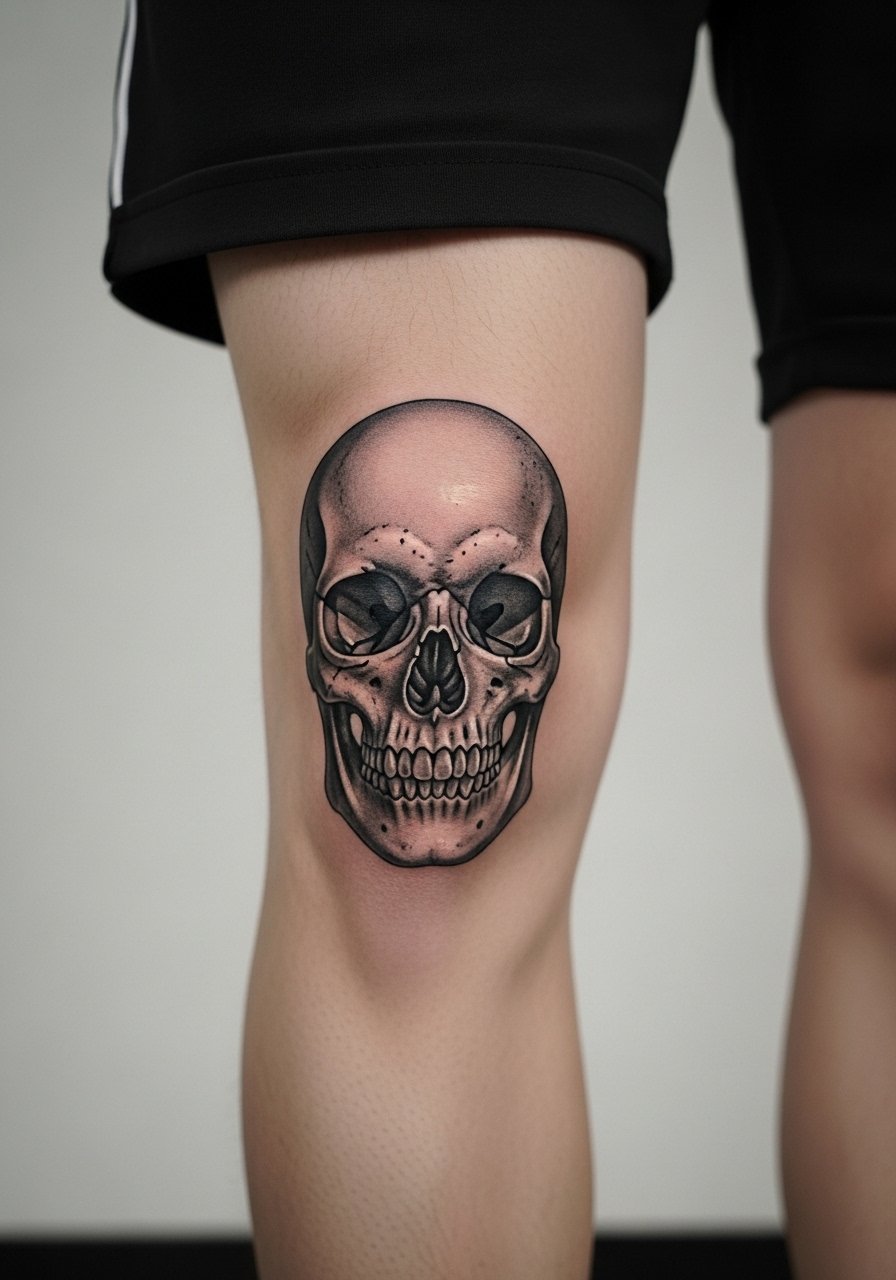
A tiny skull uses the round kneecap as a natural helmet shape. The session feels scratchy over the bone and faster in the surrounding soft tissue. For micro-realism, plan for high-contrast shading and a single session of focused work rather than chasing detail. Tell your artist you want defined edges and avoid almost-imperceptible hatch shading near the bone. A common mistake is requesting ultra-fine facial detail in a 3 cm skull; that will lose clarity as the skin moves. Expect a touch-up window at year two for shading refresh. If you want the rougher aesthetic, keep the saturation heavy and the eye sockets dark.
4. Shield Motif Over the Outer Knee
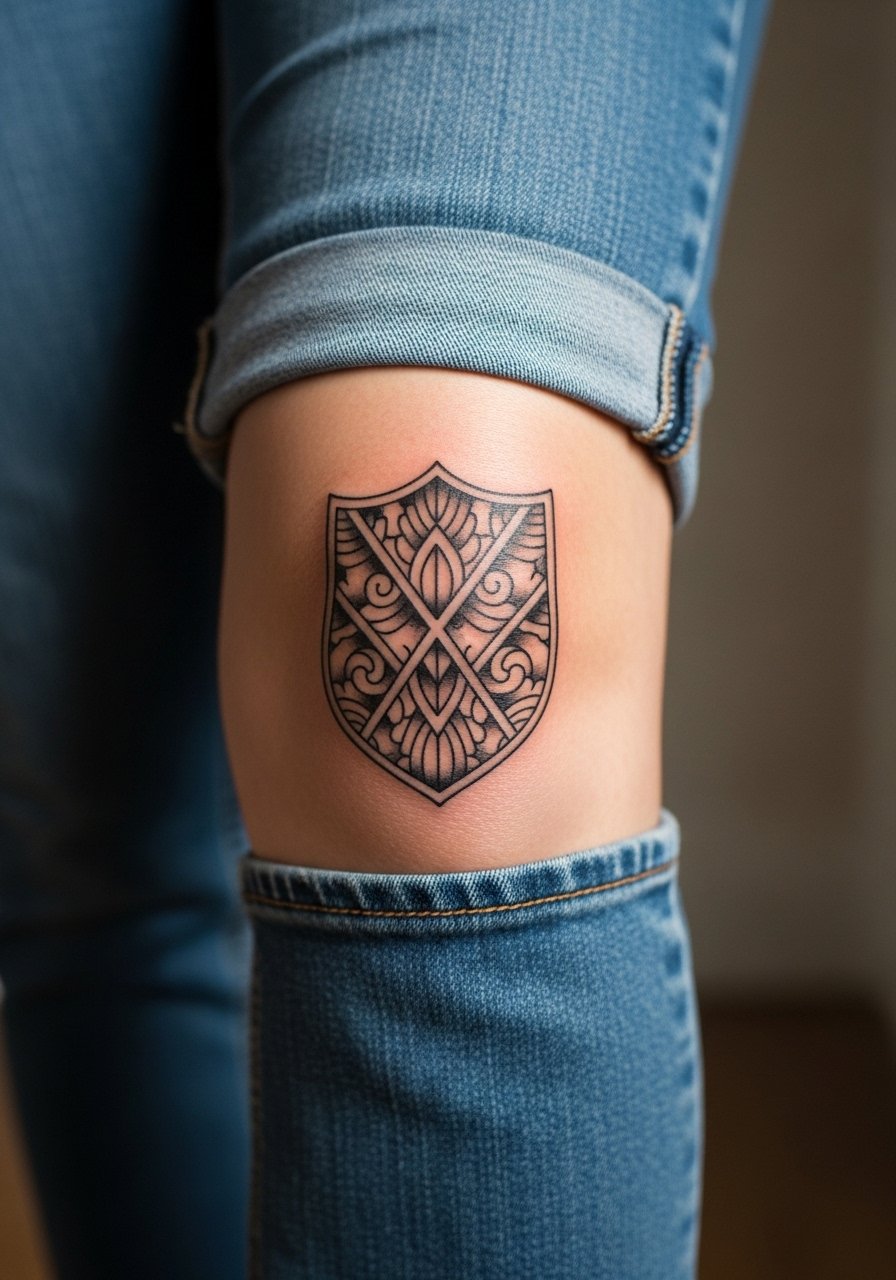
A shield reads like armor and works well on the outer knee where there is slightly more padding. Pain is milder than the kneecap center, and a medium-sized micro piece often finishes in a single session under 90 minutes. During consultation, ask for bolder outer lines and a simplified inner pattern to avoid detail loss with flexion. One debate here is color versus pure blackwork. Some artists prefer to split color into a second session for saturation, while others do the whole piece in one go. Name where you stand before booking so expectations match. Pair this placement with bootcut jeans rolled at the knee to show the motif without overexposing the area.
5. Floral Frame Above the Knee
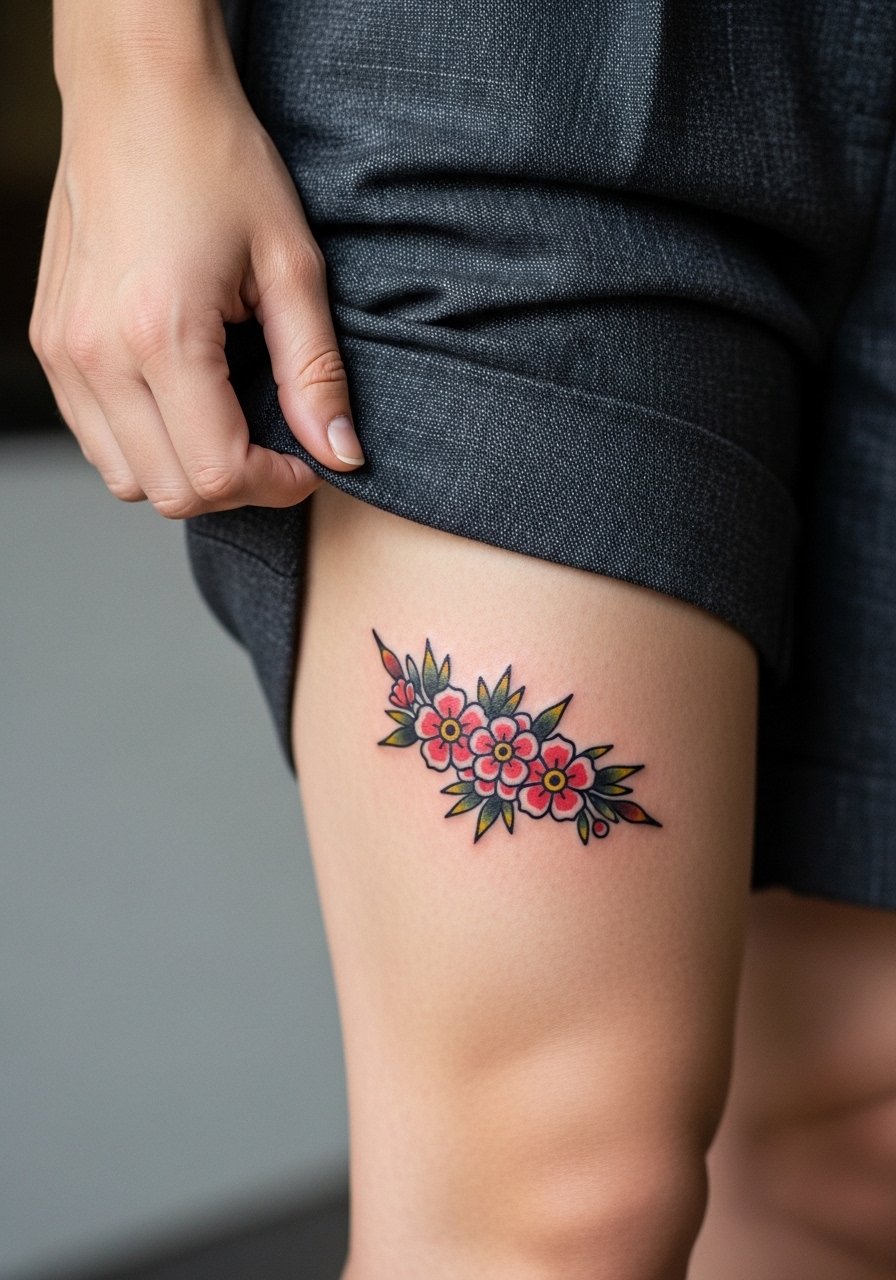
Placing florals just above the knee lets the design flow into the thigh and avoids the harshest bone contact. Session time is usually 45 to 90 minutes for a micro cluster. If you want color, expect the discussion about multiple sessions; one camp recommends laying lines and healing before color, while the other camp will pack lines and color in one visit. Make your preference clear. A common mistake is asking for tiny petal details too close together. Instead, request slightly larger petals with thicker outlines so the flowers keep their shape after movement. For weekend wear, tailored navy or gray shorts and a pair of canvas low-top sneakers frame the thigh without competing.
6. Horseshoe on the Upper Shin
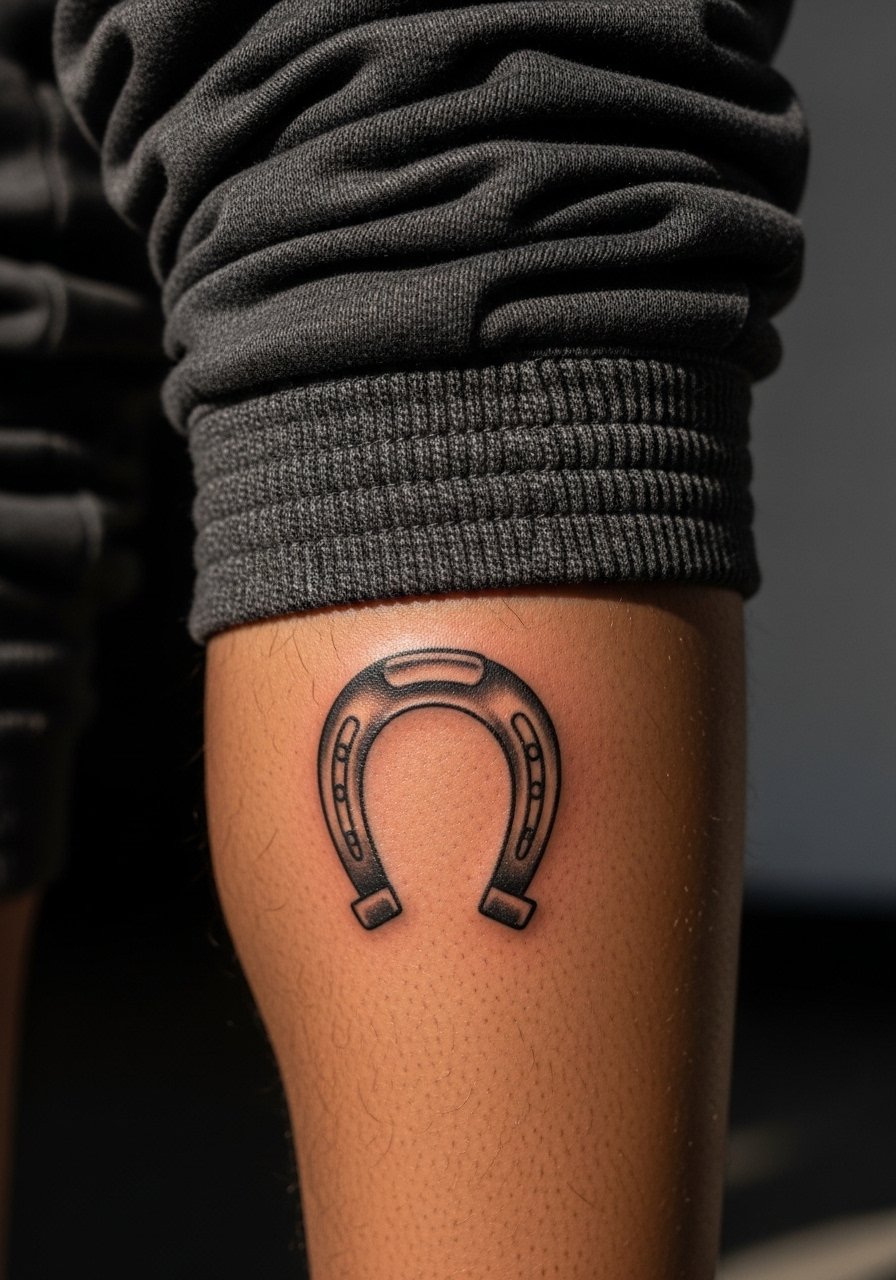
A horseshoe sits comfortably under the knee where the shin curves gently. The session is short, often 30 to 60 minutes, and pain is moderate since the bone is more covered here. Tell your artist you want a clean black outline with minimal internal fill so daily abrasion does not erode the edges. People often ask for super skinny outlines on this spot and then find the edges softening within a year. This placement is a good micro charm that can start a lower-leg flow. Wear cuffed joggers or straight-leg jeans and pair with high-top sneakers when you want the horseshoe framed.
Studio Day Picks
The first six ideas focus on kneecap and the immediate areas above and below it, so a few practical items smooth the session and the first week of healing.
-
Stencil transfer paper kit. Lets you test placement directly on the skin, which is crucial for kneecap-centered pieces that need to sit right when you bend.
-
Topical numbing cream. Apply as directed before a kneecap session to reduce the sharp bone sting without changing the artist's linework.
-
Thin protective film roll. Useful for the first 24 hours on lower-leg pieces where friction from pants and socks is likely.
-
Fragrance-free gentle body wash. Cleans the area during showers without stripping pigment from small blackwork or colored accents.
-
Aquaphor healing ointment. A thin layer in the first few days helps prevent painful cracking, especially around joints that flex a lot.
7. Butterfly Mandala Wrap
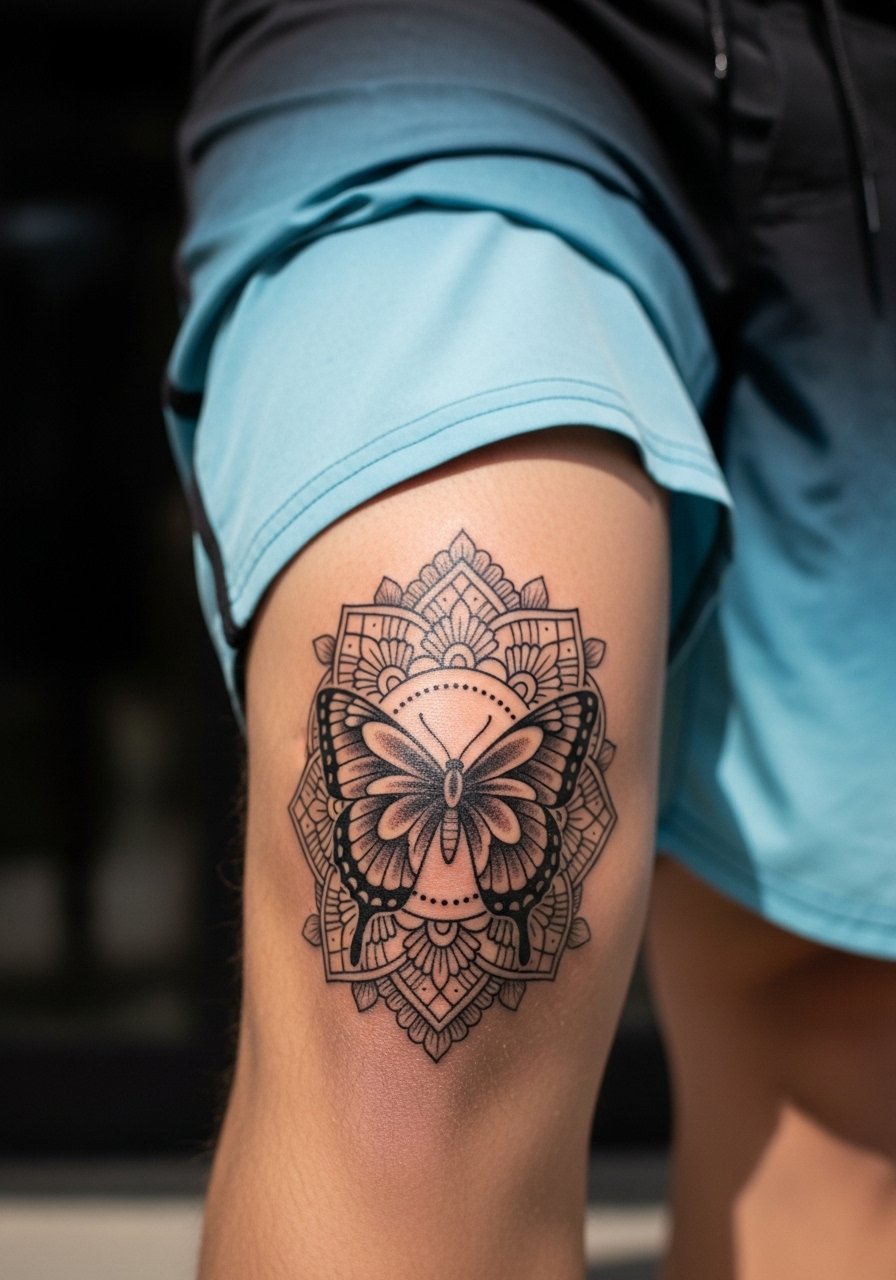
A butterfly-mandala hybrid takes advantage of the knee as a circular frame. Because it wraps, tell your artist to draft the pattern with the leg both bent and straight to ensure the wings line up. Session time is usually longer for a wrap, around 60 to 120 minutes. The frequent error is insisting on extremely fine filigree in the wrap areas that cross creases. That detail blurs faster than expected. For durability, favor negative space and slightly thicker stippling rather than hairline filigree. Show it off with rolled joggers or shorts and a chunky accessory like a chunky chain necklace if you want a tougher juxtaposition.
8. Barbed Wire Band
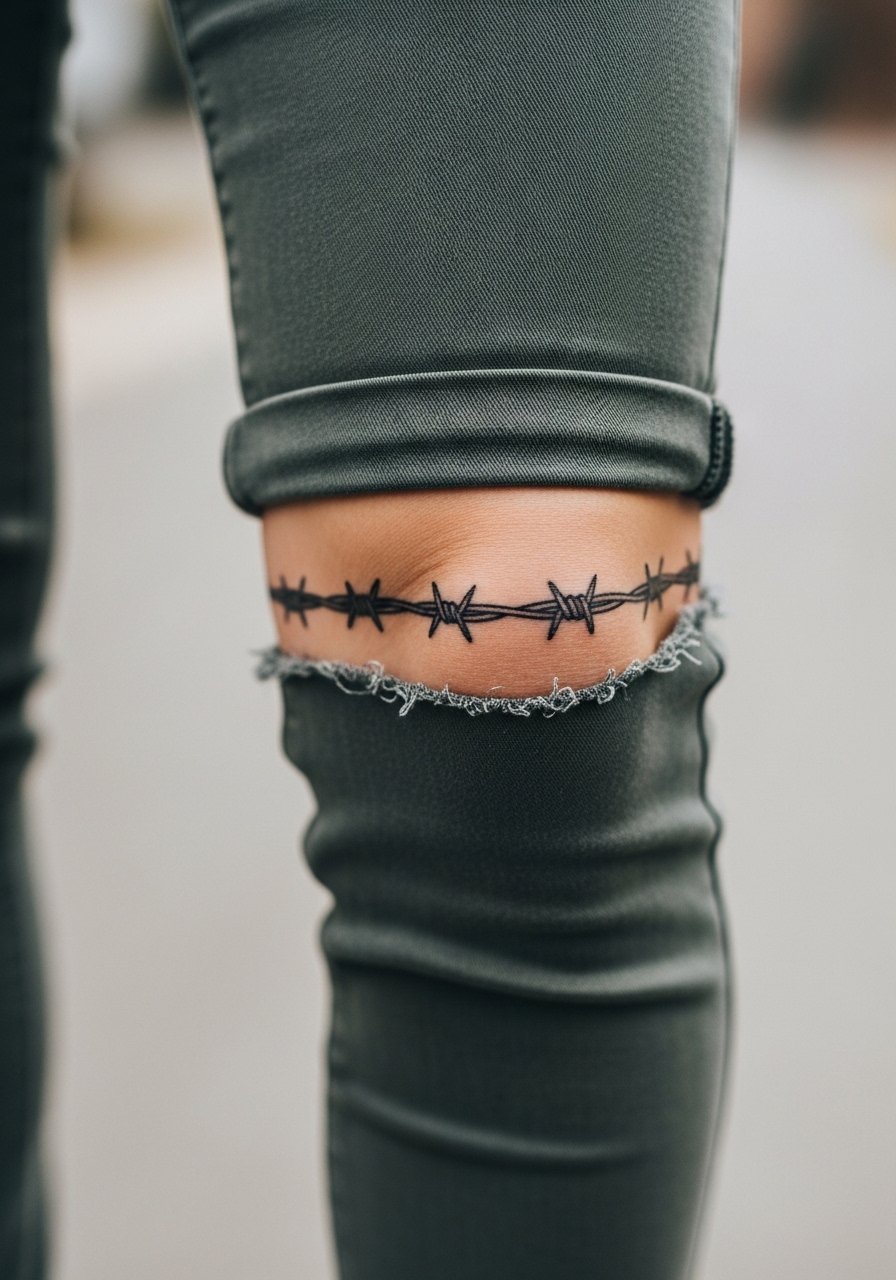
A micro barbed wire band reads aggressive and minimal. It is deceptively technical because the barbs need consistent spacing and tension to read right when the leg moves. Pain is moderate since the band often crosses both soft tissue and the top of the kneecap. Tell your artist you want consistent negative spacing between barbs, not packed barbs that will blur together as the joint folds. The most common mistake is ordering the thinnest possible lines for a band that needs to stay visible; a touch thicker lineweight avoids early feathering. For footwear, cuffed chinos and leather work boots frame this look well.
9. Predator Animal Head Centered
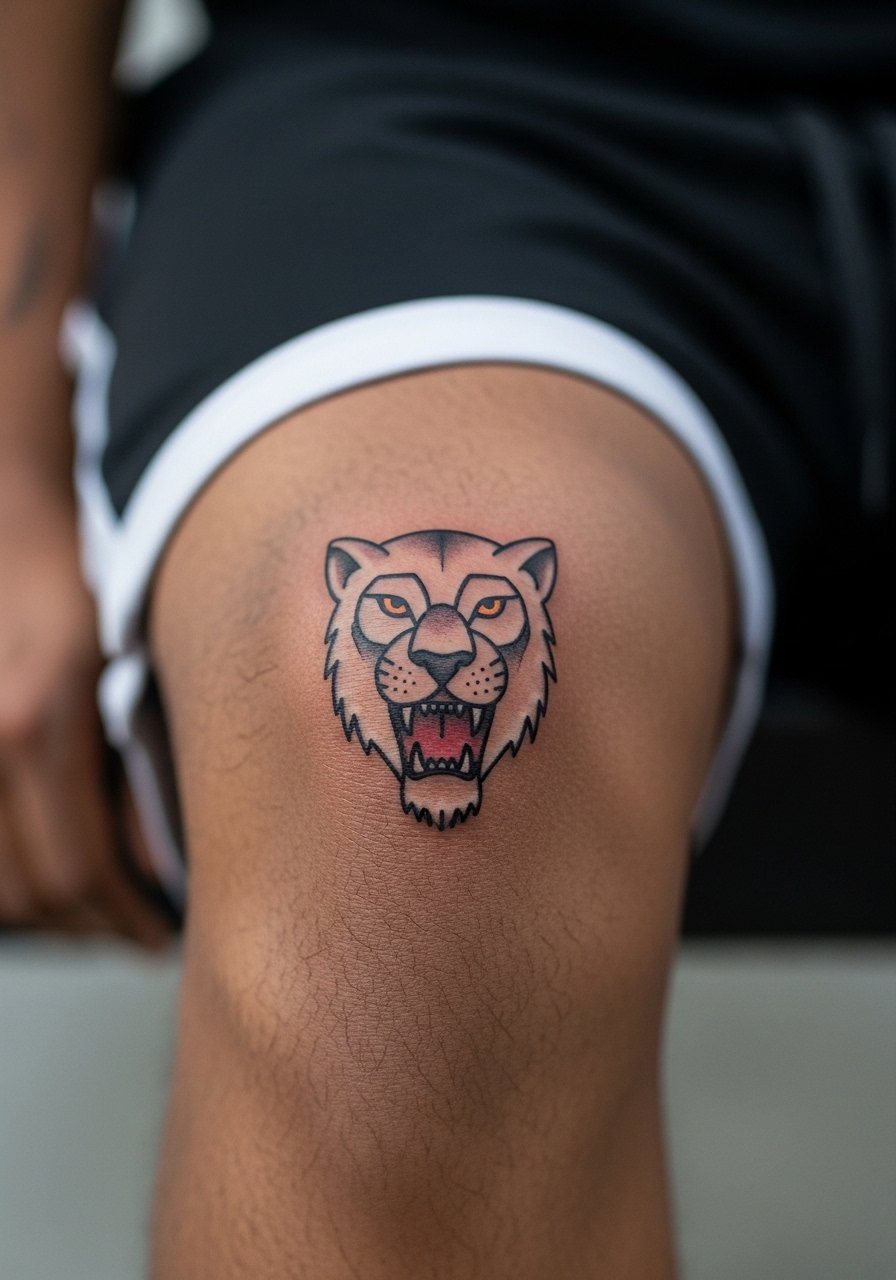
An animal head leverages the kneecap's rounded anatomy to give the creature a helmeted look. Go micro but bold with outer lines and simplified facial planes. Sessions can be 60 to 120 minutes. The mistake is asking for photoreal detail at tiny scale. That will fade into a gray patch as the joint stretches. Ask the artist to emphasize silhouette, teeth or mane texture with stipple shading, and leave heavy texture out of the central forehead. This placement pairs well with athletic shorts and a layered chain for photos, and it can anchor a future leg sleeve.
10. Moth Framed Under the Knee
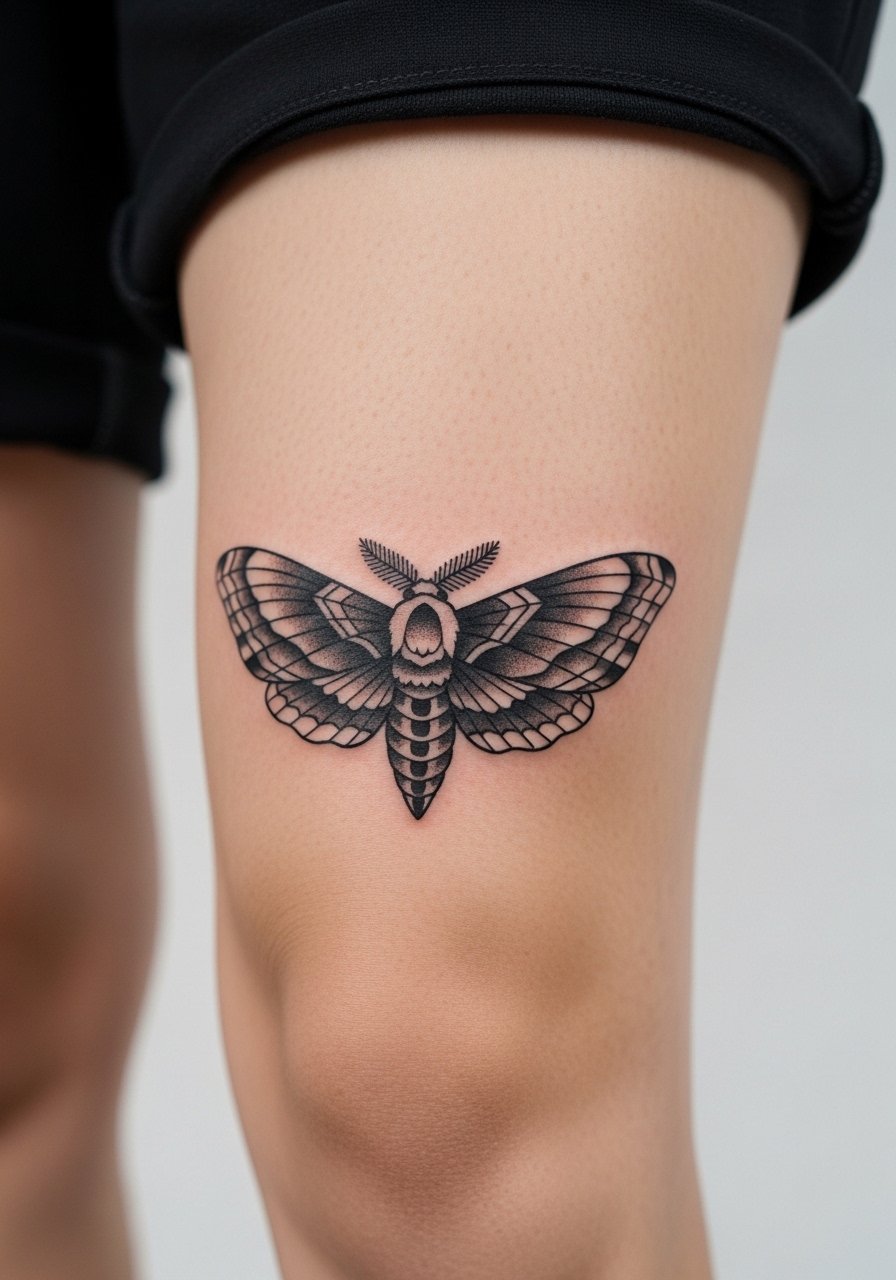
A moth under the knee uses the shin's curve to display outstretched wings. Pain here is typically less intense than the kneecap center. For a micro moth, plan for clear wing veins and simplified body shading to prevent blurring. Ask that the wings align with the natural muscle lines so movement reads like motion rather than distortion. A practical mistake is packing tiny dot shading into the wing tips; larger, consistent stipple holds better. Expect a touch-up at year three for fine shading if you want the wing texture to remain dense.
11. Cut-Out Mandala Above the Knee
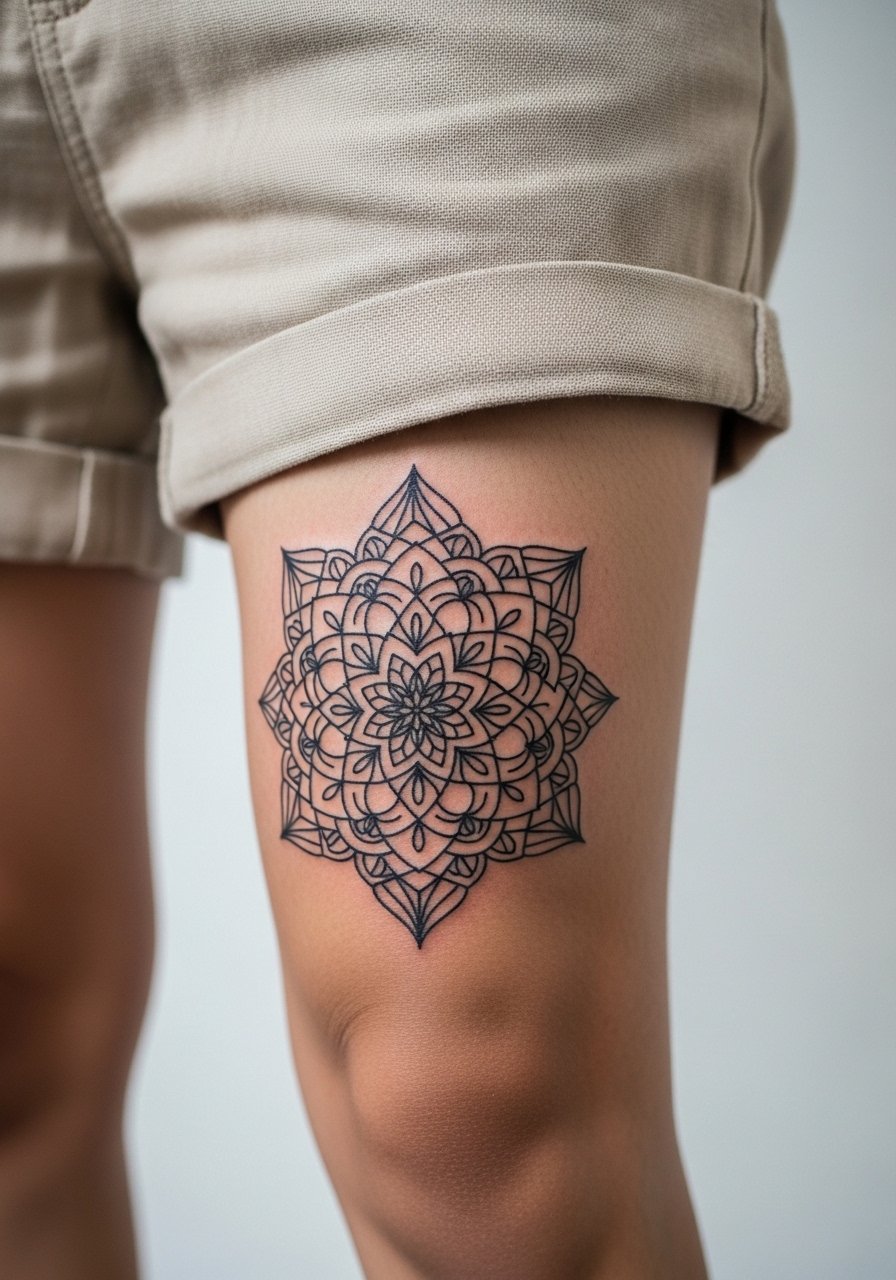
A cut-out mandala plays with negative space to create an illusion of depth. Above the knee there is more skin to support detailed geometry, but you still need spacing. Pain is milder than the kneecap, and sessions are typically one focused visit of about 60 minutes. The key consultation point is scale. Ask for larger gaps between spokes of the mandala, and request the stencil be checked on a bent knee. There is an ongoing preference split around color and single-session blackwork. Name whether you want color later or everything now. For styling, this sits well with tailored shorts in navy and a low-profile canvas sneaker so the tattoo reads with the leg extended.
12. Two-Word Phrase Across Both Knees
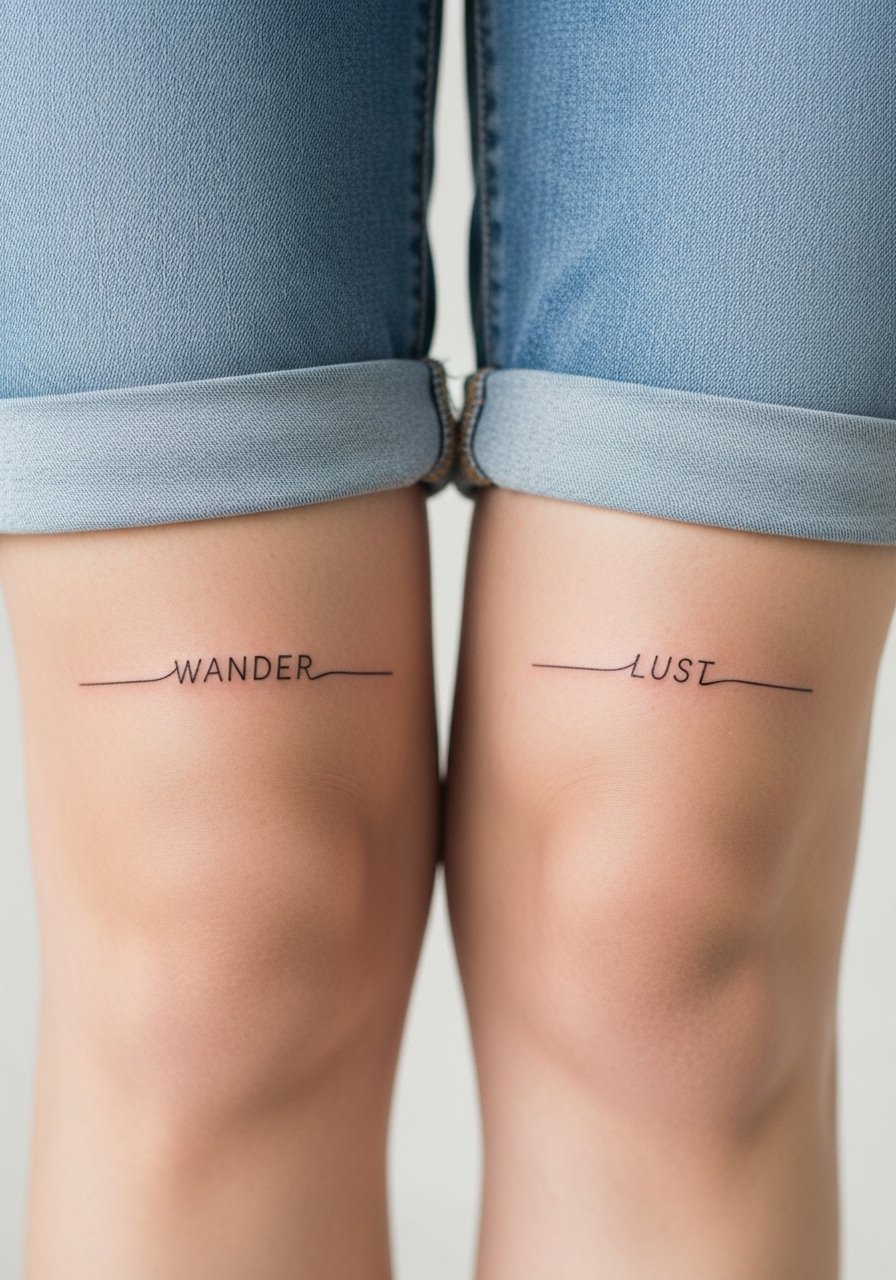
Bilateral script uses both legs to make a statement and looks deliberate when the lettering balances across the joint. Ask for a slightly bolder stroke than typical fine-line script because the knee's motion will soften hairline strokes. Pain varies since one knee might be more sensitive than the other. A real controversy here is wet versus dry healing around moving joints. One camp favors wet healing to reduce cracking during flexion, and the other recommends traditional dry care for cleaner scab formation. Ask artists where they stand and follow the approach they can reliably perform. Choose wording with short words and generous letter spacing so the phrase stays legible as you bend.
13. Minimalist Compass on the Outer Knee
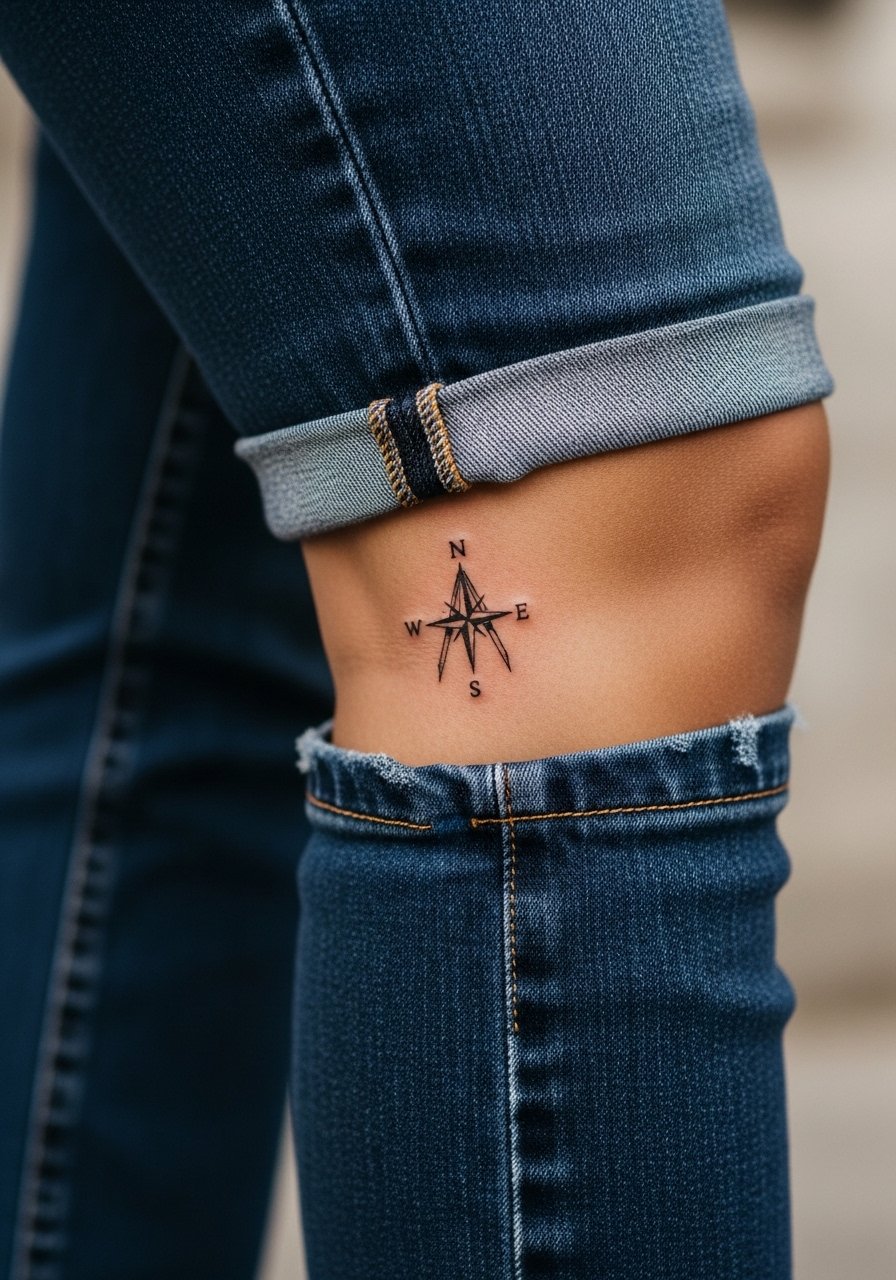
A small compass on the outer knee is a discreet directional accent that sits where there is a little more padding. The session is quick, typically under an hour. Ask for clear cardinal points and avoid extra internal ticks that will muddle with movement. A common mistake is requesting micro lettering inside the compass; keep text out and rely on shape. This spot is a smart choice for men who want a small focal piece that can later connect into a sleeve. Show it off with rolled bootcut jeans for a balanced streetwear look.
14. Tiny Lightning Bolt on the Side of the Knee
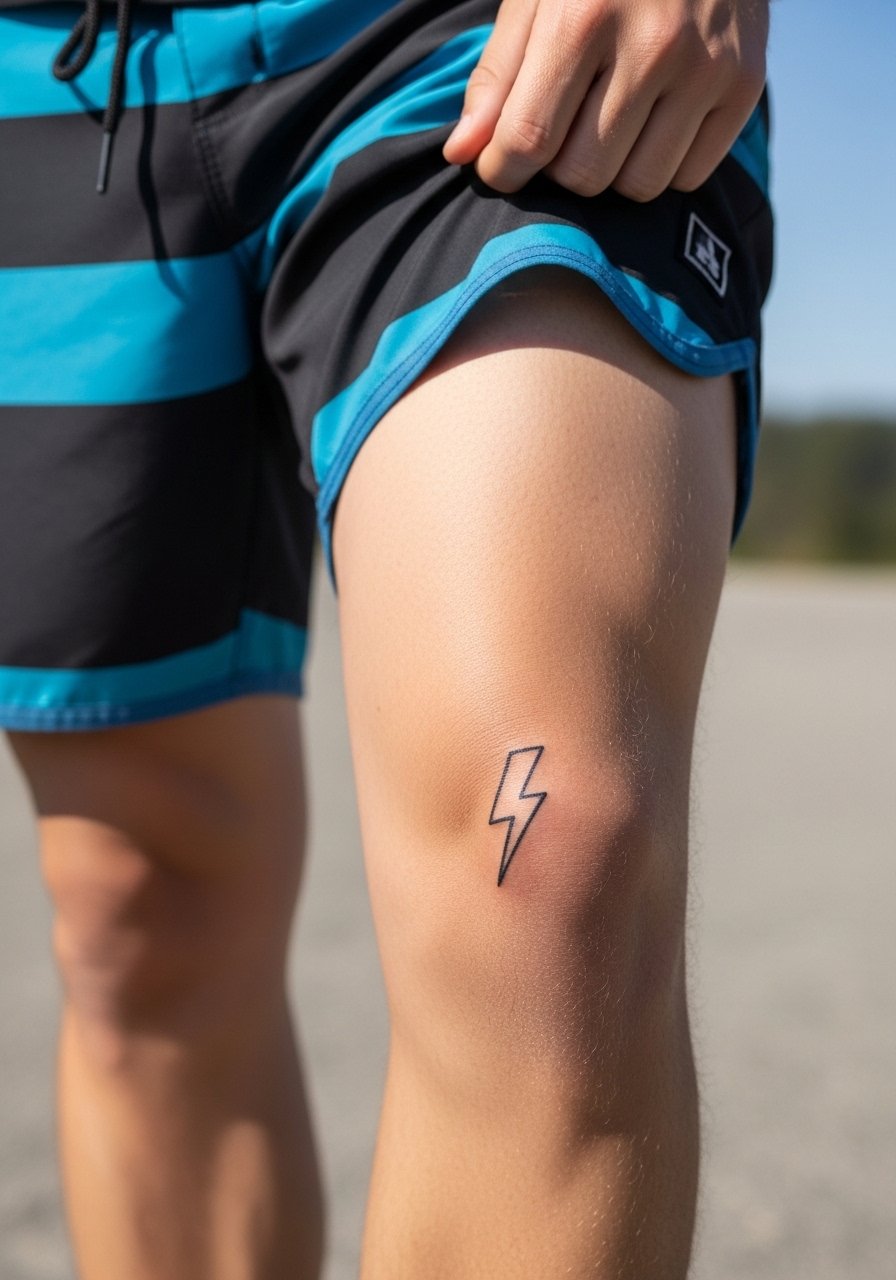
A single bolt reads clean and aggressive while staying micro. Pain is moderate since the design sits partially over the bony kneecap. For longevity, request a slightly thicker stroke than you might normally want so it keeps crisp edges when the skin moves. People often ask for the thinnest bolt possible and then notice early feathering. This piece is a fast session and makes a good accent to a larger leg composition later on. Wear athletic shorts or cuffed joggers to keep the bolt visible without chafing.
15. Micro Arrow Stack on the Inner Knee
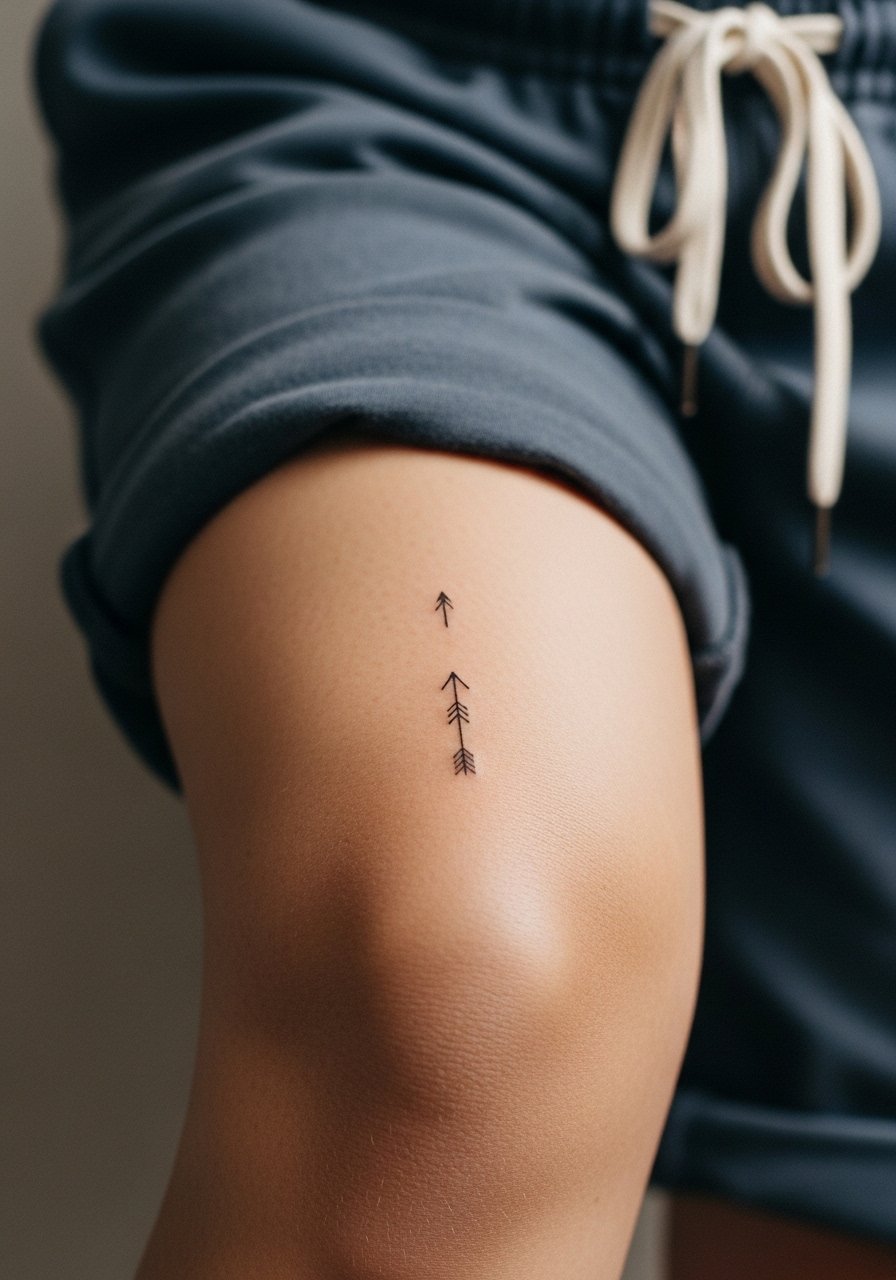
Inner knee placement can be surprisingly padded and is a good spot for a vertical micro stack. The session is short and the pain is moderate. Tell your artist you want consistent shaft width and slightly rounded barbs to avoid hair-thin points that spread. A typical mistake is packing too many stacked icons into a narrow vertical space. Keep each arrow at least a few millimeters apart. For the appointment wear a loose drawstring short so the artist can access the inner area without fabric pulling.
16. Crescent Moon in Negative Space on the Kneecap
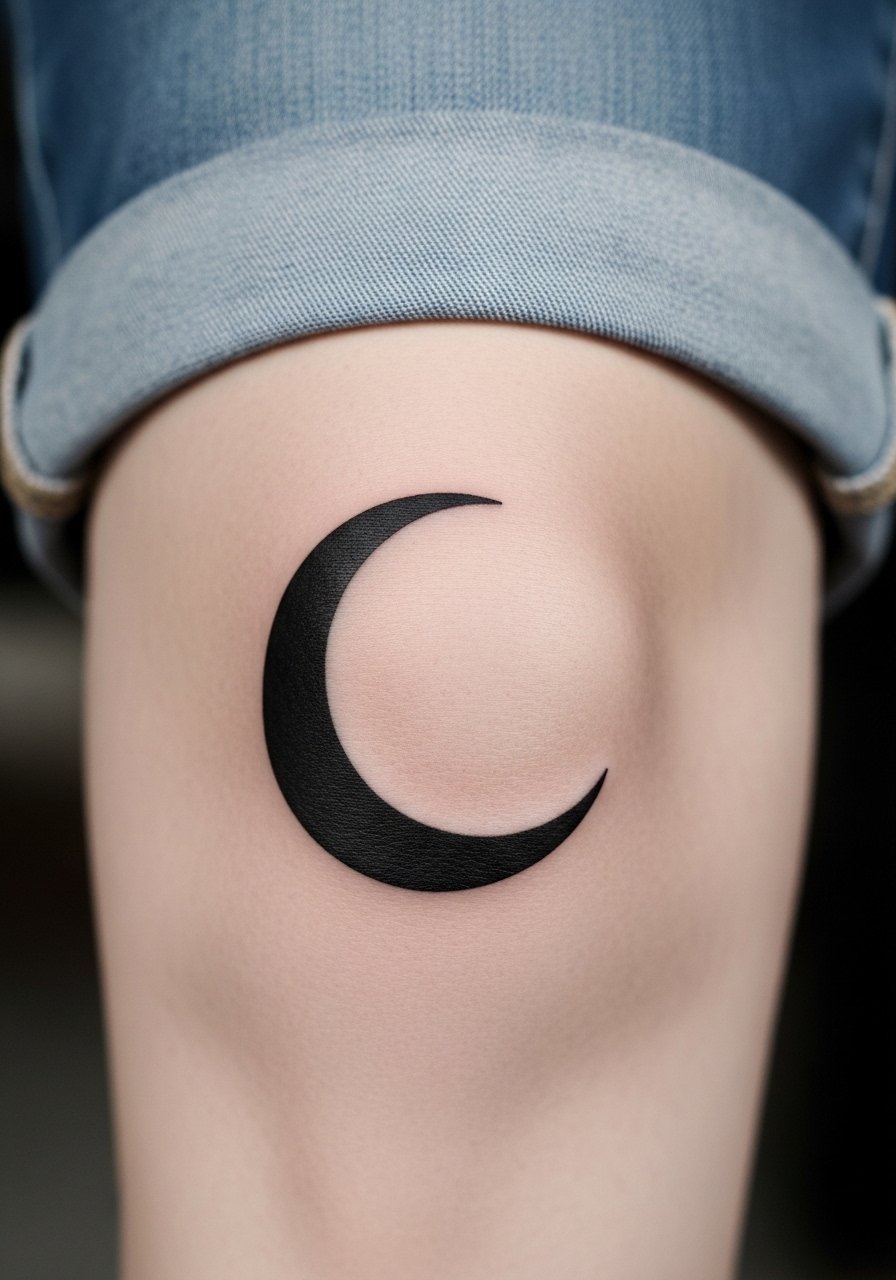
Using negative space for a crescent gives a graphic look that ages well if the surrounding black is saturated properly. This piece involves careful packing around the crescent to keep the shape crisp as the knee flexes. Session time varies but expect 45 to 90 minutes. A mistake is leaving the black edges too thin around the moon; thicker edges maintain the silhouette longer. For photos and casual wear, neutral linen shirts and rolled shorts let the crescent speak without distraction.
17. Dotwork Target on the Kneecap
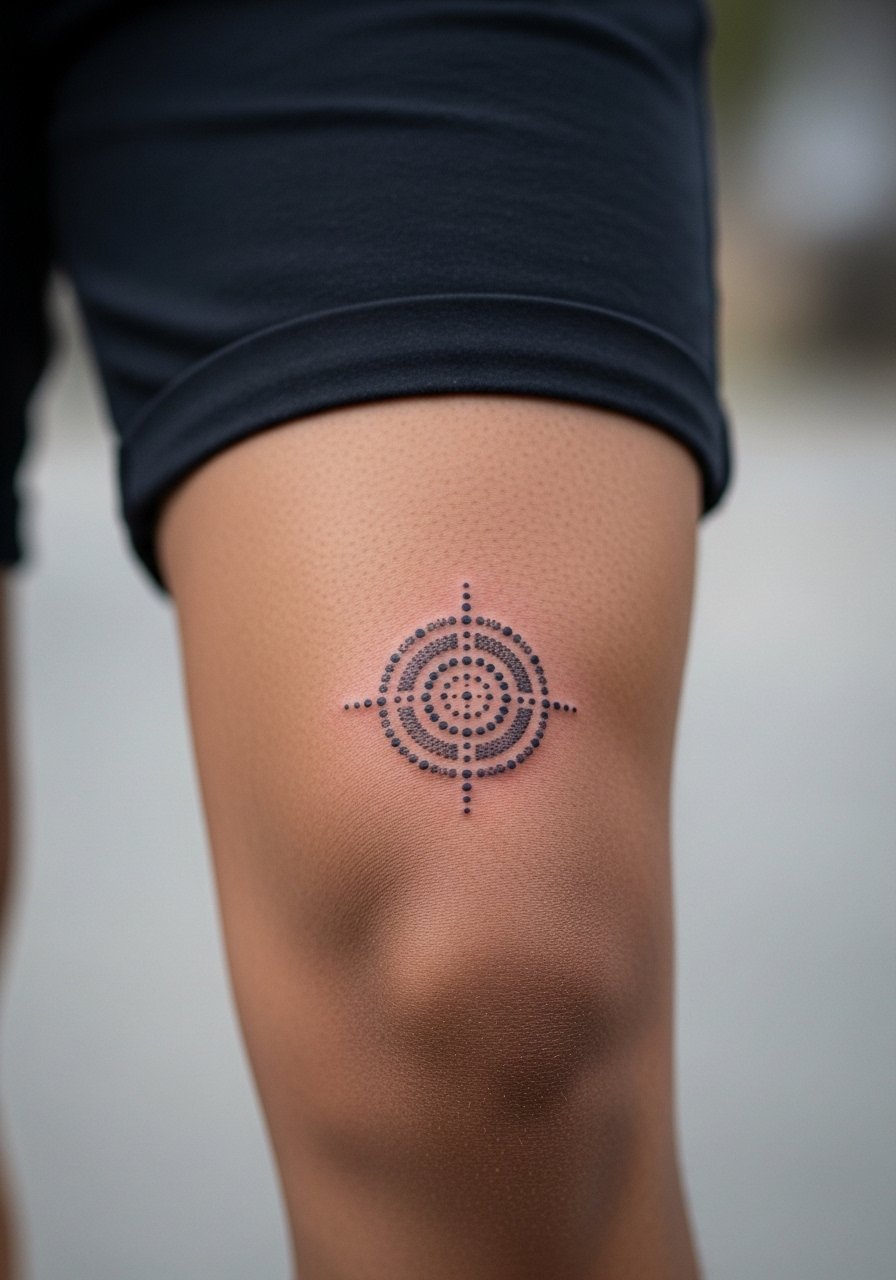
A dotwork target uses stippling to create a soft gradient that reads graphic from a distance. Because dotwork depends on consistent depth, ask your artist about needle grouping and spacing so the stipple does not become a blur over time. Pain can be pronounces at the center over bone. A common mistake is requesting ultra-tight dots in the central area; slightly increased spacing helps maintain separation after healing. Expect lighter diffusing at the five-year mark, and plan for a refresh if you want the dark center to stay prominent.
Frequently Asked Questions
Q: Will a micro kneecap tattoo hurt more than one on my shin?
A: Yes, tattoos centered on the kneecap generally feel sharper because the skin thins and sits over bone. The shin below the kneecap is often less intense since there is a small muscle pad there. Plan for shorter sessions, bring a clear idea of lineweight to the consultation, and expect that a touch-up may be needed sooner on the kneecap than on the shin.
Q: Can fine-line script across both knees stay readable over time?
A: It can if you increase letter spacing and choose slightly thicker strokes. Ultra-fine hairline script across moving joints tends to blur as the skin flexes. Tell your artist you want negative space around letters and ask for a test stencil with the knees bent so you can see how the phrase warps before it is permanent.
Q: Should I do blackwork or color on knee wraps?
A: Some artists recommend blackwork in a single session for wraps because black packs reliably into short appointments. Others split lines and color into two visits to control saturation. Name your preference during booking. If you want color, expect a plan that stages saturation to limit trauma to the joint.
Q: What should I wear to a knee tattoo appointment?
A: Wear loose shorts or joggers that you can pull comfortably above the knee without pressure. For thigh-above-knee pieces, choose tailored shorts with a drawstring or an elastic waist so the artist can access the area and you stay comfortable afterward.
Q: How long before I can sit normally after a kneecap tattoo?
A: You can sit right away but expect stiffness and a little tenderness for several days. Avoid deep knee bends for the first 48 to 72 hours if your artist advises it. Elevating the leg and avoiding tight pants over the area in the first week reduces friction and cracking.
Q: Are there cultural concerns with mandala or tribal knee tattoos?
A: Yes. Mandala patterns and tribal motifs have origins in religious and indigenous practices. If you choose those elements, consider adapting the pattern or discussing respectful interpretation with your artist. Many people opt for custom variations that honor the aesthetic without copying sacred imagery directly.