
Fine line tattoos are everywhere online, but what holds up and what fades fast are often two different things. Trends push ultra-delicate stencils for wrists and collars, and the reality is that placement and spacing determine longevity more than how pretty a stencil looks on screen. These 17 stencil outline ideas lean on designs that photograph well fresh and remain readable after years of sun and wear.
1. Fine Line Floral Wrist Outline
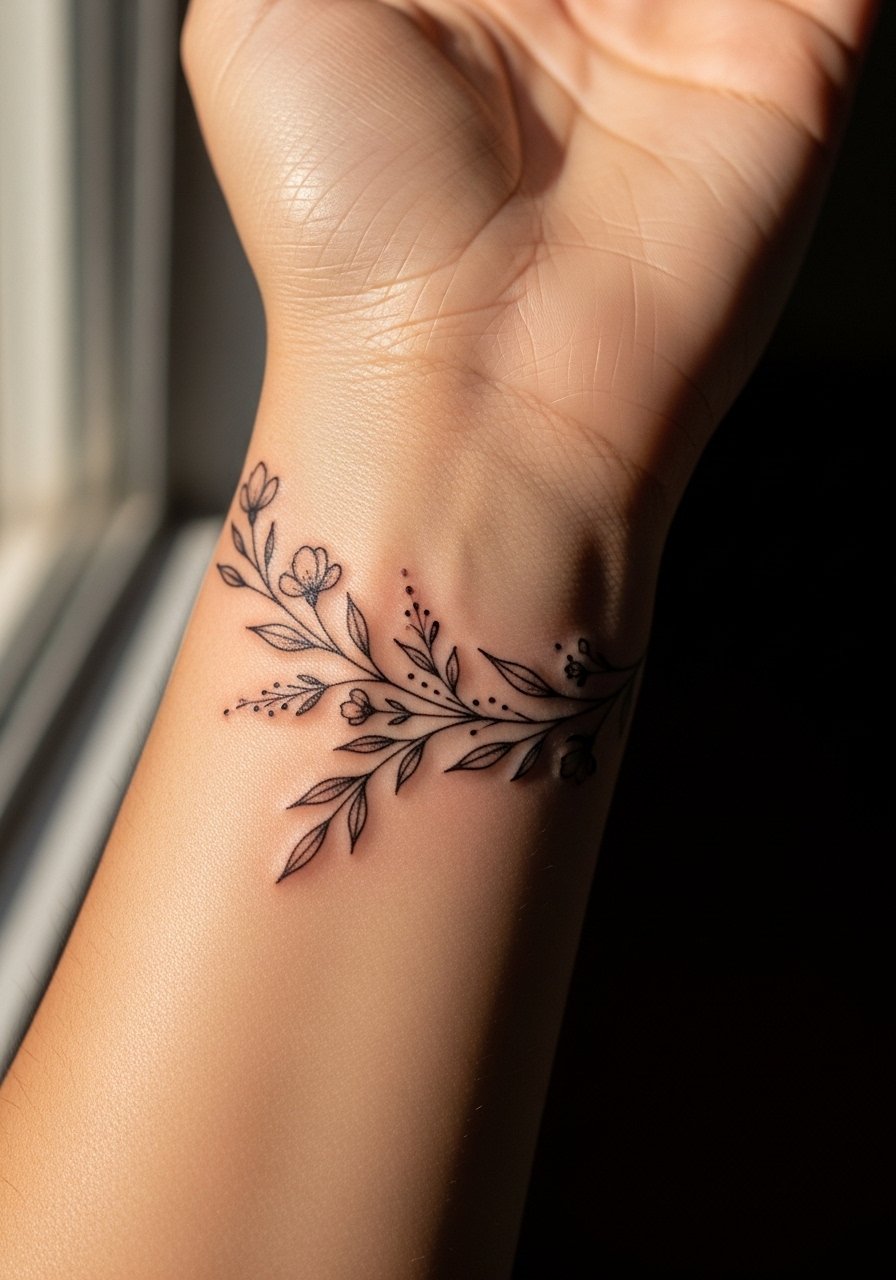
I recommend this one if you want a discreet first piece that still reads like jewelry. In consultation tell your artist you want slightly more space between petals and single-needle linework so the stencil does not crowd on healing. Fair warning, the wrist sees a lot of friction from bracelets and sleeves, so expect a light touch-up around year two for very thin lines. For the session wear a sleeveless tank or something you can roll up easily. A common mistake is asking for too many tiny petals in a one-inch area, which creates blurring as it heals.
2. Geometric Shape Forearm Stencil
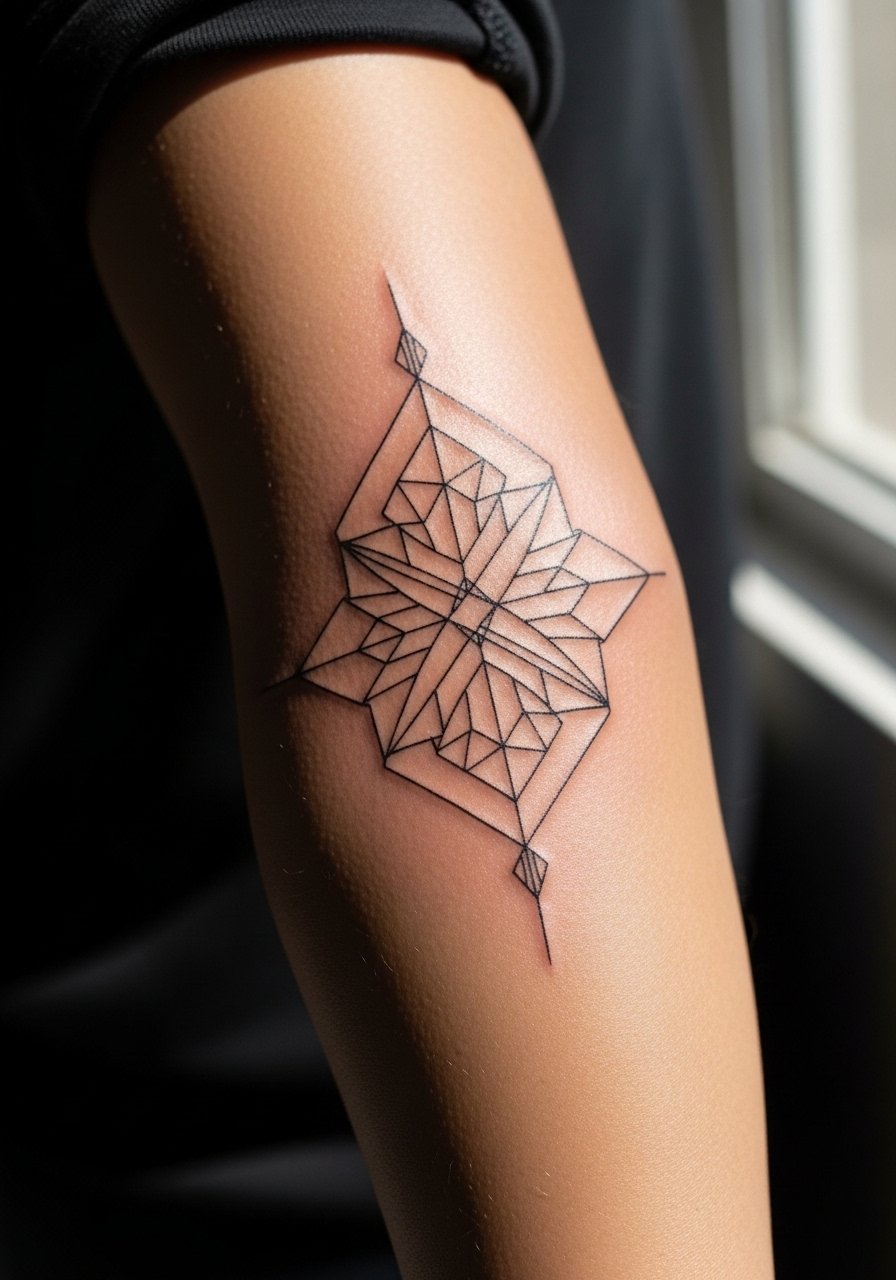
The outer forearm is forgiving for clean symmetry and scale. Bring a few reference shapes to your consult and say you want consistent lineweight across the stencil. Artists split on line weight here. One camp favors slightly bolder outlines to avoid early fading. The other camp prefers true fine line for a softer look and plans touch-ups sooner. If you prefer fewer touch-ups, ask for slightly thicker primary lines and thin inner lines. For showing it off, roll a linen button-down shirt and pair with a slim leather watch.
3. Tribal Pattern Shoulder Outline
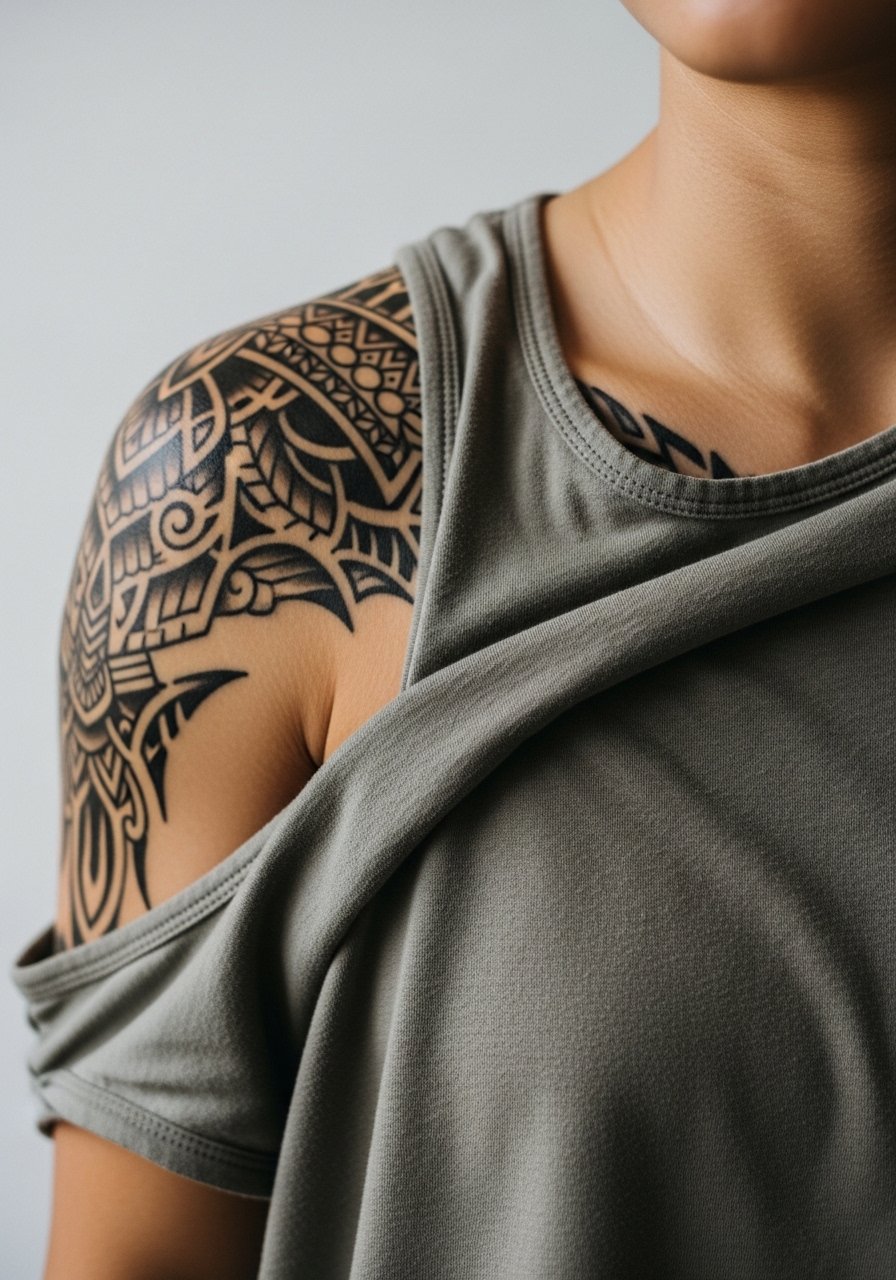
This one reads bold when placed on the upper shoulder and plays well with off-shoulder tops. During the consult say you want strong single-needle outlines with clear negative space so the stencil stays readable after a couple of years. Session-wise it is lower on the pain chart but higher on visibility, so wear a loose tank top you can shift easily. A frequent error is packing too many overlapping motifs into a shoulder panel, which looks busy after healing. Respect the cultural origins of tribal patterns by avoiding exact replicas of ceremonial marks.
4. Abstract Shape Ankle Stencil
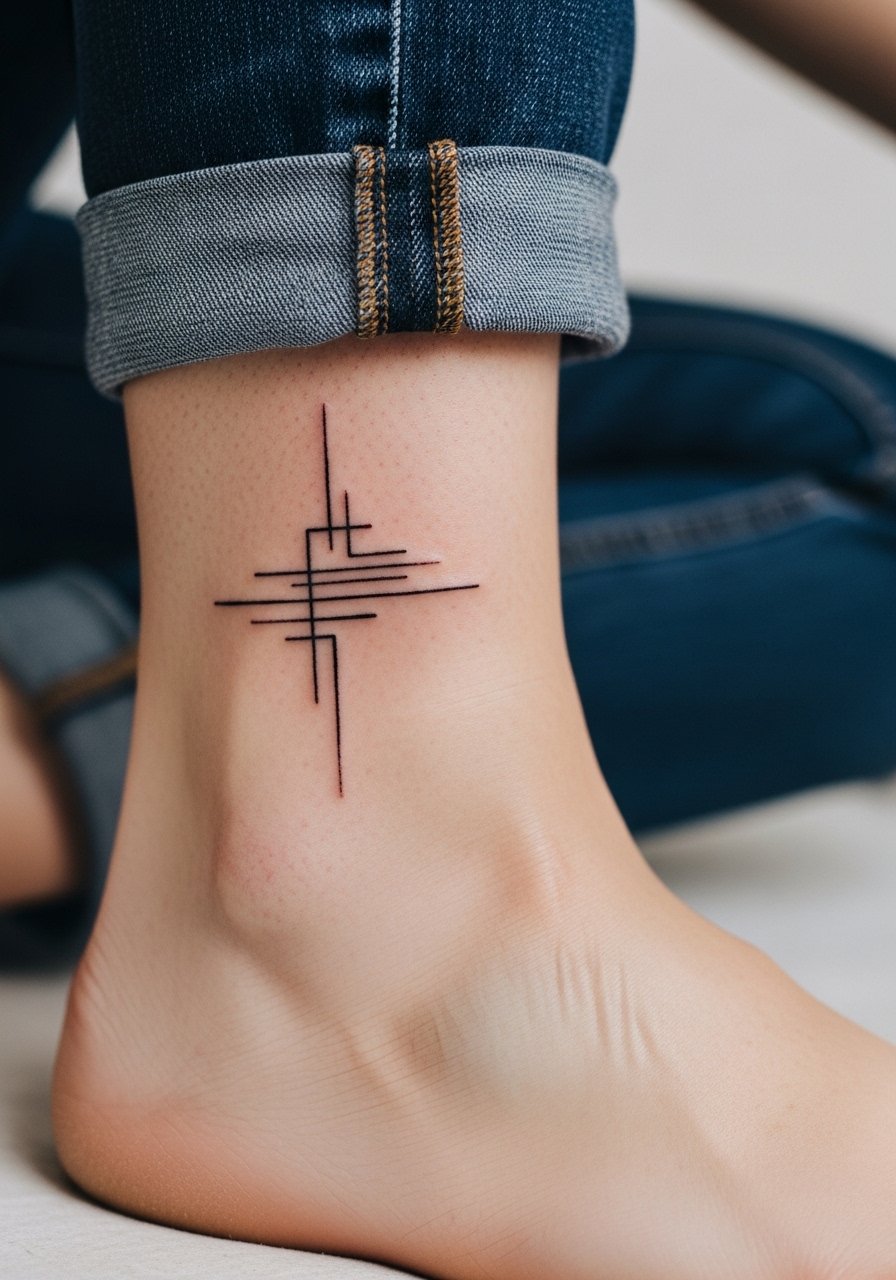
Ankle stencils are great if you want something cheeky and small that stays mostly private. The ankle is a tricky spot for stencil transfers because the skin curves and the transfer can smudge. Ask your artist to use spirit gum or professional transfer paper so the stencil adheres cleanly. Expect some tenderness during the session and extra friction from shoes while it heals. For summer show-off pairing, try strappy flat sandals and cropped jeans. A common mistake is insisting the design be too small, which causes lines to bleed together in two years.
5. Animal Motif Collarbone Outline
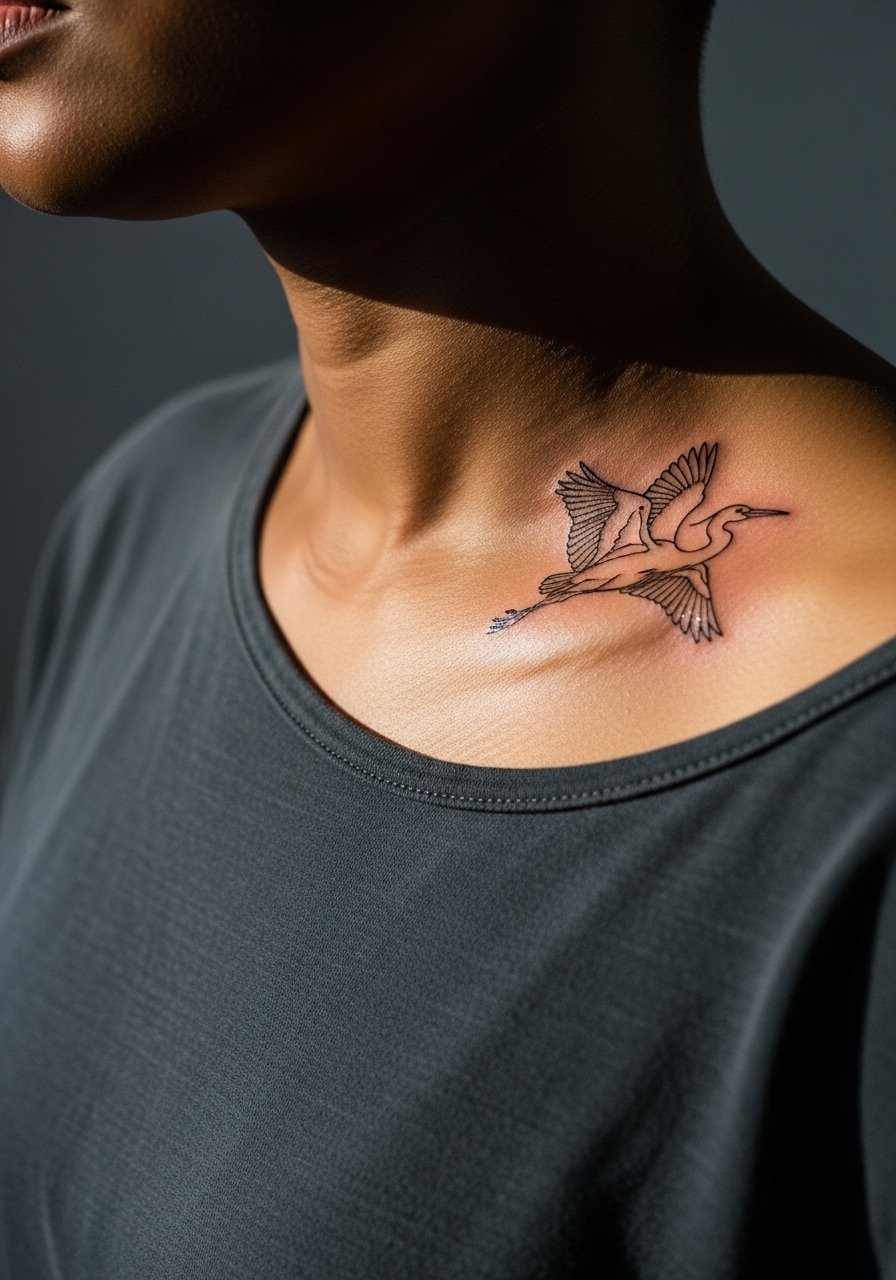
The collarbone flatters flowing animal motifs like a small bird or fox because the bones provide natural guides for the linework. Tell your artist to position the stencil to follow the collarbone curve and to keep main lines slightly bolder than finer internal strokes. Pain is moderate here, and touch-ups are common at the outermost tips. For showing it off wear a v-neck tee or a layered chain necklace that sits beneath the design. Avoid packing too many tiny markings near the bone, which can age into an indistinct cluster.
6. Quote Script Inner Arm Stencil
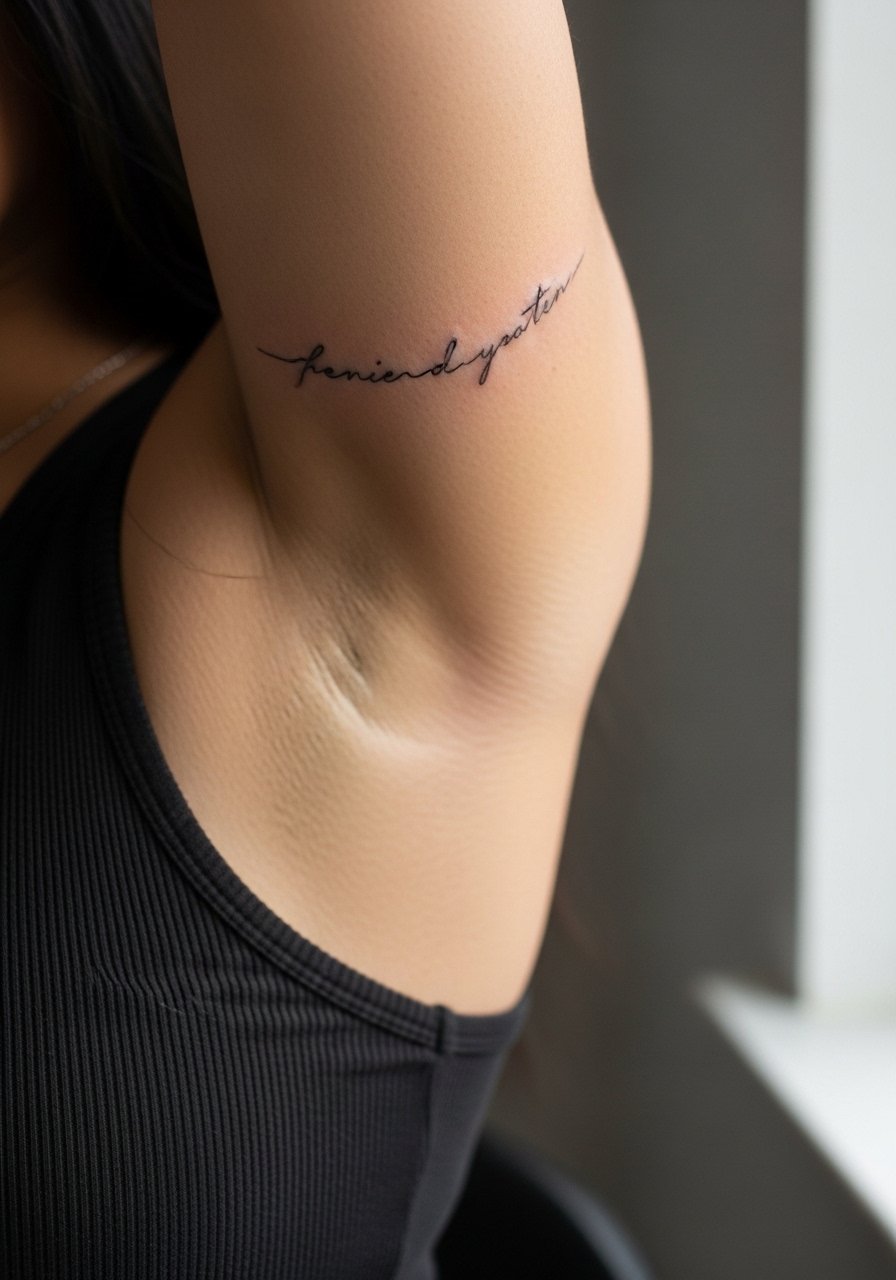
Inner arm script looks intimate and reads only when you want it to. During the consult bring the exact font sample and specify line height for readability after healing. The inner bicep is softer skin and holds script well but can stretch with muscle changes. Plan a touch-up at six to twelve months for words that sit near the underarm. For the session wear a loose button-down shirt you can pull aside. A frequent mistake is choosing an overly ornate script for a two-inch space, which blurs as it settles.
Pre-Session Essentials
The wrist and inner arm pieces above heal differently from larger work, so a few targeted items make the session and the first week easier.
-
Stencil transfer paper kit. Lets you preview the linework on skin and catch placement issues before the needle starts, especially useful for the wrist floral and inner-arm script.
-
Topical numbing cream. Applied per directions about 45 minutes before the appointment eases sensitivity on thin-skin spots like the wrist and inner bicep.
-
Thin protective film roll. Useful for low-friction areas that still rub in daily life, such as the forearm after a fresh fine line piece.
-
Fragrance-free gentle body wash. Cleans healing collarbone and shoulder work without added irritants that can dull fresh linework.
-
Aquaphor Healing Ointment. A thin layer in the first days helps keep fine line tattoos from drying out, which matters for the floral and script pieces above.
7. Scorpion Outline Thigh
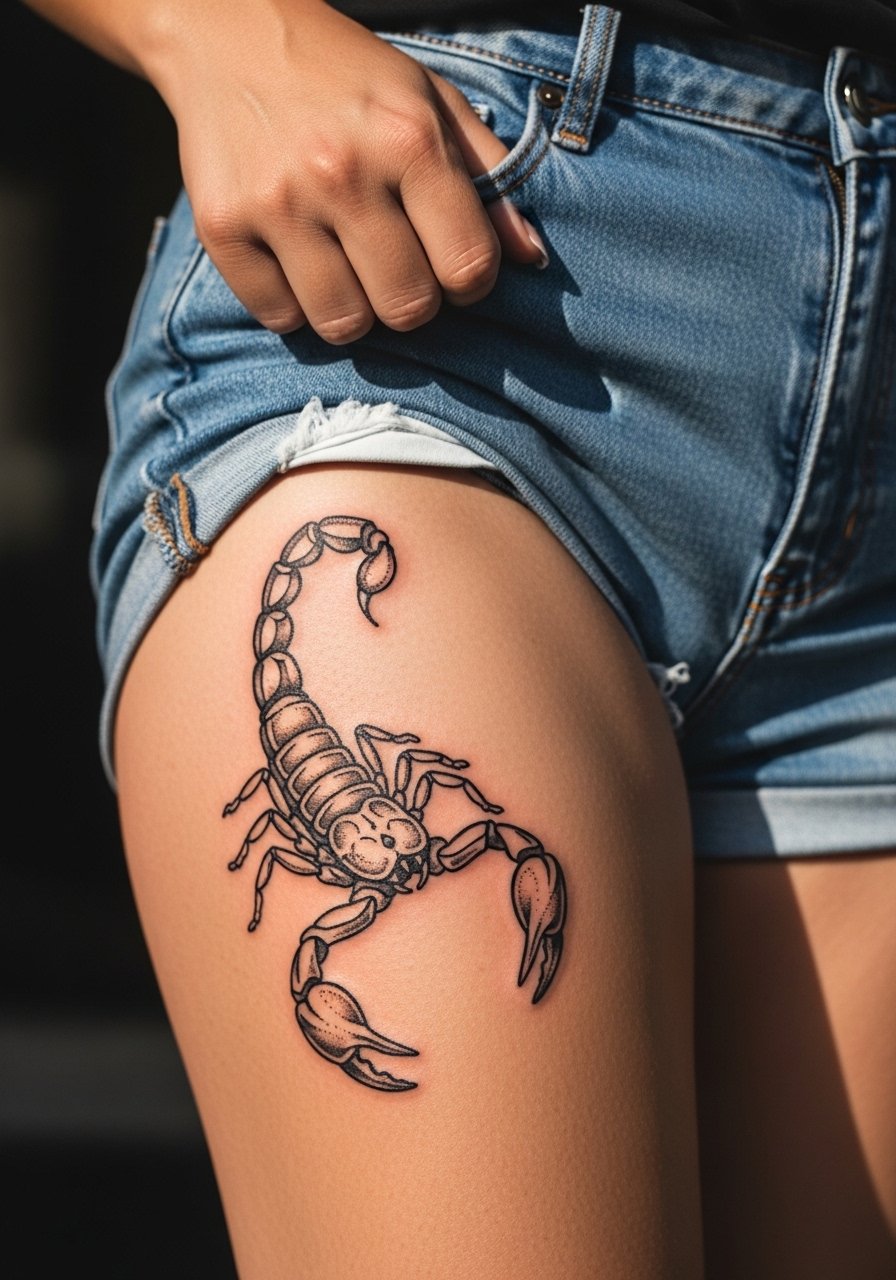
Thigh stencils are great for larger, dramatic outlines that stay private when needed. The outer thigh tolerates longer sessions and heavier saturation, so you can maintain crisp single-pass outlines without frequent repositioning. Expect a moderate pain level and a session that may need two passes depending on size. For showing it off try high waisted denim shorts or a slit skirt. A common mistake is asking for too many tiny inner details in a 5-inch scorpion, which can age into muddied linework without careful spacing.
8. Flying Eagle Ribcage Stencil
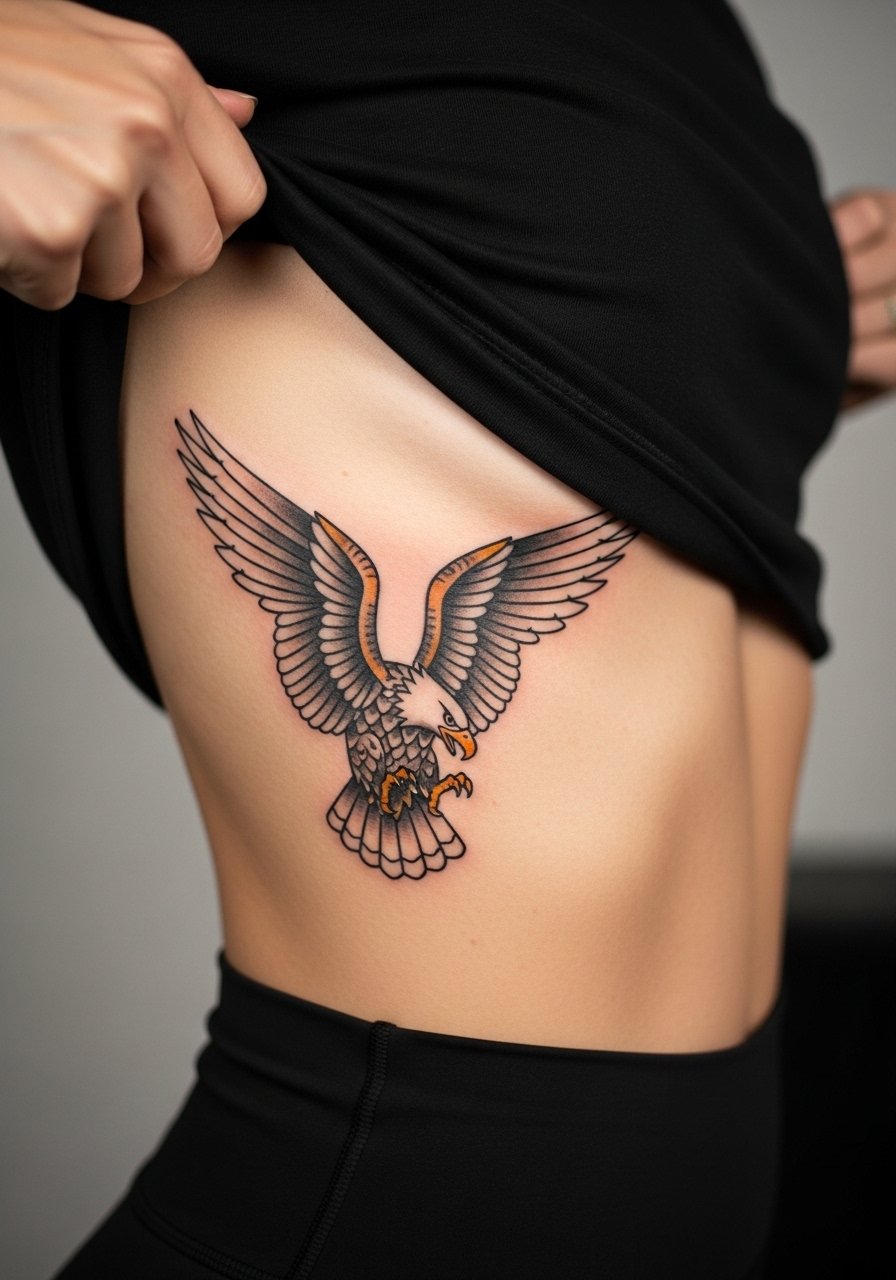
Fair warning, the ribcage rates high on pain, but the dramatic reveal in fitted tops is worth it for many people. Ask for a stencil that follows the body curve and leaves breathing room between wing feathers so dense lines do not merge over time. The ribcage stretches with breathing which creates unique aging patterns, so both camps argue over fine line versus bolder outlines here. One side says go bold for longevity. The other believes precise fine line will settle if spaced correctly. Decide which outcome you prefer and ask your artist which approach they favor. For the session wear a cropped top you can lift slightly.
9. Ghost Heart Minimalist Upper Back
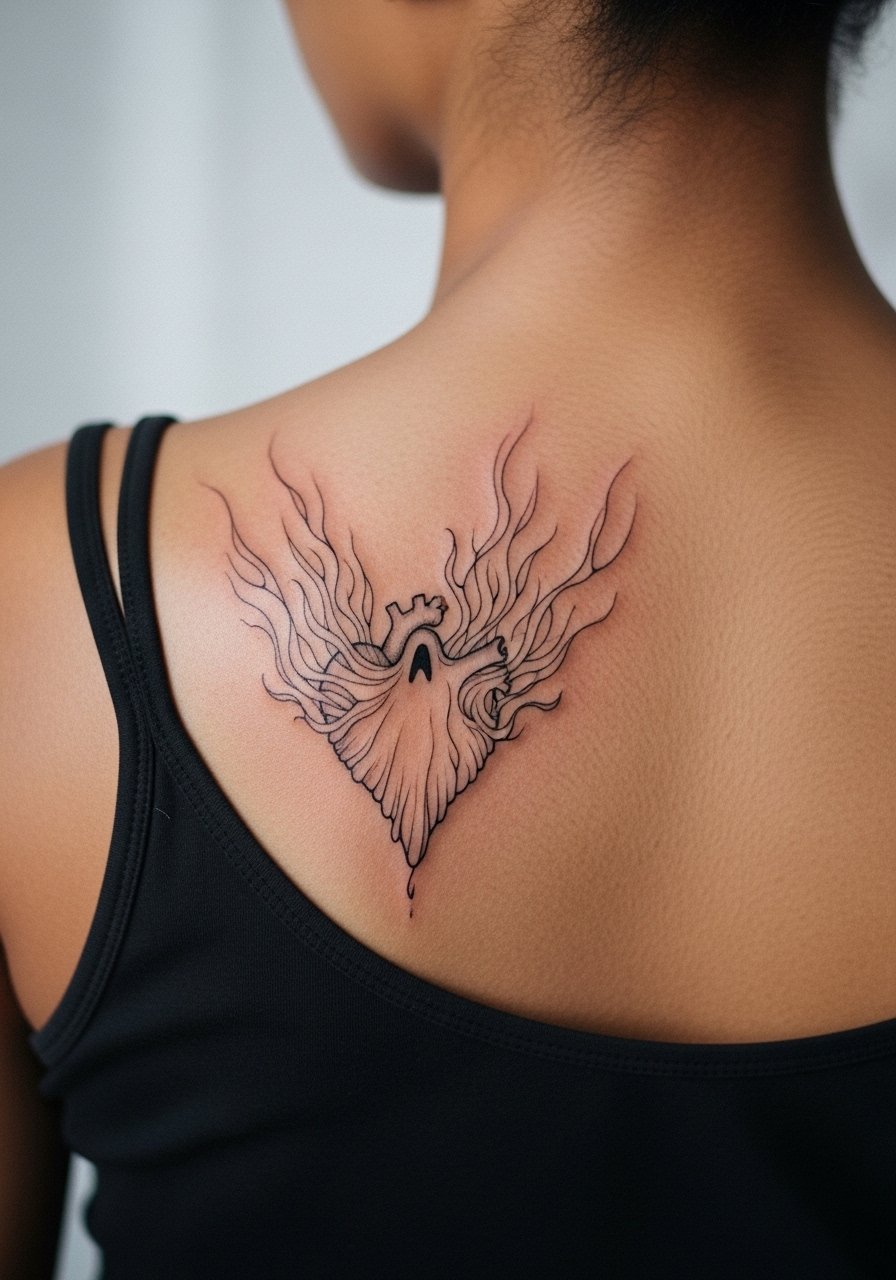
Upper-back stencils let you aim for clean negative space and subtle symbolism without daily exposure. The shoulder blades provide a stable canvas so linework remains consistent as it heals. Tell your artist to center the stencil on one side of the spine and to avoid tiny inner hatching that fades quicker on back skin. During the session wear a loose tank top you can adjust. A typical mistake is placing the design too low where shirt seams rub, which speeds fading.
10. Ornamental Mandala Calf
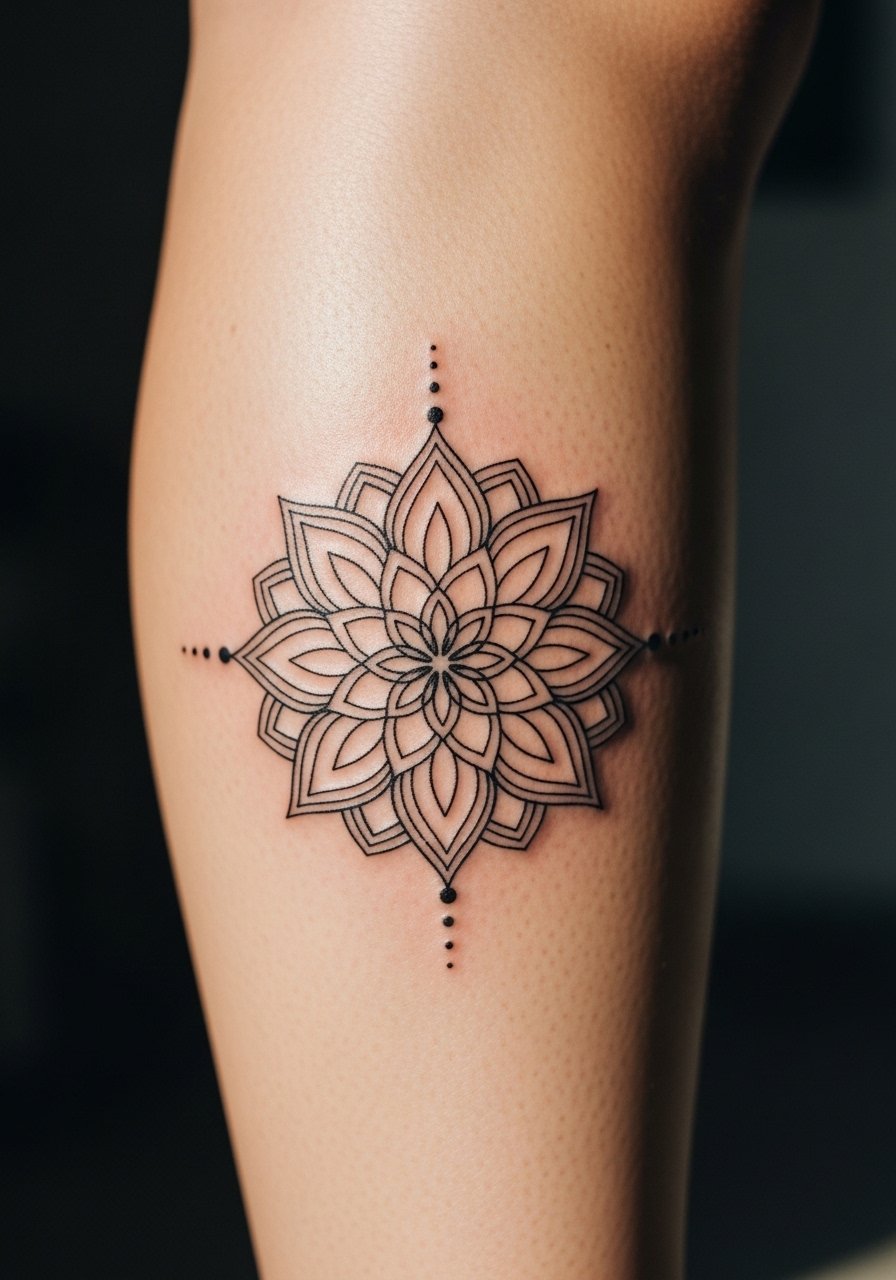
A mandala on the calf reads as meditative geometry and scales well. The calf allows more negative space in dense mandala areas, which helps prevent the center from filling in over time. For consults say you want stipple shading only in specific rings, not across the whole piece, to keep sharpness. Pair with rolled bootcut jeans or leather ankle boots for a seasonless look. The main mistake is compressing too many concentric patterns into a small diameter, which leads to early softening.
11. Botanical Vine Forearm Sleeve Starter
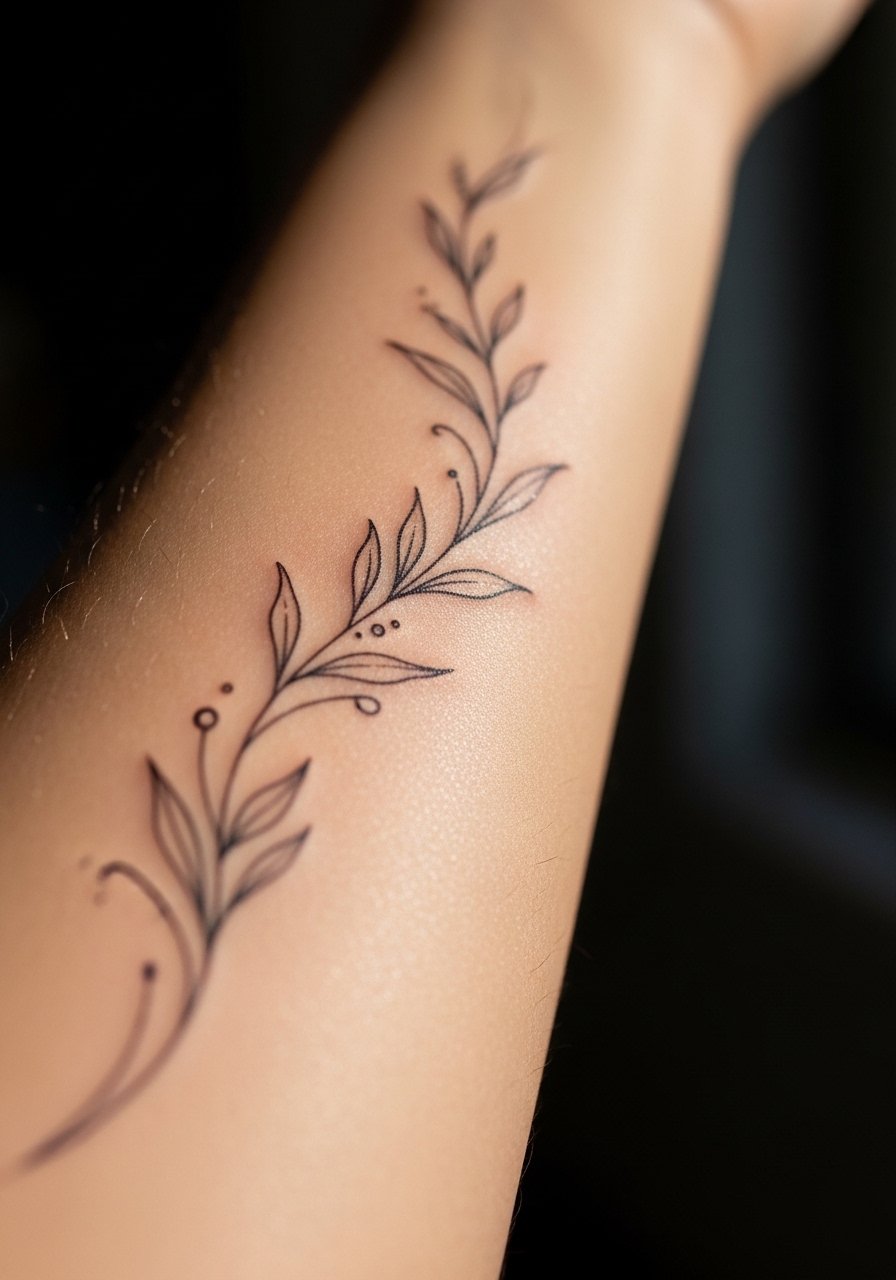
This linear piece is ideal as a starter for someone who plans to expand into a sleeve over years. I suggest mapping the vine with the stencil and checking the flow with your arm relaxed so the curves sit naturally. There is debate about fine line versus slightly bolder primary stems. One camp says bolder stems age better. The other favors true fine line for subtlety and plans touch-ups. If you want the least touch-up time ask for a stronger main stem and thinner leaf accents. For daily wear, roll a linen button-down shirt to show the vine without crowding it.
12. Custom Logo Neck Outline
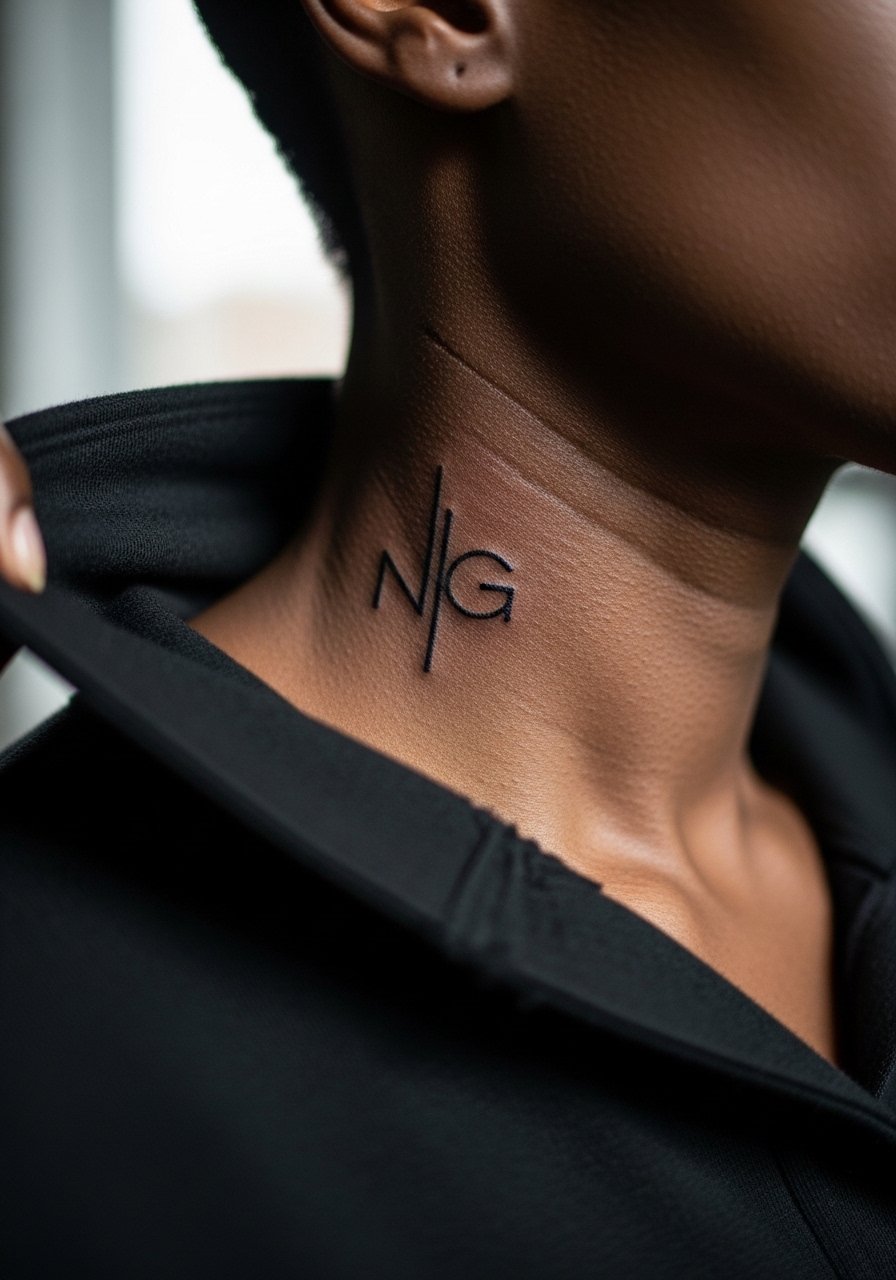
Neck stencils read vertical and compact. Bring a vector file or crisp black-and-white stencil and ask the artist to scale it to two inches tall so lines retain proportion. Neck skin changes exposure and friction patterns so keep primary lines strong to resist early fading. Hand placement and career considerations matter because neck tattoos are visible, so weigh that before booking. For the session pick a wide-neck shirt you can maneuver. A common mistake is requesting overly fine interior lines in a logo, which can disappear under the skin after a year.
13. Tiny Constellation Finger Chain
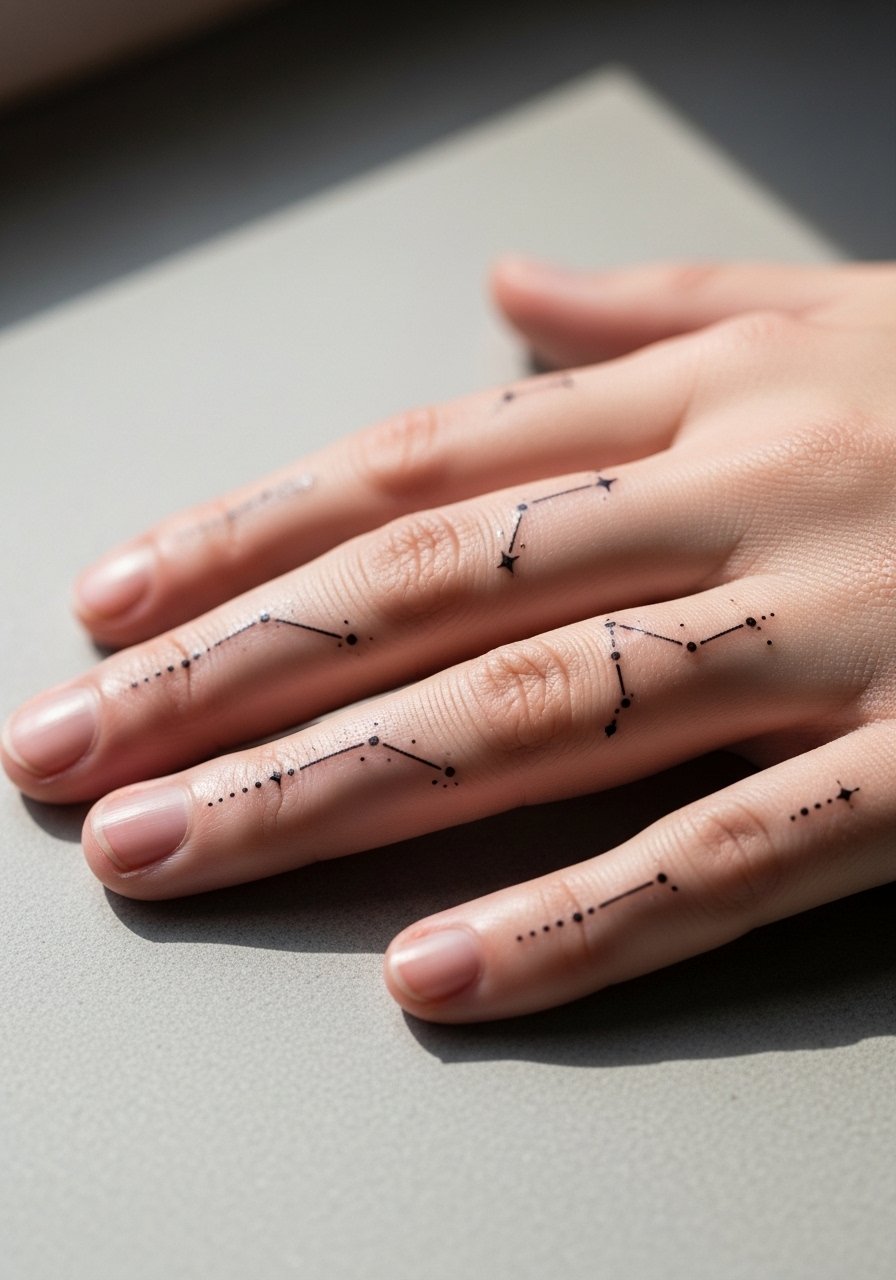
Finger and knuckle stencils are delicate and demand clarity in the stencil transfer. Expect faster fading because fingers get washed and scrubbed constantly. Ask for bold anchors on tiny stars and avoid multiple faint connector lines that will blur with hand use. For the session keep hands steady and plan a touch-up at six to twelve months. A practical session tip is to bring gloves to avoid contaminating the area after the artist finishes. The top mistake is packing too many micro elements in a one-inch span.
14. Single-Line Wave Behind the Ear
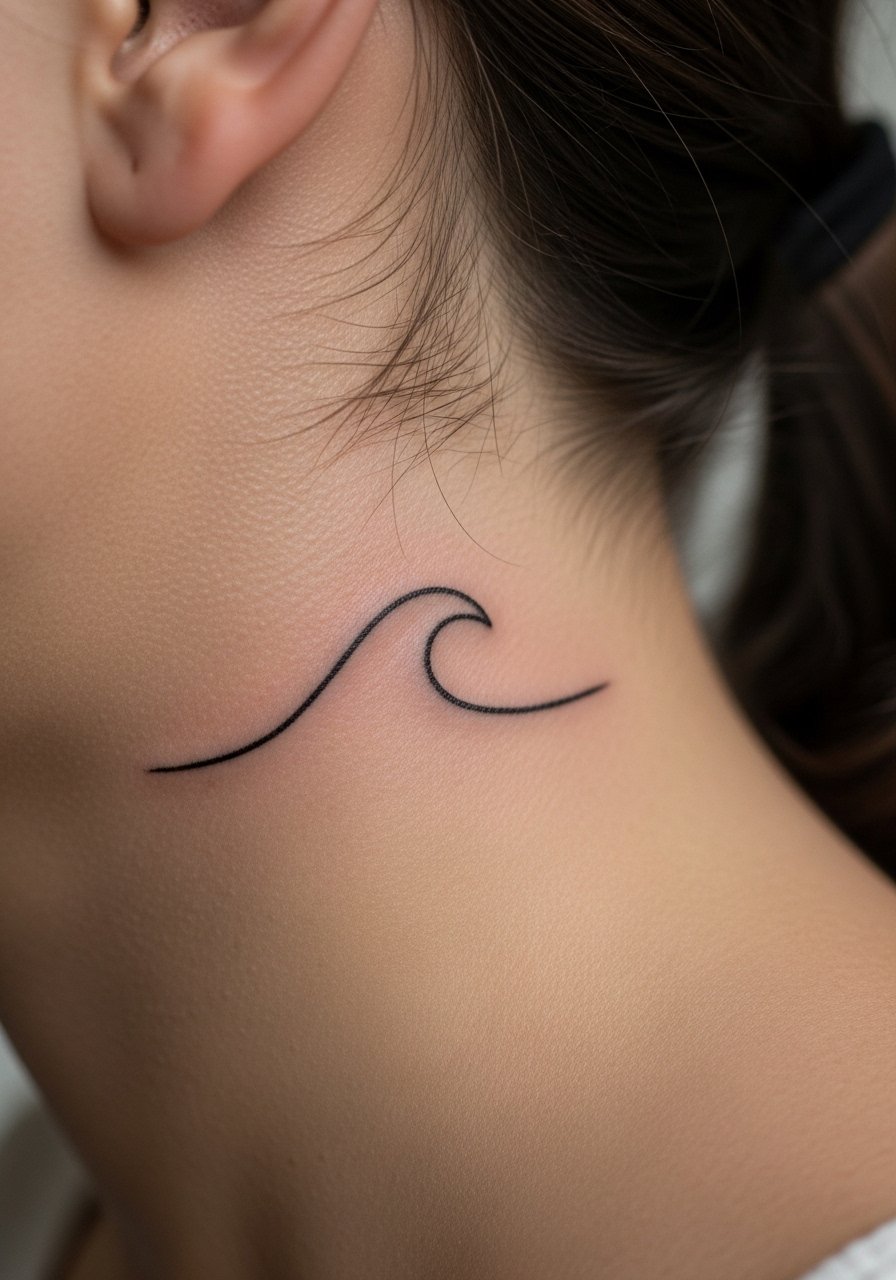
Behind-the-ear stencils need precise transfer because the curvature and hairline can skew placement. Request the stencil be applied with the head slightly tilted so the piece sits under the hairline when you return to a neutral pose. Session time is short and pain is low, but the area is prone to quick fading and hair growth interference. For discreet styling, keep hair loose or pin it to reveal the line when you want. The main error is placing the design too close to the hairline where regrowth hides it and complicates touch-ups.
15. Minimalist Barcode Nape Outline
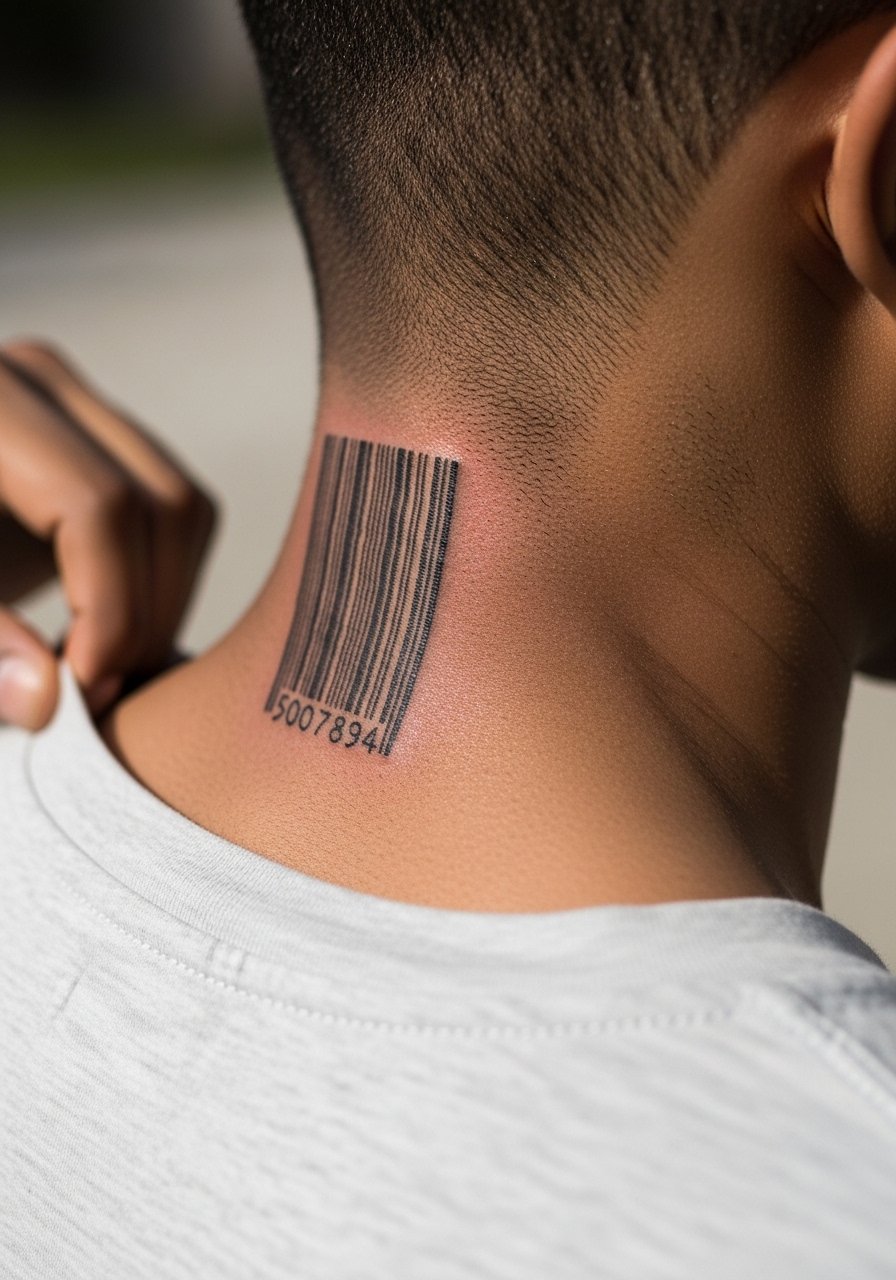
Vertical nape stencils work well as slim graphic elements that play with hair and collars. Ask your artist to test the stencil with hair down and hair up so you can see how it reads in both states. The nape is sensitive but not extreme on the pain scale. A common mistake is asking for too many narrow bars in a one-inch strip, which blends as the ink settles. For showing it off, pair with a slightly wider-neck shirt that frames the nape without covering the piece.
16. Architectural Skyline Inner Forearm
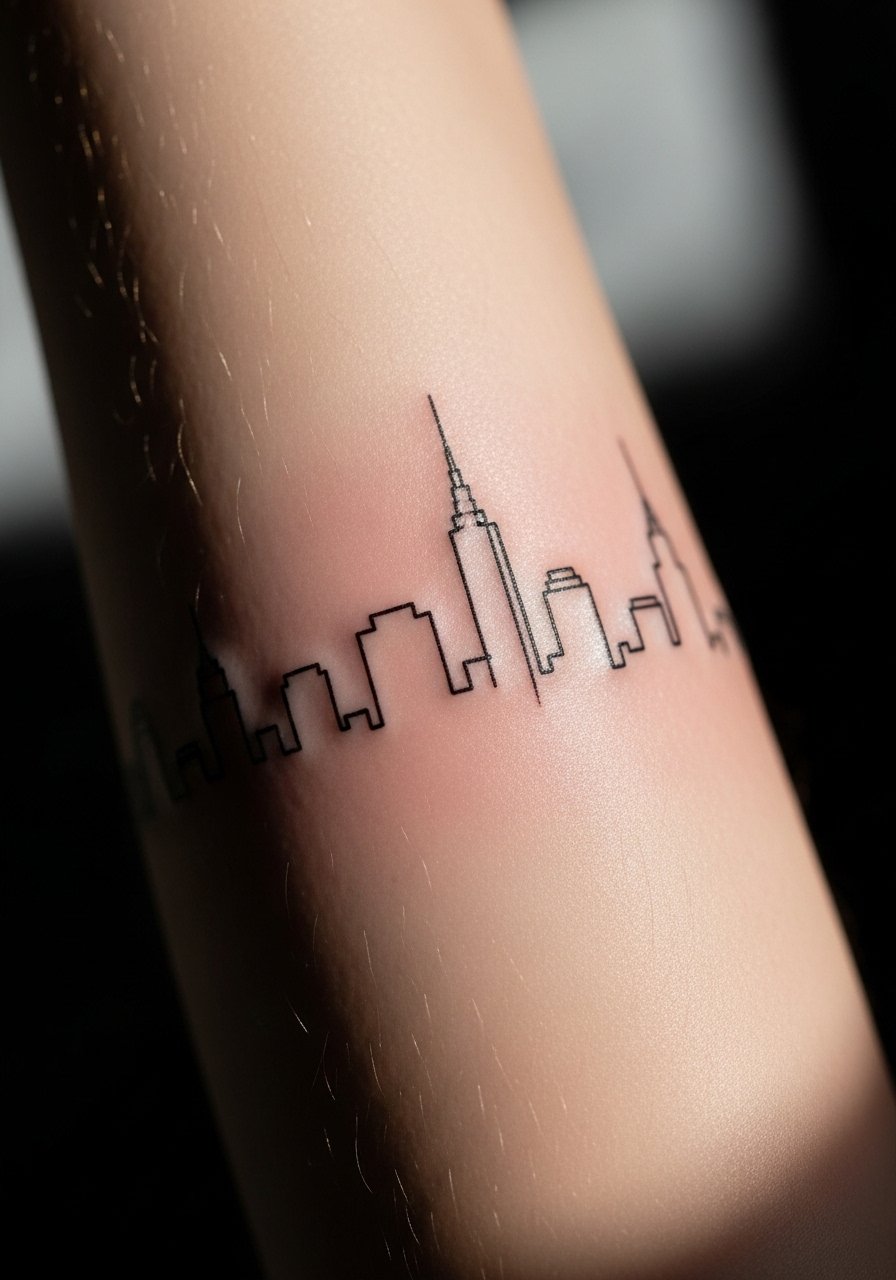
I recommend this for people who want a horizontal, linear statement that aligns with the arm. The inner forearm is forgiving for long, thin compositions and keeps crisp linework visible. Tell the artist to space rooflines and spires so the negative gaps remain after two years. Expect low to moderate pain and a single session for a small skyline. For showing it off roll a linen button-down shirt or wear short sleeves. The mistake to avoid is cramming tiny window marks into a narrow height, which ages into a textured smudge.
17. Crescent Moon Sternum Outline
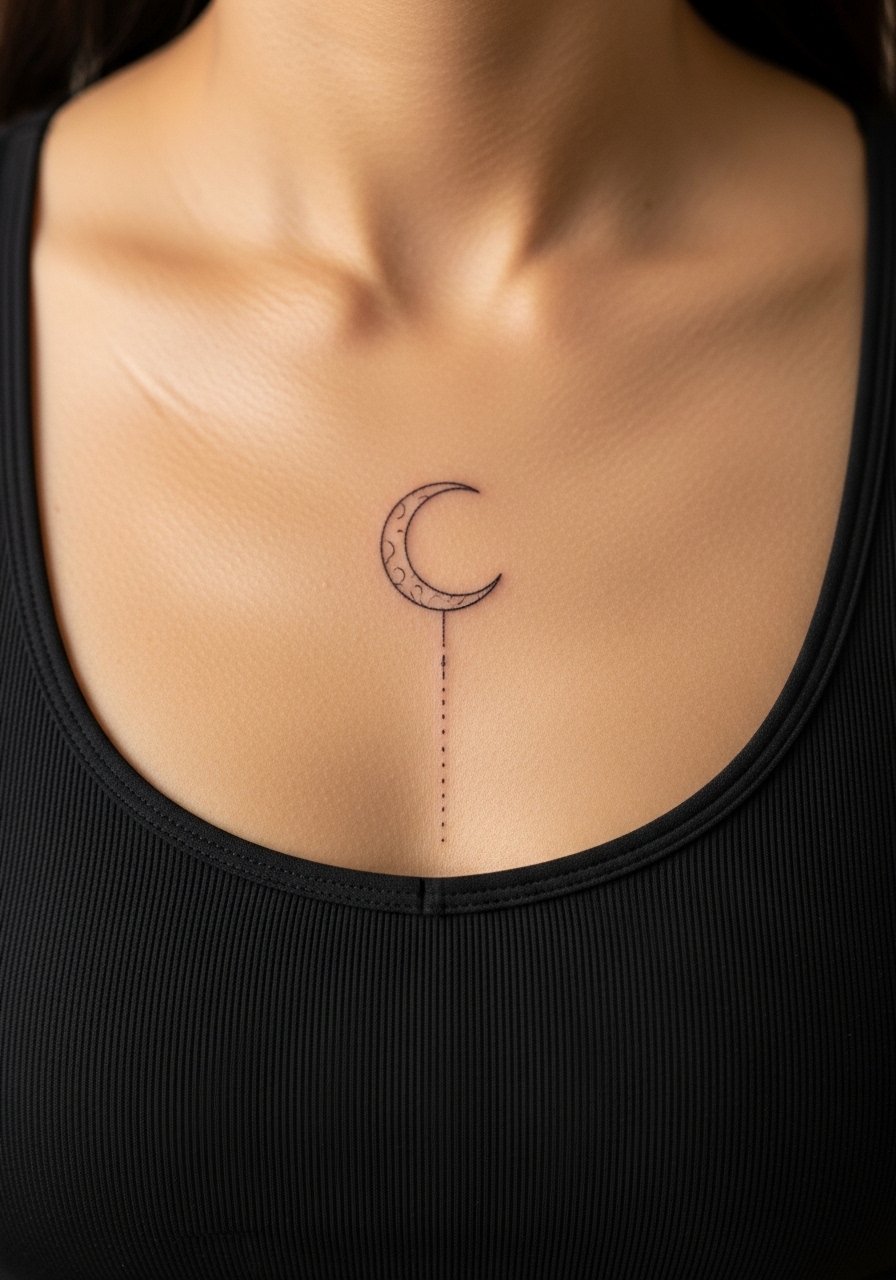
Sternum stencils are intimate and demand a precise stencil fit because the chest stretches and breathes. For consults bring a photo of how clothing will sit so the artist can anchor the stencil against the garment line. Expect higher pain and a two-pass session for symmetry on this curved area. Many artists will ask about your experience with pain before booking long chest pieces. The frequent error is choosing a design with too much inner linework for a tight sternum area, which makes touch-ups more likely.
Frequently Asked Questions
Q: Will fine line wrist tattoos blur faster than traditional bold outlines?
A: Fine line wrist tattoos can blur sooner because the wrist is high-contact and thinner skinned. One practical approach is to ask for slightly bolder primary lines while keeping inner accents delicate, which balances initial look with longevity. Expect a touch-up window around year one to two depending on sun exposure and daily friction.
Q: How do stencil transfers behave on curved spots like ankles and ribs?
A: Curved spots need professional transfer technique. Spirit gum or transfer paper helps the stencil stick cleanly on ankles. Ribs require the stencil to be placed with the client breathing normally so the design sits correctly when you return to a relaxed posture. If the artist cannot preview the stencil in the final position, request another placement check before the first pass.
Q: If I want a logo neck outline, what file should I bring to the consult?
A: Bring a clean black-and-white vector or high-resolution PNG so the artist can scale without losing line crispness. Ask to see the stencil on skin at the intended size and insist on small adjustments if it looks off. Clarity at the stencil stage prevents a lot of rework during the session.
Q: Do thigh blackwork stencils like a scorpion need different session prep than forearm pieces?
A: Yes. Thigh pieces tolerate longer sessions and allow heavier saturation, so wear loose shorts or a skirt you can shift easily. You will sit or lie in positions that keep the muscle relaxed, which helps the stencil hold. Hydrate and eat beforehand because larger thigh sessions can run longer than single-pass forearm work.
Q: How often should I expect touch-ups for chest and sternum fine line work?
A: Sternum and chest areas often need touch-ups sooner than forearm pieces because of stretching and clothing friction. Plan for a realistic touch-up around year one to two for fine line chest work. If you prefer fewer touch-ups, discuss stronger primary outlines with your artist before booking.
Q: Can I prepare a digital stencil at home for faster customization in the studio?
A: Yes. Editable files created in Procreate or vector files from a cutter help the artist make quick tweaks instead of redrawing a concept in session. Save versions at different scales and bring the one you want printed. Many artists appreciate the time-saver, but do ask first because some shops prefer to create or approve final stencils themselves.
